- Editorial Process
- Why Trust Us?
- Affiliate Linking Policy
- Privacy Policy
- Terms of Service

Weekly Must-Reads View All
7 things to do if you spilled water on your macbook.
Quick steps to save your MacBook from water damage
How to Boot Your Mac Into Verbose Mode: 4 Best Ways
Boot your Mac into Verbose Mode with this step-by-step guide
How to Fix Your Mac Shutting Down Randomly: 16 Fixes to Try
Troubleshoot random shutdowns on Mac with effective solutions
How Much Space Does macOS Take On Your Mac?
Understand macOS size and analyze your Mac's storage usage
Popular Topics
- What to Do With Your Old MacBook? 13 Useful Ways to Reuse an Old Mac
- What Is the MacBook Flexgate Issue and How to Fix It
- What Is the MacBook Flexgate Issue
- Uninstall Java
- Safely Transfer Files from Mac to Mac
- Safari Bookmarks Disappeared on Mac: 10 Best Ways to Restore Them
- Repairing disk permissions
- Old MacBook
Trending Now View All

- Mac Tips and Tricks
How to Use Mac Trackpad Gestures and Customize Them
Hashir Ibrahim
Reviewed by
Last updated: September 14, 2023
Expert verified
The Mac trackpad is an impressive piece of technology that is more than a tool for pointing and clicking. With the right knowledge, your trackpad can become a powerful ally in boosting your productivity and enhancing your user experience.
Surprisingly, many Mac users aren’t tapping into the full potential of their trackpad. Let’s change that today by learning to use Mac trackpad gestures and customize them to your liking.
Understanding the Basic Mac Trackpad Gestures
Apple’s trackpad, built with capacitive touch technology, is designed to respond to the electric charge produced by your fingers. Your Mac’s trackpad comes packed with various Multi-Touch gestures you can use immediately.
Multi-Touch gestures are actions using two or more fingers that your Mac trackpad understands. These gestures are more than just flashy tricks. They can dramatically maximize your productivity and save time doing recurrent tasks.
Here are some basic trackpad gestures built-in to your Mac:
1. Tap to Click
Single-finger tap functions as a click.

How to Turn On Tap to Click on Mac
To turn on Tap to Click on a Mac, which allows you to register a click by tapping the trackpad instead of physically pressing it down, you can follow these steps:
- Click the Apple menu and select System Settings .
- Scroll down in the left sidebar, click Trackpad , and navigate to the Point & Click tab.

- Toggle on the Tap to click switch.

Once you’ve enabled tap to click, you can register a click on the trackpad by simply tapping it with one finger without physically pressing the trackpad down. This can provide a more convenient and comfortable way to interact with your Mac.
The specific options and labels may vary depending on your macOS version or the customization options provided by your device manufacturer.
2. Right-click or Secondary Click
A two-finger tap or click performs a secondary click.

3. Smart Zoom
You can zoom in or out on a webpage or PDF by double-tapping with two fingers.

How to Turn On Smart Zoom on Mac
To turn on Smart Zoom on a Mac, which allows you to zoom in and out on your screen by using a gesture on the trackpad, you can follow these steps:
- Scroll down in the left sidebar, click Trackpad , and navigate to the Scroll & Zoom tab.

- Under the Scroll & Zoom tab, toggle on the Smart zoom switch.

Once you’ve enabled Smart Zoom, you can use the defined gesture (i.e., double tap with two fingers) on the trackpad to zoom in and out on your screen. This can be useful for reading small text, examining details in images, or navigating content more easily.
The specific options and labels may vary depending on the version of macOS you are using or the customization options provided by your device manufacturer.
To scroll, glide two fingers up or down.

How to Turn On Natural Scrolling on Mac
To turn on Natural Scrolling on a Mac, which changes the scrolling direction to mimic the movement of content on a touchscreen device, you can follow these steps:
- Under the Scroll & Zoom tab, toggle on the Natural scrolling switch.

Once you’ve enabled Natural Scrolling, the scrolling direction on your trackpad will be inverted. Instead of scrolling down to move the content up and scrolling up to move the content down as in traditional scrolling, Natural Scrolling mimics the movement of content on a touchscreen device.
So, scrolling up will move the content up, and scrolling down will move the content down, similar to how you would interact with a touchscreen.
5. Zoom In and Zoom Out
Use a two-finger pinch movement to zoom in or zoom out on Mac .

How to Turn On Zoom In or Out on Mac
To turn on Zoom In or Out on a Mac, which allows you to magnify the entire screen or a portion of it, you can follow these steps:
- Under the Scroll & Zoom tab, toggle on the Zoom in or out switch.

Once you’ve turned on Zoom, you can use the defined trackpad gesture (i.e., pinch with two fingers) to zoom in and out on your entire screen. The zooming effect allows you to magnify the content, making it easier to read text or view details.
6. Rotation
Twirl two fingers around one another to rotate an item like a photo.
How to Turn On Rotate on Mac
Here’s how to turn on rotation on Mac:
- Under the Scroll & Zoom tab, toggle on the Rotate switch.

7. Page Navigation
To swipe between pages, swipe two fingers, either left or right.

8. Notification Center Access
To open the Notification Center, swipe two fingers to the left from the right edge.

How to Turn On Notification Center Access Gesture on Mac
To turn on the Notification Center access gesture on a Mac, allowing you to access the Notification Center from your desktop quickly, you can follow these steps:
- Scroll down in the left sidebar, click Trackpad , and navigate to the More Gestures tab.
- Under the Scroll & Zoom tab, toggle on the Notification Center switch.

After enabling the Notification Center access gesture, you can perform the defined gesture (i.e., swiping left from the right edge of the trackpad) to reveal the Notification Center on your Mac. This allows you to view notifications, widgets, and other important information without leaving your current workspace.
9. Drag and Drop
Enable three-finger drag in Accessibility preferences to move items on your screen with three fingers, then tap or click to release them.

10. Word Lookup and Data Detectors
A three-finger tap lets you define a word or interact with dates, addresses, phone numbers, etc.
11. Desktop View
To see your desktop, spread your thumb and three fingers apart.

How to Turn On Show Desktop Gesture on Mac
To turn on the Show Desktop gesture on a Mac, allowing you to minimize all windows and show the desktop quickly, you can follow these steps:
- Under the Scroll & Zoom tab, toggle on the Show Desktop switch.

Once you’ve enabled the Show Desktop gesture, you can perform the defined gesture (i.e., spread with thumb and three fingers) to minimize all open windows and reveal the desktop. This allows you to access files, shortcuts, or other desktop elements without closing or minimizing individual windows.
12. Launchpad Access
Bring your thumb and three fingers together to open Launchpad.

How to Turn On Launchpad Access on Mac
To turn on Launchpad access on a Mac, which allows you to access and launch applications in a grid-like view quickly, you can follow these steps:
- Under the Scroll & Zoom tab, toggle on the Launchpad switch.
Once you’ve enabled the Launchpad access gesture, you can perform the defined gesture (i.e., pinching with your thumb and three fingers) to open Launchpad. Launchpad provides a grid-like view of all the applications installed on your Mac, making it easy to locate and launch apps without navigating through the Finder or the Dock.
13. Mission Control Access
Four-finger swipe upwards opens Mission Control.

14. App Exposé
To view all windows of the current app, swipe four fingers downwards.

15. Full-Screen App Navigation
Swipe four fingers left or right to switch between desktops and full-screen apps.

How to Customize Your Mac Trackpad Gestures
Your Mac allows you to tweak trackpad settings to suit your needs. Customizing your Mac trackpad gestures can greatly enhance your user experience and productivity. Whether you want to rotate photos with a simple twirl of your fingers or swiftly switch between full-screen apps with a four-finger swipe, the choice is yours.
Let’s see how you can customize your Mac trackpad gestures to work seamlessly on your system.
1. Adjust Tracking Speed
To adjust the tracking speed on a Mac, you can follow these steps:
- Click the Apple menu in the top-left corner of the screen and select System Settings .

- You will see a slider labeled Tracking speed . Adjust the slider to increase or decrease the tracking speed according to your preference. Moving the slider to the right will increase the speed, and moving it to the left will decrease the speed.
- As you adjust the slider, you will see a preview of the cursor speed in the window. Find a setting that feels comfortable for you.
2. Turn On Silent Clicking
To turn on silent clicking on a Mac, you can follow these steps:
- Toggle on the Silent clicking switch.

After enabling silent clicking, you should be able to click the trackpad without making an audible clicking sound.
3. Turn On Force Click and Haptic Feedback
To turn on Force Click and Haptic Feedback on a Mac, you can follow these steps:
- Toggle on the Force Click and haptic feedback switch.

Once you’ve enabled Force Click and haptic feedback, you can perform a Force Click by pressing down firmly on the trackpad with one finger or using a two-finger click, depending on your trackpad model. The haptic feedback will provide a subtle vibration or tactile response to simulate a physical click.
Not all Mac models or trackpads support Force Click and haptic feedback. The availability of this feature depends on the specific hardware and macOS version you are using.
4. Customize Look Up & Data Detectors Gesture
To customize the Look Up & Data Detectors gesture on a Mac, you can follow these steps:
- Look for the Look up & data detectors option.

- Click the dropdown menu or the associated settings button next to Look up & data detectors . You will see a list of available actions or gestures for this option.
- Select the desired gesture from the list or choose a custom gesture if available.

5. Customize Secondary Click
To customize the secondary click (also known as right-click) on a Mac, you can follow these steps:
- Look for the Secondary click option.

- Click the dropdown menu or the associated settings button next to the Secondary click .
- You will see a list of available options for the secondary click. The options typically include Click or tap with two fingers , Click in the bottom-right corner , or Click in the bottom-left corner .
- Choose the option that feels most comfortable and intuitive for you.

6. Customize Swipe Between Pages
To customize the swipe gesture for navigating between pages on a Mac, such as in Safari or other apps, you can follow these steps:
- Look for the Swipe between pages option

- Click the dropdown menu or the associated settings button next to Swipe between pages .

7. Customize Swipe Between Full-screen Applications Gesture
To customize the swipe gesture for switching between full-screen applications on a Mac, you can follow these steps:
- Locate the Swipe between full-screen applications option.

- Click the dropdown menu next to Swipe between full-screen applications .
- Select your desired gesture from the list.

8. Customize Mission Control Access Gesture
To customize the gesture for accessing Mission Control on a Mac , which provides an overview of open windows and spaces, you can follow these steps:
- Locate the Mission Control option.

- Click the dropdown menu next to Mission Control .
- You will see a list of available actions or gestures for Mission Control access. Select the desired gesture from the list.

9. Customize App Exposé Gesture
To customize the gesture for triggering App Exposé on a Mac, which shows all open windows of the active application, you can follow these steps:
- Look for the App Exposé option.

- Click the dropdown menu next to App Exposé .
- Select the desired gesture from the list.

Take Control of Your Mac Trackpad Gestures
The Mac trackpad is an underappreciated gem, full of potential to make your Mac experience more smooth, efficient, and enjoyable. While you can use Mac trackpad gestures to optimize your usage, there are many other ways to enhance your Mac experience.
Some tips to maximize your productivity on Mac are as follows:
- Learn Mac keyboard shortcuts to perform recurrent tasks quickly and save time.
- Knowing the keyboard commands can help you type special characters on Mac .
- Learn how to zoom out on your Mac to read tiny text easily.
Frequently Asked Questions
Why isn’t my mac trackpad working.
Your Mac trackpad may not work for several reasons, from hardware issues to misconfigured settings. Try restarting your Mac, checking your trackpad settings, or updating your macOS.
How do I clean my Mac trackpad?
To clean your Mac trackpad, turn off your Mac and disconnect the power adapter. Use a lint-free cloth slightly dampened with water to clean dust and debris. Don’t spray liquid directly onto the trackpad.
Can I use Mac trackpad gestures on a Windows laptop?
You may be unable to use Mac trackpad gestures on a Windows laptop. Some Windows laptops support gestures, but the range and functionality may not be as extensive as on a Mac. You can often customize these in the touchpad settings.
What do I do if my Mac trackpad is too sensitive?
If your Mac trackpad is too sensitive, adjust the trackpad sensitivity. To do that, open System Settings from the Apple menu and click Trackpad . Look for the Point & Click tab and adjust the Tracking speed slider to make the trackpad less sensitive.
I'm Hashir, a tech journalist with a decade of experience. My work has been featured in some of the top tech publications like MakeUseOf and MakeTechEasier. I have a bachelor's degree in IT, a master's in cybersecurity, and extensive knowledge of Apple hardware, specifically MacBooks. As the senior writer at MacBook Journal, I write in depth guides that help you solve any issues you have with your mac and unbiased reviews that help you make the right buying decisions.
Hi there! I'm Ojash, a tech journalist with over a decade of experience in the industry. I've had the privilege of contributing to some of the world's largest tech publications, making my mark as a respected Mac expert. My passion lies in exploring, using, and writing about MacBooks, and I enjoy sharing my expertise to help others make informed decisions and get the most out of their MacBook experience. Join me as we delve into the fascinating world of MacBooks together!
You May Also Like

How Long Do MacBooks Last? Lifespan Explained
Understanding the durability and longevity of MacBooks

Mac Sleep Modes Explained: Sleep, Hibernate, Safe Sleep, and Standby
Written by Hashir Ibrahim Reviewed by Ojash Last updated: October 12, 2023

How to Format a Drive on Mac: 2 Proven Techniques
Written by Hashir Ibrahim Reviewed by Ojash Last updated: September 6, 2023
8 Mac Trackpad Gestures (And How to Customize Them)
Learn about all the cool gestures you can use with your Mac trackpad to easily switch between apps, access notifications, and more.
Apple’s trackpad is unlike typical laptop trackpads, which only come with a couple of standard features like scrolling and clicking. In contrast, the Apple trackpad has almost a dozen tricks and gestures that you can use for shortcuts and activating different features.
In this guide, we’ll explore what these gestures are, how you can use them, and how you can tweak them to suit your preferences. All of these are either from the Scroll & Zoom or the More Gestures tabs you can find by going to System Preferences > Trackpad . Let’s get going.
1. Scroll Direction
The Scroll Direction: Natural gesture is at the top of the Scroll & Zoom tab. When enabled, it makes pages or apps scroll in “natural” directions when you scroll using trackpad. This means that the page goes up when you slide two fingers up and goes down when you slide them down. If disabled, the scroll works in the opposite way—which is the unnatural direction.
This feature is enabled for users who (often or occasionally) switch between mouse and trackpad. With the mouse, the unnatural scroll direction is mostly used. Whereas, with the trackpad, natural makes more sense. To switch the scroll directions automatically when you change devices, read our scroll direction guide .
2. Zoom Features
Up next, we have the zooming features from the Scroll & Zoom tab: Zoom in or out and Smart Zoom . The first feature is quite simple: spread two fingers to zoom in and pinch two fingers to zoom out.
The second feature, Smart Zoom , also allows you to zoom in or out using the trackpad, but you use this by double-tapping with two fingers on browser pages or word processors. Smart Zoom simplifies and smoothens the zooming experience.
Though it’s possible to turn both these features off, they are not customizable.
3. Rotate Images
Below the zooming features, you have the option to rotate images using the trackpad. This feature is useful when using image manipulation software, either built-in (like Preview) or third-party (like Photoshop).
To do this, simply place your thumb and index finger with about an inch between them on the trackpad. Then, turn both clockwise or anticlockwise to rotate the image however you want. This gesture can’t be customized.
Read More: MacBook Trackpad Not Working? Troubleshooting Tips to Try
4. Swipe Pages and Apps
The Swipe between pages and Swipe between full-screen apps are the first two features on the More Gestures tab from System Preferences > Trackpad .
Swipe Between Pages
This gesture lets you swipe pages (go back or move to the next page) when you’re using apps like Apple Books or are browsing the web. To do this, swipe two fingers left or right on your trackpad.
You can change the gesture to Swipe with three fingers or Swipe with two or three fingers , by clicking the dropdown under the feature’s name.
Swipe Between Apps
This gesture lets you switch apps quickly when you’re using the full-screen mode on your Mac. You can do this by swiping three fingers horizontally on your trackpad, by default.
Though you can change it to swiping with four fingers, keeping it to three would allow you to swipe with either three or four fingers. This is because, with the three-fingers setting, the trackpad registers three fingers only, even if you swipe with four or five fingers!
5. Check Notifications
If you swipe left on your trackpad’s far-right edge with two fingers, you can access the Notification Center . This is the third option on the More Gestures tab.
You can look at all your alerts and notifications quickly this way, and hide the menu again by swiping right with two fingers. This feature can be turned off, but not customized.
6. Reveal Apps
Mission Control and App Exposé are perhaps the most useful trackpad gestures. Both let you view the active apps, but with a slight difference.
Mission Control
Apple’s Mission Control feature shows you all your opened apps and desktops. You can then choose to add more desktops, combine different apps in full-screen mode, and see which apps you’d like to close. This is a useful feature when you want to either organize your apps or declutter your Mac.
To access Mission Control using the trackpad, simply swipe up with three fingers. You can choose to disable this feature and also customize to make it four fingers instead of three.
App Exposé
This feature shows you all the opened windows of the active app (the app that you’re using). So, if you have two Google Chrome windows opened, and you want to switch between them, swipe down with three fingers on the trackpad. You’ll then see all the active windows. Simply click the one you want to work on, and it will become active.
You can choose to disable this feature or customize it to swipe with four fingers.
7. Open Launchpad
Launchpad helps you access your apps with a single-click. While you can access it from the Dock, your Mac’s trackpad has an easier gesture for it: pinch with thumb and three fingers.
Related: How to Remove Apps From the Mac Launchpad
You can disable this feature, but cannot customize it.
8. Show Desktop
The final gesture Apple’s trackpad has to offer is Show Desktop . It allows you to instantly access your desktop by hiding all the active apps. To do this, simply spread with thumb and three fingers. Reverse this gesture (or pinch) to bring back all the apps. Unfortunately, this gesture doesn’t work if you’re using an app in full-screen mode.
The Trackpad Is Magical
With this variety of gestures, Apple’s trackpad qualifies as one of the best peripherals on the market. Remember, to get the best use out of it, it’s important you tweak the settings of each feature to suit your usage and comfort.
By the way, have you used the Magic Mouse? It also offers a variety of gestures, making it another unique pointing device. But, we still think that the Magic Trackpad is better, primarily because it’s more comfortable and that you can use it while it’s charging.
Comprehensive Guide to Mac Trackpad Gestures and Force Touch
If you have a Magic Trackpad 2 or a built-in Multi-Touch trackpad, you might not be making the most of it. There are several Mac trackpad gestures that you can use to really speed up your workflow, whether you’re surfing the web or moving files around in the Finder. Let’s take a look in this comprehensive guide to Mac trackpad gestures.

Turning on Mac Trackpad Gestures
Turning on all of the possible Mac trackpad gestures will take a few moments. You’ll need to go to System Preferences -> Trackpad , and navigate through the various tabs enabling what you want to use. All of these are also covered by an Apple support page , but I’ve found it to be a bit out-dated with the changes in macOS Sierra.
Speaking of which, this guide assumes you are running macOS Sierra on a MacBook or MacBook Pro with a Force Touch trackpad, or any Mac with a Magic Trackpad 2.
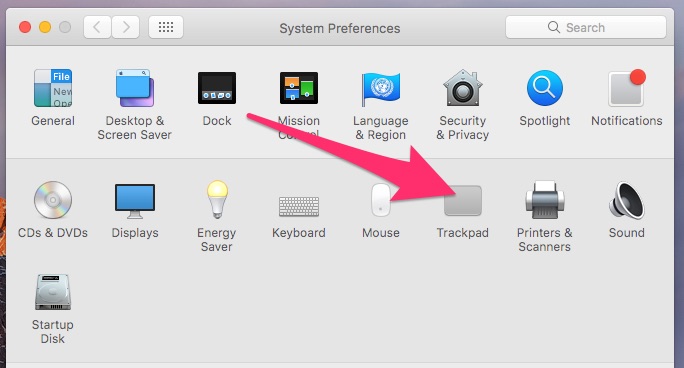
The Point & Click Gestures
You probably already know about tap to click and secondary click. You can tap with just one finger, and it will register as a click. Or, click or tap with two fingers, and you get the Windows equivalent of a right-click (a secondary click, in Mac parlance).
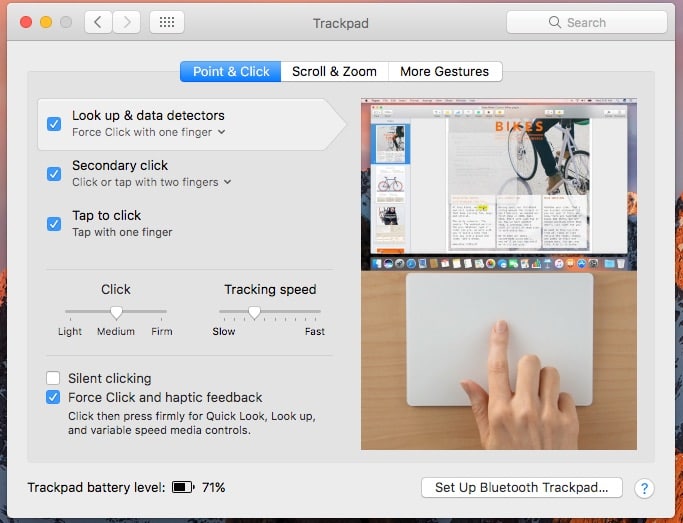
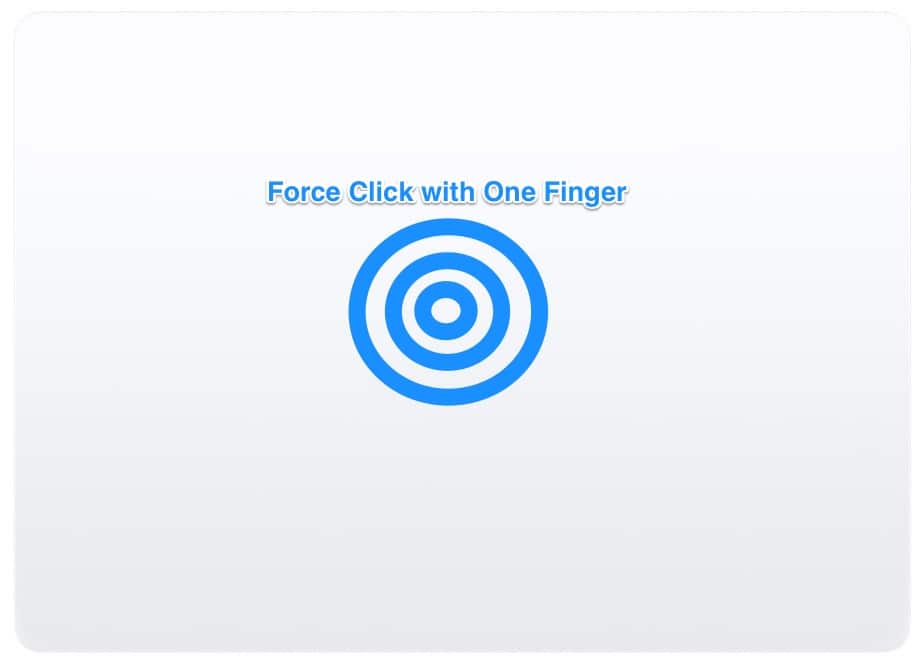
Here’s an interesting one that might have slipped your attention, though – Look up & data detectors . If you want to quickly get the definition of a word, for instance, you just have to Force Click with one finger (if it’s enabled). This also works with taking actions on dates, addresses, phone numbers, and more.
Up Next: Scrolling and Zooming Around
2 thoughts on “ Comprehensive Guide to Mac Trackpad Gestures and Force Touch ”
Yes, that’s true. Hence this statement:
The Force Click feature requires a Force Touch Trackpad. It is not available to earlier Trackpad versions.
Leave a Reply Cancel reply
You must be logged in to post a comment.
This site uses Akismet to reduce spam. Learn how your comment data is processed .
- Web Browser
- Google Chrome Browser
- Mozilla Firefox Browser
- Microsoft Edge Browser
- Apple Safari Browser
- Tor Browser
- Opera Browser
- DuckDuckGo Browser
- Brave Browser
- How to enable or disable experimental features in Safari?
- How to enable or disable iCloud Tabs in Safari for Mac/iOS?
- How to enable or disable content blockers in Safari?
- How to Enable or Disable Smooth Scrolling in Google Chrome ?
- How to enable or disable split view in Apple Safari Browser ?
- Features in Safari available only for mobile browsers
- How to Browse in Apple Safari Browser ?
- How to disable or enable auto-play videos in Apple Safari Browser ?
- How to Allow Pop-Ups in Safari?
- New WebKit Features in Apple Safari 15.4
- Layer Tab in Apple Safari Browser
- How to enable JavaScript in my browser ?
- How to Enable JavaScript on a MacOS?
- Architecture of Apple Safari Browser
- Graphics Tab in Apple Safari Browser
- Web Capture Tabs in Apple Safari Browser
- Elements Tab in Apple Safari Browser
- Network Tab in Apple Safari Browser
- How to Import Chrome Passwords to Safari on iPhone and Mac?
- jQuery Mobile Filterable disable() Method
- How to use Safari for web development
- How to change the default search engine in Safari?
- How to disable a jQuery-ui draggable of widget ?
- How to hide scroll bar for inactivity?
- React Suite Tooltip Disabled elements
- DevTools in Apple Safari Browser
- How to Disable and Enable JavaScript in Google Chrome?
- How to specify that an input element should be disabled ?
- How to create Tinder card swipe gesture using React and framer-motion ?
How to enable or disable gestures in Safari for Mac?
Safari is a web browser developed by the macOS operating system that is compatible with Apple devices. Gestures are one of the features of Safari Mac, which enables users to navigate webpages from one to the other and carry out other actions using a trackpad or mouse. Although this is the case, users may want to disable or enable this feature at varying times depending on their preference or other circumstances.
What Are Gestures in Safari?
In Safari, gestures refer to intuitive touchpad or mouse movements that allow users to navigate through webpages, switch between tabs, and perform various actions with ease. These gestures enhance the browsing experience by providing shortcuts for common tasks, such as scrolling, zooming, and navigating backward or forward through browsing history.
Common gestures in Safari include:
- Swipe: Use two fingers to swipe left or right to navigate backward or forward through browsing history.
- Pinch: Pinch with two fingers to zoom in or out on a webpage.
- Scroll: Scroll up or down with two fingers to navigate through the content of a webpage.
- Tap: Tap with two fingers to open a link in a new tab or perform other actions.
Benefits of Enabling or Disabling the Feature
Enabling or disabling gestures in safari mac has several advantages, including:.
- Customization: Disabling or enabling this feature allows users to personalize their user experience.
- Accessibility: Some people, for example, those with challenges in bodily coordination may need to disable certain gestures.
- Productivity: Enabling specific gestures, such as swiping left or right, to help users move back or forwards on a webpage, respectively which may help save a lot of time and, in turn, increase productivity.
Steps to Enable Gestures
The process of enabling gestures in safari isn’t directly possible so we can achieve this by modifying trackpad or mouse settings on mac. just follow these steps:.
- Open System Preferences:
- Click on the Apple logo in the top-left corner of your screen

- Select “System Preferences” from the dropdown menu.

- Access Trackpad Settings:
- Within the System Preferences window, locate and
- click on the “Trackpad” icon.

- Navigate to Gestures:
- In the Trackpad settings, click on the “Point & Click” tab at the top.
- Enable Gestures:
- Scroll down to the “More Gestures” section and

- Ensure that the checkboxes next to desired gestures, such as “Swipe between pages” or “Scroll direction,”are on.

- Close System Preferences:
- Once you’ve enabled the desired gestures
- Close the System Preferences window.
Steps to Disable Gestures
In case the gestures have been enabled, and you want to turn them off, the steps to follow are as easy as when we turn it on:.
- Follow the same steps as above to open the System Preferences window.
- Click on the “Trackpad” icon within System Preferences.
- Go to the “Point & Click” tab in the Trackpad settings.
- Disable Gestures:
- Scroll down to the “More Gestures” section and uncheck the checkboxes next to the gestures you want to disable.

- After deselecting the desired gestures.
- Close the System Preferences window to apply the changes.
Subsequently, the gestures for the Safari browser on the Mac will have been disabled as instructed. Lastly, gestures in Safari for Mac are an innovative way of enabling users to quickly and easily move and interact with the browser’s content. You can customize the gestures based on their positions, or you can have access to them when browsing it. Using the above steps, you can enable or disable the gestures on the Safari browser in a Mac computer.
Please Login to comment...
Similar reads.
- Apple Safari
- Web Browsers

Improve your Coding Skills with Practice
What kind of Experience do you want to share?
- Apple Watch
- Accessories
- Digital Magazine – Subscribe
- Digital Magazine – Info
- Smart Answers
- Let Loose iPad event
- New iPad Air
- iPad mini 7
- Best Mac antivirus
- Best Mac VPN
When you purchase through links in our articles, we may earn a small commission. This doesn't affect our editorial independence .
10 essential Mac trackpad gestures you need to know

Apple has created 15 known gestures for your fingers to use on a Multi-Touch trackpad in order to perform a function. At least a couple of them are undoubtedly already second nature in your daily use, but you may not have had a chance to learn others that might really help you out over time.
If you can remember the following 10 gestures, you’ll take steps toward being more efficient with your trackpad use while reducing strain on your hands. Even if it takes a moment to remember them all, there’s one additional benefit beyond saving time by using gestures. There should also be a reduction in the frequency that an annoying and task-disrupting gesture is used accidentally on the trackpad.
- Time to complete: 10 minutes
- Tools required: MacBook trackpad or Magic Trackpad
Tap to click
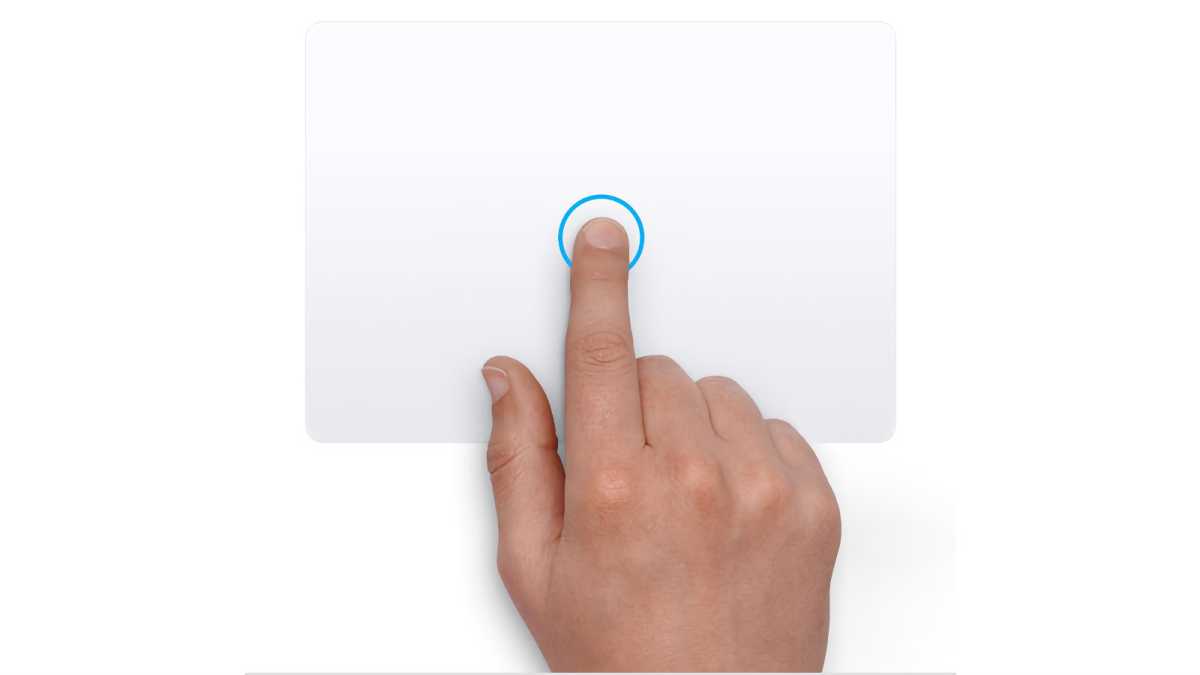
Tapping with one finger to click is a logical starting point for teaching someone how to use a trackpad. This most essential gesture allows the user to click on linked text and photos on websites and on a selected part of a document in a word processor. Without it, you’re literally going nowhere. If you double tap, you’ll perform what is probably the most frequently used gesture: open a file, folder, or app.
Secondary click (right click)
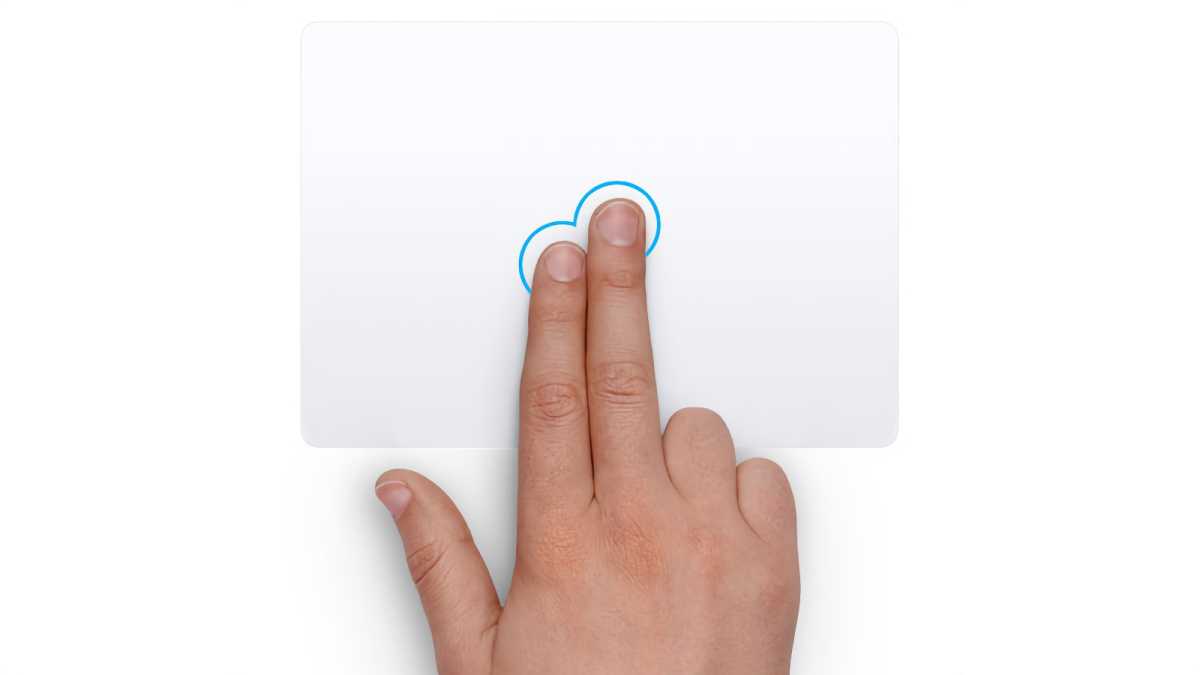
With the two crucial ones already clinched, these next gestures will only enhance your arsenal. Instead of pressing Control and tapping with one finger to right-click, you can click or tap with two fingers to achieve the same result. The Secondary click can reduce strain on your purlicue, the area of the hand between the thumb and forefinger.
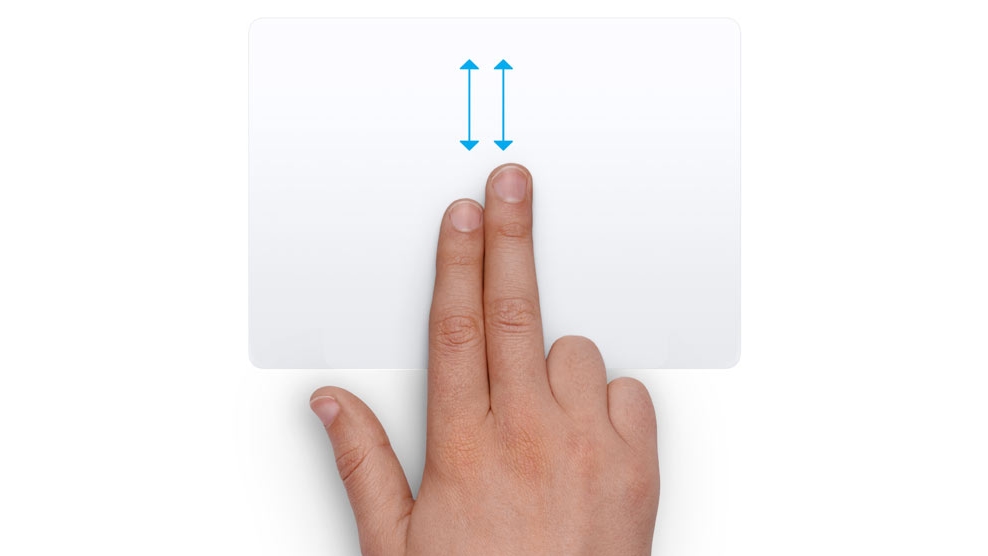
The next key gesture that all trackpad users know and use as often as breathing is when two fingers (typically the forefinger and middle finger) slide up or down to scroll websites and documents. The slider bar that’s usually found on the right edge of a website, word processing page, or Finder window is still handy when there are a lot of pages that you want to quickly jump past, but this gesture will be more useful for the finer points.
Three-finger drag
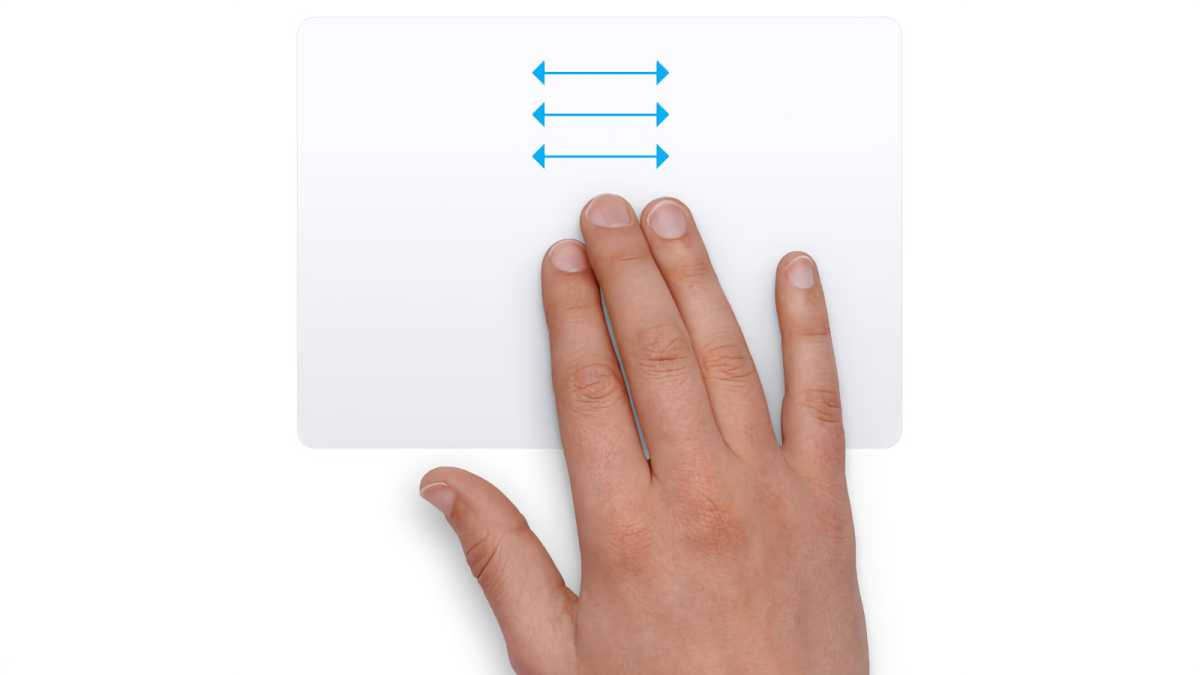
Unlike the other gestures, you’ll need to go to Accessibility preferences in System Settings to turn on three-finger drag. For a more ergonomic movement than what you may be used to making with your thumb and forefinger, you can use three fingers followed by a tap or click in order to drag and drop items on your screen.
Zoom in or out
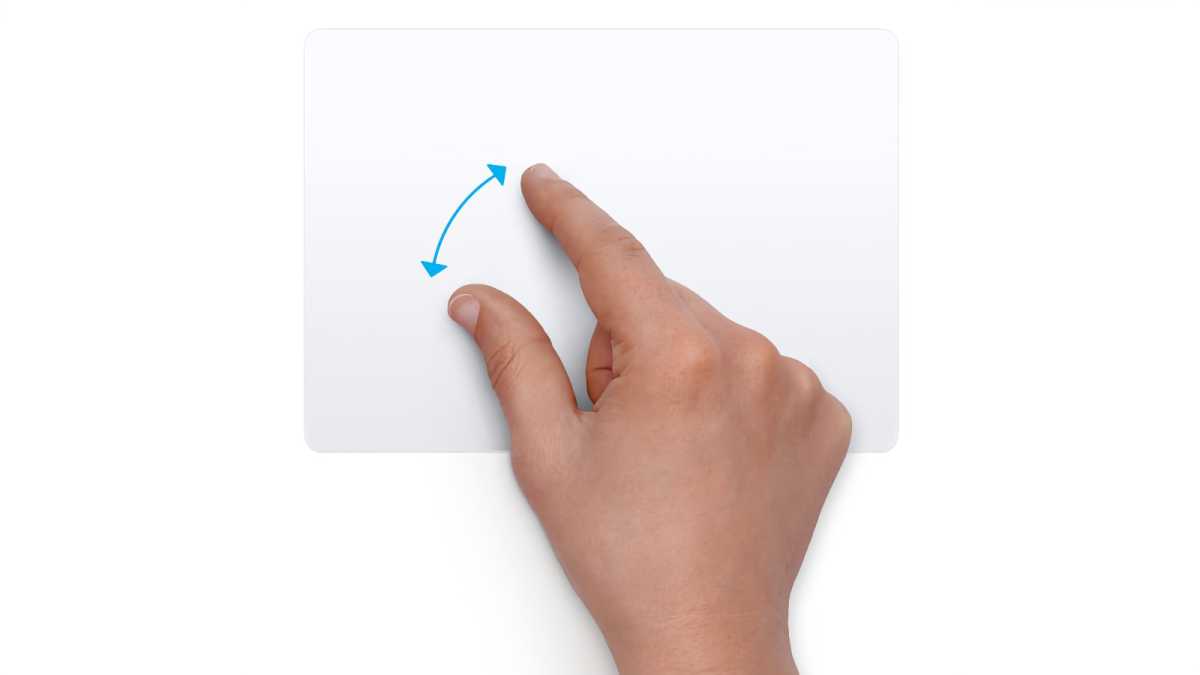
It takes two fingers to either pinch and zoom into or stretch to zoom out of text or an image. Just be careful not to accidentally zoom out so far that you see all of your tabs divided into small, separate windows–depending on your tab habits, that might be jolting.
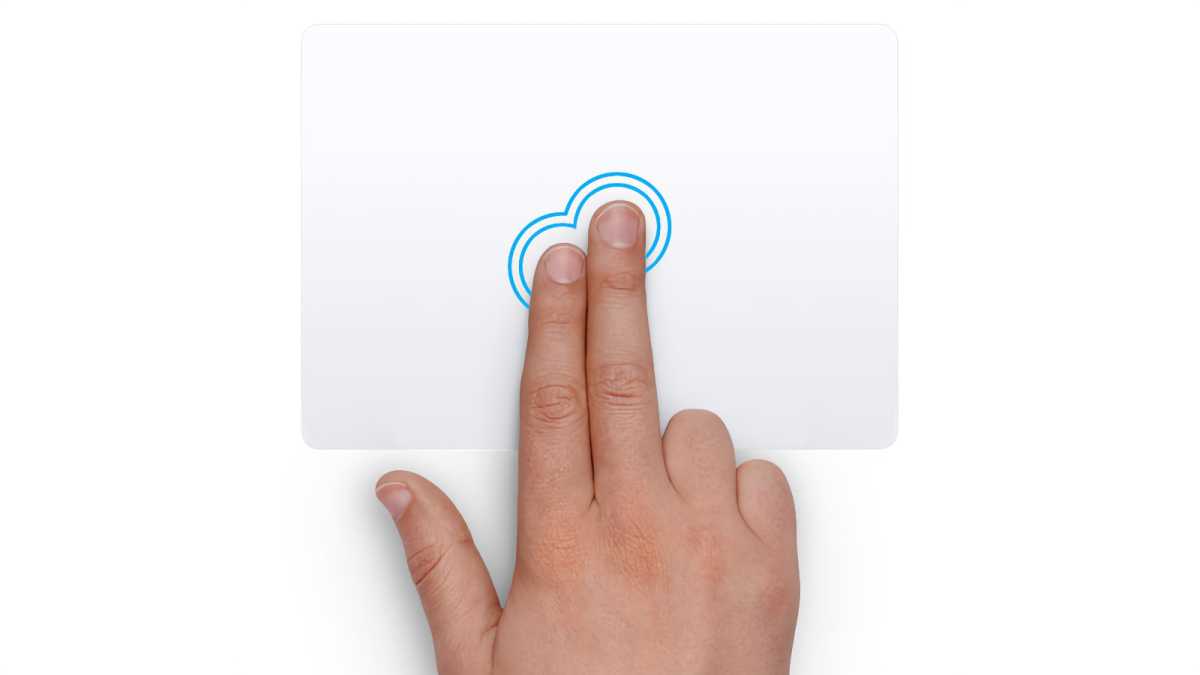
Another dual finger gesture that can help you see better is smart zoom. Tap with two digits to quickly zoom into and then back out of a page or image. This differs from the aforementioned Zoom in or out gesture because there is only one degree of zooming available.
Speaking of images, you can also move two fingers around each other in order to rotate photos. This is useful for situations where the visual might be more interesting if presented with a different orientation. It might take a little bit of practice for doing rotations in fine increments.
Mission Control
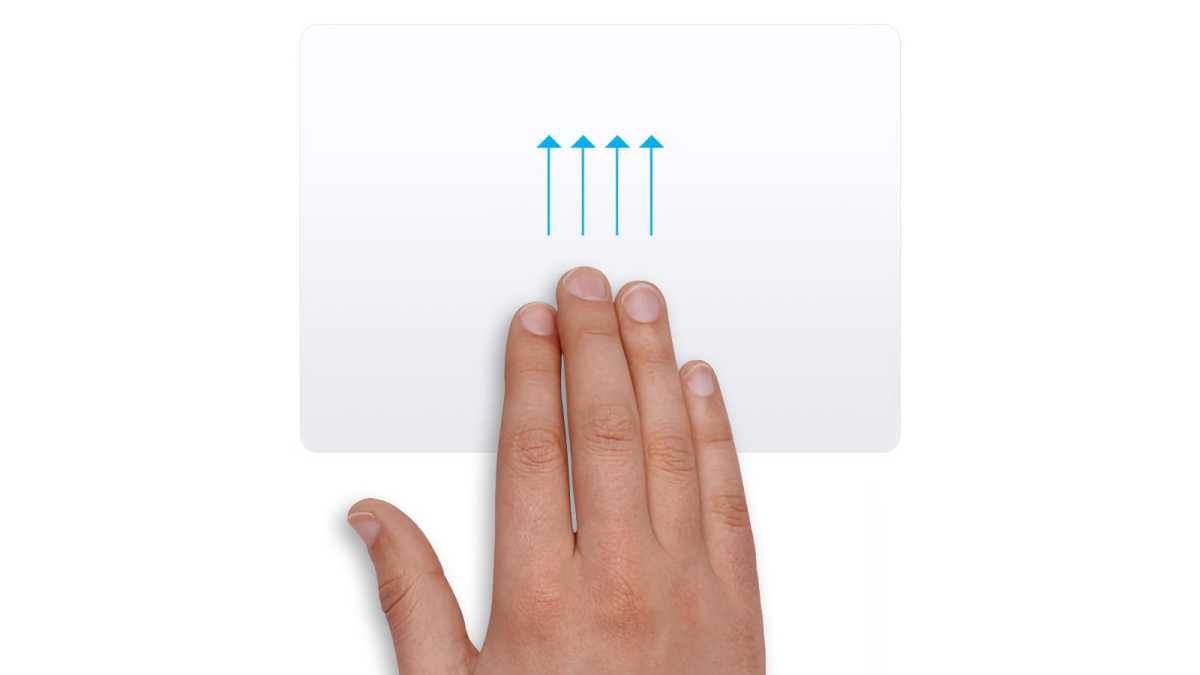
When you’re ready for the overview of everything you have open and running, you can access Mission Control by swiping up with four fingers.
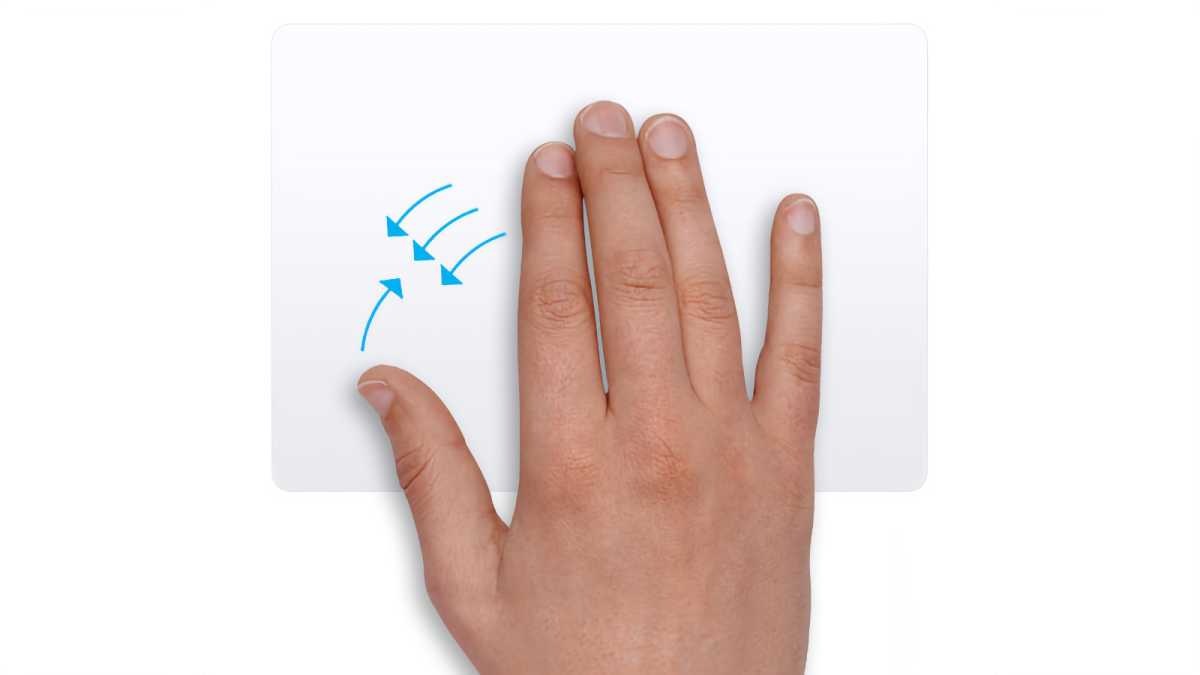
Visually browse your collection of apps with Launchpad, which is accessed by pinching your thumb and three fingers together. It’s especially handy when you want to clear some out to make space for new ones.
Show desktop
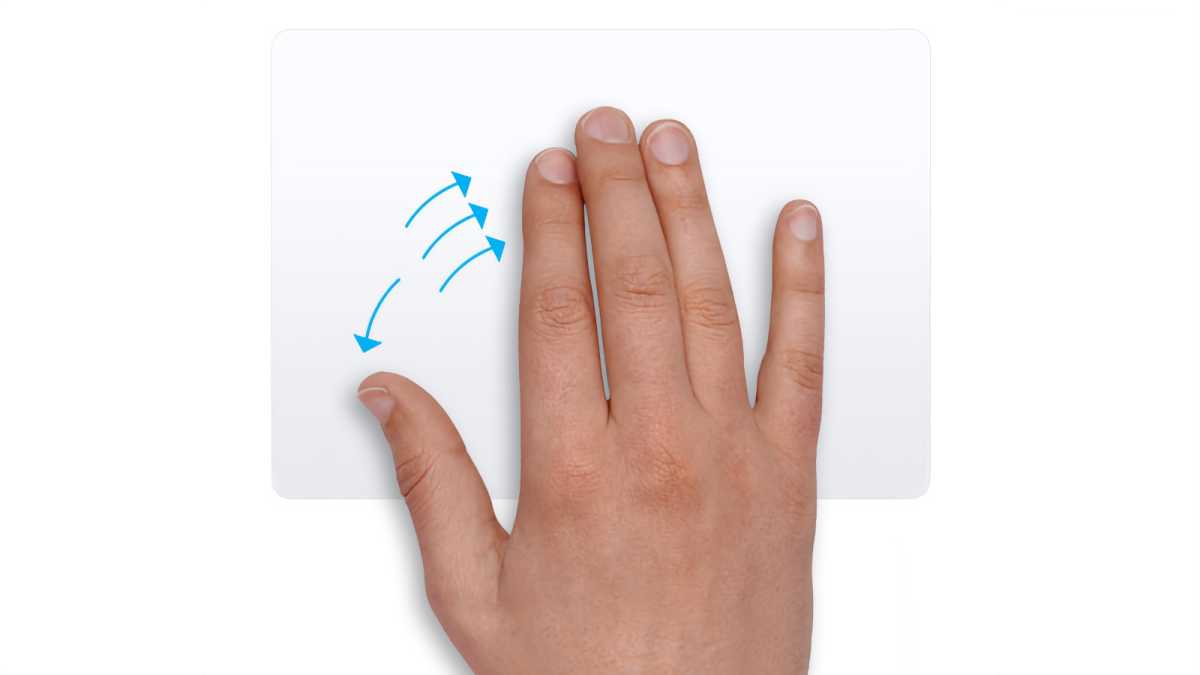
Move your thumb and three fingers apart to show the desktop, which can easily get cluttered and distracting if you don’t glance at it once in a while. This and the opposite Launchpad gesture can both help you with the good housekeeping of your Mac’s user interface.
Author: Tamara Palmer
Tamara Palmer is a freelance writer, recipe developer, zine publisher and professional DJ based in San Francisco.
Recent stories by Tamara Palmer:
- Apple buying guide for students: Pick the right device for every grade level
- 10 time-saving Mac keyboard shortcuts your fingers need to know
6 Apple Multi-Touch Trackpad Gestures That Make Using Your Mac Or MacBook Easier

MacOS is constantly iterating , often leading to several features that may or may not be helpful individually, depending on personal preference and usage requirements. This also extends to your MacBook 's (or Mac's) trackpad, which has several built-in gesture functions that can act as a quick way to do all sorts of things.
Some of these gestures are turned on by default when you set up your Mac for the first time, while others must be manually activated. You may also want to turn some gestures off if you often find yourself accidentally using them when you don't mean to (tap to click is a frequent offender). Either way, there are quite a few ways you can adjust your trackpad to make day-to-day use of your Mac a little smoother and perhaps a little faster.
These gestures can be turned on, off, or adjusted from the Trackpad menu. If you aren't sure how they will work in practice, highlight them in the menu and check out the animated demonstration at the top of the window.
Secondary click
Right-clicking is a ubiquitous mouse function, and even though Apple's peripherals lack such a button, macOS still utilizes it. But how do you right-click when your trackpad only has one physical click option? Well, that's where secondary clicking comes into play.
- Select the Apple menu in the top-left corner of the screen, then choose System Preferences (or System Settings in macOS Ventura and later).
- Scroll down the menu on the left side of the window and select Trackpad, which you'll find grouped with Keyboard, Game Controllers, and the like.
- Select the Point & Click tab, then scroll down and find Secondary Click.
- Select the drop-down menu next to Secondary Click and choose a gesture that suits you — Click (or tap) with Two Fingers is the default.
With secondary click turned on, you can now click (or tap if tap to click is active) the trackpad with two fingers, and your Mac will act like you were right-clicking. It's then easier to access those handy right-click menu options like Save As, Open Link in New Tab, and so on.
Zoom and scroll
Anyone who uses a smartphone with regularity has likely gotten used to pinching their fingers to zoom in and out quickly and dragging their fingers along the screen to scroll through a web page or document. Well, your trackpad can do this, too!
- Open the Apple menu in the top-left corner of the screen and select System Preferences (System Settings in macOS Ventura and later).
- Scroll down the menu, select Trackpad, and then the Scroll & Zoom tab.
- Turn on Zoom in or out to allow zooming.
- Scrolling is always on, but you can turn on Natural scrolling (i.e., swipe up to scroll down and down to scroll up) or turn it off.
Zooming with the trackpad works very similarly to an iPhone: Make a pinching gesture on the screen with two fingers to zoom out (or spread two fingers out in a "reverse pinch" to zoom in). Scrolling is slightly different because you must slide two fingers up or down the trackpad to scroll rather than one.
Show Desktop
Jumping from an app to Finder isn't a difficult task, as you can usually select Finder from the Dock at the bottom of the screen or press Command + H to Hide the app entirely. But hiding an app won't necessarily take you straight to the desktop if you have multiple apps open at once, and viewing Finder on top of an app isn't quite the same as being on the desktop itself — no direct Macintosh HD access, for example. Fortunately, there's a trackpad gesture for that, too.
- Click the Apple menu in the top-left corner and select System Preferences (System Settings in macOS 13 and up).
- Scroll through the menu and select Trackpad towards the bottom and just below Keyboard.
- Select the More Gestures tab, then scroll down and find Show Desktop (it should be at the bottom of the menu).
- Turn the toggle next to Show Desktop on.
With Show Desktop on, put your thumb and three fingers on the trackpad, then spread them apart — keeping your thumb separate and your three fingers grouped. This will immediately move all apps out of the way and jump to the desktop. To return to the app you were using, perform the same gesture in reverse (i.e., with your thumb and three fingers separated, "pinch" them all together).
Swipe between apps
Another common action for anyone who uses multiple apps in full-screen simultaneously is jumping back and forth between them. You can do it by hiding (Command + H) an app you're currently in or by exiting full-screen and manually clicking on each app in the Dock at the bottom of the display. However, it's a bit faster to use the trackpad instead.
- Click on the Apple menu in the top-left corner of the screen and open System Preferences (System Settings in macOS 13).
- Scroll down the menu on the left and select Trackpad, which sits just below Keyboard.
- Select the More Gestures tab and find Swipe between full-screen applications.
- Open the drop-down menu and choose between using three fingers or four fingers.
Now you can place three (or four, depending on your chosen setting) and swipe left or right to quickly jump between the full-screen apps you currently have running.
Open Launchpad
Launchpad acts as a sort of glossary of installed apps, making it easier to locate and open software you don't have on your Dock or desktop. If it's a feature you find yourself using somewhat often (or all the time), then you should consider turning on the trackpad function that lets you call up Launchpad from anywhere at any time using a simple gesture.
- Open the Apple menu in the top-left and select System Preferences (or System Settings if you're using macOS 13 Venture and later).
- Scroll down to find Trackpad (just under Keyboard), then select it.
- Find and select the More Gestures tab, then scroll down and find the Launchpad option.
- Turn on the toggle next to Launchpad.
To use this particular gesture, place your thumb on the trackpad, followed by three fingers (grouped together). "Pinch" your thumb and three fingers together on the trackpad to instantly pull up Launchpad.
Show all app windows
Due to their nature, some apps may support (and even encourage) having multiple windows open at once. This could mean more than one project open at a time in graphical editing software, multiple text documents, a handful of different spreadsheets, etc. Of course, you can jump between them using the app's Window drop-down menu, but the more windows you have open, the more clunky and cumbersome that can be. So why not use a single trackpad gesture instead?
- Click the Apple menu in the top-left corner of the screen, then choose System Preferences (System Settings in macOS 13 Ventura).
- Scroll down past Keyboard and open the Trackpad menu.
- Select the More Gestures tab, then scroll down and look for App Exposé.
- Open the drop-down menu and choose whether to use three or four fingers.
With App Exposé active, you can swipe down on the trackpad using three or four fingers (based on the setting you chose) to view all of the open windows in the app you're currently using. Your Mac will automatically size them all to fit on the screen together. Then you just have to click on the specific window you want to jump to.
- GTA 5 Cheats
- Print on a Chromebook
- Nothing Phone 2 Review
- Best YouTube TV Alternatives
- Asus ROG Ally vs. Steam Deck
- Gameshare on Nintendo Switch
10 Mac trackpad gestures that everyone should be using
One of the best parts of macOS is learning and executing all of Apple’s many internal shortcuts . These are hidden commands built into the company’s hardware that are total godsends when it comes to things like click consolidation (one command instead of three clicks) and workflow optimization. Some of these commands you may already know, but we’re willing to bet there’s at least one or two we can introduce to you!
Zoom in or out
Swipe between pages, open notification center, how to open launchpad, how to show your desktop, how to drag files (the better way), how to force click, how to open mission control, how to hide all other apps, how to switch desktops.
That’s our goal at any rate, and we’ve gone ahead and created this roundup of several trackpad gestures you can use in macOS for all our readers. Even if you don’t use shortcuts all the time, one of these quick executables could come in handy down the line.
When one needs a digitized magnifying glass, you don’t have to resort to manual macOS controls for adjusting your page zoom (clicking View > Zoom In or Zoom Out repeatedly). Instead, you can just execute zoom-in and zoom-out gestures using your trackpad.
- Best MacBook deals: Get an Air for $605 and save on M3 MacBook Pro
- iMac deals: New, renewed and refurbished iMac computers
- Best Apple deals: Save on AirPods, Apple Watch, iPad, MacBook
To do so, simply pinch with two fingers anywhere on your trackpad. Spreading your fingers outward will zoom in, while pinching inward acts as a zoom out.
Let’s say you have a PDF open with multiple pages you need to sift through. On top of scrolling through the document, or inputting whatever page number you’d like to jump to, you can also turn pages using your trackpad.
Just put two fingers together and swipe from left to right for a a page forward command, or right to left to go back one page.
All of your macOS notifications are stored in a hidden menu called the Notification Center. It’s not all that hidden though, as Apple makes it pretty simple to pull up the column with one trackpad command.
Put two fingers together, position them to the right edge of your trackpad, and swipe left.
Whether you want to gain a quick overview of your installed Mac apps or just launch something quickly, this gesture is invaluable. It opens the Launchpad app, which shows all of your apps on a grid for swift access.
To perform it, just move your thumb and first three fingers together on your trackpad. To close Launchpad, simply move your fingers and thumb apart, or press the Esc key.
You can also do the reverse of the Launchpad gesture above. In macOS, spread your thumb and first three fingers apart and your open apps will be cleared out of the way, revealing your desktop.
This is a handy way to find files and folders on your desktop that would otherwise be obscured by an app window. It’s also a great way to drag a file from your desktop into an open app. Just move your fingers and thumb apart, then click and drag the file onto the app’s icon in the Dock until it starts flashing. The app will return and you’ll be able to drop the file in place.
If you’ve ever tried to drag a file from one side of your screen to the other using just your trackpad, you’ll know this can be tricky, especially if you reach the edge of your trackpad. Luckily, there’s a better way to do it.
Open the Settings app and select Accessibility > Pointer Control > Trackpad Options . Enable Use trackpad for dragging and choose Three-Finger Drag from the dropdown menu.
This lets you move a file by positioning the macOS pointer over it and moving it using three fingers at once, at which point the pointer ‘latches on’ and starts moving the file. The best part of this is you can let go of the trackpad, and then do another three-finger drag to move the file again. That means you can quickly do multiple swipes and move the file around without having to keep your fingers on the trackpad, which isn’t always easy.
Apple’s trackpads let you ‘Force click’ (or press a little harder) in order to get extra functionality. That works really well and is definitely worth incorporating into your daily routine.
For example, if you do a single-finger Force click on a word in Safari, you’ll see a pop-up window with a definition of the word. At the bottom of the window are other categories with extra info, such as relevant films, map data, Siri knowledge, and more.
This works on what Apple calls “data detectors.” These can be addresses, phone numbers, email addresses, web links — anything you can take subsequent action on in macOS. Force-click a link, for example, and you get a pop-up preview of the web page. The many different uses of this gesture make it a very useful one to have on hand.
Sometimes, you’ll find your macOS screen crowded with a bunch of apps and windows. That can make it hard to locate an app you used a while ago without minimizing every window to the Dock, one by one. However, a quick gesture solves this problem.
Swipe up on your trackpad with four fingers and you’ll open Mission Control, which shows every window that’s currently open, letting you click the one you’re after. This gesture also reveals any virtual desktops you have open (more on that shortly).
While swiping up with four fingers shows all of your open apps, sometimes you just want to focus on the app you’re using right now. To do that, it’s a four-finger swipe down. This gesture (called App Exposé) shows any open windows for the current app next to each other, with a list of recent documents running along the bottom of your screen.
To run this gesture, you need to enable App Exposé. Open the Settings app, then select Trackpad > More Gestures . Next to App Exposé, choose Swipe Down with Four Fingers from the dropdown menu (there’s also an option for swiping down with three fingers if you prefer).
Mission Control is a great way to manage multiple desktops, and you can access it by swiping up with four fingers. But there’s actually a quicker way to move through your desktops: swipe left or right with four fingers on your trackpad.
Note that if you have a number of apps open in full-screen mode, this same four-finger drag will incorporate them into your swipes through your desktops. For example, you might have Desktop 1, then a full-screen app, then Desktop 2, all linked by four-finger swipes.
Editors' Recommendations
- Best refurbished MacBook deals: Get a MacBook Air for $140 and more
- Best Mac Mini deals: Save over $100 on an Apple desktop
- MacBook Pro OLED: Here’s everything we know so far
- Don’t download the latest macOS Ventura update just yet
- The 5 best MacBooks for video editing in 2024

For most new Mac users -- especially if they're coming from Windows -- one of the first questions they need to ask is how to take a screenshot on a Mac? There's no dedicated Print Screen key like there is on Windows, but there is keyboard shortcut, and if you want something more akin to Microsoft's Windows Snipping tool, there are some great screenshot apps you can use, too.
Here's how to take a screenshot on a Mac in a few different ways. How to take a screenshot using keyboard shortcuts MacOS keyboard shortcuts are the quickest ways to take screenshots, whether you're capturing the entire screen or just a portion. By default, Apple's methods save your screenshot to the desktop, but if you want to copy the screenshot to the clipboard, there's a keyboard shortcut you can use instead. How to capture a selected area
MacBooks are typically seen as some of the best laptops money can buy, thanks to their combination of performance and longevity. It's not uncommon for MacBooks to be running flawlessly years after purchase -- so while their upfront costs are a bit steep, they're great long-term investments.
That holds true for the MacBook Pro lineup, which comes in two sizes -- 14 inches and 16 inches. Both are top-of-the-line computers designed to handle pretty much anything you can throw at them, offering access to the M3 chip, vibrant Liquid Retina XDR displays, and plenty of other high-end hardware.
Now that Apple has started outfitting its laptops with its M3 generation of chips, it's time to take another look at which is the best MacBook to buy in 2024. That’s not always easy, though, as buying the newest MacBook isn’t always the right decision. Apple has several tiers of performance, as well as various sizes, which can further complicate the matter.
What’s more, you can also still get M1 and M2 MacBooks, some from Apple’s own website and some from third-party retailers. But are they still worth your money? Our guide should help you decide.

How to customize trackpad and mouse gestures on your Mac
Learn how to customize your trackpad and mouse gestures so you can use your Mac more efficiently and increase your productivity.
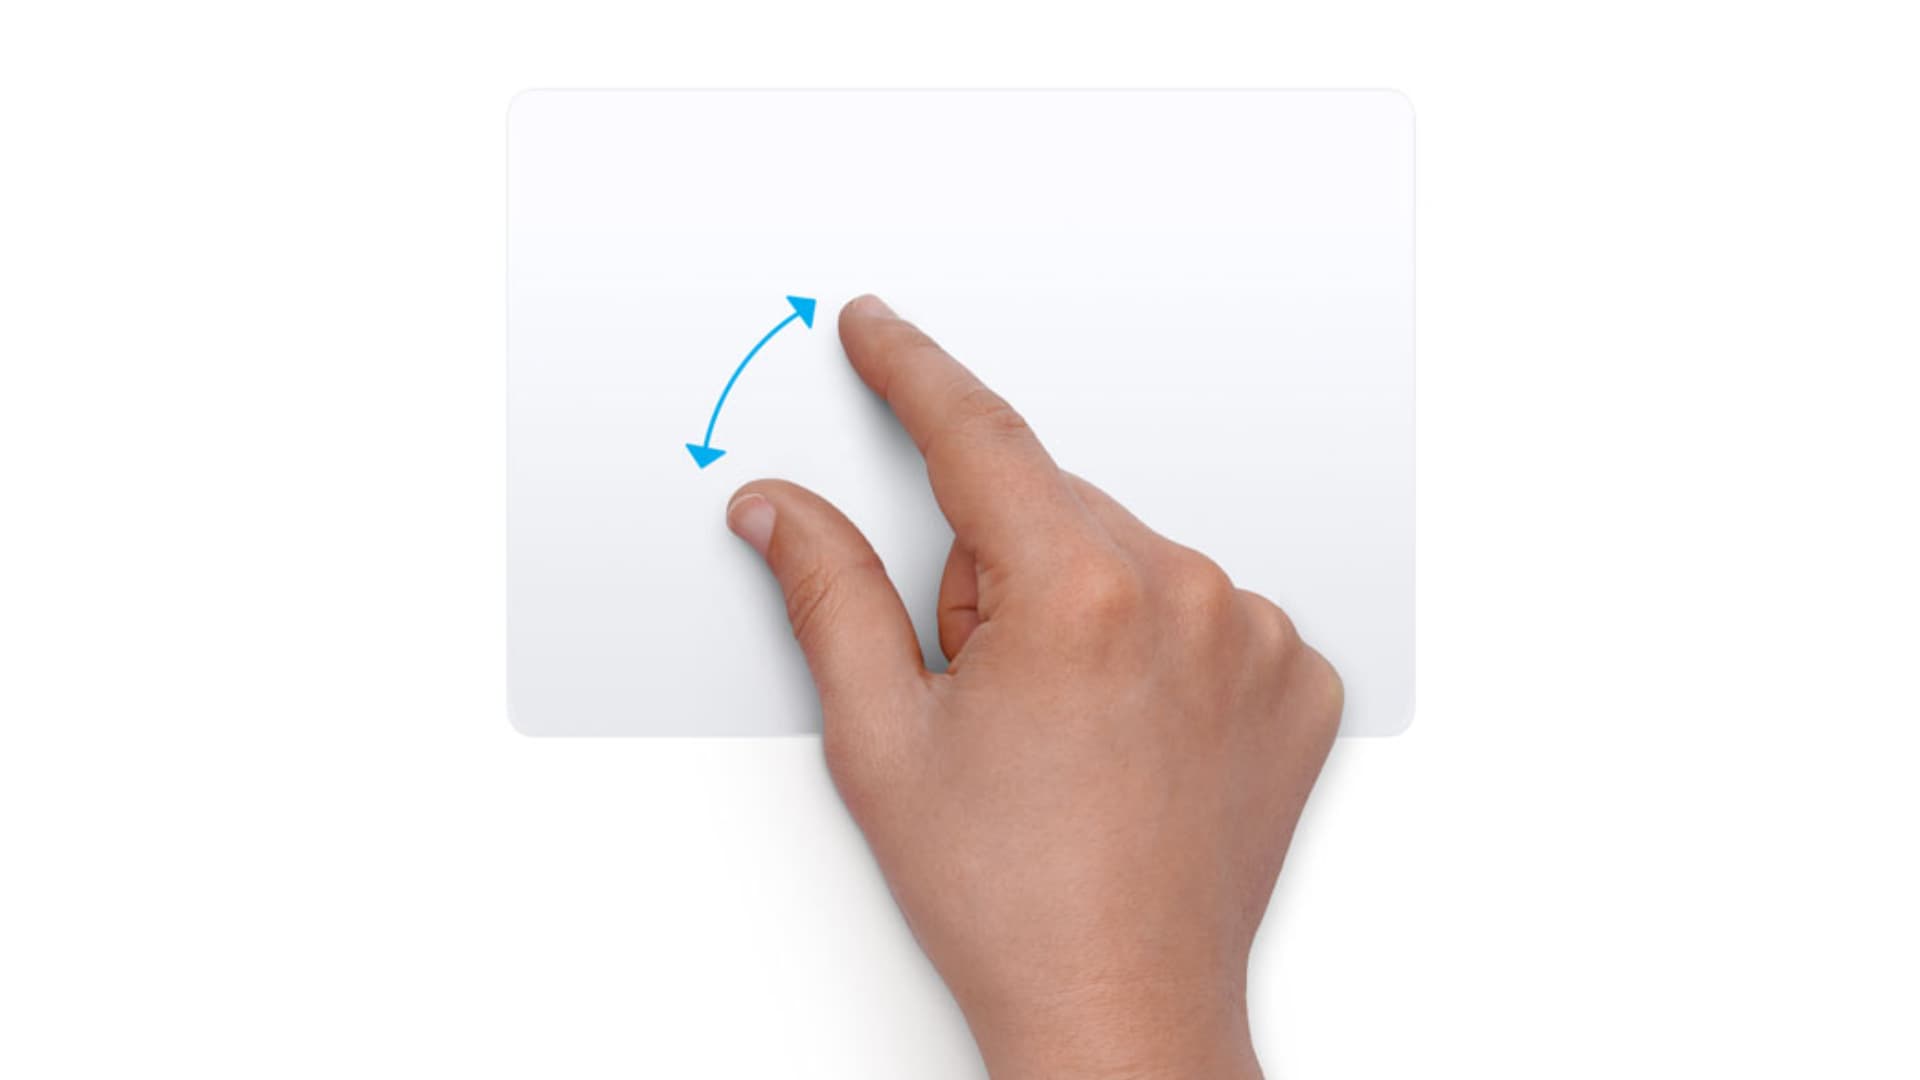
Younger people probably don’t remember the days before the trackpad (touchpad) existed. Introduced for laptops in the 90s , these handy little areas of a keyboard became the norm over time. Trackpads make doing all sorts of things on your computer easier with gestures.
Now you can buy an external trackpad if your computer doesn’t have one. Plus, you can also take advantage of gestures with your mouse on Mac with accessories like Apple’s Magic Mouse.
But similar to keyboard shortcuts, there can almost be too many gestures to remember. And there can be times you can accidentally perform an action you don’t mean to with a gesture.
Your Mac gives you options for customizing the gestures you use with both your trackpad and mouse. This lets you use the ones you want, how you want, and disable the others to avoid accidental actions.
Here, we’ll walk you through how to customize the trackpad and mouse gestures on your Mac.
Previewing and changing the gestures
For both the trackpad and mouse gestures, you’ll be able to enable or disable them as you like using the checkboxes. Some settings will offer you a choice of the exact gesture, for example, the number of fingers you want to use. Just click the arrow for that item to see the options.
And if you aren’t sure what the setting refers to or how to make the gesture, you’ll see a helpful preview.
Keep these things in mind as we walk through the available options.
How to customize trackpad gestures on Mac
To see and adjust the gestures you can use with your Mac trackpad, open the System Settings using the icon in your Dock or Apple icon > System Settings from the menu bar. Next, pick Trackpad and then check out these options.
Point & Click
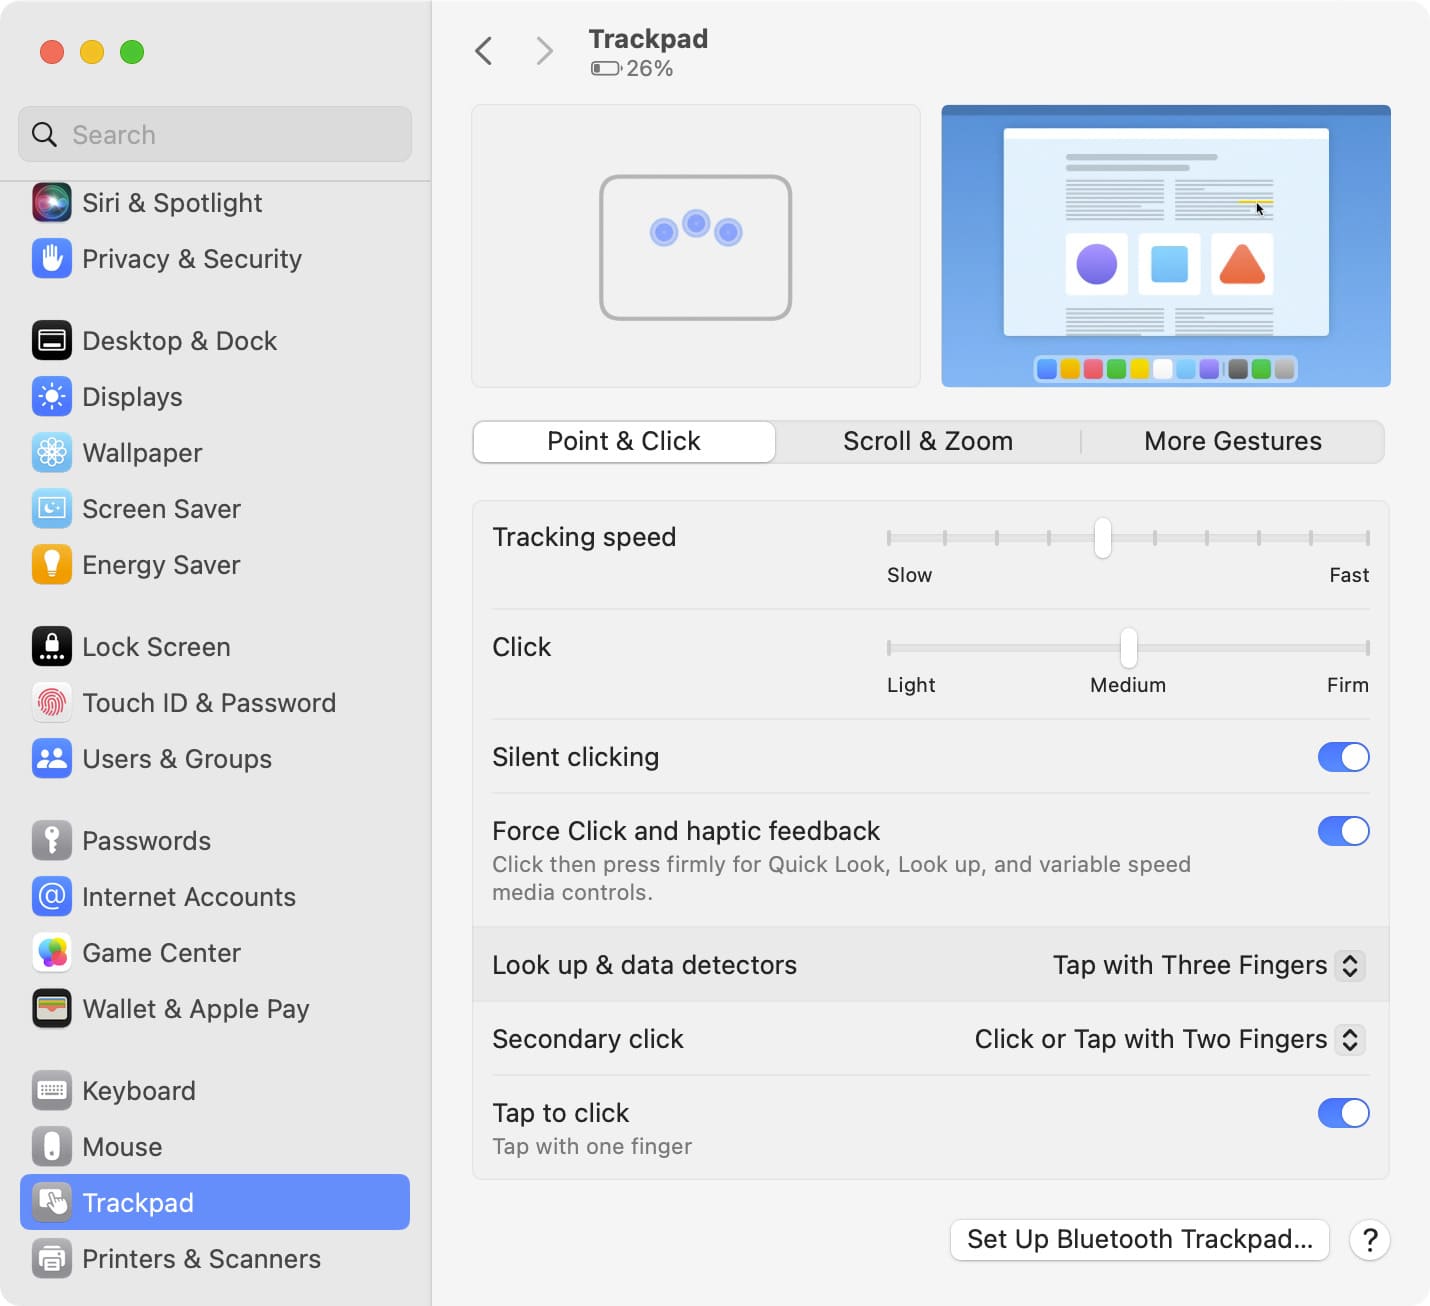
These point-and-click gestures are those you’ll likely use most often. So take your time setting them for maximum efficiency.
- Look up and data detectors : Use Force Click with one finger or Tap with three fingers. This applies to using the Look Up feature on your Mac and certain types of actions for data like dates.
- Secondary click : Click or tap with two fingers or tap one of the trackpad corners (right or left). A secondary click is like using Control + Click or a “ right-click .”
- Tap to click : This is simply on or off but is one of the gestures you’ll probably use the most as it’s a basic click.
- Click and Tracking speed : Adjust these sliders for the pressure and speed you want for the above options.
- Silent click : On or off for hearing the clicking sound. You may not see this on MacBooks, but see it if you’re using Apple’s Magic Trackpad.
- Force Click and haptic feedback : On or off for Force Touch trackpads. To Force Click, you click and then press until you feel a deeper click.
Scroll & Zoom
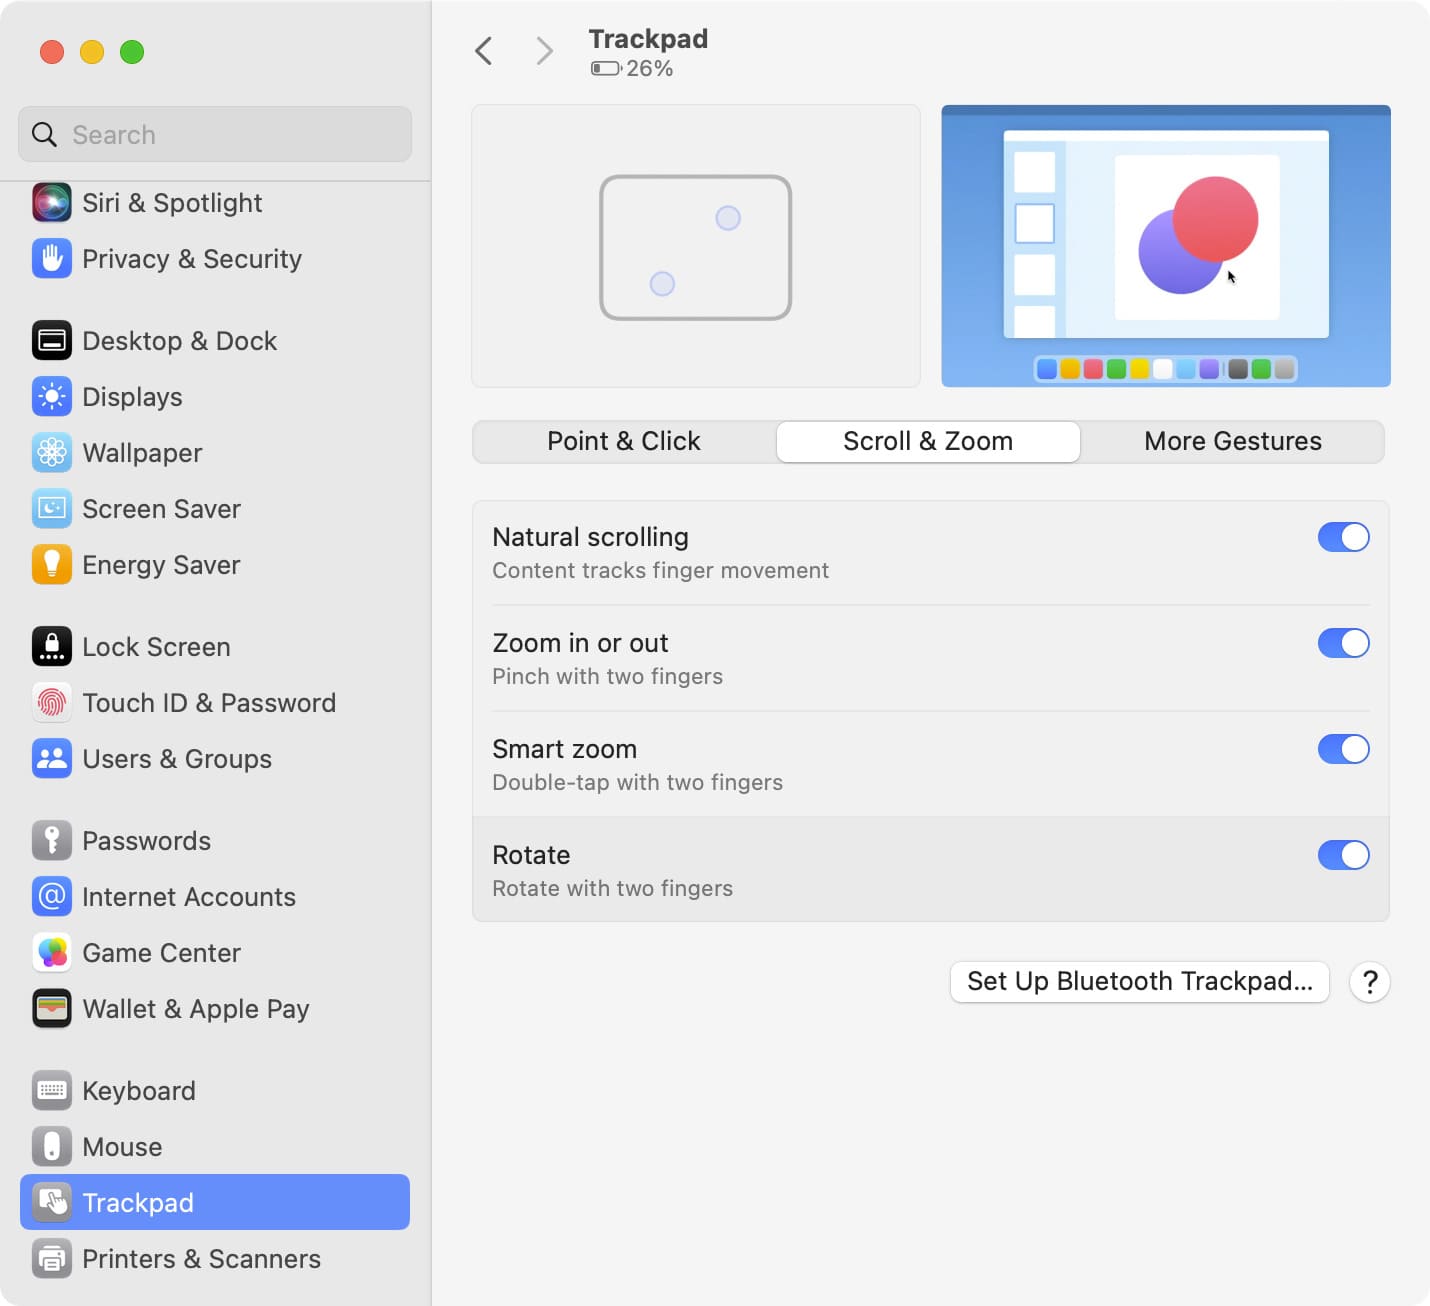
Each of the following gestures can be either enabled or disabled.
- Natural scrolling : Move the contents you’re viewing in the same direction as your fingers.
- Zoom in or out : Pinch with two fingers to zoom in and spread with two fingers to zoom out.
- Smart zoom : Double-tap with two fingers to zoom in and out.
- Rotate : Use two fingers to rotate, like you’re turning a dial.
More Gestures
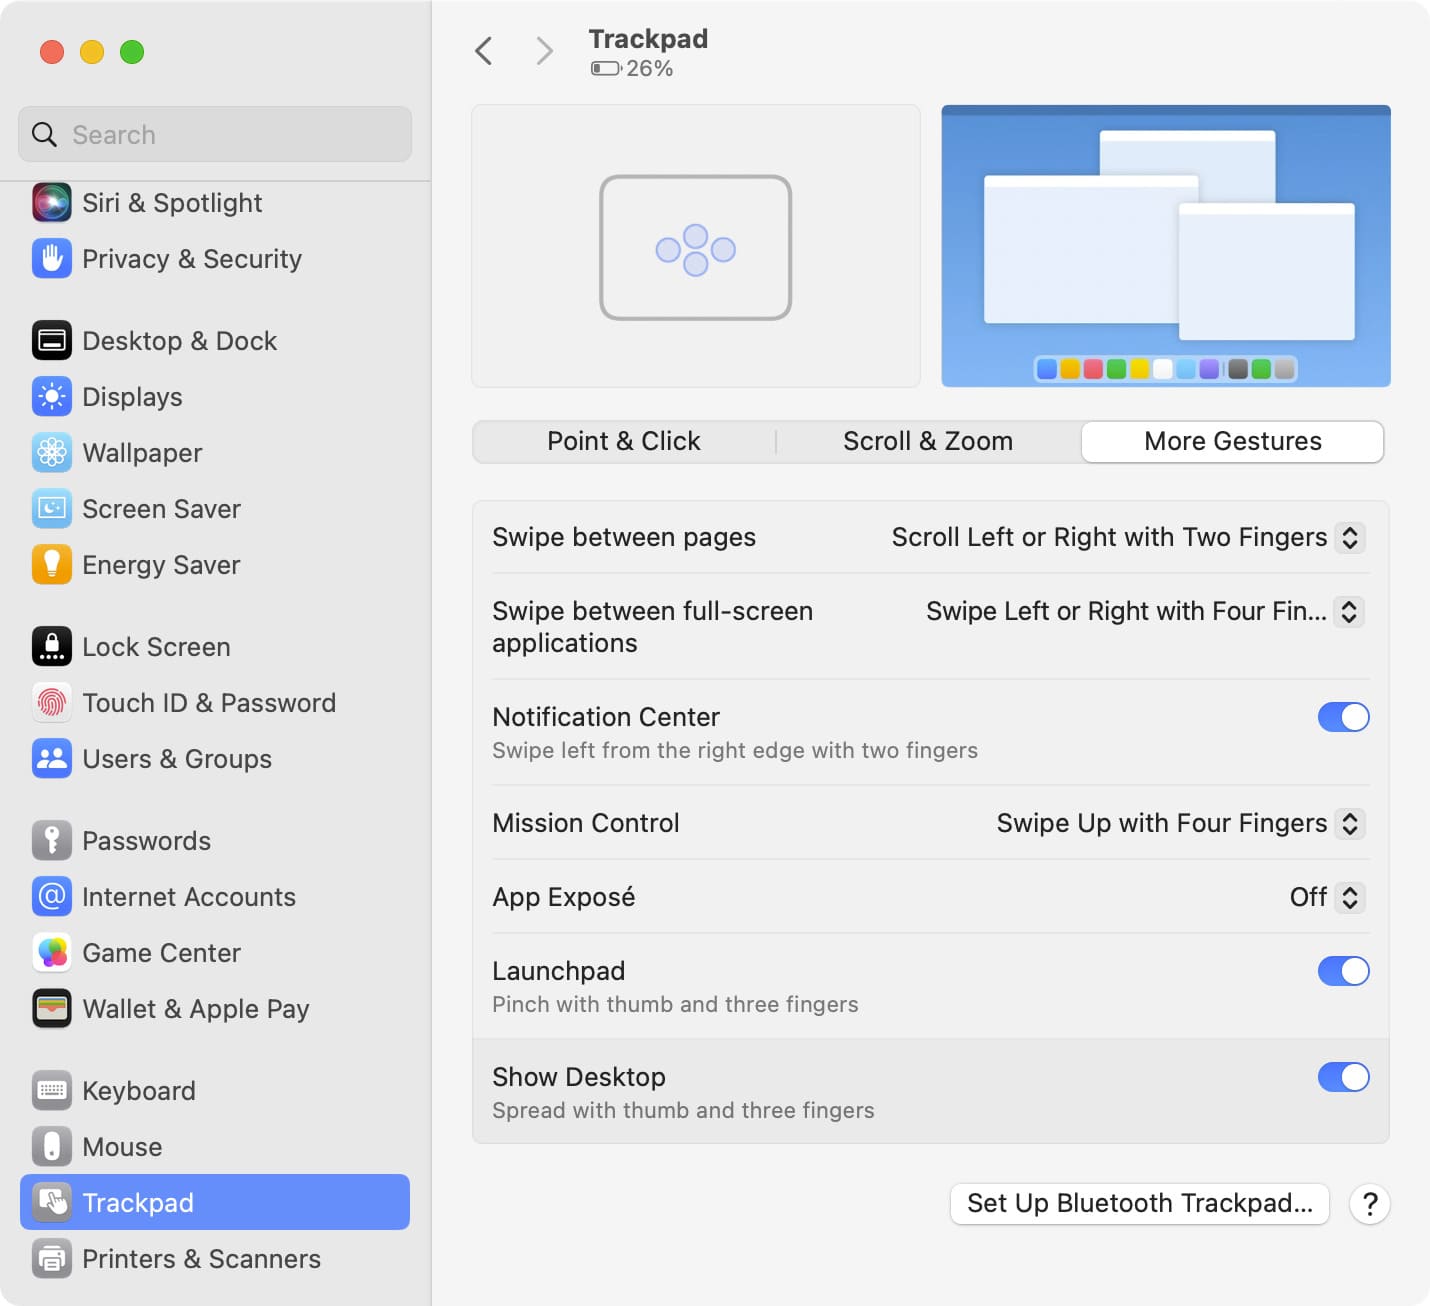
This next set of gestures is pretty cool but can also be the harder ones to remember or those you may use accidentally.
- Swipe between pages : Choose to scroll or swipe with two or three fingers or both when viewing webpages in Safari .
- Swipe between full-screen applications : Swipe left or right with three or four fingers to move between apps you have in full-screen mode.
- Notification Center : Swipe from the right edge with two fingers. This is convenient if you use your Notification Center regularly.
- Mission Control : Swipe up with three or four fingers to access Mission Control.
- App Exposé : Swipe down with three or four fingers to access App Exposé.
- Launchpad : Pinch with your thumb and three fingers to show the Launchpad.
- Show Desktop : Spread with your thumb and three fingers to show your Desktop.
How to customize mouse gestures on Mac
To see and adjust the gestures you can use with your mouse, open the System Settings , pick Mouse , and then review these options. Remember, you must have a gesture-compatible mouse.
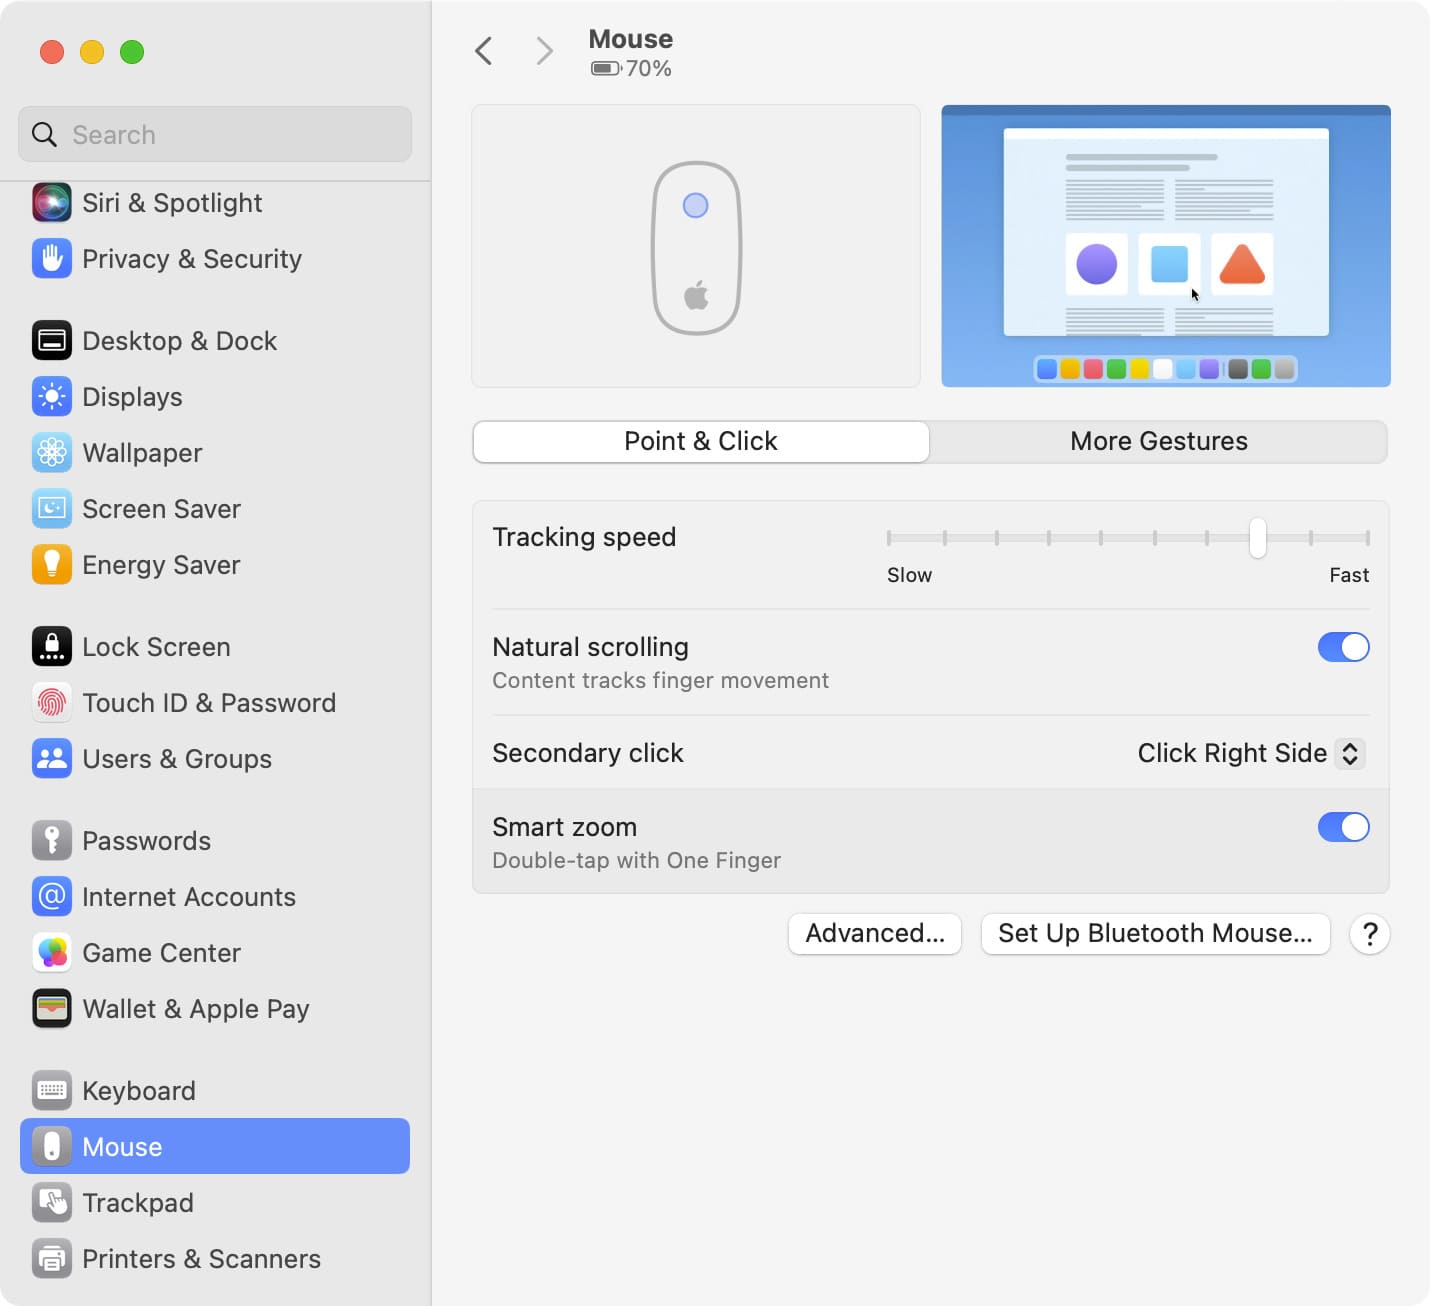
Like the trackpad, these point-and-click gestures are the basics you’ll use most.
- Natural scrolling : Move the contents you’re viewing in the same direction as your fingers
- Secondary click : Click on the right or left side. Secondary click is like using Control + Click or a “right-click.”
- Smart zoom : Double-tap with one finger to zoom in and out.
- Tracking speed : Move the slider to adjust the speed at which your cursor moves with your mouse.
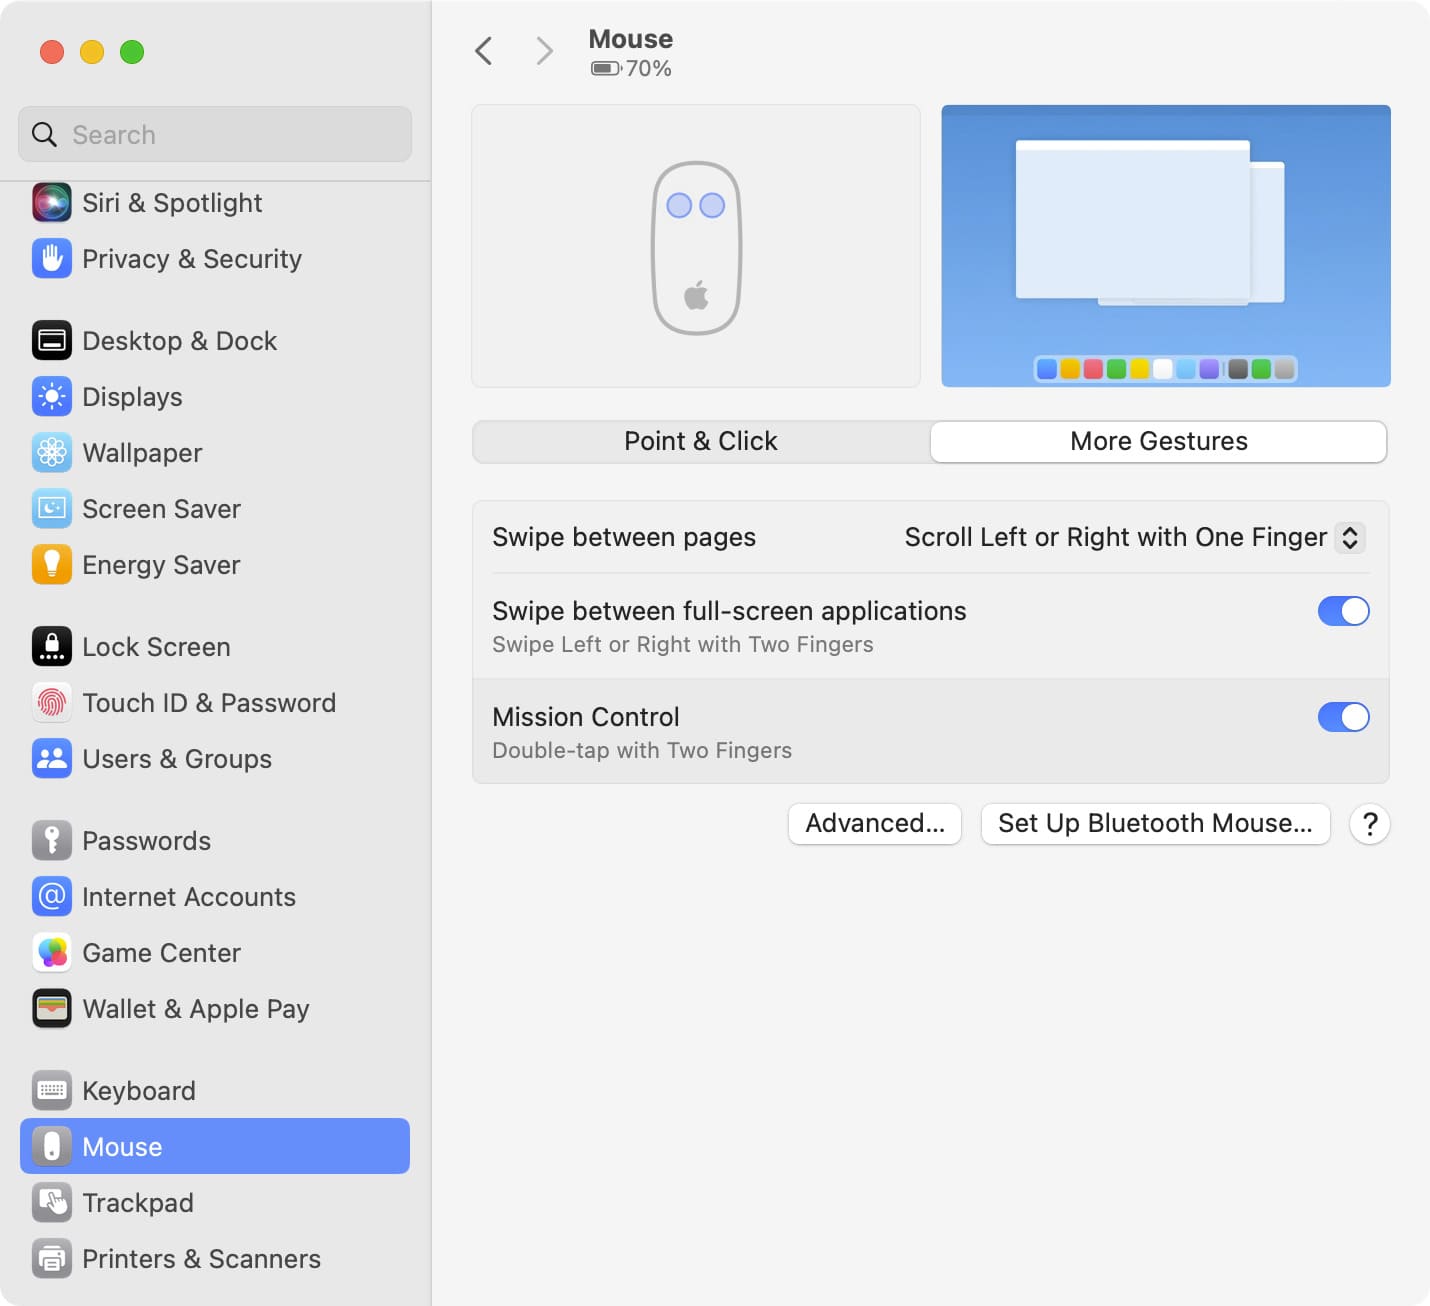
Here are a few extra gestures for your mouse, like those you can use with your trackpad.
- Swipe between pages : Choose to scroll or swipe with one or two fingers when viewing pages in Safari. Note that if you set it to two-finger gesture, you won’t be able to use the next option (Swipe between full-screen apps).
- Swipe between full-screen apps : Swipe left or right with two fingers to switch between full-screen apps.
- Mission Control : Double-tap with two fingers to access Mission Control.
Making sure that you customize your Mac gestures in a way that’s most comfortable for you is important. And with the flexibility you have, you can work or play much more effectively.
Which gestures are you fondest of on your Mac? Do you prefer to keep things simple or do you use them all? Let us know!
Check out next:
- How to enable the three-finger drag gesture for your MacBook trackpad and Magic Trackpad
- How to automatically disable the trackpad when a mouse is connected to your Mac
- How to rename your Magic Mouse, Keyboard, or Trackpad on Mac (and what to do if you can’t)
How to Use Trackpad Gestures to Navigate macOS
One of the areas where Macs beats PCs is gesture support. The MacBook trackpad features a wide range of gestures that allow you to quickly perform actions, such as switching between apps, zooming and seeing all of your notifications. Use these gestures to start zipping around macOS like a pro:
View Mission Control: Swiping up on the trackpad with three fingers causes your open windows to explode outward, allowing you to see all of the windows simultaneously. Apple calls this Mission Control. Swiping back down with three fingers collapses the windows, placing the window you last viewed at the top.
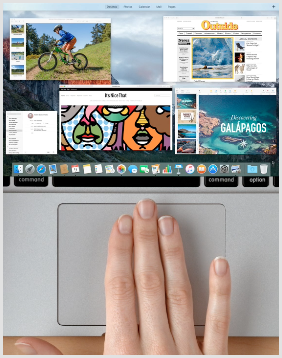
Swipe between full-screen apps: Swipe with three fingers to the left or right to switch between any apps that you have open in full-screen mode.
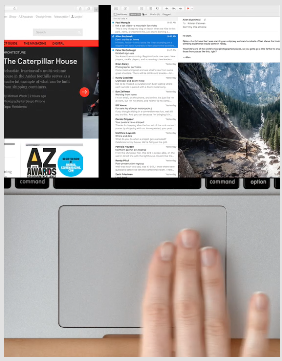
Tap to zoom : Tap the trackpad with two fingers simultaneously to zoom in on a page in Safari or a PDF.
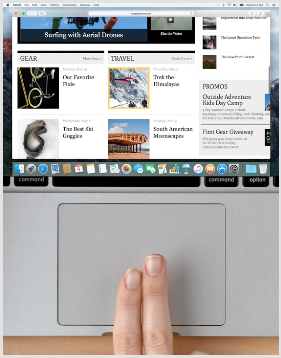
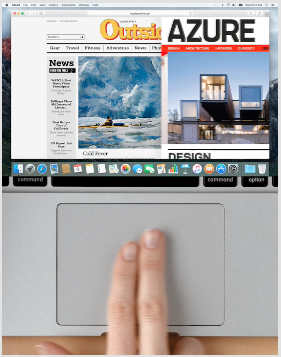
Swipe to navigate : Swipe with two fingers to the left or right to flip through Web pages and documents.
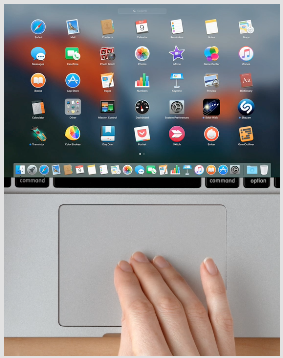
Open Launchpad : Pinch toward the center of the trackpad with your thumb placed in either the bottom left or bottom right corner and three fingers in the opposite corner above. The Launchpad lets you see your installed apps and launch them with a single click.
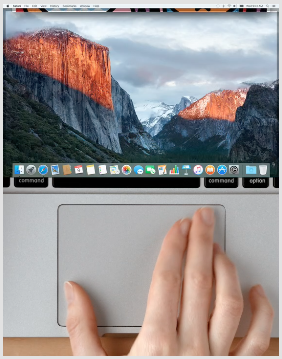
Show desktop : Spread your thumb and three fingers apart to show the desktop. This gesture is the exact opposite of the previous gesture.
Stay in the know with Laptop Mag
Get our in-depth reviews, helpful tips, great deals, and the biggest news stories delivered to your inbox.
Look up : Tap a word with three fingers to immediately look up the word’s definition, synonym and more.
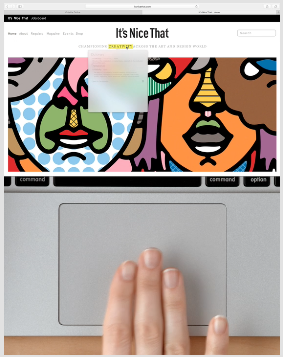
Three-finger drag : Slide three fingers around the trackpad when you've positioned the cursor at the top of the window to drag the window around the screen.
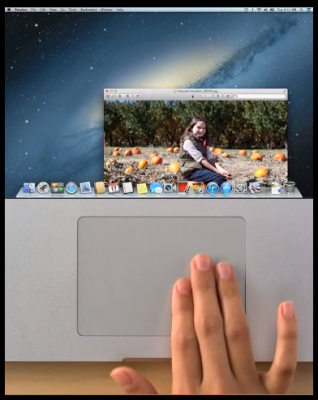
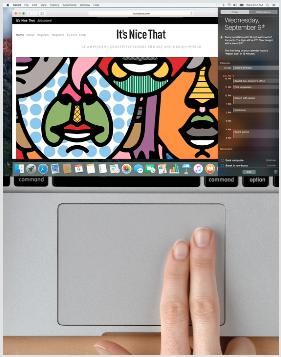
Notification Center : Swipe in with fingers from the left to open the Notification Center.
Show Safari tabs : Pinch with two fingers to see all of your Safari tabs simultaneously, and then swipe left or right with two fingers to scroll between the tabs.
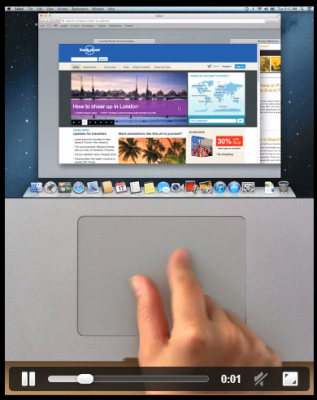
PC to Mac Guide: How to Make the Switch
- Previous Tip
- How to Use Keyboard Shortcuts in OS X
- Eject USB Devices in OS X
- How to Use Gestures to Navigate OS X
- How to Right Click in OS X
- Install Apps in OS X
- How to Find Files and Folders in OS X
- Take Screenshots in OS X
- Make Desktop Shortcuts in Mac OS X
- How to Browse Your Applications in OS X
- How to Force Close Frozen Applications in OS X
- Quit Applications in OS X
- How to Use Full Screen Apps in OS X
- Use Spotlight to Find Files in OS X
- Create an Apple ID
- Move Your PC files to a Mac
- How to set up Mail and Calendar accounts on OS X
- Use OS X El Capitan's Split Screen Mode
- Increase the Text Size on Mac
Apple earnings report reveals M3 Macs are a hit: Here's what it means for laptop users
5 takeaways from Apple's Q2 2024 earnings: New products, AI, and WWDC 2024
11 best deals from Amazon Gaming Week
Most Popular
- 2 Apple earnings report reveals M3 Macs are a hit: Here's what it means for laptop users
- 3 Top 3 Apple Watch deals to snag before Memorial Day — starting as low as $189!
- 4 5 takeaways from Apple's Q2 2024 earnings: New products, AI, and WWDC 2024
- 5 Memorial Day laptop deals 2024: What to expect, early sales

We explain and teach technology, solve tech problems and help you make gadget buying decisions.
10 Best Ways to Fix Trackpad Gestures Not Working on Mac
Sumukh has a knack for simplifying tech for the masses and helping consumers pick the right gadgets with his in-depth insights and reviews. He decided to hide his engineering degree in the closet to pursue his passion for writing. Over the past 6 years, he has contributed with guides, reviews, and detailed opinions to notable publications like TechPP and XDA-Developers – before donning the Editor hat at Guiding Tech Media.
MacBooks are widely regarded to have the best trackpads on any computer. This is mainly due to how smooth it is and how well the gestures work. Swiping away on the trackpad to switch between windows or bring up mission control is a breeze. However, you won’t be able to perform these actions if trackpad gestures are not working on your Mac.

You may face the issue where you’re unable to swipe up with three fingers to switch desktops. Or you may not be able to pinch to zoom. Regardless of the issue, here are some of the best ways to fix Mac trackpad gestures not working.
1. Clean the Trackpad Surface
The primary reason why your MacBook trackpad gestures are not working or your mouse cursor is stuck could be the accumulation of dirt and grime. Over time, dust, oil, and grease from our fingers settle over the trackpad. If not cleaned regularly, it can cause issues with your Mac’s trackpad.

So, it’s a good idea to regularly clean your Mac’s trackpad. Grab a microfiber cloth and gently rub it on the Mac trackpad. You can also use some rubbing alcohol if there’s a lot of gunk on the surface. It’s also a good idea to wash your hands thoroughly before you use the trackpad again.
2. Force Reboot Your Mac
Let’s now move to the customary solution for most problems – rebooting your Mac. Since your MacBook touchpad gestures are not working, there is a chance that a software glitch is causing it. Hence, a force reboot using the power button is a good way out.
Press and hold the power button or the Touch ID button (depending on which Mac you have) until you see the Apple logo. Let go of the button when the Apple logo appears and your Mac will reboot.
3. Restart the Service From Terminal
This method is mainly helpful when the three-finger swipe to bring up mission control or app exposé doesn’t work. You can try restarting the dock service on your Mac using the terminal to see if the gestures start working again. Here’s how to do it.
Step 1: Press the Command key on your Mac followed by the space bar. This will bring up Spotlight Search.
Step 2: Type in Terminal and hit the Enter Key.

Step 3: In the terminal window, input the below command and hit the enter key.

Reboot your Mac once and try using the trackpad gestures now.
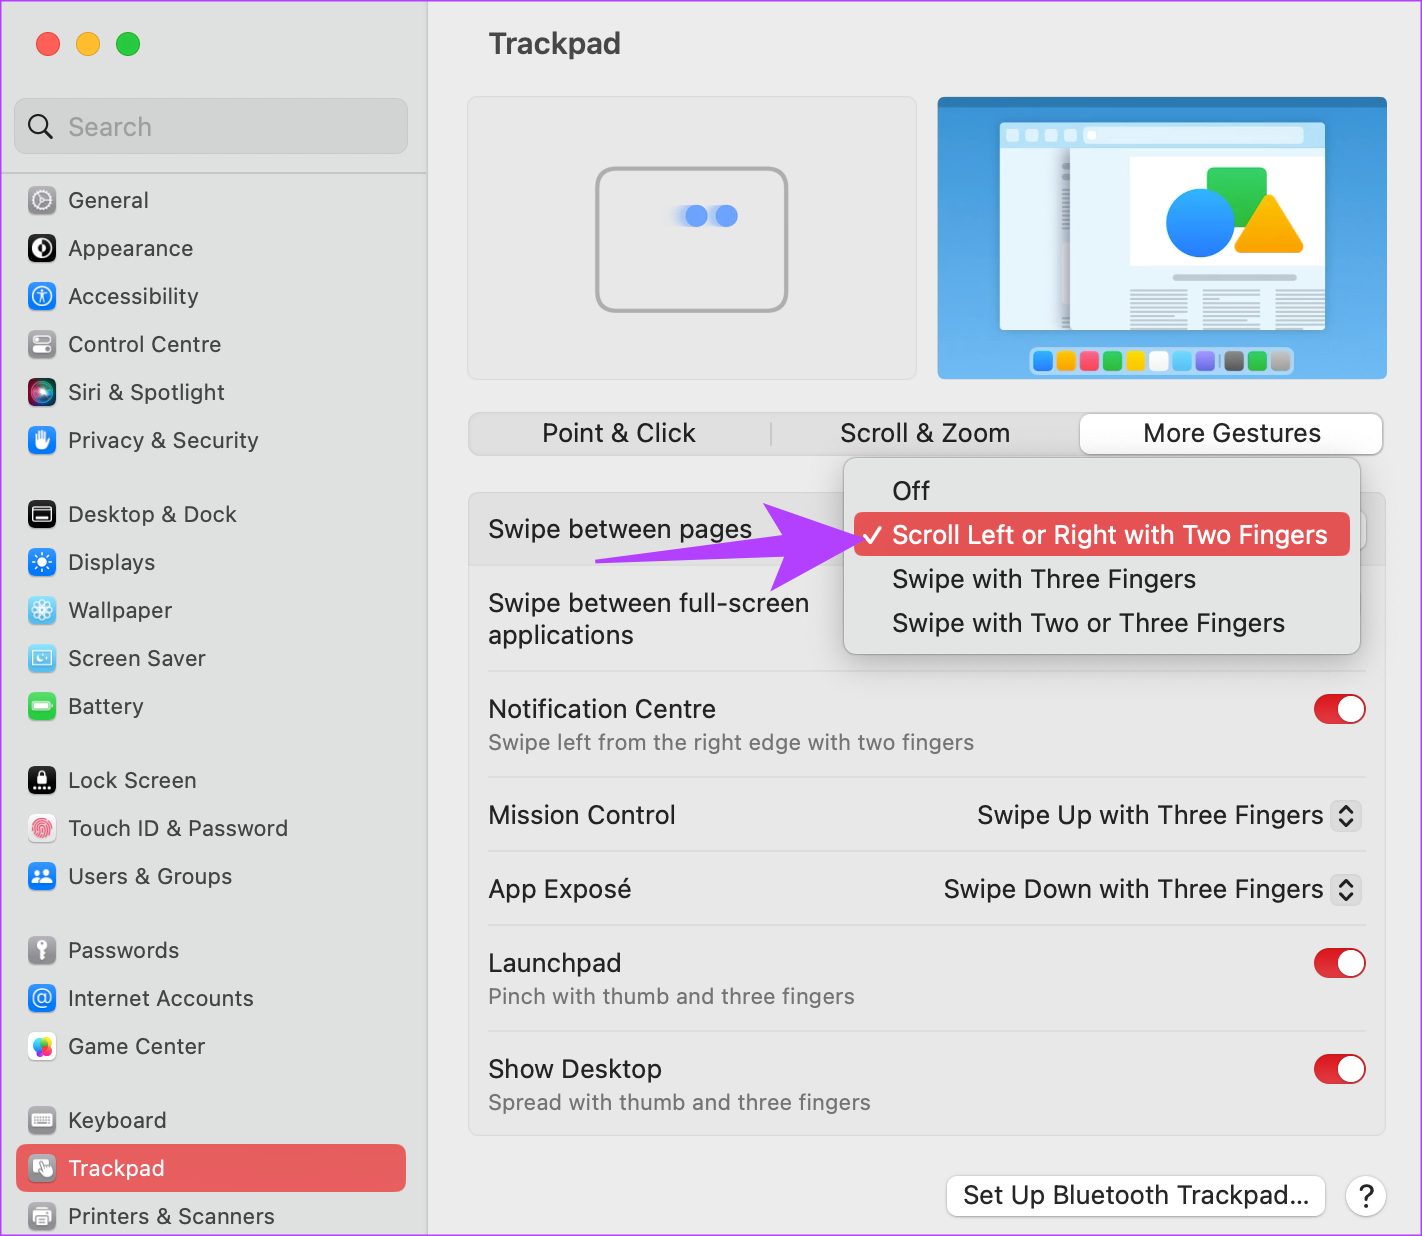
4. Customize Gestures From Trackpad Settings
macOS gives you the ability to change and customize gestures. If you’re trying to perform a specific gesture but it’s not working, it’s possible that the gesture is assigned to do something else. Here’s how you can change it if that’s the case.
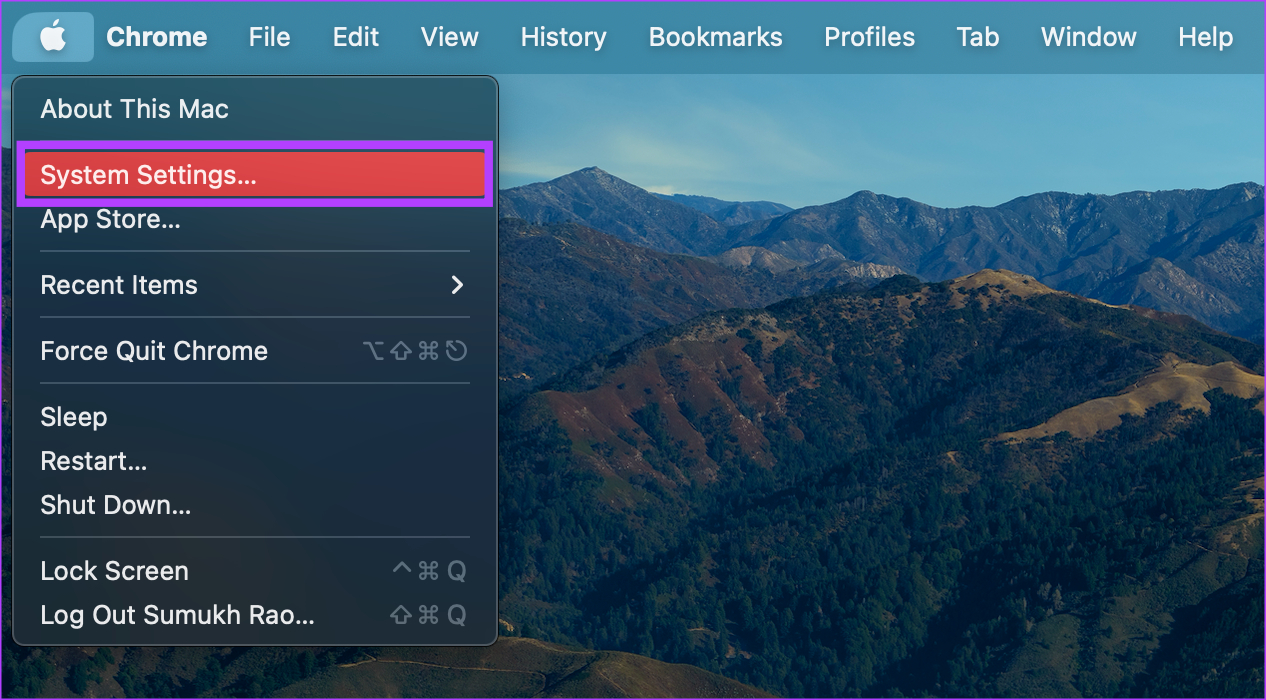
Step 1: Click on the Apple logo in the top-left corner of your screen. Select System Settings. If your Mac is running macOS Monterey or earlier, select System Preferences.
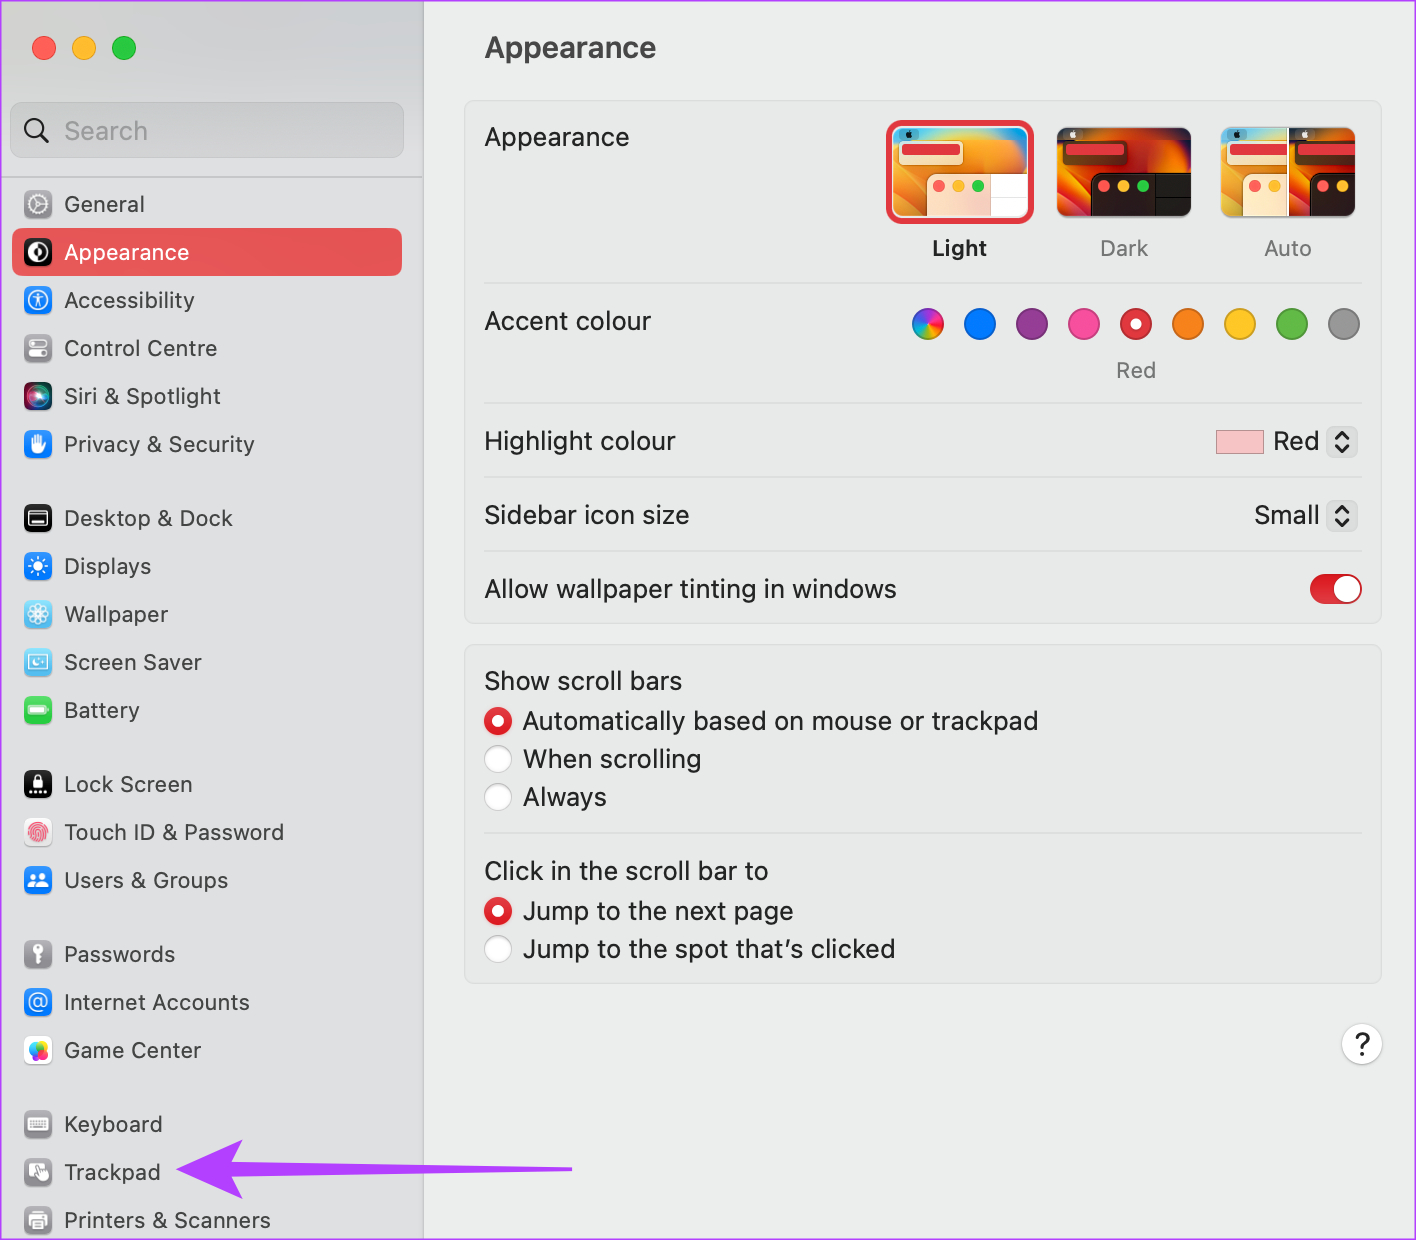
Step 2: Navigate to the Trackpad option in the left pane.
Step 3: Switch to the More Gestures tab. Here, you should see the description of various gestures.
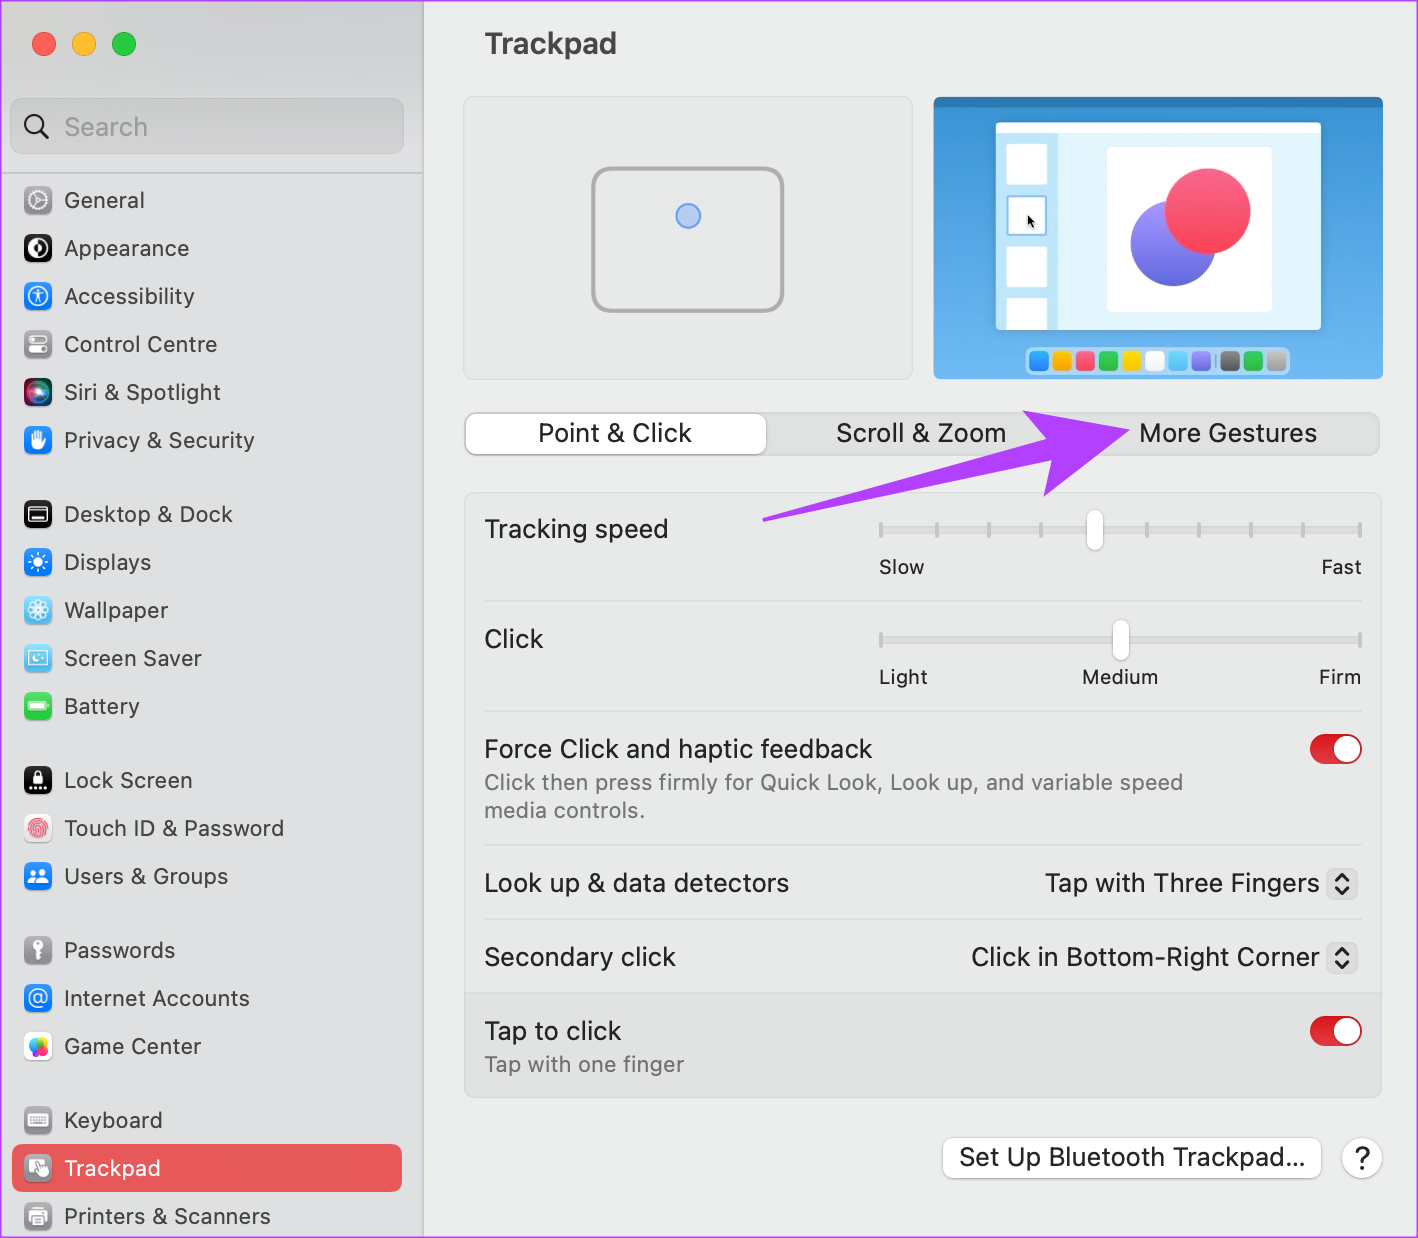
Step 4: Select the relevant action and click on the gesture next to it.

Step 5: Then, choose the trackpad gesture that you want to perform to trigger that action.
5. Disconnect Any External Mouse
Sometimes, an external mouse can interfere with the functioning of the trackpad. It can cause the MacBook trackpad to behave erratically and in such a case, you won’t be able to use the gesture either.
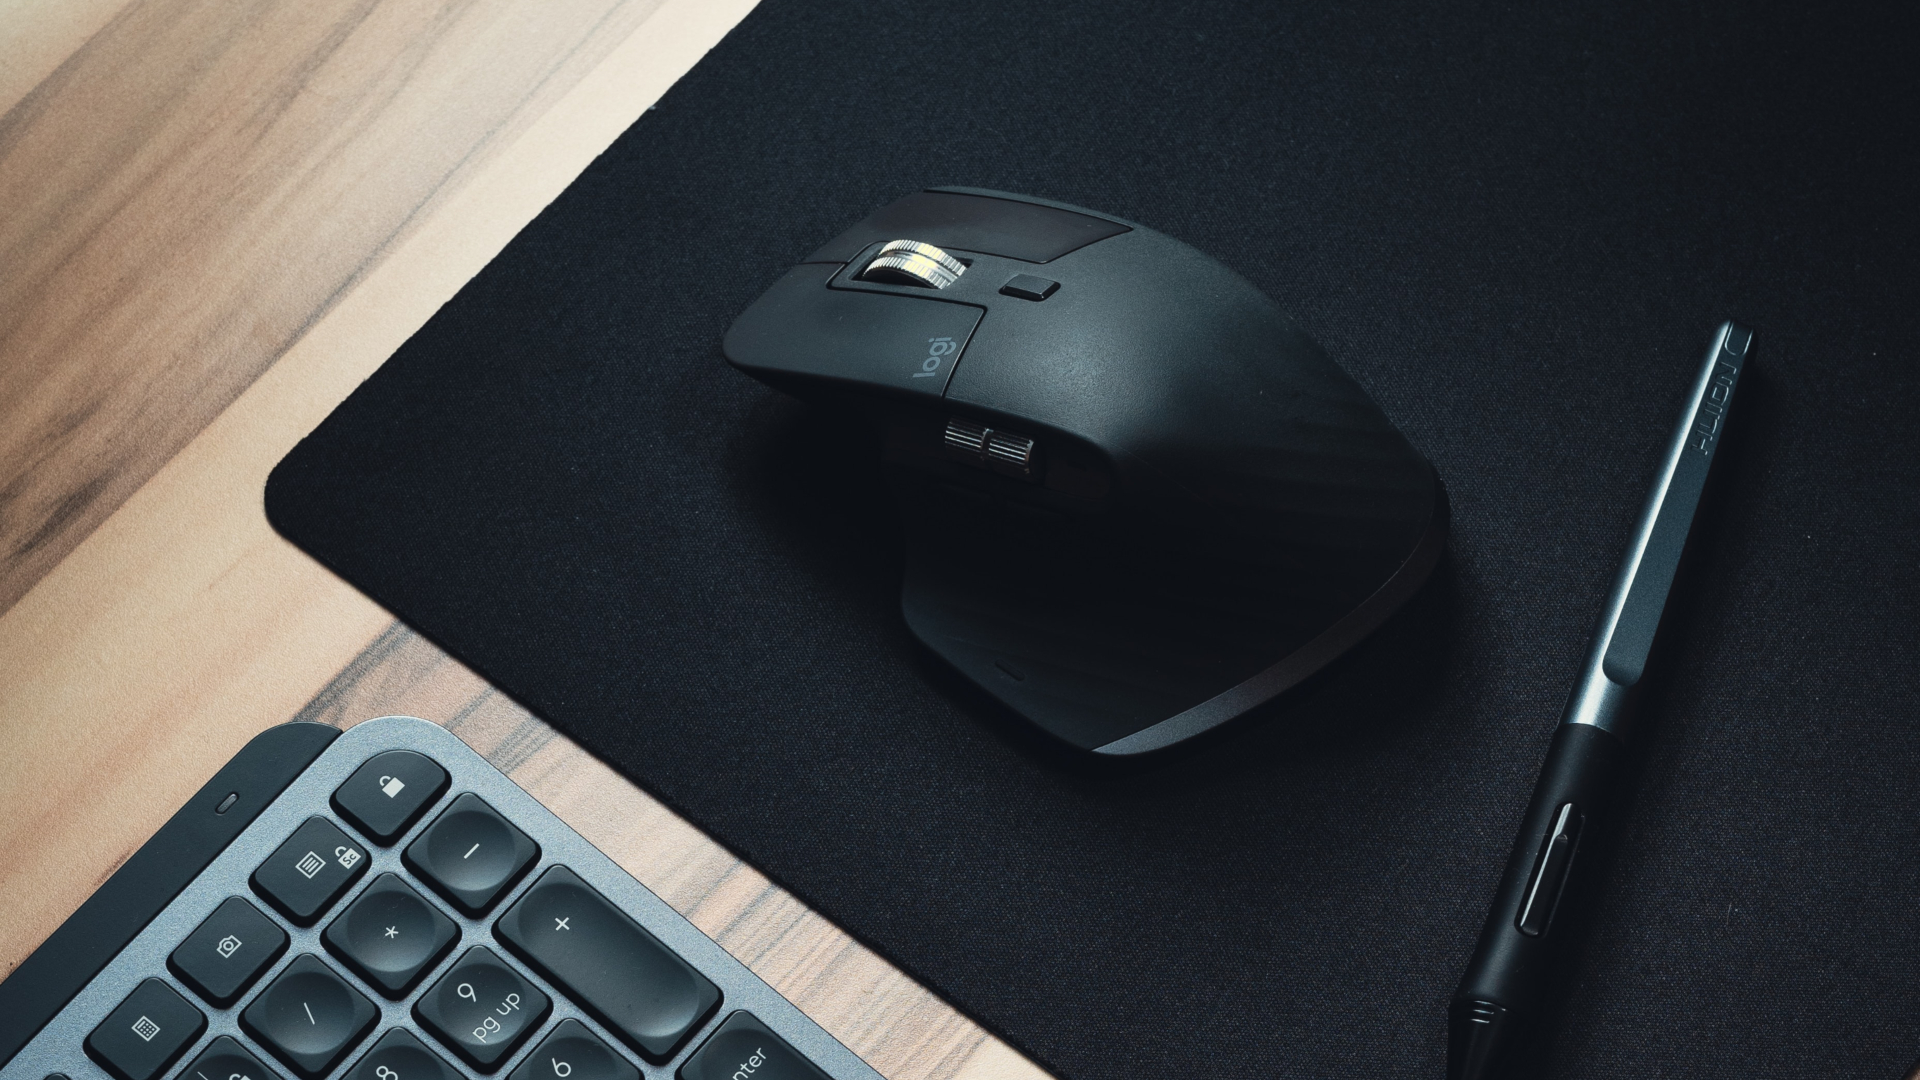
So, if you’re using an external mouse with your Mac, try disconnecting it to see if your trackpad works properly.
6. Disable Force Click
The Mac’s trackpad has the ability to detect different levels of pressure. As a result, you get the ability to force-click on the trackpad to perform certain functions. However, enabling a force click can interfere with some gestures at times. Try disabling it via the steps below to see if it makes a difference.
Step 1: Click on the Apple logo in the top-left corner of your screen. Select System Settings. If your Mac is running macOS Monterey, select System Preferences.
Step 3: In the Point & Click tab, disable the toggle next to ‘Force Click and haptic feedback’.
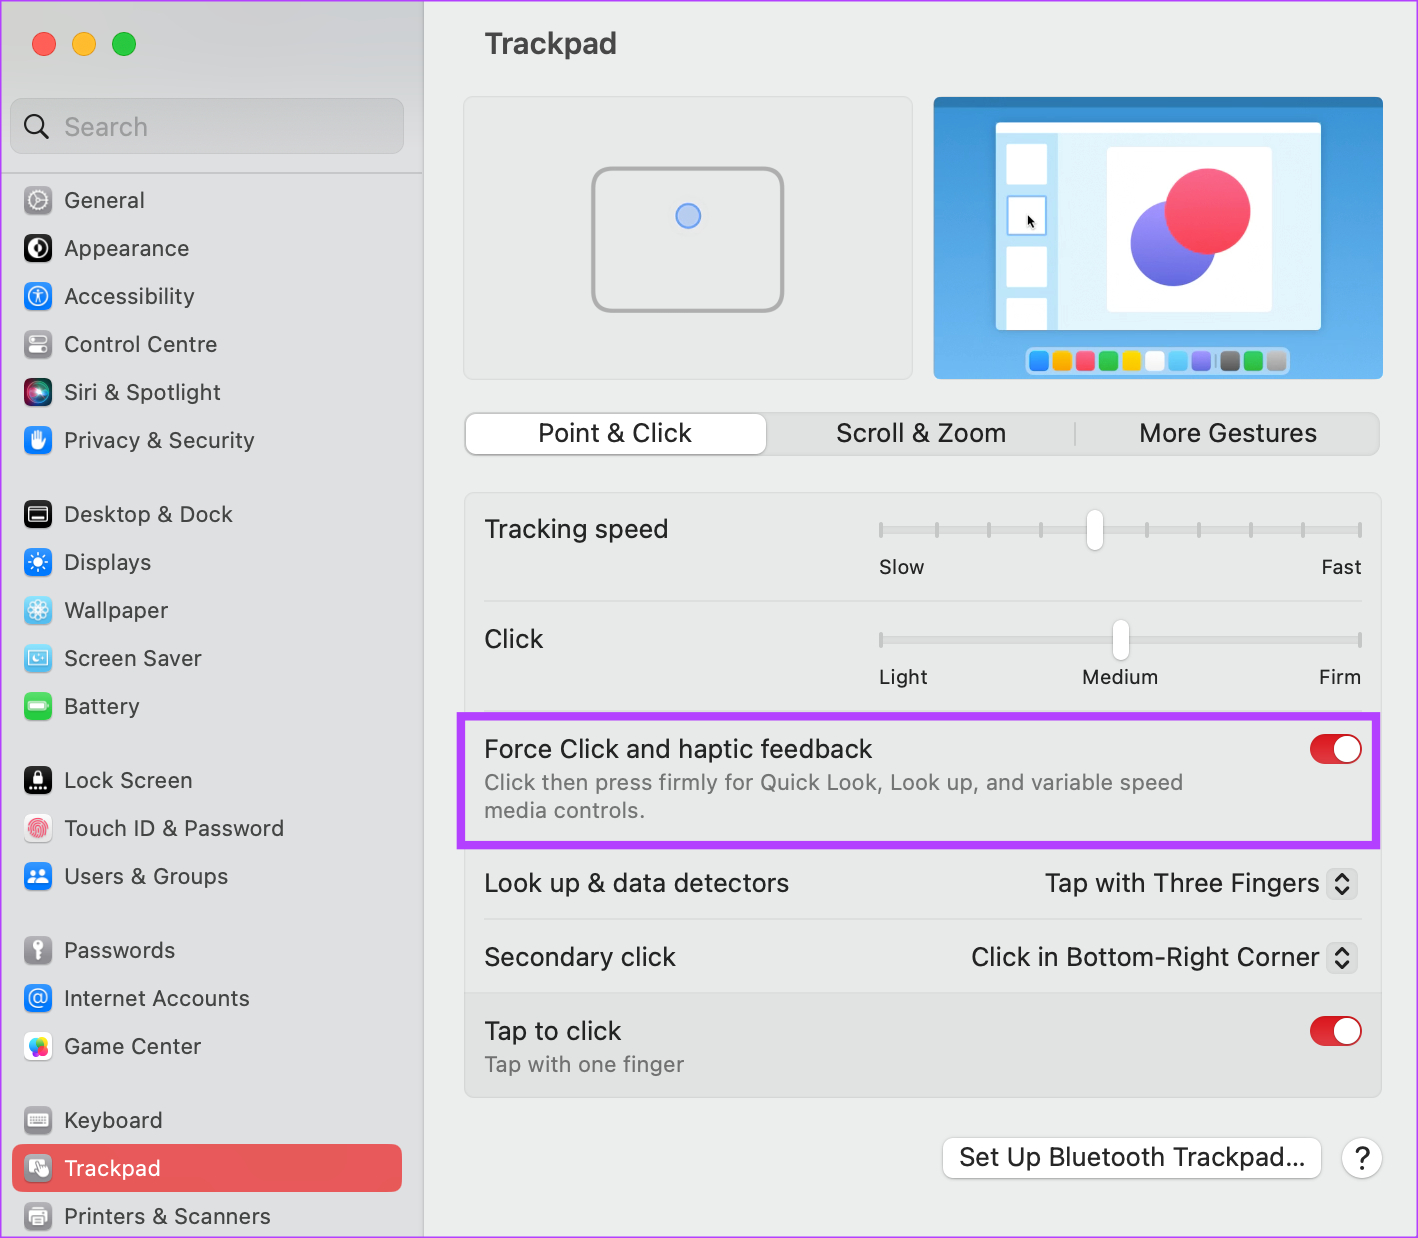
Try performing the trackpad gestures now to see if they work.
7. Reset NVRAM or PRAM
The PRAM (Parameter RAM) or NVRAM (Non-Volatile Random Access Memory) stores important data about your Mac, like the default values of the startup disk, virtual memory, and even some preferences of hardware components. Resetting the PRAM can help bring your touchpad gestures back to life. However, this is only for Intel-based MacBooks.
Refer to our guide on how to reset the PRAM on your MacBook for detailed instructions.
8. Update the Version of macOS
Some macOS versions can have peculiar issues . It’s possible that the current version of macOS you’re using is causing problems with trackpad gestures. So, update your Mac to the latest version of macOS to iron out any software bugs. Here’s how to do it.
Step 1: Click on the Apple logo on the top-left section of your screen. Select System Settings or System Preferences depending on your macOS version.

Step 2: Navigate to the General section.

Step 3: Head over to the Software Update tab. Your Mac will now search for updates to install.
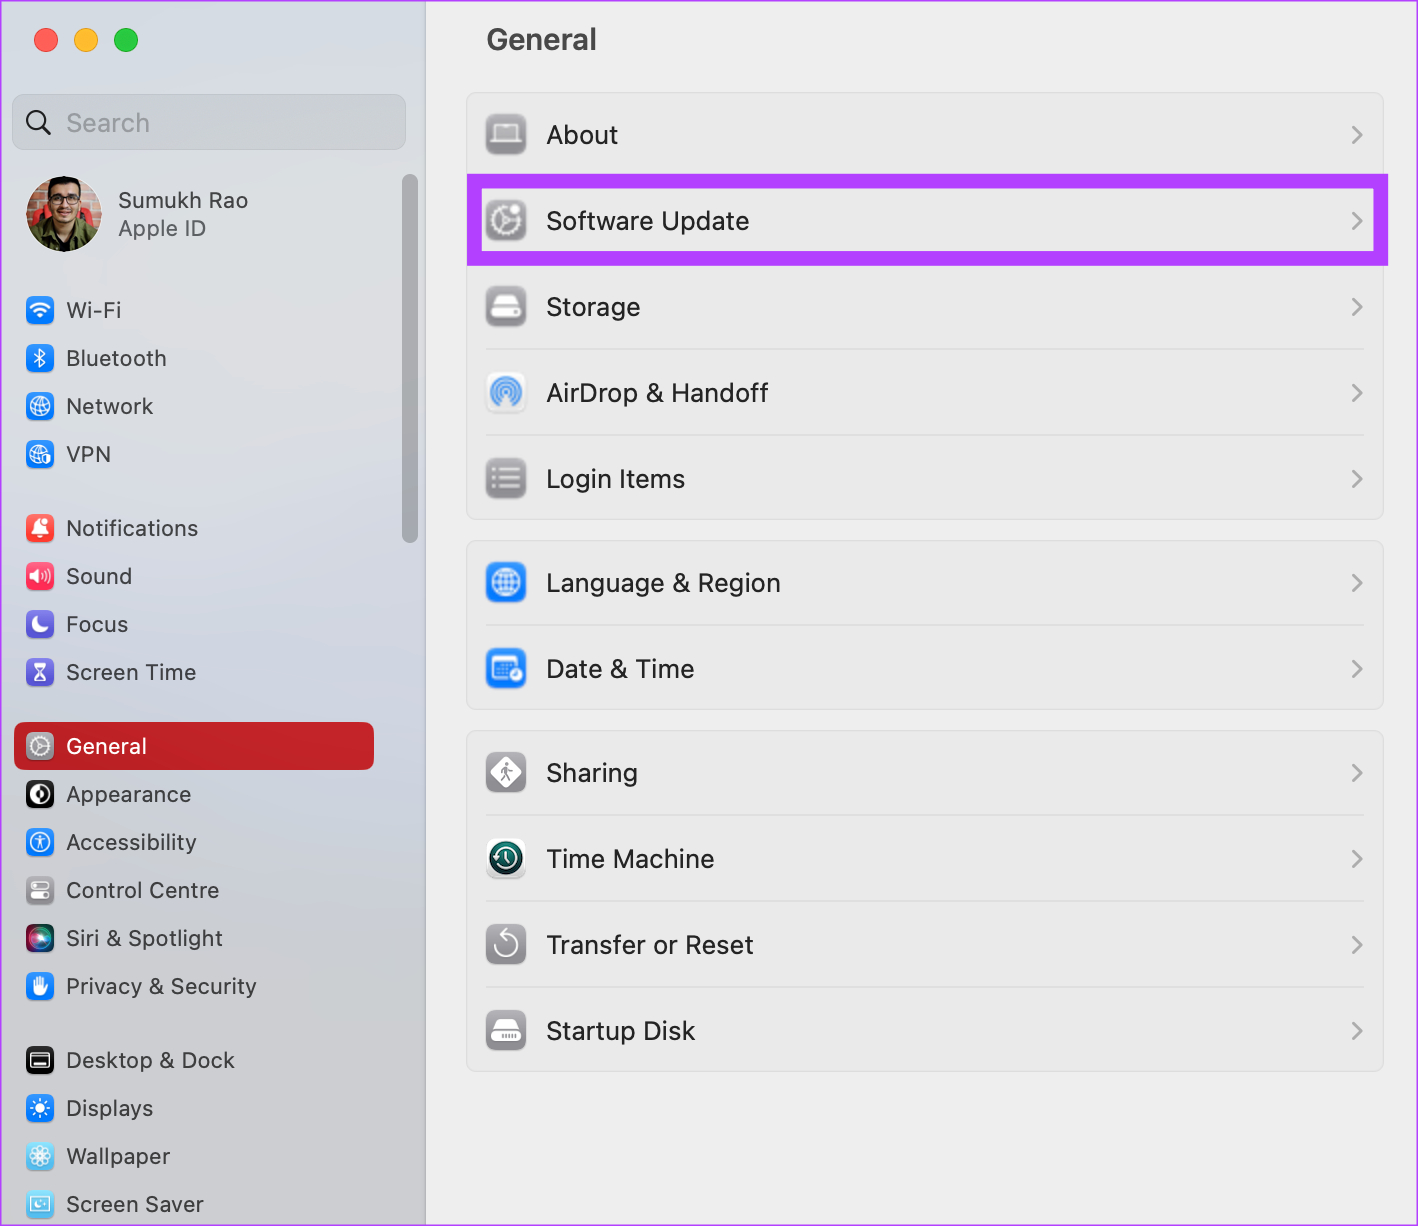
If there is an available update, hit the Update button and wait for it to install.
9. Factory Reset Your Mac
If none of the above solutions worked, it’s time to restore your Mac to the default settings — the way it came out of the box. A factory reset generally solves all problems so it should also help in case the trackpad for your MacBook isn’t working properly. Here’s how to do it.
However, note that this step wipes all the data on your Mac so ensure you have a backup before proceeding.
Note: This method is applicable only to Macs that run on Apple silicon (M series chips).
Step 1: Click on the Apple logo in the top-left and select System Settings.
Step 2: Navigate to the General option in the left pane.
Step 3: Select ‘Transfer or Reset’. This will give you the option to wipe your Mac.

Step 4: Hit the ‘Erase all Contents and Settings’ button. Enter your administrator credentials and click on Unlock.
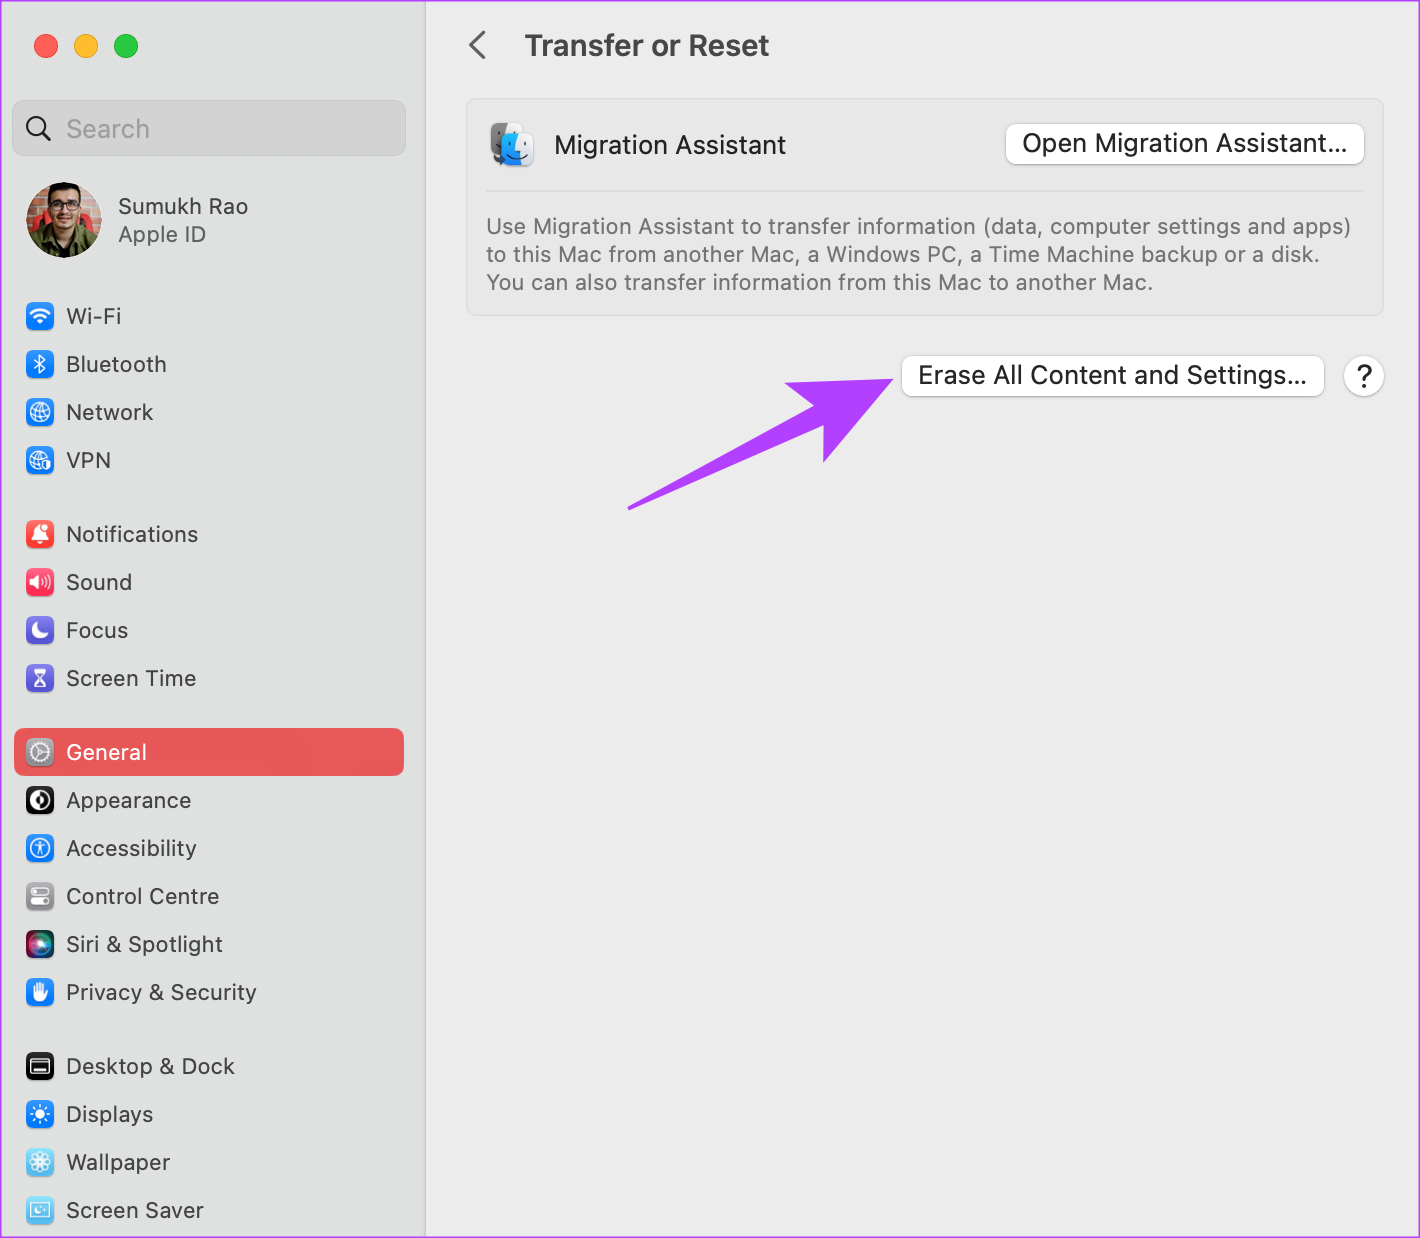
Now, follow the on-screen instructions to reset your Mac.
If you’re running on macOS Monterey, click on Apple menu > select System Preferences > click on System Preferences in the menu bar > select Erase All Content and Settings. Enter your credentials and follow the on-screen instructions.
10. Contact Apple Support
All the solutions mentioned above are related to software or basic hardware. So, if there’s a hardware issue that’s causing problems with the built-in trackpad, head over to the nearest Apple service center to get assistance from the Genius bar.
If your Mac is under warranty, you should ideally get a free repair.
FAQs for Mac Trackpad Gestures Not Working
Set the right gesture to trigger Mission Control from the trackpad settings. If one gesture doesn’t work, try setting something else. You can also use the Terminal method above to reset Mission Control.
Yes, Mac gestures are customizable from the System Settings section.
Restore Your Workflow With Gestures
If you’re accustomed to using gestures on your Mac trackpad, your workflow would surely take a hit if gestures are not working on your Mac. Don’t worry, though, as following these steps should help you restore the functionality.
Was this helpful?
Last updated on 17 February, 2023
The above article may contain affiliate links which help support Guiding Tech. However, it does not affect our editorial integrity. The content remains unbiased and authentic.
Leave a Reply Cancel reply
Your email address will not be published. Required fields are marked *
The article above may contain affiliate links which help support Guiding Tech. The content remains unbiased and authentic and will never affect our editorial integrity.
DID YOU KNOW
More in Mac

Top 10 Fixes for Apps Not Opening on Mac
9 Best Ways to Fix Safari Closing Tabs on Its Own
Join the newsletter.
Get Guiding Tech articles delivered to your inbox.
How To Switch Between Tabs On Mac Using Trackpad

- How-To Guides
- Software Tutorials
Introduction
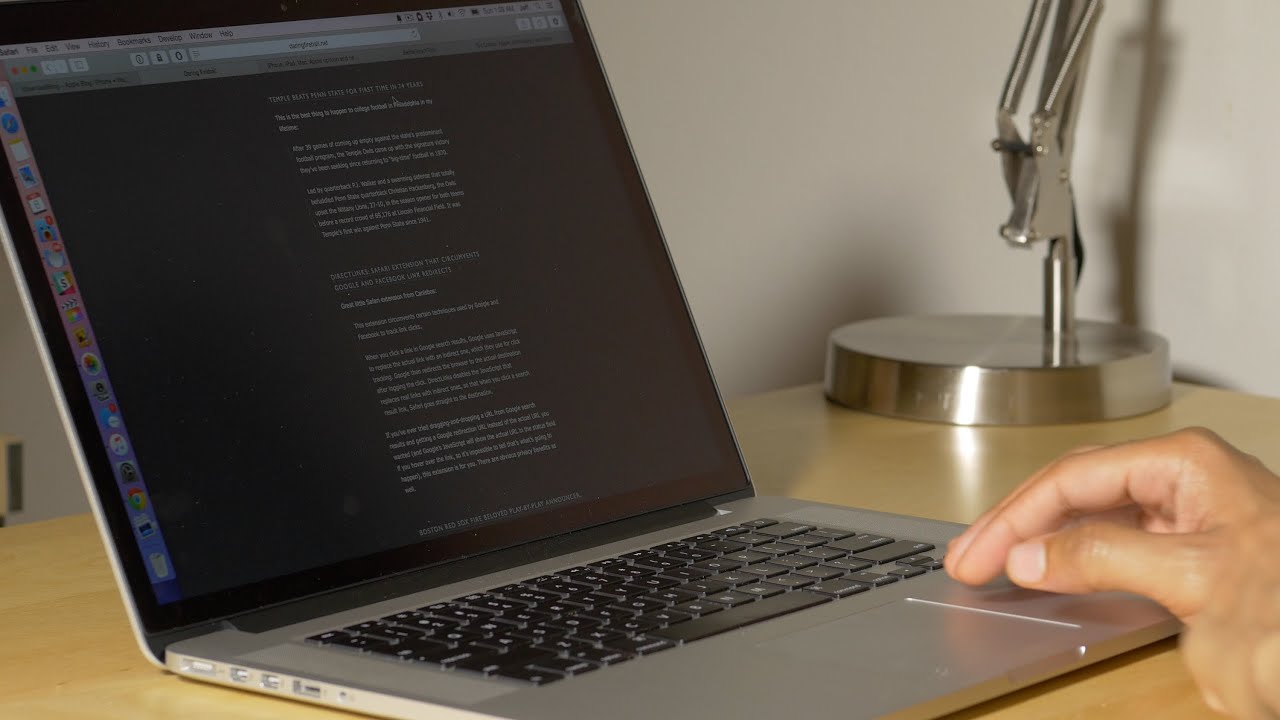
Switching between tabs on a Mac is a common task that many users perform on a daily basis. Whether you’re browsing the web, working on multiple projects, or managing various applications, being able to efficiently switch between tabs is essential for productivity and convenience.
One of the most effective and intuitive ways to switch between tabs on a Mac is by using the trackpad. The trackpad offers a seamless and ergonomic experience, allowing users to navigate through their open tabs with ease.
In this article, we will explore the different trackpad gestures available on Mac that enable quick and effortless tab switching. We will also discuss how you can customize these gestures to suit your preferences and workflow.
By mastering these trackpad gestures, you can streamline your multitasking process and navigate through your tabs more efficiently, saving valuable time and effort.
Whether you’re a student, professional, or casual user, this guide will provide you with the knowledge and skills to make the most out of your Mac’s trackpad and enhance your browsing and multitasking experience.
Why Use Trackpad for Switching Between Tabs on Mac
The trackpad on a Mac offers several advantages when it comes to switching between tabs. Here are a few reasons why using the trackpad for tab switching is beneficial:
- Convenience: The trackpad is conveniently located on your laptop, allowing for easy and quick access to tab switching gestures without the need for additional peripherals.
- Seamless Integration: Apple has designed the trackpad to seamlessly integrate with the macOS operating system. This ensures smooth and responsive tab switching gestures that enhance the overall user experience.
- Efficiency: The trackpad gestures for tab switching are designed to be intuitive and efficient. With a simple swipe, you can navigate between tabs without having to rely on keyboard shortcuts or clicking on individual tabs, saving you time and effort.
- Multi-Touch Gestures: The trackpad supports multi-touch gestures, allowing for more flexibility in tab switching. You can use various combinations of finger swipes to navigate through your tabs, providing a more tactile and immersive experience.
- Reduced Strain: Using the trackpad for tab switching can help reduce strain on your fingers and wrists. Unlike using a mouse or keyboard shortcuts, the trackpad allows for a more natural and ergonomic hand position, minimizing the risk of repetitive strain injuries.
By utilizing the trackpad for tab switching, you can enjoy a seamless and efficient browsing experience on your Mac. The combination of convenience, integration, efficiency, multi-touch gestures, and reduced strain make the trackpad an ideal tool for navigating through your open tabs.
How to Enable Trackpad Gesture for Tab Switching
Enabling trackpad gestures for tab switching on your Mac is a straightforward process. Here’s how you can do it:
- Open System Preferences: Click on the Apple menu in the top-left corner of your screen and select “System Preferences” from the dropdown menu.
- Select Trackpad: In the System Preferences window, locate and click on the “Trackpad” icon.
- Choose “More Gestures”: Within the Trackpad settings, navigate to the “More Gestures” tab. Here, you will find a range of customizable gestures for your trackpad.
- Enable Tab Switching Gesture: Look for the option labeled “Swipe between full-screen apps” or a similar description. Check the box next to it to enable the gesture.
- Adjust Trackpad Sensitivity: If necessary, you can adjust the sensitivity of the trackpad gestures to your liking. Experiment with the settings until you find the most comfortable and responsive configuration.
- Test the Gesture: Once you’ve enabled the tab switching gesture, you can test it out. Open a few tabs in your preferred web browser and then swipe left or right on the trackpad using three fingers. You should see the tabs switch back and forth as you perform the gesture.
By following these steps, you can enable the trackpad gesture for tab switching on your Mac. This allows you to seamlessly navigate through your open tabs using intuitive and efficient swiping motions.
Two-Finger Swipe Gesture
The two-finger swipe gesture is a popular method for switching between tabs on a Mac trackpad . It offers a simple and intuitive way to navigate through your open tabs. Here’s how you can perform the two-finger swipe gesture:
- Place your fingers on the trackpad: Position two fingers (usually your index and middle finger) on the trackpad’s surface. Make sure your fingers are in a comfortable position and have a good grip.
- Swipe left or right: Once your fingers are on the trackpad, swipe left or right in a horizontal motion. Use a smooth and controlled movement to initiate the tab switch. You can start the swipe from either edge of the trackpad, depending on your preference.
- Observe the tab switch: As you perform the two-finger swipe gesture, you will see the active tab switch to the next or previous tab in your web browser or application. This allows you to quickly navigate through your open tabs without having to click on individual tabs or use keyboard shortcuts.
The two-finger swipe gesture is a versatile and efficient method for tab switching. It provides a seamless and tactile experience, making it easier to manage and navigate through multiple tabs on your Mac.
It’s worth noting that different applications and web browsers may have slight variations in how they interpret the two-finger swipe gesture. Some may require enabling specific settings, while others may have additional functionality tied to this gesture. Be sure to explore the settings and preferences of your preferred applications to make the most out of the two-finger swipe gesture for tab switching.
Three-Finger Swipe Gesture
The three-finger swipe gesture is another powerful way to switch between tabs on a Mac trackpad. It offers a slightly different experience compared to the two-finger swipe gesture, allowing for additional functionality and flexibility. Here’s how you can perform the three-finger swipe gesture:
- Position your fingers: Rest three fingers (such as your thumb, index, and middle finger) on the trackpad. Ensure that your fingers are comfortably placed and have a good grip.
- Swipe left or right: Using a smooth and controlled motion, swipe left or right horizontally with your three fingers on the trackpad. The swipe can start from either edge of the trackpad, depending on your preference.
- Observe the tab switch: As you perform the three-finger swipe gesture, you will notice that the active tab switches to the next or previous tab in your web browser or application, similar to the two-finger swipe gesture. Additionally, some applications may utilize the three-finger swipe gesture to reveal other functionalities, such as switching between full-screen apps or displaying the Mission Control view.
The three-finger swipe gesture offers a heightened level of control and convenience for tab switching. Its multi-finger nature allows for smoother navigation and adds versatility to your trackpad usage. By utilizing this gesture, you can navigate through your tabs swiftly and efficiently, improving your overall productivity.
Do keep in mind that the interpretation of the three-finger swipe gesture may vary depending on the application or web browser you are using. It’s worth exploring the settings and preferences of your preferred applications to discover additional functionalities that can be triggered by the three-finger swipe gesture.
Four-Finger Swipe Gesture
The four-finger swipe gesture is a powerful and versatile way to switch between tabs on a Mac trackpad. It offers additional functionality and customization options compared to the two and three-finger swipe gestures. Here’s how you can perform the four-finger swipe gesture:
- Position your fingers: Place four fingers (such as your thumb, index, middle, and ring finger) on the trackpad. Make sure your fingers are comfortably positioned and have a firm grip.
- Swipe left or right: Using a smooth and controlled motion, swipe left or right horizontally with your four fingers on the trackpad. The swipe can start from either edge of the trackpad, based on your preference and comfort.
- Observe the tab switch and other functionalities: As you perform the four-finger swipe gesture, you will notice that the active tab switches to the next or previous tab in your web browser or application, similar to the two and three-finger swipe gestures. In addition, the four-finger swipe gesture can also trigger other actions, such as revealing the Notification Center or launching Mission Control, depending on your macOS settings and app configurations.
The four-finger swipe gesture provides an enhanced level of control and customization for tab switching, as well as access to other system functions. By utilizing this gesture, you can navigate through your tabs seamlessly, while also leveraging the power of additional macOS features.
It’s important to note that the interpretation of the four-finger swipe gesture may vary depending on the applications and settings you have. Certain applications might utilize this gesture for specific actions, so it’s worth exploring the preferences and settings of your favorite apps to fully harness the potential of the four-finger swipe gesture.
Customizing Trackpad Gestures for Tab Switching
One of the great advantages of using a Mac trackpad is the ability to customize gestures to suit your specific preferences and workflow. This includes customizing trackpad gestures for tab switching. Here’s how you can tailor these gestures to enhance your tab navigation experience:
- Select Trackpad: In the System Preferences window, click on the “Trackpad” icon.
- Navigate to “More Gestures”: Within the Trackpad settings, click on the “More Gestures” tab. Here, you will find a range of customizable gestures for your trackpad.
- Modify Tab Switching Gesture: Look for the option related to tab switching or navigating between open windows. You can modify the gesture by selecting a different swipe direction or adjusting the number of fingers required for the gesture. For example, you can switch from a three-finger swipe to a four-finger swipe or change the direction from horizontal to vertical.
- Experiment with Different Settings: Play around with the trackpad gesture settings to find the configuration that feels most comfortable and intuitive to you. Consider factors such as finger placement, swipe direction, and the number of fingers required. Tweak the settings until you find the ideal setup that matches your personal preferences and enhances your tab switching experience.
By customizing the trackpad gestures for tab switching, you can optimize your workflow and streamline your multitasking process. Tailoring these gestures allows you to have more control and flexibility in navigating through your tabs, making it easier to find the information or content you need swiftly and efficiently.
Remember that the customization options for trackpad gestures may vary depending on your macOS version and specific trackpad model. Explore the settings and preferences available to you to unlock the full potential of customizing trackpad gestures for tab switching based on your unique needs and preferences.
Switching between tabs on a Mac is made effortless and efficient with the use of trackpad gestures. Whether you prefer the simplicity of the two-finger swipe gesture, the versatility of the three-finger swipe gesture, or the additional functionality of the four-finger swipe gesture, the trackpad offers a seamless and ergonomic way to navigate through your open tabs.
By enabling and customizing these trackpad gestures, you can enhance your browsing and multitasking experience on your Mac. The convenience, integration, efficiency, and multi-touch capabilities of the trackpad allow for quick and intuitive tab switching, reducing strain on your fingers and wrists.
Remember to explore the System Preferences and application settings to tailor the trackpad gestures to your liking. Experiment with different swipe directions, finger combinations, and sensitivity settings to find the configuration that best suits your workflow and preferences.
Whether you’re a student, a professional, or a casual user, mastering the trackpad gestures for tab switching will undoubtedly improve your productivity and streamline your tasks on a Mac. Take the time to familiarize yourself with these gestures and enjoy the seamless and efficient navigation through your tabs.
So go ahead, unlock the full potential of your Mac’s trackpad and discover the joy of effortless tab switching!
Leave a Reply Cancel reply
Your email address will not be published. Required fields are marked *
Save my name, email, and website in this browser for the next time I comment.
- Crowdfunding
- Cryptocurrency
- Digital Banking
- Digital Payments
- Investments
- Console Gaming
- Mobile Gaming
- VR/AR Gaming
- Gadget Usage
- Gaming Tips
- Online Safety
- Tech Setup & Troubleshooting
- Buyer’s Guides
- Comparative Analysis
- Gadget Reviews
- Service Reviews
- Software Reviews
- Mobile Devices
- PCs & Laptops
- Smart Home Gadgets
- Content Creation Tools
- Digital Photography
- Video & Music Streaming
- Online Security
- Online Services
- Web Hosting
- WiFi & Ethernet
- Browsers & Extensions
- Communication Platforms
- Operating Systems
- Productivity Tools
- AI & Machine Learning
- Cybersecurity
- Emerging Tech
- IoT & Smart Devices
- Virtual & Augmented Reality
- Latest News
- AI Developments
- Fintech Updates
- Gaming News
- New Product Launches
Learn To Convert Scanned Documents Into Editable Text With OCR
Top mini split air conditioner for summer, related post, comfortable and luxurious family life | zero gravity massage chair, when are the halo awards 2024, what is the best halo hair extension, 5 best elegoo mars 3d printer for 2024, 11 amazing flashforge 3d printer creator pro for 2024, 5 amazing formlabs form 2 3d printer for 2024, related posts.

How To Use Apple Magic Trackpad
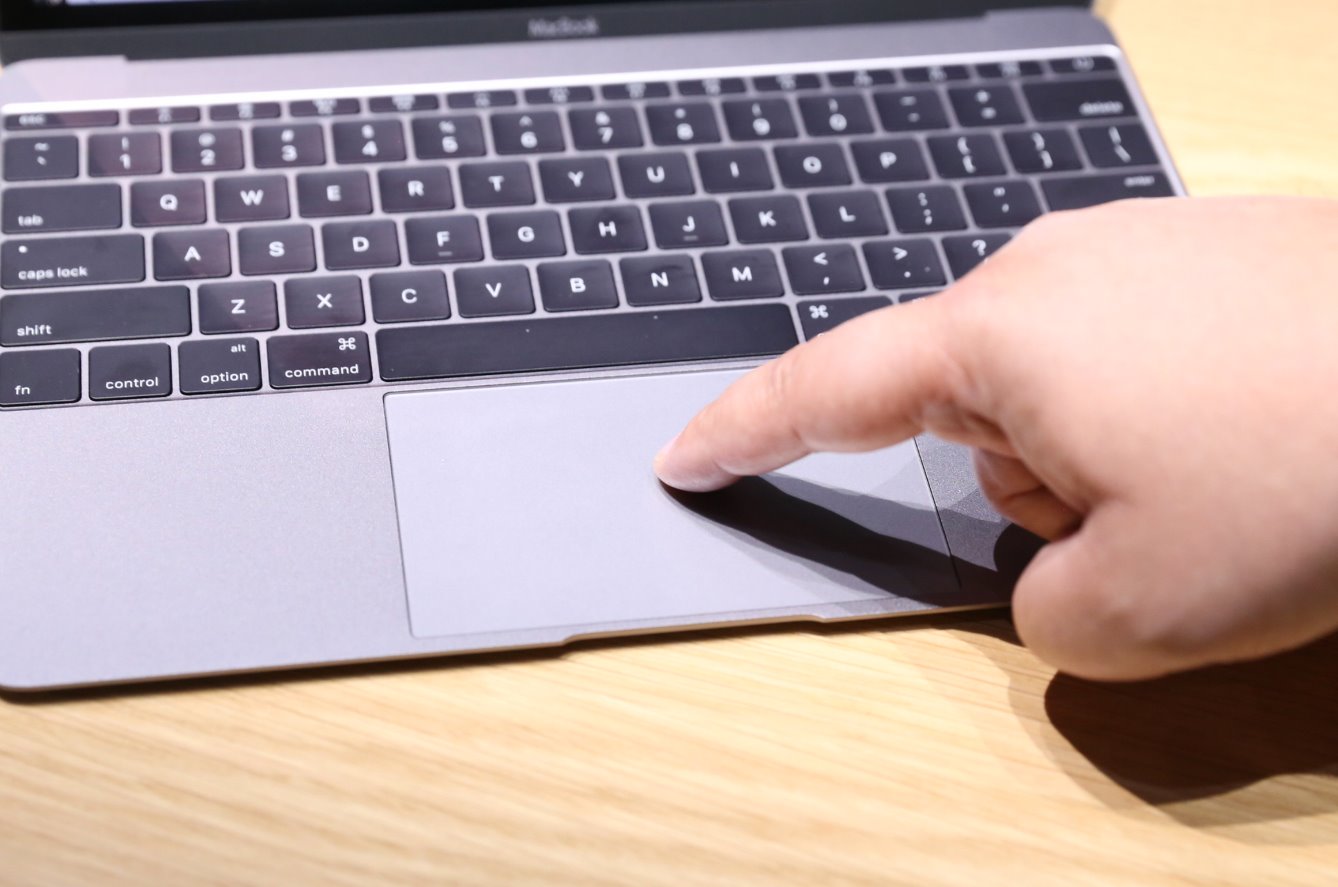
How To Use Macbook Trackpad
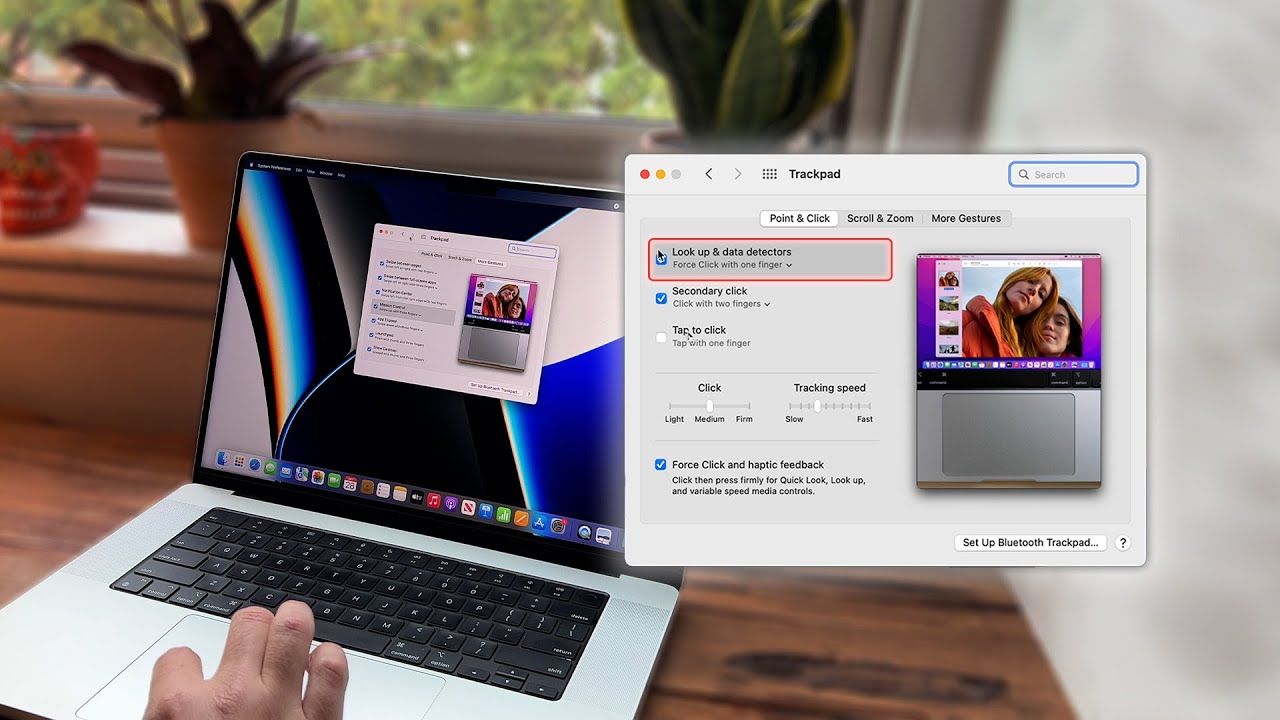
How To Change Trackpad Settings Mac
How To Switch Tabs On Safari
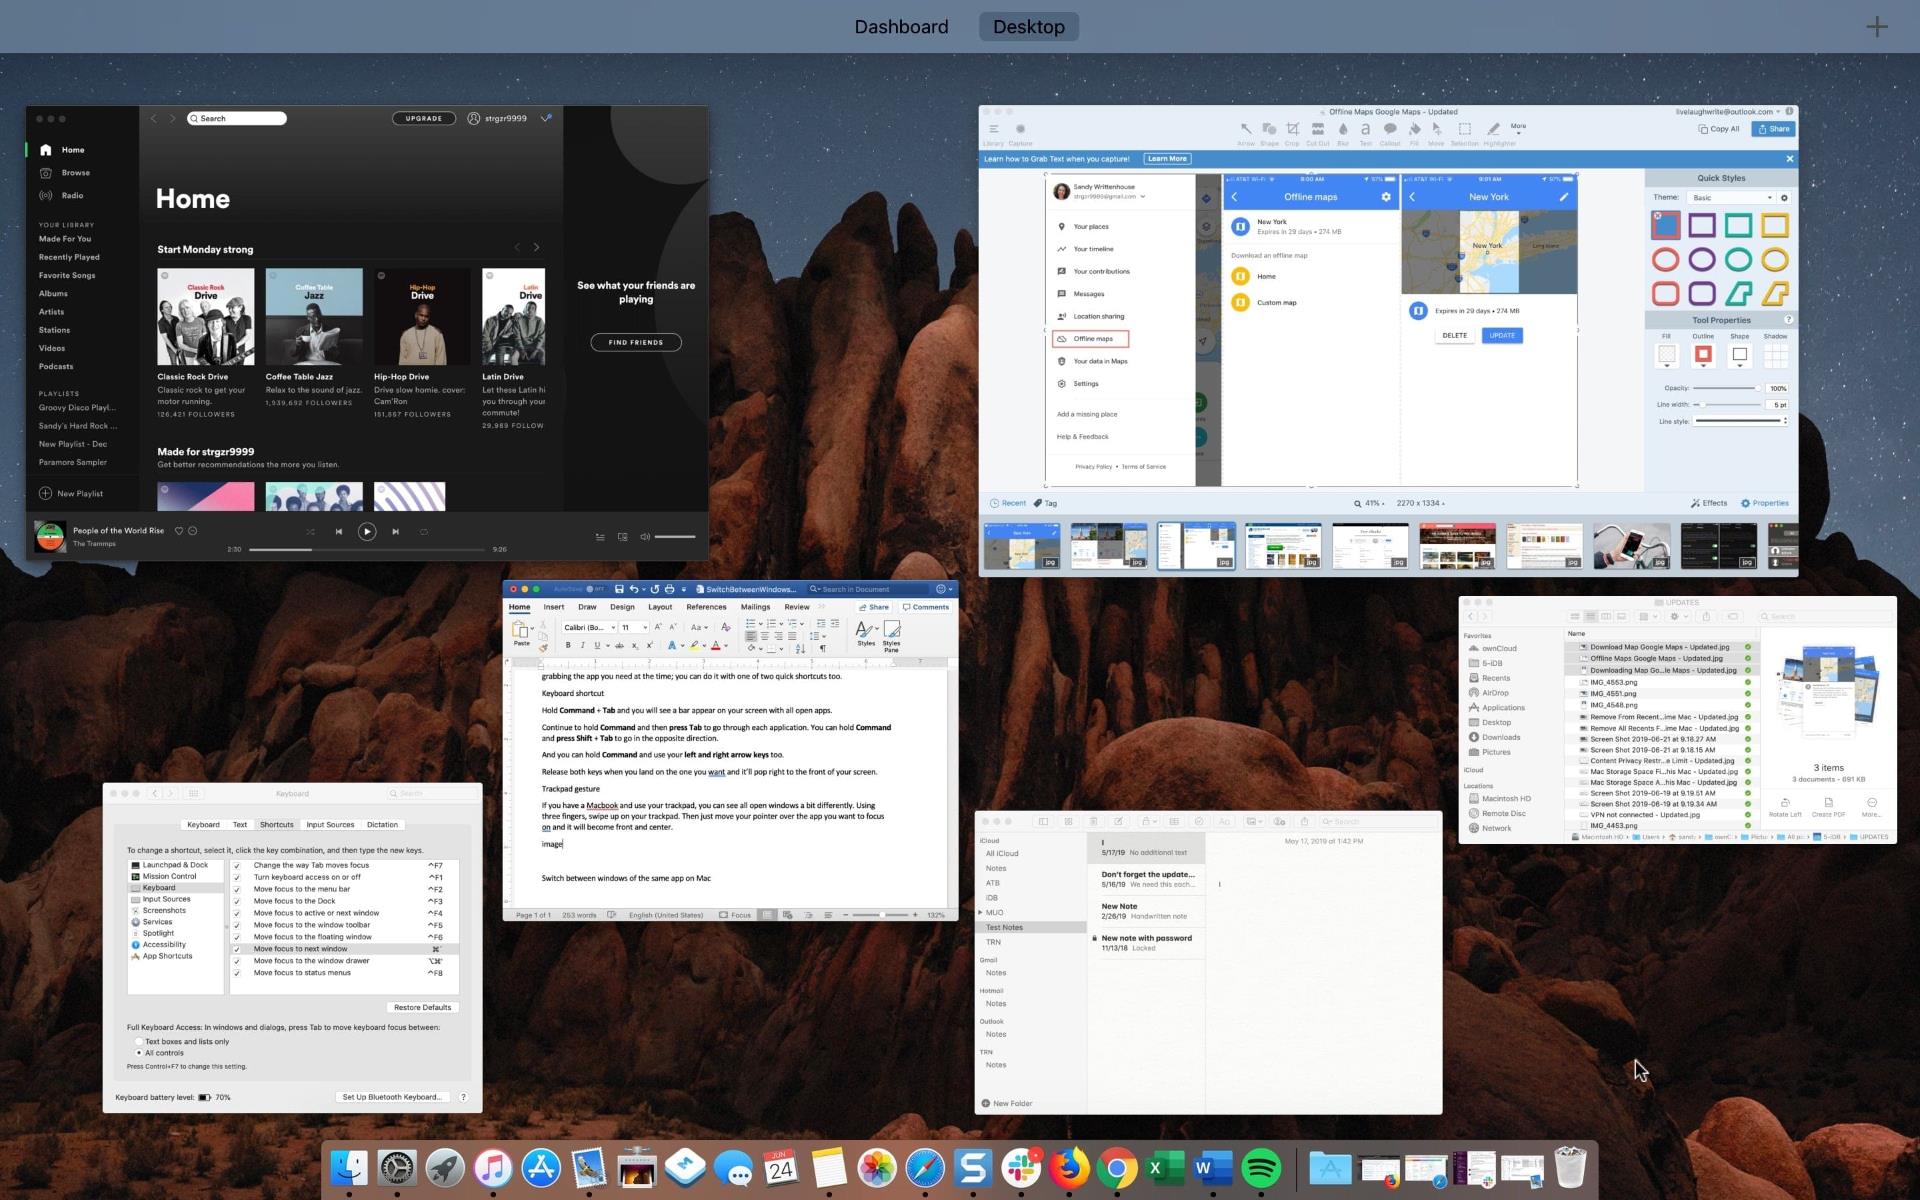
How To See All Open Windows On Mac
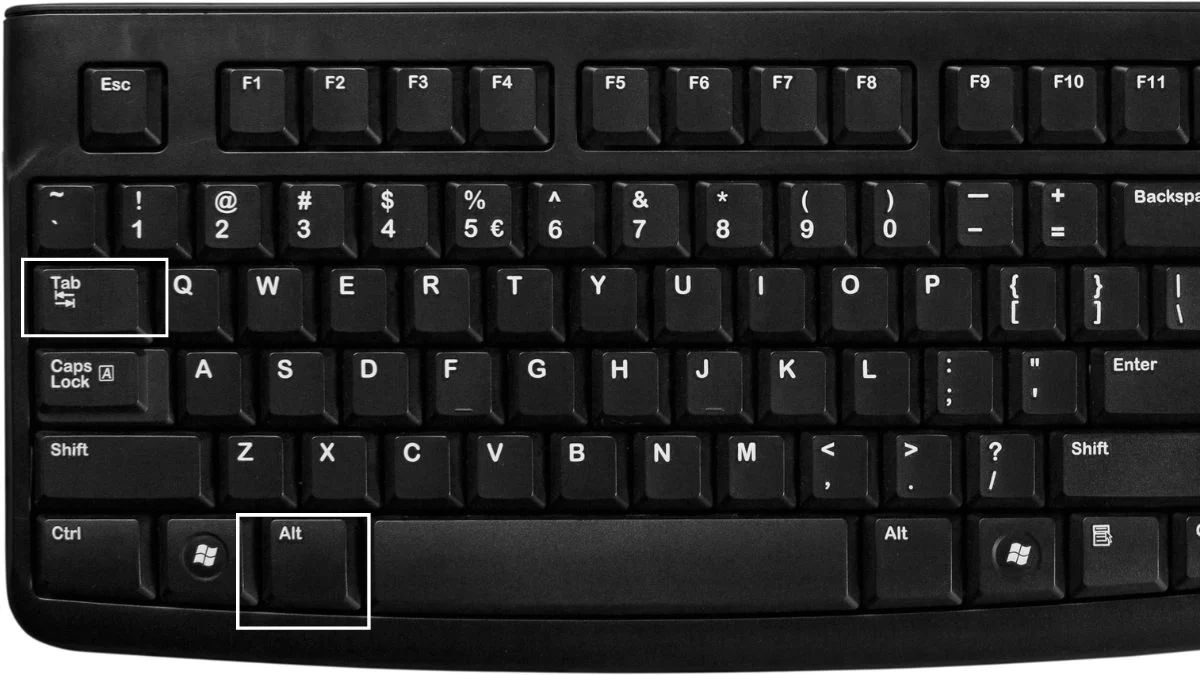
How To Switch Tabs With Keyboard
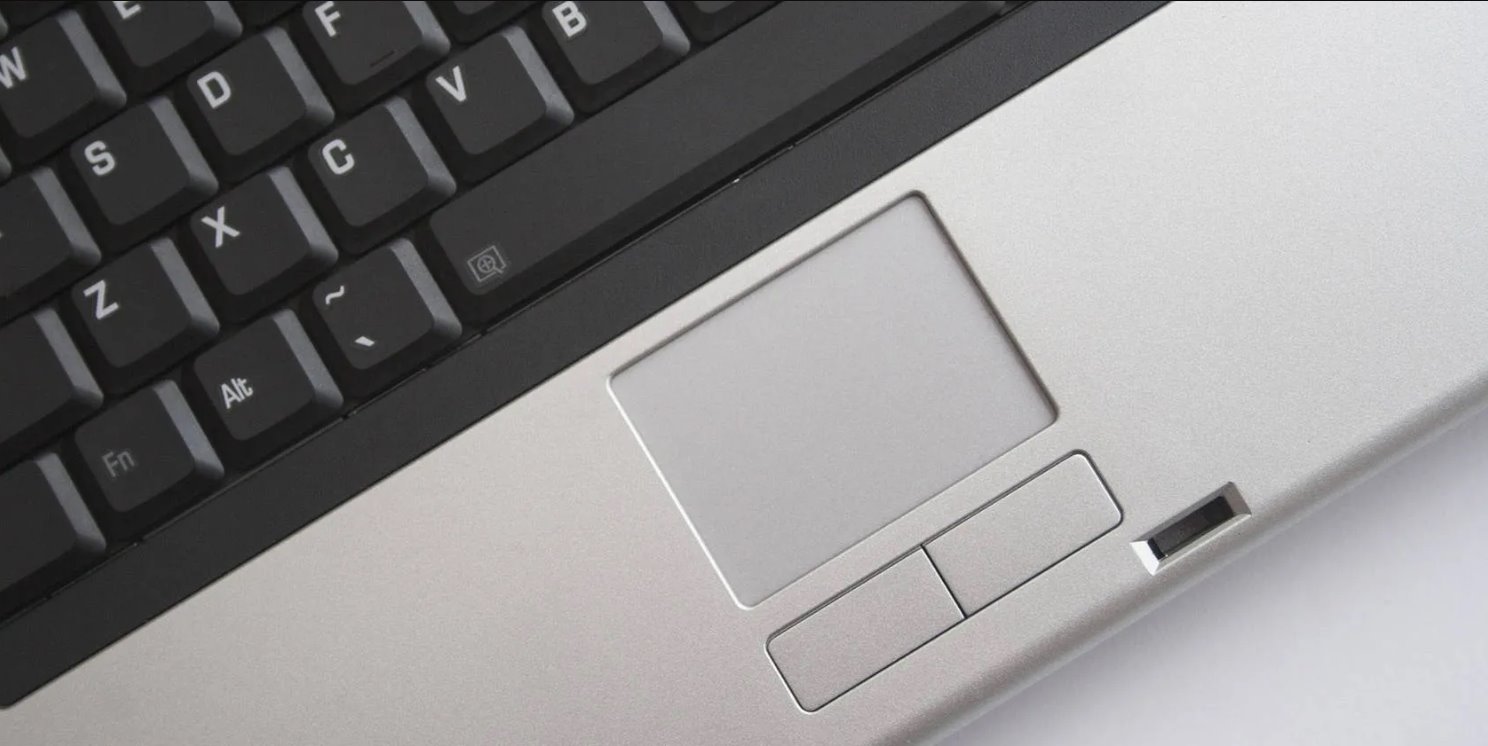
How To Middle Click On A Trackpad
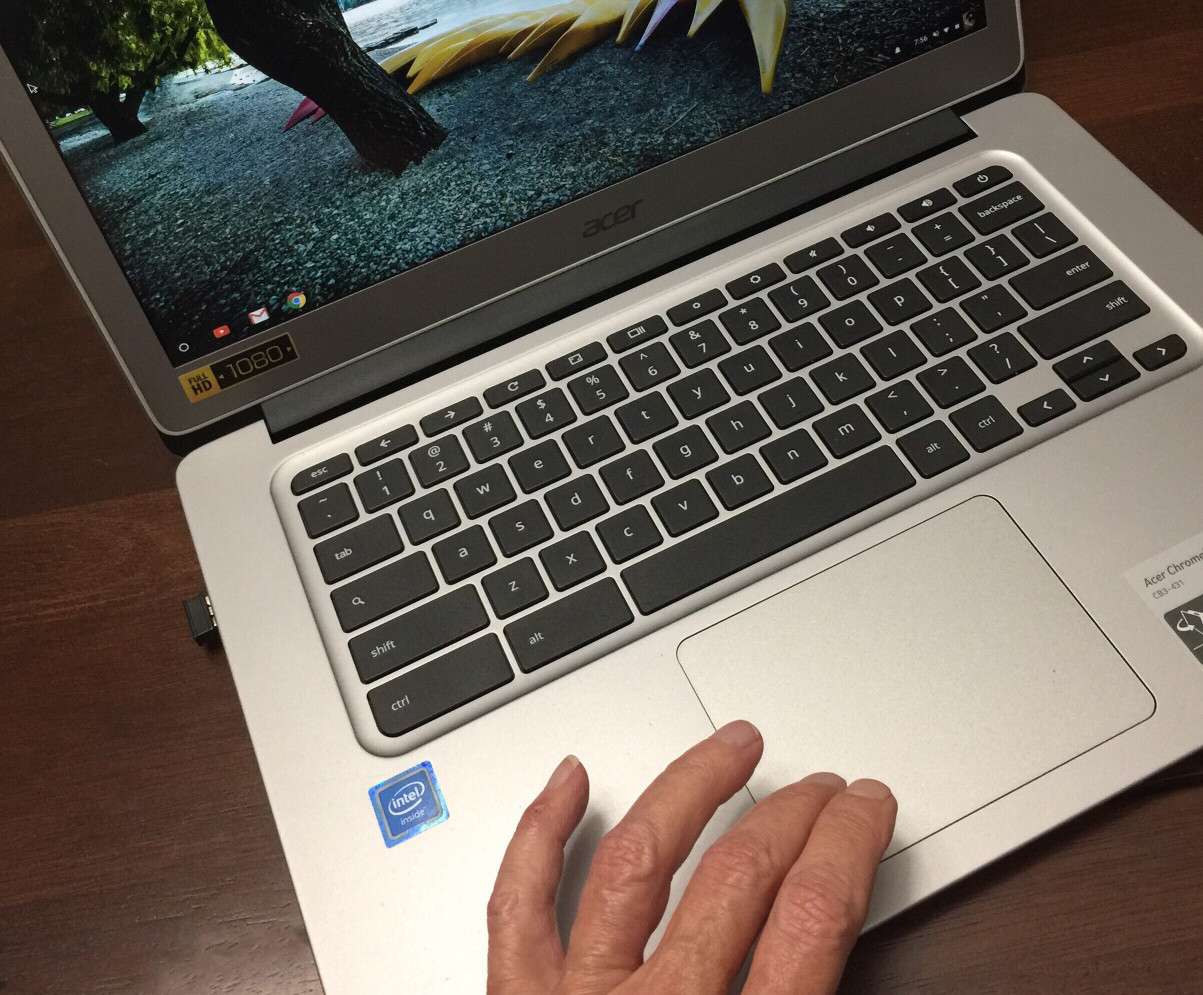
Why Does My Trackpad Keep Freezing Mac
Recent stories.

Fintechs and Traditional Banks: Navigating the Future of Financial Services

AI Writing: How It’s Changing the Way We Create Content

How to Find the Best Midjourney Alternative in 2024: A Guide to AI Anime Generators

How to Know When it’s the Right Time to Buy Bitcoin

Unleashing Young Geniuses: How Lingokids Makes Learning a Blast!

- Privacy Overview
- Strictly Necessary Cookies
This website uses cookies so that we can provide you with the best user experience possible. Cookie information is stored in your browser and performs functions such as recognising you when you return to our website and helping our team to understand which sections of the website you find most interesting and useful.
Strictly Necessary Cookie should be enabled at all times so that we can save your preferences for cookie settings.
If you disable this cookie, we will not be able to save your preferences. This means that every time you visit this website you will need to enable or disable cookies again.
How-To Geek
Here's how to make mac keyboards, mice, and trackpads work like on windows.
New to Mac? You can make your keyboard, trackpad, and mouse feel more like they do on Windows.
Quick Links
Make your mac mouse and trackpad work like windows, set up your mac keyboard like windows, key takeaways.
- Adjust the trackpad settings in System Settings to enable tap-to-click and right-click with two fingers.
- Customize mouse scrolling, switching, and dragging preferences to mirror Windows functionality.
- Configure keyboard shortcuts, emojis, and modifier keys in System Settings to resemble standard Windows operations.
Fresh converts from Windows and folks who've never used a Mac often find navigating macOS difficult. Scrolling is inverted, shortcuts don't work, right-clicking does nothing, and windows fly away when you click the desktop. Fortunately, you can adjust your keyboard, trackpad, and mouse settings on macOS so they work just like on Windows.
Whether you're using a MacBook trackpad or a mouse, there are several settings you can change to make them more Windows-like.
Enable Tap to Click
On macOS, you need to press the trackpad to perform a click. But worry not: you can make your Mac interpret taps as regular clicks instead. Go to System Settings > Trackpad, select the "Point & Click" tab, and enable "Tap to Click" so you can tap instead of clicking.
Bring Back the Right-Click
Because early Macs used a single-button mouse, the OS is set up so that you need to hold the Control key while clicking to access the Mac equivalent of the Windows right-click menu. You can, however, enable the right-click in macOS.
Go to System Settings > Trackpad, select the "Point & Click" tab, click the "Secondary Click" menu, and choose "Click or Tap with Two Fingers."
You can now bring up the contextual menu by tapping the trackpad with two fingers, clicking the right side of the Magic Mouse, or hitting the second button on other mice.
Turn off Natural Scrolling
When scrolling on macOS, content tracks your finger movements in the same way it does on the iPhone. This confuses the hell out of Windows users, but there's a remedy. In System Settings > Trackpad, select the "Scroll & Zoom" tab and switch off "Natural Scrolling."
To scroll, drag two fingers on the trackpad, swipe vertically with one finger on the Magic Mouse, or turn the wheel on non-Apple mice.
Turn off Scrolling Inertia
iPhone users are familiar with rubber band scrolling, and it's part of macOS too. It's yet another Apple peculiarity that often annoys Windows users. To disable the bouncing effect, and to be able to scroll with more control and precision, go to System Settings > Accessibility, click "Pointer Control," hit "Trackpad Options," and turn off "Use inertia when scrolling."
Disable Force Click and Haptic Feedback
MacBook trackpads and standalone Magic Trackpads use force sensors to distinguish between light and hard presses. Built-in vibratory motors simulate a clicking sensation—this is why the trackpad doesn't click when it's turned off.
There are lots of things you can do with a force click, like previewing links, but neither it nor tactile feedback exists on Windows. To turn them off in one fell swoop, uncheck "Force Click and Haptic Feedback" under System Settings > Trackpad.
Some MacBooks play a clicking sound when pressing a Force Touch trackpad. You can turn it off by selecting "Silent Clicking."
Enable the Windows-Style ClickLock Feature
The ClickLock feature on Windows lets you continue dragging beyond the touchpad edges without holding the button. To replicate this on macOS, open System Settings > Accessibility > Pointer Control, click "Trackpad Options," and enable "Use Trackpad for Dragging." Also, select the "Dragging Style" menu and choose "With Drag Lock."
You can now double-tap (not double-click) a window title or another item and start dragging without lifting a finger. When you reach the trackpad's edge, reposition your finger and continue dragging. To release it, tap the trackpad again.
Learn how to drag stuff instantly with three fingers on your Mac.
Adjust the Multi-Touch Gestures
Many multitasking Windows gestures have macOS equivalents. To set them up, go to System Settings > Trackpad and select the "More Gestures" tab.
To show all your open windows with an upward swipe, click the "Mission Control" menu and choose "Swipe Up with Three Fingers" or "Swipe Up with Four Fingers."
To show the current app's open windows, use the App Exposé gesture.
On PCs, you can show the desktop with a three-finger downward swipe. On a Mac, you must spread your thumb and three fingers so long as "Show Desktop" is enabled.
To switch between apps, click "Switch between full-screen applications" and choose "Swipe Left or Right with Four Fingers" (on Windows, this switches active desktops).
To show the Notification Center, you must swipe left from the trackpad's right edge with two fingers, not one like on a PC.
Prevent Mouse Pointer Shaking
macOS lets you temporarily enlarge the pointer by quickly moving the mouse or your finger on the trackpad back and forth. It's useful if you've lost sight of it, but Windows lacks this option, so you may want to turn it off.
Open System Settings > Accessibility > Display, and switch off the option "Shake mouse pointer to locate."
Change the Mouse Pointer Color
The Windows pointer is white with a black outline, the opposite of macOS. To fix this, venture into System Settings > Accessibility > Display, then set "Pointer outline color" to black and "Pointer fill color" to white.
Disable Wallpaper Clicking
By default, clicking your Mac's wallpaper hides all open windows to reveal your desktop widgets and volumes, but this utterly confuses folks who've never used a Mac.
To disable this behavior, go to System Settings > Desktop & Dock, hit "Click wallpaper to show desktop items," choose "Only in Stage Manager," and turn off "Stage Manager."
Muscle memory causing you problems? You can set up keyboard shortcuts and more on your Mac so they're similar to how you had them on Windows.
Turn on the Keyboard Navigation Feature
On Windows, the Tab key selects buttons, menus, etc. You must enable two separate features on macOS to use your keyboard like a mouse.
In System Settings > Keyboard, enable "Keyboard navigation." You can now press Tab and Shift+Tab to move focus between onscreen controls.
You can also enable additional keyboard navigation. In System Settings > Accessibility, click "Keyboard" and turn on "Full Keyboard Access. "Click "ⓘ" to see the available navigation shortcuts. To display them when Full Keyboard Access is on, press Tab-H.
Configure Dictation
To replicate the PC shortcut Windows+H for entering text by speaking, open System Settings > Keyboard and turn on the switch next to the microphone icon.
To change the Dictation keyboard shortcut, click the "Shortcut" menu, choose "Customize," and press your desired key combination.
Enable the Function Keys
Pressing function keys on a Mac doesn't invoke standard actions like on Windows. To change it, open System Settings > Keyboard > Keyboard Shortcuts, select "Function Keys," and enable "Use F1, F2, etc. keys as standard function keys."
Set the Emoji Panel Shortcut
On PCs, pressing Windows+. (period) brings up the emoji panel. Macs use the Fn+E (or Globe+E) shortcut, but you can optimize it. Go to System Settings > Keyboard, click "Press fn key to" or "Press Globe key to," and choose "Show Emoji & Symbols."
You can now press only the Fn key (or Globe) to access the emoji selector.
Adjust Language and Spell Checking
To configure the layout, language, spell checker, word capitalization, and other keyboard options, hit "Edit" next to "Input Sources" in System Settings > Keyboard.
Remap the Modifier Keys
Many common Windows keyboard shortcuts have Mac counterparts, but they're confusingly assigned to the Command key instead of Control.
To fix this, open System Settings > Keyboard > Keyboard Shortcuts, select "Modifier Keys," click the "Control (⌃) key" menu, and choose "⌘ Command." You can now copy and paste like a boss with standard Ctrl+C and Ctrl+V shortcuts without changing your muscle memory.
Adjust System Shortcuts
The Keyboard Shortcuts menu also lets you change other keyboard shortcuts to work like Windows. For example, you can adjust the key combinations for screenshots, brightness, Mission Control, Notification Center, Spotlight, and more.
To adjust app-specific shortcuts, select "App Shortcuts" in the sidebar.
Enable Mouse Keys
On Windows, you can move the mouse pointer with the keyboard. To set it up on a Mac, open System Settings > Accessibility, hit "Pointer Control," and enable "Mouse Keys."
- Numeric keypad: 7, 8, 9, 4, 6, 1, 2, 3
- Regular keyboard: 7, 8, 9, U, O, J, K, L
- Numeric keypad: 5
- Regular keyboard: I
For other shortcuts, read Apple's support document .
If you've followed our tips, you'll soon stop complaining about the weirdness of the Mac. Windows switchers are accustomed to the Microsoft way, but macOS has its own conventions.
Once you get used to them, consider readjusting some of these settings. macOS is well-known for its ease of use, but you must embrace its peculiarities.

How to Zoom In and Out on a Mac: 4 Methods
Quick links, zoom in or out on your mac using keyboard shortcuts, zoom in and out in various apps on macos, zoom in and out using trackpad gestures on a mac, use your mac's built-in magnifier to zoom in.
Having difficulties viewing what's on your Mac? Zooming in will make everything a bit easier for you to see. macOS has several built-in methods to help you zoom in and out on your content. Let's look at them below.
The easiest way to zoom in and out is to use a keyboard shortcut on your Mac . There are three main keyboard shortcuts that will trigger the zoom feature in the vast majority of Mac apps:
- Cmd + Plus (+): Zoom in on your Mac.
- Cmd + Minus (-): Zoom out on your Mac.
- Cmd + Zero (0): Return to the default zoom level.
If you don't like using keyboard shortcuts, you can still access these common zoom options from the menu bar. Once you have the relevant app open, click the View tab and choose from Zoom In , Zoom Out , or Actual Size , depending on your needs.
Many built-in and third-party apps for macOS also have their own zoom features. You can use these options instead of the generic keyboard shortcuts mentioned earlier. Here are some examples of how to use the zoom feature in various popular apps for Mac:
- Safari: Go to Safari > Settings > Websites > Page Zoom from the menu bard. From the When visiting other websites dropdown menu, select your preferred zoom percentage.
- Google Chrome: Click the three-dot menu at the top-right corner and select the Plus ( +) or Minus (-) icons from the Zoom option.
- Preview: Click the plus (+) or minus (-) magnifier icon to zoom in and out on an image you opened.
- Photos: Press Z on your keyboard to zoom in or out on your photo by 100 percent, or use the zoom slider at the top to zoom in to a maximum of 400 percent.
There's also a way to zoom in and out using your Mac's trackpad gestures . You'll like this method if you're used to using the trackpad for all your tasks.
Click the Apple logo in the menu bar and go to System Settings > Trackpad . Select the Scroll & Zoom tab and ensure that Zoom in or out and Smart zoom are toggled on. This way, you can pinch or double-tap with two fingers on the trackpad to zoom in and out on your Mac.
In most cases, the general keyboard shortcuts and trackpad gestures mentioned above should be sufficient. However, you can't use them to zoom in on, say, the macOS menu bar or your Google Chrome tabs. If you need to zoom in on these parts of the macOS user interface, you can enable the built-in magnifier on your Mac.
Head to System Settings > Accessibility > Zoom and toggle on Use scroll gesture with modifier keys to zoom . For the Modifier key for scroll gesture option, choose Control from the dropdown menu. For Zoom style , choose Picture-in-Picture .
Now, to zoom in, press and hold the Control button on your keyboard. At the same time, use two fingers to swipe upwards on your trackpad for the magnifier window to appear. Swiping upwards multiple times will increase the zoom level.
To zoom out and exit the magnifier, swipe downwards with two fingers until the zoom level returns to default. The magnifier window will then disappear on its own.
You can customize this zoom setting in several ways. For instance, you can choose Full Screen or Split Screen to change how the zoomed-in parts of your Mac screen will appear. Instead of a small magnifier window, Split Screen will use a quarter of your Mac screen to display the zoomed section.
As another example, if you don't like swiping on your trackpad and using the modifier key to zoom, you can opt to enable Use Keyboard shortcuts to zoom . When this setting is enabled, you'll have three additional keyboard shortcuts that you can use to zoom in and out on your Mac:
- Option + Cmd + 8: Press this once to activate zoom. Press it again to deactivate.
- Option + Cmd + Equals(=): Press these keys to zoom in on your screen.
- Option + Cmd + Minus(-): Press these buttons to zoom out from your screen.
Overall, if you want to zoom in or out on your Mac, the easiest way is to use the three main keyboard shortcuts or the zoom options in the View tab. Popular apps such as Photos and Google Chrome also have their own zoom buttons that you can use.
If the generic options are not what you're looking for, there's still a built-in magnifier available. It's one of your Mac's Accessibility features for people with visual impairments . This function will allow you to zoom in anywhere on the user interface.
New Apple Pencil to include haptic feedback and new gestures
Alongside the new iPad Pro and iPad Air lineup, Apple’s May 7 event will also feature updates to the iPad accessories, with new generation of Magic Keyboard and Apple Pencil.
Bloomberg’s Mark Gurman reports today that the new Pencil will include haptic feedback for the first time. This should help the digital stylus feel more realistic in use.
Although details are light, you can imagine how the haptic feedback produced by the Pencil can vary depending on the tool selected in the current drawing app. A crayon mode may make the Pencil feel rougher and heavier, for instance.
Alongside haptic feedback, the new Pencil will include additional gestures for more versatility. As previously spotted by 9to5Mac in code references , there will be a new ‘squeeze’ gesture that summons a contextual menu based on the current task. For example, the squeeze gesture could allow users to quickly invoke actions like adding shapes, stickers or text to the canvas.
Alongside the accessories, May 7 will see Apple update the iPad hardware lineup for the first time in eighteen months, having skipped 2023 altogether. The new iPad Pro lineup will feature OLED displays, and maybe even an M4 chip . The iPad Air will also be updated, adding a larger 12.9-inch size for the first time.
Stay tuned to 9to5Mac for full coverage of all the announcements, with Apple’s ‘Let Loose’ event set for May 7.
Follow Benjamin: @bzamayo on Threads and Twitter .
FTC: We use income earning auto affiliate links. More.

Check out 9to5Mac on YouTube for more Apple news:
Benjamin develops iOS apps professionally and covers Apple news and rumors for 9to5Mac. Listen to Benjamin, every week, on the Happy Hour podcast. Check out his personal blog . Message Benjamin over email or Twitter .
Benjamin Mayo's favorite gear

Philips Hue Lights
The easiest way to get into HomeKit and Apple smart home tech. Great for gifts.

iPhone Wireless Charger
Inexpensive, fast, wireless charger for iPhone.

Manage push notifications
- a. Send us an email
- b. Anonymous form
- Buyer's Guide
- Upcoming Products
- Tips / Contact Us
- Podcast Instagram Facebook Twitter Mastodon YouTube Notifications RSS Newsletter
What to Expect From the May 7 Apple Event
Apple is set to hold its first event of the year next Tuesday, and the focus will be on the iPad . The iPad Pro and iPad Air models are set to be updated, and Apple also plans to refresh some of its iPad accessories.
The iPad Pro models will be the star of Apple's event, featuring the first larger form factor OLED displays. OLED display technology will bring deeper blacks, better contrast, more vibrant colors, and better power efficiency.
Apple is said to be using the "best OLED panels on the market" with higher brightness, extended battery life, 120Hz ProMotion refresh rates, and a long lifetime for the OLED technology. OLED displays have pixels that can be controlled individually, so high dynamic range content looks more realistic and true-to-life.

It's not entirely clear which M-series chip the iPad Pro models will use, and there is a possibility that these will be the first devices equipped with the AI-focused next-generation M4 chip . If that doesn't happen, Apple will use the M3 that's in the iMac and MacBook Air . Either way, it'll mark a massive improvement.
Along with slimmed down bezels, the iPad Pro's front-facing camera is expected to be relocated to the side of the device rather than the top, so the camera will be upright when the iPad is in a landscape orientation. That makes more sense for video calls and filming done when the iPad is used with a keyboard.
There have been rumors of possible MagSafe charging support and up to 4TB of storage, and we could also see prices go up . Multiple sources have said that the OLED technology will make the 2024 iPad Pro models more expensive, but just how much more expensive remains to be seen. Rumors have ranged from $160 more to $700 more.
For more on the rumors that we've heard so far about the iPad Pro, we have a dedicated 2024 iPad Pro guide .
The iPad Air will get a refresh alongside the iPad Pro, and for the first time, Apple is splitting the Air lineup and introducing two models. The first iPad Air will be a direct successor to the current version, measuring in at 10.9 inches. The second model will come in at 12.9 inches, similar to the iPad Pro.
We are not expecting design changes to the iPad Air, except for the new, larger size. Both models will look like the iPad Air 4, featuring an edge-to-edge display with slim bezels and an aluminum chassis with flat, rounded edges. The iPad Air will be thicker than the iPad Pro, and it will have thicker bezels.
Leaked iPad Air images point to a rear camera with a protruding pill-shaped camera bump that's similar to the design we're expecting to see with the iPhone 16 . The front camera could be repositioned so that it will be at the top of the iPad Air when it's in landscape mode, allowing it to be in the right orientation for video calls when it's used with a keyboard. The current version has the camera at the top when it is in portrait mode.
While we won't see notable design updates, Apple may introduce new color options. The existing model comes in a range of pastel shades, so Apple could tweak the color selection.
We have more on what's expected for the iPad Air in our iPad Air guide .
Apple Pencil
The iPad Pro and iPad Air will be accompanied by an updated version of the Apple Pencil , which Apple might call the Apple Pencil 3. It isn't yet clear if there will be design changes, but it is expected to be the first Apple Pencil that supports haptic feedback.
There were rumors of interchangeable magnetic tips at one point, but we don't know if that's actually a feature that's coming or an inaccurate rumor. Deeper integration with the Vision Pro is a possibility, and it could perhaps work with drawing apps that support visionOS . There's also a chance that we could see the Apple Pencil come in both black and white rather than just white.
Magic Keyboard
Apple plans to overhaul the Magic Keyboard , introducing a sturdier frame made from aluminum rather than the polyurethane material used for the current version. While the frame and area around the keyboard will be made from aluminum, the exterior shell will still be made from silicone.
Apple is using more premium materials for the new Magic Keyboard, so it could be more expensive. The current model is priced starting at $299 for the 11-inch version. The new Magic Keyboard is likely to work with both the upcoming iPad Air and iPad Pro models as they are similar in size (11.1 and 12.9 inches for the iPad Pro and 10.9 and 12.9 inches for the iPad Air).
Other Accessories
Apple refreshes its selection of Apple Watch bands, iPhone cases, and iPad cases regularly, introducing new color options. We could see new summer colors for many accessories, and Apple will need to update its iPad cases to accommodate the new designs.
Vision Pro Expansion
Rumors suggest that Apple will expand the Vision Pro headset to additional countries before WWDC, and we're getting short on time. We could see Apple bring the Vision Pro to countries like the UK, Canada, China, and more as part of the May 7 event.
How to Watch
The "Let Loose" event is set to take place on Tuesday, May 7 at 7:00 a.m. Pacific Time or 10:00 a.m. Eastern Time. Apple will live stream the event on its website and on YouTube , plus there is an option to watch it on the Apple TV .
Those unable to watch or those who want to follow along with MacRumors can visit MacRumors.com for the liveblog or follow us on Twitter at MacRumorsLive for live tweet coverage.
Get weekly top MacRumors stories in your inbox.
Top Rated Comments
I expect to be disappointed and will be disappointed if my expectations are not met.
Popular Stories

iOS 18 Rumored to Add New Features to These 16 Apps on Your iPhone
Check Out This Apple Watch iPad Demo Unit From 2014

Will the New iPad Pro Really Have the M4 Chip?

Report Examines GM's Controversial Move to Abandon Apple CarPlay
Kuo: Apple Watch Ultra to Get 'Almost No' Hardware Upgrades This Year
Next article.

Our comprehensive guide highlighting every major new addition in iOS 17, plus how-tos that walk you through using the new features.

App Store changes for the EU, new emoji, Podcasts transcripts, and more.

Get the most out your iPhone 15 with our complete guide to all the new features.
A deep dive into new features in macOS Sonoma, big and small.

Revamped models with OLED displays, M3 or M4 chip, and redesigned Magic Keyboard accessory.
Updated 10.9-inch model and new 12.9-inch model, M2 chip expected.

Apple's annual Worldwide Developers Conference will kick off with a keynote on June 10.

Expected to see new AI-focused features and more. Preview coming at WWDC in June with public release in September.
Other Stories

2 days ago by Tim Hardwick
4 days ago by Tim Hardwick
1 week ago by Joe Rossignol

1 week ago by MacRumors Staff

Use Multi-Touch gestures on your Mac
With a Multi-Touch trackpad or Magic Mouse, you can tap, swipe, pinch, or spread one or more fingers to perform useful actions.
Trackpad gestures
For more information about these gestures, choose Apple menu > System Settings (or System Preferences), then click Trackpad. You can turn a gesture off, change the type of gesture, and learn which gestures work with your Mac.
Trackpad gestures require a Magic Trackpad or built-in Multi-Touch trackpad. If your trackpad supports Force Touch, you can also Force click and get haptic feedback .
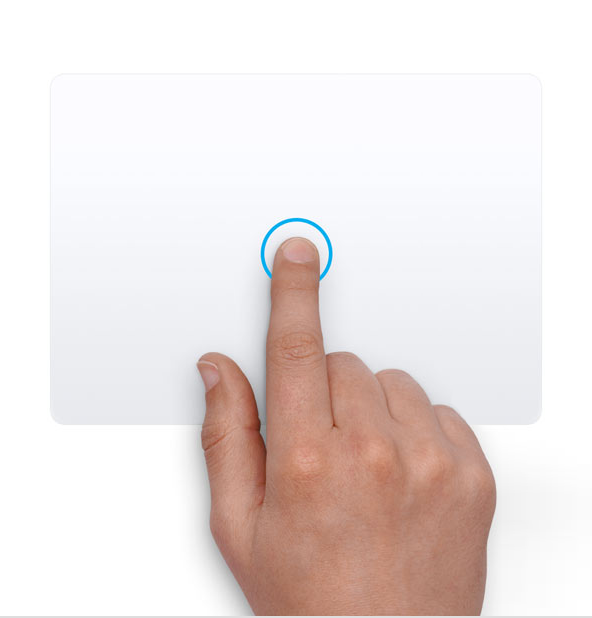
Tap to click
Tap with one finger to click.

Secondary click (right-click)
Click or tap with two fingers.

Double-tap with two fingers to zoom in and back out of a webpage or PDF.

Slide two fingers up or down to scroll. 1

Zoom in or out
Pinch with two fingers to zoom in or out.
Move two fingers around each other to rotate a photo or other item.

Swipe between pages
Swipe left or right with two fingers to show the previous or next page.

Open Notification Center
Swipe left from the right edge with two fingers to show Notification Center.

Three finger drag
Use three fingers to drag items on your screen, then click or tap to drop. Turn on this feature in Accessibility preferences .

Look up and data detectors
Tap with three fingers to look up a word or take actions with dates, addresses, phone numbers, and other data.

Show desktop
Spread your thumb and three fingers apart to show your desktop.

Pinch your thumb and three fingers together to display Launchpad.

Mission Control
Swipe up with four fingers 2 to open Mission Control .

App Exposé
Swipe down with four fingers 2 to see all windows of the app you're using.

Swipe between full-screen apps
Swipe left or right with four fingers 2 to move between desktops and full-screen apps.
Mouse gestures
For more information about these gestures, choose Apple menu > System Settings (or System Preferences), then click Mouse. There you can turn a gesture off, change the type of gesture, and learn which gestures work with your Mac. Mouse gestures require a Magic Mouse.

Click the right side of the mouse.

Slide one finger up or down to scroll. 1

Double-tap with one finger to zoom in and back out of a webpage or PDF.

Double-tap with two fingers to open Mission Control .

Swipe left or right with two fingers to move between desktops and full-screen apps.

Swipe left or right with one finger to show the previous or next page.
1. You can turn off trackpad scrolling in Accessibility settings .
2. In some versions of macOS, this gesture uses three fingers instead of four.

Related topics
Contact Apple Support
Need more help? Save time by starting your support request online and we'll connect you to an expert.

IMAGES
VIDEO
COMMENTS
Trackpad gestures. For more information about these gestures, choose Apple menu > System Settings (or System Preferences), then click Trackpad. You can turn a gesture off, change the type of gesture, and learn which gestures work with your Mac. Trackpad gestures require a Magic Trackpad or built-in Multi-Touch trackpad.
Multi-Touch gestures are actions using two or more fingers that your Mac trackpad understands. These gestures are more than just flashy tricks. They can dramatically maximize your productivity and save time doing recurrent tasks. Here are some basic trackpad gestures built-in to your Mac: 1. Tap to Click. Single-finger tap functions as a click.
1. Scroll Direction. The Scroll Direction: Natural gesture is at the top of the Scroll & Zoom tab. When enabled, it makes pages or apps scroll in "natural" directions when you scroll using trackpad. This means that the page goes up when you slide two fingers up and goes down when you slide them down. If disabled, the scroll works in the ...
Turning on all of the possible Mac trackpad gestures will take a few moments. You'll need to go to System Preferences -> Trackpad, and navigate through the various tabs enabling what you want to ...
Scrolling is simple -- place two fingers on your trackpad and move them up, down, left, or right to scroll in any direction. Zoom in our out in a browser or another document with a pinch-to-zoom gesture. Place two fingers on the trackpad and move them together to zoom in or move them apart to zoom out. Perform a "smart zoom" by double-tapping ...
All of these gestures can be used on a built-in and an external trackpad. 1. Click or Select an Item. Let's start with basic Mac Trackpad gestures. Tap or click with one finger to click/select ...
Click on the "Trackpad" icon within System Preferences. Navigate to Gestures: Go to the "Point & Click" tab in the Trackpad settings. Disable Gestures: Scroll down to the "More Gestures" section and uncheck the checkboxes next to the gestures you want to disable. Close System Preferences: After deselecting the desired gestures.
Tap to click. Apple. Tapping with one finger to click is a logical starting point for teaching someone how to use a trackpad. This most essential gesture allows the user to click on linked text ...
Find and select the More Gestures tab, then scroll down and find the Launchpad option. Turn on the toggle next to Launchpad. To use this particular gesture, place your thumb on the trackpad ...
How to use gestures with Apple's Magic Mouse. From the menu bar on your Mac, go to > System Preferences… then click Mouse. At the top of the window, you've got two options: Point & Click or ...
For this example, pick Trackpad. In the pane on the left, you can choose which apps will support the new gestures. They can be Global, work just in the Finder or other specific apps (just click the plus icon to add them). Once you've chosen all apps, click the Add New Gesture button at the bottom of the main pane.
Trackpad gestures. For more information about these gestures, choose Apple menu > System Settings (or System Preferences), then click Trackpad. You can turn a gesture off, change the type of gesture and find out which gestures work with your Mac. Trackpad gestures require a Magic Trackpad or built-in Multi-Touch trackpad.
This gesture (called App Exposé) shows any open windows for the current app next to each other, with a list of recent documents running along the bottom of your screen. To run this gesture, you ...
Which trackpad gestures does Safari support, and what do those gestures do? Stack Exchange Network Stack Exchange network consists of 183 Q&A communities including Stack Overflow , the largest, most trusted online community for developers to learn, share their knowledge, and build their careers.
Secondary click: Click or tap with two fingers or tap one of the trackpad corners (right or left). A secondary click is like using Control + Click or a " right-click .". Tap to click: This is simply on or off but is one of the gestures you'll probably use the most as it's a basic click. Click and Tracking speed: Adjust these sliders for ...
Tap to zoom: Tap the trackpad with two fingers simultaneously to zoom in on a page in Safari or a PDF. Swipe to navigate: Swipe with two fingers to the left or right to flip through Web pages and ...
To create custom gestures, click which input device you'd like to recognize: we'll start with the Trackpad. Then, click "Add New Gesture." Once you've done this, shift your attention to the bottom of the window. On the left, you can pick a gesture; on the right, an action for the gesture to trigger. We can do just about anything, but let's add ...
Here's how you can change it if that's the case. Step 1: Click on the Apple logo in the top-left corner of your screen. Select System Settings. If your Mac is running macOS Monterey or earlier ...
Enabling trackpad gestures for tab switching on your Mac is a straightforward process. Here's how you can do it: Open System Preferences: Click on the Apple menu in the top-left corner of your screen and select "System Preferences" from the dropdown menu. Select Trackpad: In the System Preferences window, locate and click on the ...
Open the System Settings app on your Mac. In the sidebar on the left, scroll down and click Trackpad. From here, you'll see three different sections available that you can customize and interact with. These sections are "Point & Click", "Scroll & Zoom", and "More Gestures". Within the Point & Click section, here are the options ...
Safari Gestures Tapping and swiping are how you'll type in search terms, select URLs, and respond to messages online. They are also the gestures you'll use to pull off some of Safari's fancier moves .
Make Your Mac Mouse and Trackpad Work Like Windows Whether you're using a MacBook trackpad or a mouse, there are several settings you can change to make them more Windows-like. ... To set them up, go to System Settings > Trackpad and select the "More Gestures" tab. To show all your open windows with an upward swipe, click the "Mission Control ...
Trackpad gestures. For more information about these gestures, choose Apple menu > System Settings (or System Preferences), then click Trackpad. You can turn a gesture off, change the type of gesture and find out which gestures work with your Mac. Trackpad gestures require a Magic Trackpad or built-in Multi-Touch trackpad.
Use Keyboard shortcuts to zoom. When this setting is enabled, you'll have three additional keyboard shortcuts that you can use to zoom in and out on your Mac: Option + Cmd + 8: Press this once to ...
A crayon mode may make the Pencil feel rougher and heavier, for instance. Alongside haptic feedback, the new Pencil will include additional gestures for more versatility. As previously spotted by ...
Apple Announces 'Let Loose' Event on May 7 Amid Rumors of New iPads. Tuesday April 23, 2024 7:11 am PDT by Joe Rossignol. Apple has announced it will be holding a special event on Tuesday, May 7 ...
Trackpad gestures. For more information about these gestures, choose Apple menu > System Settings (or System Preferences), then click Trackpad. You can turn a gesture off, change the type of gesture, and learn which gestures work with your Mac. Trackpad gestures require a Magic Trackpad or built-in Multi-Touch trackpad.