
- Forum Listing
- Marketplace
- Advanced Search
- Modifications
- General Maintenance

Cruise Controll not working
- Add to quote
Hi Guys, I have an '08 G5 Automatic 4 cylinder. the cruise control stopped working last month and it does not say cuise engaged when I try to set it. I checked the manual but could not figure out if there is a fuse for it that might have blown. Does anybody know if there is one, or possibly what might be wrong? The car only has 17,000 KM on it so I'm surprised it stopped working so soon.

since you have a n auto maybe shake the shifter a bit or pull up on the brake pedal. while trying. or take it to the dealer. I am gonna go out on a limb and guess you are form calgary? LOL
I've tried pulling up on the brake pedal, but have not tried shaking the shifter. I'll give it a go. Yes, I'm from Calgary, lol.
Did you have any trouble codes happen? Sometimes cruise gets disabled due to a problem occurring in the vehicle (My Friend's Subaru does this). Or have you had the ECU reflashed/replaced at any point? If so, it could have gotten disabled in the config. Since your car is well within the warranty, I'd say just throw it at them and let them figure it out.

Did you check your cruise control fluid level?
Hmm... possible. And while he's checking that, he might as well check to see if the Turbo Encabulator is also functional.
Lol!!
Usually if there is a Check Engine light, it'll throw a code. I'm not sure if Canadian tire does free code reading like Autozone down here does.
Ouch. 75 bucks? Damn... I could rent a H-haul and 20 hookers to put in the river for that.

Well I'll probably just let the dealer look at it since it's under warranty.

I know this is reviving an old thread, but I thought this could be useful as it took me some searching through other forums and youtube to get to my solution, at least. My cruise control also randomly stopped working, The orange light would say that CC is on, but nothing would set. I figured out that the 3rd brake light (CHMSL) had all 3 bulbs burnt out, and because of this, the whole CC system wouldn't enable, but as soon as I replaced the bulbs, the cruise control system returned to working correctly.

JadeTree said: I know this is reviving an old thread, but I thought this could be useful as it took me some searching through other forums and youtube to get to my solution, at least. My cruise control also randomly stopped working, The orange light would say that CC is on, but nothing would set. I figured out that the 3rd brake light (CHMSL) had all 3 bulbs burnt out, and because of this, the whole CC system wouldn't enable, but as soon as I replaced the bulbs, the cruise control system returned to working correctly. Click to expand...

Yes cruise control stops working........... check third brake light bulbs.
- ?
- 385.1K posts
- 9.3K members
Top Contributors this Month

Press enter to search.
- Browse Categories
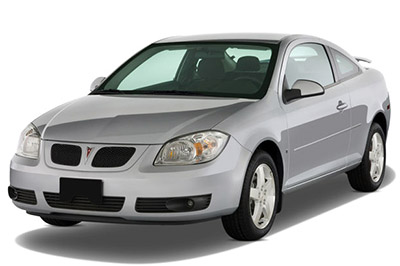
2008 Pontiac G5
- Pontiac G5 Car and Truck
- Pontiac Car and Truck
- Cars & Trucks
Ask a Question
- Share on Facebook
- Share on Twitter
- Share on Google+
- Share on Pinterest
- Share by Email

Related Topics:
- Pontiac Cars & Trucks
- View All »

Trustworthy Expert Solutions
At Fixya.com, our trusted experts are meticulously vetted and possess extensive experience in their respective fields. Backed by a community of knowledgeable professionals, our platform ensures that the solutions provided are thoroughly researched and validated.
I have a 2008 pontiac g5 gt cruise control quit working disconnected the battery&now all electronic dash readings are gone like mileage etc.What can I do myself?
- Want Answer 2 Clicking this will make more experts see the question and we will remind you when it gets answered.
- Add a Comment
- Print this page
- Share this page
- Video Images
An expert who has achieved level 3 by getting 1000 points
An expert that got 20 achievements.
An expert that got 10 achievements.
An expert that got 5 achievements.
- Pontiac Master 4,148 Answers
- Posted on Oct 18, 2018
The dash won't work with the battery disconnected
- Not Helpful
5 Related Answers
- 462 Answers
- Posted on Jul 25, 2009
SOURCE: installation of cruise for Pontiac G5
THE DEALER WOULD HAVE TO PROGRAM THE BODY CONTROL MODULE TO RECOGNIZE THE ADDED CRUISE CONTROL.
- 6982 Answers
- Posted on Jul 29, 2009
SOURCE: i'm trying to jump a battery using a pontiac g5....
There is no battery in the world that does not have a negative terminal. but, the negative lead of the jumper should be connected to any solid metal bracket on the engine (on both vehicles) Stay away from drive belts.
Sean Bailey
- Posted on Aug 15, 2009
SOURCE: Pontiac G5 Tire sensors and air bags
Don't go to the dealer, unless you just have too much money. Call around to tire shops in your area and see if anyone has a "Bar-Tech" tool or a similar device that will reset your sensors for you and HUGE savings.
- Posted on Nov 24, 2009
SOURCE: mY PONTIAC G5 REMOTE DOES NOT WORK TO LOCK OR
I had your exact problem. My fix was resoldering the battery contact where it mates on the circuit board of the remote. ( It should be connected at 3 places ) The center and left were not making contact. only the panic button side was. Works like new now. btw while its apart use a pencil eraser to clean the button contacts.
- 516 Answers
- Posted on Jun 04, 2010
SOURCE: how do i disconnect the battery on pontiac g5
The battery is on the right side of the trunk compartment next to the spare tire. There is a corporate bulletin about the battery terminals being stripped from the factory and it states to clean the treads and replace the terminal bolts. The terminal bolts are 8mm or 5/16inch in size.
Add Your Answer
Tips for a great answer:
- - Answer the question.
- - If you need clarification, ask it in the comment box above.
- - Better answers use proper spelling and grammar.
- - Provide details, support with references or personal experience.
Upload an image from your computer
Draw a box over the problem!!

Attachments: Added items
Uploading: 0 %
my-video-file.mp4
Complete. Click "Add" to insert your video. Add
Related Questions:
2005 dodge ram 1500 5.7 no bus where mileage is and all my dash lights are on but starts., what fuse controls hazard lights 2008 pontiac g5, pontiac g5 (2007-2010) fuses and relays, i have a 08 g5 gt took ti the dealer replaced throttle body and sensor replaced intake and exhaust cmp actuator solenoid replaced maf sensor after 2 days car is missing surging and shutting off, cruise control doesn't work in 2010 pontiac g5.
- Lubricate the actuator switch;
- Lubricate the brake switch (yes, the brake switch is in the circuit);
- Lubricate all actuator switches for the cruise control system at the steering wheel;
- Check for vacuum leaks, damaged vacuum lines, or other visible problems around the cruise control servo (under the hood).
- If your vehicle is equipped with a TRIP COMPUTER, and the trip computer is not updating mileage, replace the SPEED SENSOR.
I have a 2001 Dodge Ram 3500 4X4, w/5 spd tranny. I am having trouble with my HVAC controls (they quit working and only hot air comes out), and also the instrument cluster. Periodically I lose the tach...
Left key in occ position with radio on. key was stuck in ignitio, how do i disconnect the battery on pontiac g5, the mileage on my 2002 grand am gt is scrambled,led read out,can not read mileage,what is the fix, cruise quit working, wrench light came on, does the cruise control have a fuse what do i need to check. cant afford to take it to dealer. it is a 2008 but not under warranty., installation of cruise for pontiac g5, not finding what you are looking for.
View Most Popular
Related Question
- Dodge Cars & Trucks
Usually answered in minutes!
Popular Questions
Where is the remote start fuse located.
2007 Pontiac G5 Gt Coupe
Have a 2007 Pontiac G5 and need to add power steering fluid.
How do i open the, where the cigarette lighter fuse in car 2005 grand.
2006 Pontiac G5
Where is the traction control button on Pontiac G5 located?

Check Out the Latest Top Trucks Report!
View all Fixya Reports
Top Pontiac Experts

Level 3 Expert
17989 Answers

Jeffrey Turcotte
8992 Answers

Thomas Perkins
15088 Answers
Are you a Pontiac Expert? Answer questions, earn points and help others
Answer questions
Manuals & User Guides
. 2008 g5 manual.
Have a manual for 2008 Pontiac G5?
Or just drag it here!
Step 2: Please assign your manual to a product:
5 Reasons Why Your Cruise Control Stopped Working
- Updated: March 15, 2023

It would be difficult to find a vehicle on the road today without cruise control. This invaluable feature makes driving long distances easier but can also cause trouble when it malfunctions. Understanding the reasons your cruise control stopped working ensures that you can get the problem fixed quickly for a more enjoyable ride.
While this fault can cause issues with the cruise control system itself, there could also be an effect on the acceleration of your vehicle. That’s why you want to have it looked at as soon as you notice a problem. Let’s take a quick look at the reasons your cruise control may have stopped working.
Reasons Why Your Cruise Control Stopped Working
The most common reason a cruise control stops working is due to a blown fuse or a defective brake pedal switch . It can also be caused by issues with the throttle control system or the ABS. In older cruise control systems, it can be caused by a broken vacuum line.
Here is a more detailed list of the possible reasons your cruise control is not working:
1. Blown Fuse

All electrical systems in the vehicle are controlled by fuses. Your cruise control system is attached to a fuse that can blow if there is a short circuit or fault. Without a good fuse, the cruise control system can’t work at all.
Thankfully, it’s not difficult to find and replace a blown fuse. Look in the owner’s manual to find the fuse that corresponds with the cruise control technology.
2. Defective Brake Pedal Switch

The brake pedal switch is responsible for turning the brake lights on and off based on the pedal position. Cruise control systems are designed to disengage whenever your brake pedal gets pressed.
Because the cruise control is wired into the brake pedal switch, any fault can cause it to stop working. When the brake pedal switch malfunctions, the car believes the brakes are engaged, causing the system to turn off automatically. Not only that, but your car’s brake light might also be stuck on, leaving confused drivers in your wake.
3. Malfunctioning Speed Sensor

Speed sensors are located on every wheel or differential. The purpose of these sensors is to monitor the speed of the wheels to determine if traction control is needed.
The speed sensors are also part of the cruise control system. When a sensor fails, the cruise control can stop working and the speedometer might act strange as well.
If there is an issue with a speed sensor, it will often show with an ABS warning light or a check engine light on the dashboard.
RELATED: 3 Symptoms of a Bad ABS Wheel Speed Sensor
4. Electrical Issues

The cruise control system is electronic, with many components working together to make the system operate. If the cruise control fails to work, you want to check the wiring harness and associated connectors for a fault.
You also need to ensure that the voltage source is supplying enough power to the system. Even the smallest fault can cause defects with the cruise control. In many cases, there can be an issue with the cruise control lever or buttons causing the cruise control to not engage.
If your cruise control buttons are located on the steering wheel it could also be caused by a bad clock spring, which is located behind the steering wheel.
Check the system with an OBD2 scanner to look for any trouble codes related to the cruise control.
RELATED: 5 Symptoms of a Broken Clock Spring, Location & Replacement Cost
5. Damaged Vacuum Actuator, Hoses or Cable (Older cruise control)
If you drive an older vehicle with cruise control, you might have an issue with the vacuum actuator or the cable that connects to the throttle. If there has been damage done to the vacuum hoses or the actuator, the cruise control will stop working altogether.
Additionally, the cable linking the actuator to the throttle must be in good shape. If it has been broken, the cruise control will fail.
What is Cruise Control?
Cruise control is a feature that is used when you are traveling at a consistent speed. Cruise control was first introduced for automobiles in the 1950s. However, it took many years before it became a staple in the modern vehicle.
This electrical system allows you to set a predetermined speed and take your foot off of the gas pedal. If you are on a long drive, there is less fatigue because you don’t have to try to maintain your speed. Cruise control can also benefit fuel economy because the vehicle uses less fuel when traveling steadily.
In newer cars, you might be able to find adaptive cruise control , which is a smart technology. Adaptive cruise control allows you to travel at a predetermined speed, but it also helps to maintain a safe distance from the vehicles in front of you with the help of sensors. With conventional cruise control, you need to take over when the car in front of you slows down, but that’s not the case with adaptive cruise control.
There are also vehicles nowadays with not only cruise control, but fully self-driving vehicles . We will most likely see much more of this in the future.
Cruise Control Repair Cost
The cost to repair your cruise control system depends on what caused it to fail. If you need to replace a cruise control or brake switch, you might spend between $125 and $350, including parts and labor. However, the cost to change a fuse is only a few dollars and you can perform the replacement yourself in just a matter of seconds.
On the other hand, when something major fails, such as the actuator, you could be looking at a much higher repair bill. In some vehicles, the cost to replace a cruise control actuator can cost more than $700. These costs rise if you drive a luxury vehicle or one that is difficult to get parts for.
It might not seem immediately important for you to fix the broken cruise control, but this defective system can affect other performance aspects. You could start to notice issues with acceleration or have trouble with the speedometer. To play it safe, it’s always best to have the cruise control repaired as soon as you notice a problem.
Is there a fuse for the cruise control?
Yes. If the cruise control is installed from the factory, you should check your car’s owner’s manual for the fuse location. If it’s an aftermarket cruise control, you’ll need to follow the wires to find the fuse.
Does the brake switch affect the cruise control system?
Yes. The brake switch affects the cruise control system. The brake switch sends a signal to the cruise control system to let it know when the brakes are being applied for the engine to know when it should stop accelerating.
Will the cruise control work if the check engine light is on?
The cruise control function will be disabled when the check engine light is on in most car models, even if the cause of the check engine light is not the cruise control itself. This is mainly due to safety reasons.
Can a vacuum leak affect cruise control?
Older vehicles use vacuum to control the throttle for the cruise control, and in this case a vacuum leak can heavily affect the cruise control. However, modern cruise controls are fully electric and in most cases will not be affected by a vacuum leak if the check engine light is not illuminated.
Although many people may think that the cruise control system is unimportant and not worth spending money to repair, the problem can be caused by a faulty part that will affect the engine’s performance or durability. Therefore, it is best not to ignore the problem if your cruise control is not working without first diagnosing the car properly.
If your cruise control still isn’t working after trying all the tips in this article, it’s probably time to take it in for a professional opinion from a mechanic. It may be a more serious problem that requires replacement parts or repairs. In the meantime, drive safe and enjoy the open road!
Learn more:
- Brake Lights Not Working But Tail Lights Are? (How to Fix)
- Tail Lights Not Working But Brake Lights Are? (How to Fix)
- Brake Lights Stay On? (5 Causes & How to Fix it)
Categories: Electric , Troubleshooting
Related Posts

Latest Posts
- The Best & Worst Years Of Ford Explorer
- Best & Worst Years Of Toyota Corolla
- Best & Worst Years of Toyota RAV4
- When Should Your Child Switch To A Forward-Facing Car Seat?
- The Best & Worst Years Of Toyota Camry
- I Accidentally Put Premium Gas In My Car, What To Do?

Fuse Box Diagrams
All automotive fuse box diagrams in one place
Pontiac G5 (2007-2010) fuses and relays
Ad vertisements
The Pontiac G5 was produced from 2007 to 2010. In this article, you will find fuse box diagrams of Pontiac G5 2007, 2008, 2009 and 2010 , get information about the location of the fuse panels inside the car, and learn about the assignment of each fuse (fuse layout) and relay.
Fuse Layout Pontiac G5 2007-2010
Cigar lighter (power outlet) fuses in the Pontiac G5 are located in the Engine Compartment fuse box (see fuses “OUTLET”(Auxiliary Power Outlet) and “LTR” (Cigarette Lighter)).
Table of Contents
Passenger Compartment Fuse Box
Fuse box location.

Fuse box diagram

Fuse Box in the engine compartment

Learn more:

- Pontiac Manuals
- Owner's manual
Pontiac 2008 G5 Owner's Manual
- page of 388 Go / 388
Table of Contents
- Using this Manual
Seats and Restraint Systems
- Manual Seats
- Seat Height Adjuster
- Manual Lumbar
- Heated Seats
- Reclining Seatbacks
- Head Restraints
- Easy Entry Seat (Coupe)
- Split Folding Rear Seat
- Why Safety Belts Work
- How to Wear Safety Belts Properly
- Lap-Shoulder Belt
- Shoulder Belt Height Adjuster
- Safety Belt Pretensioners
- Rear Safety Belt Comfort Guides
- Safety Belt Use During Pregnancy
- Safety Belt Extender
- Older Children
- Infants and Young Children
- Child Restraint Systems
- Where to Put the Restraint
- Securing a Child Restraint in a Rear Seat Position
- Securing a Child Restraint in the Right Front Seat Position
- Where Are the Airbags
- When Should an Airbag Inflate
- What Makes an Airbag Inflate
- How Does an Airbag Restrain
- What will You See after an Airbag Inflates
- Passenger Sensing System
- Servicing Your Airbag-Equipped Vehicle
- Checking the Restraint Systems
- Replacing Restraint System Parts after a Crash
Features and Controls
- Remote Keyless Entry (Rke) System
- Battery Replacement
- Remote Vehicle Start
- Power Door Locks
- Delayed Locking
- Automatic Door Lock
- Rear Door Security Locks (Sedan
- Programmable Automatic Door Unlock
- Lockout Protection
- Remote Trunk Release
- Emergency Trunk Release Handle
- Power Windows
- Disarming the System
- How the System Alarm Is Activated
- How to Turn off the System Alarm
- How to Detect a Tamper Condition
- New Vehicle Break-In
- Starting the Engine
- Retained Accessory Power (Rap)
- Engine Coolant Heater
- Automatic Transmission Operation
- Manual Transmission Operation
- Shift Speeds
- Parking Brake
- Parking Your Vehicle
- Parking over Things that Burn
- Engine Exhaust
- Running the Vehicle While Parked
- Onstar System
- How Onstar Service Works
- Center Console Storage
- Driver's Storage Compartment
- Convenience Net
Instrument Panel
Section 3 instrument panel.
- Hazard Warning Flashers
- Other Warning Devices
- Turn Signal/Multifunction Lever
- Headlamp High/Low-Beam Changer
- Turn and Lane-Change Signals
- Windshield Wipers
- Cruise Control
- Windshield Washer
- Wiper Activated Headlamps
- Daytime Running Lamps (Drl)
- Headlamps on Reminder
- Instrument Panel Brightness
- Electric Power Management
- Entry/Exit Lighting
- Mirror Reading Lamps
- Accessory Power Outlet(S)
- Battery Run-Down Protection
- Ashtray(S) and Cigarette Lighter
- Climate Control System
- Defogging and Defrosting
- Outlet Adjustment
- Passenger Compartment Air Filter
- Instrument Panel Cluster
- Speedometer and Odometer
- Safety Belt Reminders
- Airbag Readiness Light
- Passenger Airbag Status Indicator
- Charging System Light
Service and Appearance Care
- Brake System Warning Light
- Anti-Lock Brake System (Abs) Warning Light
- Engine Coolant Temperature Warning Light
- Tire Pressure Light
- If the Light Is on Steady
- If the Light Is Flashing
- Maintenance Schedule
- Oil Pressure Light
- Security Light
- Fog Lamp Light
- Highbeam on Light
Driver Information Center (DIC)
- DIC Operation and Displays
- Brake Fluid
- Power Steering
- Service Air Bag
- DIC Vehicle Personalization
- Audio System(S)
- Setting the Clock
- With Date Display
- Playing the Radio
- Setting Preset Stations
- Setting the Tone
- Finding a Category (Cat) Station
- Radio Messages
- Care of Your CD Player
- Care of Your Cds
- Using an MP3
- XM Radio Messages
- Theft-Deterrent Feature
- Audio Steering Wheel Controls
- Radio Reception
- Fixed Mast Antenna
- XM™ Satellite Radio Antenna System
Section 4 Driving Your Vehicle
Driving your vehicle, your driving, the road, and your vehicle.
- Defensive Driving
- Drunk Driving
- Control of a Vehicle
- Antilock Brake System (ABS)
- Braking in Emergencies
- Traction Control Operation
- Enhanced Traction System (ETS)
- Electronic Stability Control (ESC)
- Steering Tips
- Steering in Emergencies
- Off-Road Recovery
- Loss of Control
- Driving at Night
- Driving in Rain and on Wet Roads
- Before Leaving on a Long Trip
- Highway Hypnosis
- Hill and Mountain Roads
- If You Are Caught in a Blizzard
- If Your Vehicle Is Stuck in Sand, Mud, Ice, or Snow
- Rocking Your Vehicle to Get It out
- Loading Your Vehicle
- Towing Your Vehicle
- Dinghy Towing
- Dolly Towing
- Towing a Trailer (Manual Transmission)
- If You Do Decide to Pull a Trailer
- Weight of the Trailer
- Weight of the Trailer Tongue
- Safety Chains
- Trailer Brakes
- Driving with a Trailer
- Following Distance
- Making Turns
- Driving on Grades
- Turn Signals When Towing a Trailer
- Parking on Hills
- Maintenance When Trailer Towing
- Engine Cooling When Trailer Towing
Section 5 Service and Appearance Care
- Accessories and Modifications
- California Proposition 65 Warning
- California Perchlorate Materials Requirements
- Doing Your Own Service Work
- Adding Equipment to the Outside of Your Vehicle
- Gasoline Octane
- Gasoline Specifications
- California Fuel
- Fuels in Foreign Countries
- Filling the Tank
- Filling a Portable Fuel Container
Checking Things under the Hood
- Hood Release
- Engine Compartment Overview
- When to Add Engine Oil
- What Kind of Engine Oil to Use
- Engine Oil Life System
- Engine Air Cleaner/Filter
- Automatic Transmission Fluid
- Manual Transmission Fluid
- Hydraulic Clutch
- What to Use
- Checking Coolant
- Coolant Surge Tank Pressure Cap
- Engine Overheating
- If no Steam Is Coming from Your Engine
- Cooling System
- How to Add Coolant to the Coolant Surge Tank
- Windshield Washer Fluid
- Adding Washer Fluid
- Brake Pedal Travel
- Brake Adjustment
- Replacing Brake System Parts
- Jump Starting
Headlamp Aiming
Bulb replacement.
- Halogen Bulbs
- Headlamps, Front Turn Signal, Sidemarker, and Parking Lamps
- Center High-Mounted Stoplamp (CHMSL)
- Taillamps and Turn Signal Lamps (Coupe)
- Taillamps, Turn Signal, Stoplamps and Back-Up Lamps (Sedan)
- Back-Up Lamps (Coupe)
- License Plate Lamp
- Replacement Bulbs
Windshield Wiper Blade Replacement
- Tire Sidewall Labeling
- Tire Terminology and Definitions
- Inflation - Tire Pressure
- Tire Pressure Monitor System
- Tpms Malfunction Light and Message
- Tpms Sensor Matching Process
- Tire Inspection and Rotation
- When It Is Time for New Tires
- Buying New Tires
- Different Size Tires and Wheels
- Uniform Tire Quality Grading
- Wheel Alignment and Tire Balance
- Used Replacement Wheels
- Tire Chains
- If a Tire Goes Flat
- Changing a Flat Tire
- Removing the Spare Tire and Tools
- Removing the Flat Tire and Installing the Spare Tire
- Storing a Flat or Spare Tire and Tools
- Compact Spare Tire
Appearance Care
- Interior Cleaning
- Fabric/Carpet
- Instrument Panel, Vinyl, and Other Plastic Surfaces
- Care of Safety Belts
- Weatherstrips
- Washing Your Vehicle
- Finish Care
- Windshield and Wiper Blades
- Aluminum or Chrome-Plated Wheels and Trim
- Sheet Metal Damage
- Finish Damage
- Underbody Maintenance
- Chemical Paint Spotting
- Vehicle Care/Appearance Materials
Vehicle Identification
- Vehicle Identification Number (VIN)
- Service Parts Identification Label
Electrical System
- Add-On Electrical Equipment
- Headlamp Wiring
- Windshield Wiper Fuses
- Power Windows and Other Power Options
- Fuses and Circuit Breakers
- Floor Console Fuse Block
- Engine Compartment Fuse Block
Capacities and Specifications
Advertisement
Quick Links
- 1 Instrument Panel Overview
- 2 Warning Lights, Gages, and Indicators
- Download this manual
- Table of Contents 1
- Section 3 Instrument Panel 118
- Section 4 Driving Your Vehicle 195
- Section 5 Service and Appearance Care 235
- Section 6 Maintenance Schedule 339
- Section 7 Customer Assistance Information 357
Related Manuals for Pontiac 2008 G5

Summary of Contents for Pontiac 2008 G5
Page 1: table of contents.
- Page 2 GENERAL MOTORS, GM, the GM Emblem, PONTIAC, the PONTIAC Emblem are registered trademarks, and the name G5 is a trademark of General Motors Corporation. This manual includes the latest information at the time it was printed. We reserve the right to make changes after that time without further notice.
Page 3: Using This Manual
- Page 4 Vehicle Damage Warnings You will also find notices in this manual. Notice: These mean there is something that could damage your vehicle. A notice tells about something that can damage the vehicle. Many times, this damage would not be covered by your vehicle’s warranty, and it could be costly.
Page 5: Seats And Restraint Systems
Page 6: front seats, page 7: seat height adjuster, page 8: heated seats.
- Page 9 Your seats have manual reclining seatbacks. The lever used to operate them is located on the outboard side of the seats. To recline the seatback, do the following: 1. Lift the recline lever. 2. Move the seatback to the desired position, then release the lever to lock the seatback in place.
- Page 10 CAUTION: Sitting in a reclined position when your vehicle is in motion can be dangerous. Even if you buckle up, your safety belts cannot do their job when you are reclined like this. The shoulder belt cannot do its job because it will not be against your body.
Page 11: Head Restraints
Page 12: easy entry seat (coupe), page 13: rear seats, page 14: safety belts, page 15: why safety belts work.
- Page 16 Get it up to speed. Then stop the vehicle. The rider does not stop. 1-12 The person keeps going until stopped by something. In a real vehicle, it could be the windshield...
- Page 17 or the instrument panel... or the safety belts! With safety belts, you slow down as the vehicle does. You get more time to stop. You stop over more distance, and your strongest bones take the forces. That is why safety belts make such good sense. 1-13...
- Page 18 Questions and Answers About Safety Belts Will I be trapped in the vehicle after a crash if I am wearing a safety belt? You could be — whether you are wearing a safety belt or not. But your chance of being conscious during and after an accident, so you can unbuckle and get out, is much greater if you are belted.
Page 19: How To Wear Safety Belts Properly
- Page 20 What is wrong with this? The shoulder belt is too loose. It will not give as much protection this way. 1-16 CAUTION: You can be seriously hurt if your shoulder belt is too loose. In a crash, you would move forward too much, which could increase injury.
- Page 21 What is wrong with this? The lap belt is too loose. It will not give nearly as much protection this way. CAUTION: You can be seriously hurt if your lap belt is too loose. In a crash, you could slide under the lap belt and apply force on your abdomen.
- Page 22 What is wrong with this? The belt is buckled in the wrong place. 1-18 CAUTION: You can be seriously injured if your belt is buckled in the wrong place like this. In a crash, the belt would go up over your abdomen. The belt forces would be there, not on the pelvic bones.
- Page 23 What is wrong with this? The belt is over an armrest. CAUTION: You can be seriously injured if your belt goes over an armrest like this. The belt would be much too high. In a crash, you can slide under the belt.
- Page 24 What is wrong with this? The shoulder belt is worn under the arm. It should be worn over the shoulder at all times. 1-20 CAUTION: You can be seriously injured if you wear the shoulder belt under your arm. In a crash, your body would move too far forward, which would increase the chance of head and neck injury.
- Page 25 What is wrong with this? The belt is behind the body. CAUTION: You can be seriously injured by not wearing the lap-shoulder belt properly. In a crash, you would not be restrained by the shoulder belt. Your body could move too far forward increasing the chance of head and neck injury.
- Page 26 What is wrong with this? The belt is twisted across the body. 1-22 CAUTION: You can be seriously injured by a twisted belt. In a crash, you would not have the full width of the belt to spread impact forces. If a belt is twisted, make it straight so it can work properly, or ask your dealer/retailer to fix it.
Page 27: Lap-Shoulder Belt
- Page 28 4. Push the latch plate into the buckle until it clicks. Pull up on the latch plate to make sure it is secure. If the belt is not long enough, see Safety Belt Extender on page 1-29. Make sure the release button on the buckle is positioned so you would be able to unbuckle the safety belt quickly if necessary.
Page 29: Shoulder Belt Height Adjuster
Page 30: safety belt pretensioners.
- Page 31 2. Place the guide over the belt and insert the 3. Be sure that the belt is not twisted and it lies flat. two edges of the belt into the slots of the guide. The elastic cord must be under the belt and the guide on top.
- Page 32 CAUTION: A safety belt that is not properly worn may not provide the protection needed in a crash. The person wearing the belt could be seriously injured. The shoulder belt should go over the shoulder and across the chest. These parts of the body are best able to take belt restraining forces.
Page 33: Safety Belt Use During Pregnancy
Page 34: child restraints.
- Page 35 What is the proper way to wear safety belts? An older child should wear a lap-shoulder belt and get the additional restraint a shoulder belt can provide. The shoulder belt should not cross the face or neck. The lap belt should fit snugly below the hips, just touching the top of the thighs.
Page 36: Infants And Young Children
- Page 37 CAUTION: Children can be seriously injured or strangled if a shoulder belt is wrapped around their neck and the safety belt continues to tighten. Never leave children unattended in a vehicle and never allow children to play with the safety belts. Every time infants and young children ride in vehicles, they should have the protection provided by appropriate restraints.
- Page 38 {CAUTION: Children who are up against, or very close to, any airbag when it inflates can be seriously injured or killed. Airbags plus lap-shoulder belts offer protection for adults and older children, but not for young children and infants. Neither the vehicle’s safety belt system nor its airbag system is designed for them.
- Page 39 CAUTION: Newborn infants need complete support, including support for the head and neck. This is necessary because a newborn infant’s neck is weak and its head weighs so much compared with the rest of its body. In a crash, an infant in a rear-facing seat settles into the restraint, so the crash forces can be distributed across the strongest part of an infant’s body, the back and...
Page 40: Child Restraint Systems
- Page 41 Securing an Add-On Child Restraint in the Vehicle CAUTION: A child can be seriously injured or killed in a crash if the child restraint is not properly secured in the vehicle. Make sure the child restraint is properly installed in the vehicle using the vehicle’s safety belt or LATCH system, following the instructions that came with that restraint, and also the instructions in...
Page 42: Where To Put The Restraint
- Page 43 Lower Anchors and Tethers for Children (LATCH) The LATCH system holds a child restraint during driving or in a crash. This system is designed to make installation of a child restraint easier. The LATCH system uses anchors in the vehicle and attachments on the child restraint that are made for use with the LATCH system.
- Page 44 Top Tether Anchor A top tether (A, C) anchors the top of the child restraint to the vehicle. A top tether anchor is built into the vehicle. The top tether attachment (B) on the child restraint connects to the top tether anchor in the vehicle in order to reduce the forward movement and rotation of the child restraint during driving or in a crash.
- Page 45 Lower Anchor and Top Tether Anchor Locations Seating positions with top tether anchors. (Lower Anchor): Seating positions with two lower anchors. Rear Seat Each rear seating position has two exposed metal lower anchors in the crease between the seatback and the seat cushion.
- Page 46 Securing a Child Restraint Designed for the LATCH System CAUTION: If a LATCH-type child restraint is not attached to anchors, the restraint will not be able to protect the child correctly. In a crash, the child could be seriously injured or killed. Make sure that a LATCH-type child restraint is properly installed using the anchors, or use the vehicle’s safety belts to secure the restraint, following the...
- Page 47 CAUTION: Children can be seriously injured or strangled if a shoulder belt is wrapped around their neck and the safety belt continues to tighten. Secure any unused safety belts behind the child restraint so children cannot reach them. Pull the shoulder belt all the way out of the retractor to set the lock, if your vehicle has one, after the child restraint has been installed.
- Page 48 2.3. If you have an adjustable headrest or head restraint, raise the headrest or head restraint. 2.4. Route, attach, and tighten the top tether according to your child restraint instructions and the following instructions: If the position you are using does not have a headrest or head restraint and you are using a single tether, route the...
Page 49: Securing A Child Restraint In A Rear Seat Position
- Page 50 4. Pull the rest of the shoulder belt all the way out of 3. Push the latch plate into the buckle until it clicks. the retractor to set the lock. Make sure the release button is positioned so you would be able to unbuckle the safety belt quickly if necessary.
- Page 51 5. To tighten the belt, push down on the child restraint, pull the shoulder portion of the belt to tighten the lap portion of the belt, and feed the shoulder belt back into the retractor. If you are using a forward-facing child restraint, you may find it helpful to use your knee to push down on the child restraint as you tighten the belt.
Page 52: Securing A Child Restraint In The Right Front Seat Position
- Page 53 If your child restraint has the LATCH system, see Lower Anchors and Tethers for Children (LATCH) on page 1-39 for how to install your child restraint using LATCH. If you secure a child restraint using a safety belt and it uses a top tether, see Lower Anchors and Tethers for Children (LATCH) on page 1-39 for top tether anchor locations.
- Page 54 6. Pull the rest of the shoulder belt all the way out of the retractor to set the lock. 1-50 7. To tighten the belt, push down on the child restraint, pull the shoulder portion of the belt to tighten the lap portion of the belt and feed the shoulder belt back into the retractor.
Page 55: Airbag System
- Page 56 Airbags are designed to supplement the protection provided by safety belts. Even though today’s airbags are also designed to help reduce the risk of injury from the force of an inflating bag, all airbags must inflate very quickly to do their job. Here are the most important things to know about the airbag system: CAUTION:...
- Page 57 CAUTION: Airbags inflate with great force, faster than the blink of an eye. Anyone who is up against, or very close to, any airbag when it inflates can be seriously injured or killed. Do not sit unnecessarily close to the airbag, as you would be if you were sitting on the edge of your seat or leaning forward.
Page 58: Where Are The Airbags
- Page 59 Driver Side shown, Passenger Side similar If your vehicle has roof-rail airbags for the driver, right front passenger, and second row outboard passengers, they are in the ceiling above the side windows. CAUTION: If something is between an occupant and an airbag, the airbag might not inflate properly or it might force the object into that person causing severe injury or even death.
Page 60: When Should An Airbag Inflate
Page 61: what makes an airbag inflate, page 62: how does an airbag restrain.
- Page 63 CAUTION: When an airbag inflates, there may be dust in the air. This dust could cause breathing problems for people with a history of asthma or other breathing trouble. To avoid this, everyone in the vehicle should get out as soon as it is safe to do so.
Page 64: Passenger Sensing System
- Page 65 CAUTION: A child in a rear-facing child restraint can be seriously injured or killed if the right front passenger’s airbag inflates. This is because the back of the rear-facing child restraint would be very close to the inflating airbag. Even though the passenger sensing system is designed to turn off the right front passenger’s frontal airbag if the system detects a rear-facing child restraint, no system is...
- Page 66 If a child restraint has been installed and the on indicator is lit, turn the vehicle off. Remove the child restraint from the vehicle and reinstall the child restraint following the child restraint manufacturer’s directions and refer to Securing a Child Restraint in the Right Front Seat Position on page 1-48.
- Page 67 Safety belts help keep the passenger in position on the seat during vehicle maneuvers and braking, which helps the passenger sensing system maintain the passenger airbag status. See “Safety Belts” and “Child Restraints” in the Index for additional information about the importance of proper restraint use. If you ever pull the shoulder portion of the belt out all the way, you will engage the child restraint locking feature.
Page 68: Servicing Your Airbag-Equipped Vehicle
- Page 69 Adding Equipment to Your Airbag-Equipped Vehicle Is there anything I might add to or change about the vehicle that could keep the airbags from working properly? Yes. If you add things that change your vehicle’s frame, bumper system, height, front end or side sheet metal, they may keep the airbag system from working properly.
Page 70: Restraint System Check
Page 71: replacing restraint system parts after a crash.
- Page 72 NOTES 1-68...
Page 73: Features And Controls
Page 74: keys, page 75: remote keyless entry (rke) system.
- Page 76 Remote Keyless Entry (RKE) System Operation The Remote Keyless Entry (RKE) transmitter functions will work up to 195 feet (60 m) away, however, the operating range may be less while the vehicle is running. There are other conditions which can affect the performance of the transmitter.
- Page 77 If enabled through the DIC, and it is dark enough outside, the vehicle’s high-beam headlamps, parking lamps, and back-up lamps will turn on each time transmitter is pressed. These exterior lamps will stay on for 20 seconds, or until a door is opened. See “EXT (Exterior) LIGHTS”...
Page 78: Battery Replacement
- Page 79 After your vehicle’s engine has been started two times using the remote vehicle start button, the vehicle’s ignition switch must be turned to ON/RUN and then back to LOCK/OFF using the key before the remote start procedure can be used again. See Ignition Positions on page 2-21 for information regarding the ignition positions on your vehicle.
- Page 80 To manually shut off a remote start, do any of the following. The parking lamps will turn off to indicate the engine is off. • Aim the RKE transmitter at the vehicle and press and release the remote start button. •...
Page 81: Doors And Locks
Page 82: power door locks, page 83: automatic door lock, page 84: lockout protection, page 85: remote trunk release, page 86: windows, page 87: power windows, page 88: theft-deterrent systems, page 89: disarming the system, page 90: how the system alarm is activated.
- Page 91 ® PASS-Key III+ Operation ® Your vehicle has PASS-Key III+ (Personalized Automotive Security System) theft-deterrent system. ® PASS-Key III+ is a passive theft-deterrent system. The system is automatically armed when the key is removed from the ignition. You do not have to manually arm or disarm the system. The security light will come on if there is a problem with arming or disarming the theft-deterrent system.
Page 92: Starting And Operating Your Vehicle
- Page 93 Ignition Positions With the key in the ignition switch, you can turn it to four different positions. In order to shift out of PARK (P), automatic transmission, the ignition must be in ON/RUN or ACC/ACCESSORY and the regular brake pedal must be applied. Notice: Using a tool to force the key from the ignition switch could cause damage or break the key.
- Page 94 (ON/RUN): This is the position the switch returns to after you start your engine and release the switch. The switch stays in the ON/RUN position when the engine is running. But even when the ignition is not running, you can use ON/RUN to operate your electrical accessories and to display some warning and indicator lights.
- Page 95 Column Lock Release For vehicles with an automatic transmission, the following procedure allows the ignition to be turned to LOCK/OFF and ignition key removal in case of a dead battery or low voltage battery. 1. Make sure the shift lever is in PARK (P). 2.
Page 96: Starting The Engine
- Page 97 Starting Procedure 1. With your foot off the accelerator pedal, turn the ignition key to START. When the engine starts, let go of the key. The idle speed will go down as your engine gets warm. Do not race the engine immediately after starting it.
Page 98: Engine Coolant Heater
Page 99: automatic transmission operation.
- Page 100 If you cannot shift out of PARK (P), ease pressure on the shift lever and push the shift lever all the way into PARK (P) as you maintain brake application. Then press the shift lever button and then move the shift lever into another gear.
- Page 101 DRIVE (D): This position is for normal driving with the automatic transmission. It provides the best fuel economy for your vehicle. If you need more power for passing, and you are: • Going less than about 35 mph (55 km/h), push your accelerator pedal about halfway down.
Page 102: Manual Transmission Operation
Page 103: shift speeds, page 104: parking brake.
- Page 105 Shifting Into PARK (P) (Automatic Transmission) CAUTION: It can be dangerous to get out of your vehicle if the shift lever is not fully in PARK (P) with the parking brake firmly set. Your vehicle can roll. If you have left the engine running, the vehicle can move suddenly.
- Page 106 Leaving Your Vehicle With the Engine Running (Automatic Transmission) CAUTION: It can be dangerous to leave your vehicle with the engine running. Your vehicle could move suddenly if the shift lever is not fully in PARK (P) with the parking brake firmly set. And, if you leave the vehicle with the engine running, it could overheat and even catch fire.
Page 107: Parking Your Vehicle
Page 108: parking over things that burn, page 109: running the vehicle while parked, page 110: mirrors.
- Page 111 Outside Power Mirrors The controls for the outside power mirrors are located on the driver’s door armrest. Move the selector switch located below the four-way control pad to the left or right to choose either the driver’s side or passenger’s side mirror. To adjust a mirror, use the arrows located on the four-way control pad to move the mirror in the desired direction.
Page 112: Onstar System
- Page 113 Available Services with Safe & Sound Plan • Automatic Notification of Airbag Deployment • Advanced Automatic Crash Notification (AACN) (If equipped) • Link to Emergency Services • Roadside Assistance • Stolen Vehicle Location Assistance • AccidentAssist • Remote Door Unlock/Vehicle Alert •...
Page 114: How Onstar Service Works
Page 115: storage areas, page 116: sunroof, page 117: instrument panel.
- Page 118 Section 3 Driver Information Center (DIC) ...3-42 DIC Operation and Displays ...3-42 DIC Warnings and Messages ...3-44 DIC Vehicle Personalization ...3-50 Audio System(s) ...3-55 Setting the Clock ...3-56 Radio(s) ...3-59 Instrument Panel Using an MP3 ...3-69 XM Radio Messages ...3-74 Theft-Deterrent Feature ...3-75 Audio Steering Wheel Controls ...3-76 Radio Reception ...3-76...
- Page 119 NOTES...
Page 120: Instrument Panel Overview
- Page 121 The main components of the instrument panel are the following: A. Side Window Outlets. See Climate Control System on page 3-19. B. Air Outlets. See Outlet Adjustment on page 3-22. C. Turn Signal/Multifunction Lever. See Turn Signal/Multifunction Lever on page 3-7. D.
Page 122: Hazard Warning Flashers
Page 123: tilt wheel, page 124: turn and lane-change signals, page 125: windshield wipers, page 126: cruise control.
- Page 127 Setting Cruise Control CAUTION: If you leave your cruise control on when you are not using cruise, you might hit a button and go into cruise when you do not want to. You could be startled and even lose control. Keep the cruise control switch off until you want to use cruise control.
- Page 128 Resuming a Set Speed Suppose the cruise control is set at a desired speed and then the brake is applied. This disengages the cruise control. To return to the previously set speed, you do not need to go through the set process again. Once the vehicle is traveling at least 25 mph (40 km/h) or more, press the RES+ part of the button briefly.
- Page 129 Using Cruise Control on Hills How well the cruise control will work on hills depends upon the vehicle speed, load, and the steepness of the hills. When going up steep hills, you might have to step on the accelerator pedal to maintain the vehicle’s speed.
Page 130: Wiper Activated Headlamps
Page 131: headlamps on reminder, page 132: fog lamps, page 133: entry/exit lighting, page 134: battery run-down protection, page 135: climate controls.
- Page 136 Operation To change the current mode, select one of the following: (Vent): The air is directed though the instrument panel outlets. (Bi-Level): The air is split between the instrument panel outlets and the floor outlets. Cooler air is directed to the upper outlets and warmer air to the floor outlets.
Page 137: Defogging And Defrosting
Page 138: outlet adjustment, page 139: passenger compartment air filter.
- Page 140 3. Open the passenger compartment air filter door by reaching through the opening in the back of the glove box and raising the tab until the door can be opened downward. 3-24 4. Remove the filter by sliding it out of the housing. When installing a new air filter make sure the AIR FLOW arrow is pointing downward.
Page 141: Warning Lights, Gages, And Indicators
Page 142: instrument panel cluster, page 143: speedometer and odometer, page 144: safety belt reminders, page 145: airbag readiness light, page 146: passenger airbag status indicator.
- Page 147 CAUTION: Even though the passenger sensing system is designed to turn off the right front passenger’s frontal airbag if the system detects a rear-facing child restraint, no system is fail-safe, and no one can guarantee that an airbag will not deploy under some unusual circumstance, even though it is turned off.
Page 148: Charging System Light
Page 149: service, page 150: anti-lock brake system (abs) warning light.
- Page 151 Electronic Stability Control (ESC)/ Traction Control System (TCS) Indicator/Warning Light This light is located in the center of the instrument panel cluster. For vehicles that have the Electronic Stability Control (ESC) system or the Traction Control System (TCS), this indicator/warning light should come on briefly when the engine is started.
Page 152: Engine Coolant Temperature Warning Light
- Page 153 When the Light Flashes First and Then is Solid This indicates that there may be a problem with the Tire Pressure Monitor System. The light flashes for about a minute and stays on solid for the remainder of the ignition cycle. This sequence will repeat with every ignition cycle.
Page 154: If The Light Is On Steady
- Page 155 Have you recently changed brands of fuel? If so, be sure to fuel your vehicle with quality fuel. See Gasoline Octane on page 5-5. Poor fuel quality causes the engine not to run as efficiently as designed. You might notice this as stalling after start-up, stalling when you put the vehicle into gear, misfiring, hesitation on acceleration, or stumbling on acceleration —...
Page 156: Maintenance Schedule
Page 157: highbeam on light, page 158: dic operation and displays.
- Page 159 TRIP A or TRIP B Press the information button until TRIP A or TRIP B display. These modes show the current distance traveled since the last reset for each trip odometer in either miles (mi) or kilometers (km). Both odometers can be used at the same time.
Page 160: Dic Warnings And Messages
Page 161: brake fluid.
- Page 162 ENGINE DISABLED This message displays if the starting of the engine is disabled. Have your vehicle serviced by your dealer/retailer immediately. ENG (Engine) PWR (Power) REDUCED This message displays to inform you that the vehicle has reduced engine power to avoid damaging the engine.
Page 163: Power Steering
Page 164: service air bag.
- Page 165 SVC (Service) TIRE MONITOR This message displays if a part on the Tire Pressure Monitor System (TPMS) is not working properly. The tire pressure light also flashes and then remains on during the same ignition cycle. See Tire Pressure Light on page 3-36.
Page 166: Dic Vehicle Personalization
- Page 167 TIRE LEARN? This mode is available on vehicles without the Remote Keyless Entry (RKE) system. After rotating the tires or after replacing a tire or sensor, the Tire Pressure Monitor System (TPMS) must re-learn the tire positions. To re-learn the tire positions, see Tire Pressure Monitor System on page 5-56.
- Page 168 UNLOCK HORN If your vehicle has Remote Keyless Entry (RKE), this feature, which allows the vehicle’s horn to chirp on the first press of the unlock button on the RKE transmitter, can be enabled or disabled. When UNLOCK HORN appears on the display, press and hold the reset button for at least one second to scroll through the available settings: OFF (default): The horn will not chirp when the unlock...
- Page 169 DELAY LOCK This feature, which delays the actual locking of the vehicle, can be enabled or disabled. When DELAY LOCK appears on the display, press and hold the reset button for at least one second to scroll through the available settings: ON (default): The doors will not lock until five seconds after the last door is closed.
- Page 170 UNLK (Unlock) (Automatic Transmission Only) This screen displays only if your vehicle has an automatic transmission and DRIVER or ALL is selected for the AUTO UNLK feature. This feature determines when the automatic door unlocking will occur. When UNLK appears on the display, press and hold the reset button for at least one second to scroll through the available settings: KEY OFF: The door(s) will unlock when the key is...
Page 171: Audio System(S)
Page 172: setting the clock, page 173: with date display.
- Page 174 3. Press the pushbutton located under that label. The HR, MIN, MM, DD, YYYY displays. 4. Press the pushbutton located under any one of the labels you want to change. Every time the pushbutton is pressed again, the time or the date if selected, increases by one.
Page 175: Radio(S)
Page 176: playing the radio, page 177: setting preset stations, page 178: setting the tone.
- Page 179 To quickly adjust bass, midrange, or treble to the middle position, press the pushbutton positioned under the BASS, MID, or TREB label for more than two seconds. A beep sounds and the level adjusts to the middle position. To quickly adjust all tone and speaker controls to the middle position, press the knob for more than two seconds until a beep sounds.
Page 180: Finding A Category (Cat) Station
Page 181: radio messages, page 182: care of your cd player.
- Page 183 (Tune): Turn to select tracks on the CD currently playing. © ¨ SEEK : Press the left arrow to go to the start of the current track, if more than ten seconds have played. Press the right arrow to go to the next track. If either arrow is held, or pressed multiple times, the player continues moving backward or forward through the tracks on the CD.
- Page 184 (Information) (Radio with CD (Base)): Press to switch the display between the track number, elapsed time of the track, and the time. When the ignition is off, press this button to display the time. BAND: Press to listen to the radio while a CD is playing.
Page 185: Using An Mp3
Page 186: mp3 format.
- Page 187 Root Directory The root directory of the CD-R or CD-RW is treated as a folder. If the root directory has compressed audio files, the directory displays as F1 ROOT. All files contained directly under the root directory are accessed prior to any root directory folders. However, playlists (Px) are always accessed before root folders or files.
- Page 188 Preprogrammed Playlists Preprogrammed playlists that were created using WinAmp™, MusicMatch™, or Real Jukebox™ software, can be accessed, however, they cannot be edited using the radio. These playlists are treated as special folders containing compressed audio song files. Playing an MP3 Insert a CD-R or CD-RW partway into the slot (Single CD Player), or press the load button and wait for the message to insert disc (Six-Disc CD Player), label...
- Page 189 FWD (Fast Forward): Press and hold this button to advance playback quickly within an MP3 file. You will hear sound at a reduced volume. Release this button to resume playing the file. The elapsed time of the file displays. RDM (Random): With the random setting, MP3 files on the CD-R or CD-RW can be played in random, rather than sequential order, on one CD-R/CD-RW or all discs in a six-disc CD player.
Page 190: Xm Radio Messages
Page 191: theft-deterrent feature, page 192: audio steering wheel controls, page 193: fixed mast antenna.
- Page 194 NOTES 3-78...
Page 195: Driving Your Vehicle
Page 196: your driving, the road, and your vehicle, page 197: control of a vehicle, page 198: braking, page 199: antilock brake system (abs), page 200: braking in emergencies.
- Page 201 If your vehicle is in cruise control while TCS begins to limit wheel spin, the cruise control will automatically disengage. When road conditions allow you to safely use it again, the cruise control can be re-engaged. See Turn Signal/Multifunction Lever on page 3-7. When this light is on and either the SERVICE TRACTION or TRACTION...
Page 202: Traction Control Operation
Page 203: enhanced traction system (ets), page 204: electronic stability control (esc).
- Page 205 For more information, see Driver Information Center (DIC) on page 3-42 and Electronic Stability Control (ESC)/Traction Control System (TCS) Indicator/Warning Light on page 3-35. This light flashes on the instrument panel cluster when the ESC system is on and activated. ESC activates when the computer senses a discrepancy between your intended path and the direction the vehicle is actually travelling.
Page 206: Steering
Page 207: steering tips, page 208: steering in emergencies, page 209: off-road recovery.
- Page 210 Skidding In a skid, a driver can lose control of the vehicle. Defensive drivers avoid most skids by taking reasonable care suited to existing conditions, and by not overdriving those conditions. But skids are always possible. The three types of skids correspond to your vehicle’s three control systems.
Page 211: Driving At Night
Page 212: before leaving on a long trip, page 213: hill and mountain roads, page 214: winter driving.
- Page 215 If you have the Enhanced Traction System (ETS), it will improve your ability to accelerate when driving on a slippery road. Even if you have ETS, slow down and adjust your driving to the road conditions. See Enhanced Traction System (ETS) on page 4-9. If your vehicle does not have ETS, accelerate gently.
Page 216: If You Are Caught In A Blizzard
- Page 217 CAUTION: Snow can trap exhaust gases under your vehicle. This can cause deadly CO (carbon monoxide) gas to get inside. CO could overcome you and kill you. You cannot see it or smell it, so you might not know it is in your vehicle.
Page 218: If Your Vehicle Is Stuck In Sand, Mud, Ice, Or Snow
Page 219: loading your vehicle.
- Page 220 The Tire and Loading Information label also shows the tire size of the original equipment tires (C) and the recommended cold tire inflation pressures (D). For more information on tires and inflation see Tires on page 5-48 and Inflation - Tire Pressure on page 5-55.
- Page 221 Example 1 Item Description Vehicle Capacity Weight for Example 1 Subtract Occupant Weight 150 lbs (68 kg) Available Occupant and Cargo Weight Total Item 1,000 lbs (453 kg) 300 lbs (136 kg) 700 lbs (317 kg) Example 2 Description Vehicle Capacity 1,000 lbs Weight for (453 kg)
- Page 222 Example 3 Item Description Vehicle Capacity Weight for Example 3 Subtract Occupant Weight 200 lbs (91 kg) Available Cargo Weight Refer to your vehicle’s Tire and Loading Information label for specific information about your vehicle’s capacity weight and seating positions. 4-28 The combined weight of the driver, passengers, and cargo should never exceed your vehicle’s...
- Page 223 And, if you do have a heavy load, you should spread it out. See “Steps for Determining Correct Load Limit” earlier in this section. CAUTION: Do not load your vehicle any heavier than the Gross Vehicle Weight Rating (GVWR), or either the maximum front or rear Gross Axle Weight Rating (GAWR).
Page 224: Towing
Page 225: dinghy towing, page 226: dolly towing, page 227: if you do decide to pull a trailer, page 228: weight of the trailer, page 229: safety chains, page 230: driving with a trailer, page 231: making turns, page 232: parking on hills, page 233: maintenance when trailer towing.
- Page 234 NOTES 4-40...
Page 235: Service And Appearance Care
- Page 236 Section 5 Tire Inspection and Rotation ...5-62 When It Is Time for New Tires ...5-64 Buying New Tires ...5-65 Different Size Tires and Wheels ...5-66 Uniform Tire Quality Grading ...5-67 Wheel Alignment and Tire Balance ...5-68 Wheel Replacement ...5-68 Tire Chains ...5-70 If a Tire Goes Flat ...5-71 Changing a Flat Tire ...5-72 Removing the Spare Tire and Tools ...5-73...
Page 237: Service
Page 238: california perchlorate materials requirements, page 239: adding equipment to the outside of your vehicle, page 240: gasoline specifications, page 241: fuels in foreign countries, page 242: filling the tank.
- Page 243 CAUTION: Fuel can spray out on you if you open the fuel cap too quickly. If you spill fuel and then something ignites it, you could be badly burned. This spray can happen if your tank is nearly full, and is more likely in hot weather. Open the fuel cap slowly and wait for any hiss noise to stop.
Page 244: Filling A Portable Fuel Container
Page 245: hood release, page 246: engine compartment overview, page 247: engine oil, page 248: when to add engine oil, page 249: what kind of engine oil to use, page 250: engine oil life system, page 251: engine air cleaner/filter, page 252: automatic transmission fluid, page 253: manual transmission fluid, page 254: what to use.
- Page 255 CAUTION: Turning the surge tank pressure cap when the engine and radiator are hot can allow steam and scalding liquids to blow out and burn you badly. Never turn the surge tank pressure cap — even a little — when the engine and radiator are hot.
Page 256: Coolant Surge Tank Pressure Cap
Page 257: if no steam is coming from your engine, page 258: cooling system.
- Page 259 CAUTION: Heater and radiator hoses, and other engine parts, can be very hot. Do not touch them. If you do, you can be burned. Do not run the engine if there is a leak. If you run the engine, it could lose all coolant. That could cause an engine fire, and you could be burned.
Page 260: How To Add Coolant To The Coolant Surge Tank
- Page 261 CAUTION: Adding only plain water to the cooling system can be dangerous. Plain water, or some other liquid such as alcohol, can boil before the proper coolant mixture will. The vehicle’s coolant warning system is set for the proper coolant mixture. With plain water or the wrong mixture, the engine could get too hot but you would not get the overheat warning.
- Page 262 3. Fill the coolant surge tank with the proper mixture, to the COLD FILL line. Wait about five minutes, then check to see if the level is below the COLD FILL line. If the level is below the line, add additional coolant to bring the level up to the line.
Page 263: Windshield Washer Fluid
Page 264: brakes.
- Page 265 What to Add When you do need brake fluid, use only DOT-3 brake fluid. Use new brake fluid from a sealed container only. See Recommended Fluids and Lubricants on page 6-12. Always clean the brake fluid reservoir cap and the area around the cap before removing it.
Page 266: Brake Wear
Page 267: battery, page 268: jump starting.
- Page 269 Notice: Ignoring these steps could result in costly damage to your vehicle that would not be covered by your warranty. Trying to start your vehicle by pushing or pulling it will not work, and it could damage your vehicle. 1. Check the other vehicle. It must have a 12-volt battery with a negative ground system.
- Page 270 4. Open the hood on the other vehicle and locate the positive (+) and negative ( ) terminal locations on that vehicle. You will not see the battery of your vehicle under the hood. It is located in the trunk. You will not need to access your battery for jump starting.
- Page 271 CAUTION: Using a match near a battery can cause battery gas to explode. People have been hurt doing this, and some have been blinded. Use a flashlight if you need more light. Be sure the battery has enough water. You do not need to add water to the battery installed in your new vehicle.
- Page 272 7. Do not let the other end touch metal. Connect it to the positive (+) terminal of the good battery. Use a remote positive (+) terminal if the vehicle has one. 8. Now connect the black negative ( ) cable to the negative ( ) terminal of the good battery.
Page 273: Headlamp Aiming
- Page 274 Headlamp aiming is done with the vehicle’s low-beam headlamps. The high-beam headlamps will be correctly aimed if the low-beam headlamps are aimed properly. To adjust the vertical aim on the headlamps: 1. Open the hood. See Hood Release on page 5-11 for more information.
- Page 275 7. Locate the vertical headlamp aiming screws, which are under the hood near each headlamp assembly. The adjustment screw can be turned with a 6 mm socket wrench. 8. Turn the vertical aiming screw until the headlamp beam is aimed to the horizontal tape line. Turn it clockwise or counterclockwise to raise or lower the angle of the beam.
Page 276: Bulb Replacement
- Page 277 To replace one of these bulbs: 1. Open the hood. See Hood Release on page 5-11 for more information. 2. Remove the two hex bolts from the headlamp assembly. 3. Remove the two plastic fasteners from the fascia. 4. Pull the front fascia back. You might need someone else to assist you with Steps 3 and 4.
Page 278: Center High-Mounted Stoplamp (Chmsl)
Page 279: taillamps, turn signal, stoplamps and back-up lamps (sedan), page 280: back-up lamps (coupe), page 281: replacement bulbs, page 282: tires, page 283: tire sidewall labeling.
- Page 284 (F) Uniform Tire Quality Grading (UTQG) manufacturers are required to grade tires based on three performance factors: treadwear, traction and temperature resistance. For more information see Uniform Tire Quality Grading on page 5-67. (G) Maximum Cold Inflation Load Limit Maximum load that can be carried and the maximum pressure needed to support that load.
- Page 285 (F) Tire Size A combination of letters and numbers define a tire’s width, height, aspect ratio, construction type and service description. The letter T as the first character in the tire size means the tire is for temporary use only. (G) TPC Spec (Tire Performance Criteria Specification) Original equipment tires designed...
Page 286: Tire Terminology And Definitions
- Page 287 GAWR RR Gross Axle Weight Rating for the rear axle. See Loading Your Vehicle on page 4-25. Intended Outboard Sidewall an asymmetrical tire, that must always face outward when mounted on a vehicle. Kilopascal (kPa) The metric unit for air pressure. Light Truck (LT-Metric) Tire light duty trucks and some multipurpose passenger vehicles.
- Page 288 Radial Ply Tire A pneumatic tire in which the ply cords that extend to the beads are laid at 90 degrees to the centerline of the tread. A metal support for a tire and upon which the tire beads are seated. Sidewall The portion of a tire between the tread and the bead.
Page 289: Inflation - Tire Pressure
Page 290: tire pressure monitor system.
- Page 291 Please note that the TPMS is not a substitute for proper tire maintenance, and it is the driver’s responsibility to maintain correct tire pressure, even if under-inflation has not reached the level to trigger illumination of the TPMS low tire pressure telltale. Your vehicle has also been equipped with a TPMS malfunction indicator to indicate when the system is not operating properly.
Page 292: Tire Pressure Monitor Operation
Page 293: tpms malfunction light and message, page 294: tpms sensor matching process.
- Page 295 7. The passenger side rear turn signal comes on to indicate that corner sensor is ready to be learned. Proceed to the passenger side rear tire and repeat the procedure in Step 5. 8. The driver side rear turn signal comes on to indicate that corner sensor is ready to be learned.
Page 296: Tire Inspection And Rotation
- Page 297 When rotating the vehicle’s tires, always use the correct rotation pattern shown here. Do not include the compact spare tire in the tire rotation. After the tires have been rotated, adjust the front and rear inflation pressures as shown on the Tire and Loading Information label. See Inflation - Tire Pressure on page 5-55 and Loading Your Vehicle on page 4-25.
Page 298: When It Is Time For New Tires
Page 299: buying new tires, page 300: different size tires and wheels, page 301: uniform tire quality grading, page 302: wheel alignment and tire balance, page 303: used replacement wheels, page 304: tire chains, page 305: if a tire goes flat, page 306: changing a flat tire, page 307: removing the spare tire and tools.
- Page 308 A. Cover B. Retainer C. Spare Tire D. Wing Nut E. Jack and Wheel Wrench F. Bolt 5-74...
- Page 309 3. Remove the retainer (B) that holds down the spare tire. See Compact Spare Tire on page 5-85 for more information. 4. Remove the spare tire (C) by gently pulling it up and out of the trunk. 5. Remove the wing nut (D) that holds the jack and remove the jack and wheel wrench (E).
- Page 310 A. Retainer B. Jack and Wheel Wrench C. Spare Tire D. Foam Support E. Bolt 5-76...
- Page 311 3. Remove the retainer (A) that holds down the jack, wheel wrench (B) and spare tire (C). 4. Remove the spare tire by gently pulling it up and out of the trunk. The tools you will be using include the jack (A) and wheel wrench (B).
Page 312: Removing The Flat Tire And Installing The Spare Tire
- Page 313 3. Using the flat end of the wheel wrench, pry along the edge of the wheel cover until it comes off. Store the wheel cover in the trunk until you have the flat tire repaired or replaced. 4. Use the wheel wrench to loosen all the wheel nuts. Do not remove them yet.
- Page 314 7. Raise the jack head until it fits firmly in the vehicle’s frame, where the notch is located, nearest the flat tire. 8. Put the compact spare tire near the flat tire. CAUTION: Getting under a vehicle when it is jacked up is dangerous.
- Page 315 CAUTION: Rust or dirt on a wheel, or on the parts to which it is fastened, can make wheel nuts become loose after time. The wheel could come off and cause an accident. When you change a wheel, remove any rust or dirt from places where the wheel attaches to the vehicle.
- Page 316 CAUTION: Incorrect or improperly tightened wheel nuts can cause the wheel to come loose and even come off. This could lead to a crash. If you have to replace them, be sure to get new original equipment wheel nuts. Stop somewhere as soon as you can and have the nuts tightened with a torque wrench to the proper torque specification.
Page 317: Storing A Flat Or Spare Tire And Tools
- Page 318 A. Cover B. Retainer C. Jack and Wheel Wrench D. Stow Bolt Extension Rod E. Spare Tire F. Foam Support G. Bolt Uplevel Model 5-84 To store a flat or spare tire and tools: 1. Remove the stow bolt extension rod and sleeve from the jack.
Page 319: Compact Spare Tire
Page 320: appearance care, page 321: fabric/carpet, page 322: instrument panel, vinyl, and other plastic surfaces, page 323: care of safety belts, page 324: cleaning exterior lamps/lenses, page 325: windshield and wiper blades, page 326: aluminum or chrome-plated wheels and trim, page 327: tires, page 328: vehicle care/appearance materials, page 329: vehicle identification, page 330: electrical system, page 331: fuses and circuit breakers.
- Page 332 5-98 Fuses Usage Fuse Puller Empty Empty Empty Empty Amplifier Cluster Ignition Switch, PASS-Key Stoplamp Heating, Ventilation, Air Conditioning, PASS-Key Empty Spare Airbag Spare Windshield Wiper Climate Control System, Ignition Window Retained Accessory Power ® ®...
Page 333: Engine Compartment Fuse Block
- Page 334 5-100 Fuses Usage SPARES Spares Blank Blank Blank Blank REAR DEFOG Rear Defogger COOL FAN2 Engine Cooling Fan High Speed CRNK Starter COOL FAN 1 Engine Cooling Fan Low Speed BCM3 Body Control Module 3 BCM2 Body Control Module 2 FOG LAMP Fog Lamps HORN...
- Page 335 Fuses Usage Electric Power Steering AIR PUMP AIR Pump PRK LAMP Parking Lamps Windshield Wiper IP IGN Ignition A/C CLTCH Air Conditioning Clutch CHMSL Center High Mount Stop Lamp ABS2 Antilock Brake System 2 Blank Blank Engine Control Module, ECM/TRANS Transmission BCK UP Back-Up Lamps...
Page 336: Capacities And Specifications
- Page 337 Application Transmission, Automatic (Complete Drain and Refill) Transmission, Manual (Complete Drain and Refill) 2.2L L4 and 2.4L L4 Engines Wheel Nut Torque All capacities are approximate. When adding, be sure to fill to the appropriate level, as recommended in this manual.
- Page 338 NOTES 5-104...
- Page 339 Section 6 Maintenance Schedule ...6-2 Introduction ...6-2 Maintenance Requirements ...6-2 Your Vehicle and the Environment ...6-2 Using the Maintenance Schedule ...6-3 Scheduled Maintenance ...6-4 Additional Required Services ...6-6 Maintenance Footnotes ...6-7 Maintenance Schedule Owner Checks and Services ...6-8 At Each Fuel Fill ...6-8 At Least Once a Month ...6-9 At Least Once a Year ...6-9 Recommended Fluids and Lubricants ...6-12...
Page 340: Maintenance Schedule
Page 341: using the maintenance schedule, page 342: scheduled maintenance.
- Page 343 Scheduled Maintenance Service Maintenance I Maintenance II Change engine oil and filter. See Engine Oil on page 5-13. Reset oil life system. See Engine Oil Life System on page 5-16. An Emission Control Service. Visually check for any leaks or damage. See footnote (j). Inspect engine air cleaner filter.
Page 344: Additional Required Services
Page 345: maintenance footnotes, page 346: owner checks and services, page 347: at least once a month, page 348: ignition transmission lock check, page 349: underbody flushing service, page 350: recommended fluids and lubricants.
- Page 351 Usage Fluid/Lubricant Multi-Purpose Lubricant, Superlube Key Lock (GM Part No. U.S. 12346241, Cylinders in Canada 10953474). Chassis Lubricant Manual (GM Part No. U.S. 12377985, Transmission in Canada 88901242) or lubricant Shift Linkage meeting requirements of NLGI #2, Category LB or GC-LB. Chassis Lubricant (GM Part No.
Page 352: Maintenance Replacement Parts
Page 353: engine drive belt routing, page 354: maintenance record.
- Page 355 Maintenance Record (cont’d) Odometer Maintenance I or Date Serviced By Services Performed Reading Maintenance II 6-17...
- Page 356 Maintenance Record (cont’d) Odometer Maintenance I or Date Serviced By Services Performed Reading Maintenance II 6-18...
Page 357: Customer Assistance Information
Page 358: customer assistance and information.
- Page 359 Although you may be required to resort to this informal dispute resolution program prior to filing a court action, use of the program is free of charge and your case will generally be heard within 40 days. If you do not agree with the decision given in your case, you may reject it and proceed with any other venue for relief available to you.
Page 360: Online Owner Center
Page 361: customer assistance for text telephone (tty) users, page 362: gm mobility reimbursement program, page 363: roadside assistance program.
- Page 364 However, any cost for parts and labor for non-warranty repairs are the responsibility of the driver. Pontiac and General Motors of Canada Limited reserve the right to limit services or reimbursement to an owner or driver when, in their sole discretion, the claims become...
- Page 365 Roadside Assistance is not part of or included in the coverage provided by the New Vehicle Limited Warranty. Pontiac and General Motors of Canada Limited reserve the right to make any changes or discontinue the Roadside Assistance program at any time without...
Page 366: Scheduling Service Appointments
Page 367: additional program information, page 368: collision damage repair, page 369: if a crash occurs.
- Page 370 • If possible, call your insurance company from the scene of the crash. They will walk you through the information they will need. If they ask for a police report, phone or go to the police department headquarters the next day and you can get a copy of the report for a nominal fee.
Page 371: Reporting Safety Defects
Page 372: service publications ordering information, page 373: vehicle data recording and privacy, page 374: onstar.
- Page 375 Accessories and Modifications ... 5-3 Adding Equipment to Your Airbag-Equipped Vehicle ... 1-65 Additives, Fuel ... 5-6 Add-On Electrical Equipment ... 5-96 Air Cleaner/Filter, Engine ... 5-17 Air Conditioning ... 3-19 Airbag Passenger Status Indicator ... 3-30 Readiness Light ... 3-29 Airbag System ...
- Page 376 Audio System ... 3-55 Audio Steering Wheel Controls ... 3-76 Fixed Mast Antenna ... 3-77 Radio Reception ... 3-76 Setting the Clock ... 3-56 Theft-Deterrent Feature ... 3-75 XM™ Satellite Radio Antenna System ... 3-77 Audio System(s) ... 3-59 Automatic Door Lock ... 2-11 Automatic Transmission Fluid ...
- Page 377 CD, MP3 ... 3-69 Center Console Storage Area ... 2-43 Center High-Mounted Stoplamp (CHMSL) ... 5-44 Chains, Tire ... 5-70 Charging System Light ... 3-32 Check Engine Light ... 3-37 Checking Things Under the Hood ... 5-10 Chemical Paint Spotting ... 5-93 Child Restraints Child Restraint Systems ...
- Page 378 Cooling System ... 5-24 Cruise Control ... 3-10 Cupholder(s) ... 2-43 Customer Assistance Information Courtesy Transportation ... 7-10 Customer Assistance for Text Telephone (TTY) Users ... 7-5 Customer Assistance Offices ... 7-5 Customer Satisfaction Procedure ... 7-2 GM Mobility Reimbursement Program ... 7-6 Reporting Safety Defects to General Motors ...
- Page 379 Easy Entry Seat ... 1-8 EDR ... 7-17 Electrical System Add-On Equipment ... 5-96 Engine Compartment Fuse Block ... 5-99 Floor Console Fuse Block ... 5-97 Fuses and Circuit Breakers ... 5-97 Headlamp Wiring ... 5-96 Power Windows and Other Power Options ... 5-96 Windshield Wiper Fuses ...
- Page 380 Fuel ... 5-5 Additives ... 5-6 California Fuel ... 5-6 Filling a Portable Fuel Container ... 5-10 Filling the Tank ... 5-8 Fuels in Foreign Countries ... 5-7 Gage ... 3-41 Gasoline Octane ... 5-5 Gasoline Specifications ... 5-6 Running Out of ... 2-37 Fuses Engine Compartment Fuse Block ...
- Page 381 Ignition Positions ... 2-21 Infants and Young Children, Restraints ... 1-32 Inflation - Tire Pressure ... 5-55 Instrument Panel Overview ... 3-4 Instrument Panel (I/P) Brightness ... 3-16 Cluster ... 3-26 Jump Starting ... 5-34 Keyless Entry System ... 2-3 Keys ...
- Page 382 Loading Your Vehicle ... 4-25 Lockout Protection ... 2-12 Locks Automatic Door Lock ... 2-11 Delayed Locking ... 2-10 Door ... 2-9 Lockout Protection ... 2-12 Power Door ... 2-10 Programmable Automatic Door Unlock ... 2-11 Rear Door Security Locks ... 2-11 Loss of Control ...
- Page 383 Navigation System, Privacy ... 7-18 New Vehicle Break-In ... 2-20 Odometer ... 3-27 Off-Road Recovery ... 4-15 Engine ... 5-13 Pressure Light ... 3-40 Oil, Engine Oil Life System ... 5-16 Older Children, Restraints ... 1-30 Online Owner Center ... 7-4 OnStar, Privacy ...
- Page 384 Radio Frequency Identification (RFID), Privacy ... 7-18 Radio(s) ... 3-59 Radios Reception ... 3-76 Setting the Clock ... 3-56 Theft-Deterrent ... 3-75 Rear Door Security Locks ... 2-11 ® Rearview Mirror with OnStar ... 2-38 Rearview Mirrors ... 2-38 Reclining Seatbacks ... 1-4 Recommended Fluids and Lubricants ...
- Page 385 Seats Driver Seat Height Adjuster ... 1-3 Easy Entry Seat ... 1-8 Head Restraints ... 1-7 Heated Seats ... 1-4 Manual Lumbar ... 1-3 Reclining Seatbacks ... 1-4 Split Folding Rear Seat ... 1-9 Securing a Child Restraint Rear Seat Position ... 1-45 Right Front Seat Position ...
- Page 386 Tachometer ... 3-27 Taillamps Turn Signal Lamps ... 5-44 Turn Signal, Stoplamps and Back-up Lamps ... 5-45 Theft-Deterrent, Radio ... 3-75 Theft-Deterrent Systems ... 2-16 Content Theft-Deterrent ... 2-17 ® PASS-Key III+ ... 2-18 ® PASS-Key III+ Operation ... 2-19 Tilt Wheel ...
- Page 387 Transmission Operation, Automatic ... 2-27 Transmission Operation, Manual ... 2-30 Trunk ... 2-12 Turn and Lane-Change Signals ... 3-8 Turn Signal/Multifunction Lever ... 3-7 Uniform Tire Quality Grading ... 5-67 Up-Shift Light ... 3-32 Using this Manual ... iii Vehicle Control ...
- Page 388 Windshield Washer ... 3-10 Washer Fluid ... 5-29 Wiper Blade Replacement ... 5-47 Wiper Blades, Cleaning ... 5-91 Wiper Fuses ... 5-96 Wipers ... 3-9 Winter Driving ... 4-20 Wiper Activated Headlamps ... 3-14 XM Radio Messages ... 3-74 XM™ Satellite Radio Antenna System ... 3-77 Your Vehicle and the Environment ...
Rename the bookmark
Delete bookmark, delete from my manuals, upload manual.

- Forum Listing
- Marketplace
- Advanced Search
- Technical Solstice Discussion
- General Tech, Platform Common Issues & Solutions
Cruise control not working

- Add to quote
Don't think I've seen anyone else have this problem, but this morning my cruise control would not work. Tried turning it off and back on a couple of times. Nothing, set or resume, nothing. Anyone else have this problem? First thought is maybe an ill-seated fuse :dunno:

I had a problem on the way to the Skyline Drive meet. It had worked great for several hours, then after a stop it just would not engage. On-Off-On-Off, nothing seemed to work. Then about an hour later I tried it and it worked great. No problem since. Still have not checked the fuse, hard to imagine that a loose fuse could reseat itself.

I had the same on the Ruidoso NM ride last weekend. Would only engage when the minus button was pushed...at the dealer today for the interior door handle "chrome" bubbling off...more to follow.
Update..... Cruise control worked no problem on the way home. The car seemed a little funny at one point on the way home after beating on it a little. I like to check codes with the DH after doing that because the code I've had a problem with, will "flag", but not cause the light to come on. I found a P0833. Came up as "unknown" on the DH. I pasted it into google with GM and came up with this interesting thread. I almost fell over when I got to the third post. Very informative and posted below. While it doesn't mention the '07 Solstice, it does mention the '07 Sky... http://www.ls1gto.com/forums/showthread.php?t=189557 +1 I know for sure this was an issue on Cobalt SS models. P0833 correct? here is the TSB for this. Subject: P0833 and/or Cruise Control Inop - keywords 5sp 6sp clutch M12 MM6 MZ6 M10 pedal switch transmission PIP3673a #PIP3673C - (04/12/2007) Models: 2004-2006 Cadillac CTS-V 2004-2006 Chevrolet Cobalt, Corvette, Silverado and SSR 2006-2007 Chevrolet HHR 2004-2006 Pontiac GTO 2006 Pontiac Pursuit and Solstice 2007 Pontiac G5 2007 Saturn SKY 2006-2007 Saturn Ion 2004-2006 GMC Sierra Equipped With Manual Transmission This PI Superecedes To Include 2007 Saturn SKY. Please Discard PIP3673B. The following diagnosis might be helpful if the vehicle exhibits the symptom(s) described in this PI. Condition/Concern: Cruise control inoperative and/or MIL on with DTC P0833 stored. The condition may not be able to be duplicated by the dealer yet the customer may have a repeat concern. Recommendation/Instructions: Check the "Top of Travel" or CCP switch for adjustment if your application is adjustable. Also check for possible intermittent connections in the clutch switch circuit It has been discovered in some applications that during circuit testing of the (CCP) clutch switch, the Tech II may read APPLIED/RELEASE if toggled several times then stop toggling and remain in either the APPLIED or RELEASED state. Although if the switch is checked with a DVOM the switch will toggle from open to closed. Use of a DVOM to check clutch and cruise switches is recommended instead of monitoring Tech 2 data. If no circuit concerns are found, this code can be induced by certain driving habits. This code can set (and the cruise control disabled) if the driver rests their foot on the clutch continuously and could potentially keep the pedal from reaching the top switch. This will keep the ECM from seeing transitions while they drive above and then below the vehicle speeds listed for setting the DTC. This can cause a false P0833 to set. An example of this occurring would be in slow moving stop and go traffic such as a construction zone or heavy traffic. Please make the customer aware of this scenario and advise to make an effort to refrain from resting their foot on the clutch pedal in these situations to avoid disabling the cruise control and/or setting DTC P0833. Please follow this diagnostic or repair process thoroughly and complete each step. If the condition exhibited is resolved without completing every step, the remaining steps do not need to be performed.
2009 soltice gxp, auto transmision, Cruise control was working fine, hit an on ramp to get onto the highway which had a bit of a jarring bump. The coolent light when on then off, and at that point cruise control stopped working. Any ideas?

There are multiple instances of cruise not working. Some were a result of the center brake light burning out and giving a false reading to the BCM which inhibits enabling of the cruise. I experienced multiple incidents of the cruise working while on a trip on the freeway, then when I stopped for fuel when I re-enterd the freeway the cruise indicated on but would not engage. After a length of time, it always returned for operation but was very irritating. I found that if I always turn the cruise off when shutting down the car it would be in service when restarting the car. I also found that when the cruise would not engage, a firm braking action while driving at speed would force the BCM to the disengaged state such that when I then pressed the set button, the cruise would then engage. Its like it gets into a state that is neither ON nor OFF and until you force it into the OFF state it does not want to go to ON again.

My cruise exhibited strange behavior several times over a couple of years. I'd drive a couple hundred miles and it would decide to turn off any time I activated the turn signal -- like every time I changed lanes to pass some one. When I stopped and shut it off, it usually worked fine for a time. I do think there were a couple of times it would not engage at all. By the time I got home, it would not fail, of course. I did mention it to the dealer, but they didn't find anything. It didn't happen all last driving season. The ignition switch was replaced sometime in there, so it is possible that replacing the ignition switch fixed it. Now watch. Since I posted this, it will start failing again on the trip to the Poconos. Or maybe after the recall switch replacement has been completed.

lol - I was just going to warn you against tempting fate like that!
- ?
- 38.4K members
Top Contributors this Month

- Shopping Cart 0
2008 Pontiac G5 Cruise Control Components

Popular Products

- 2008 Pontiac G5 Base
- 2008 Pontiac G5 Basico
- 2008 Pontiac G5 GT
- 2008 Pontiac G5 LS
- 2008 Pontiac G5 SE
- High Quality 2008 Pontiac G5 After Market Accessories
- Buy 08 Pontiac G5 Door Handles
- my account Sign in Register

Pontiac G5 2007-2010 Complete Cruise Control Kit
This is a complete cruise control kit for the 2007-2010 Pontiac G5. Works with automatic and manual transmission. This kit will require programming by a local GM dealer after installation ( instructions for dealer are below ). Very simple installation...
© 2024 The Cruise Control Store Powered by BigCommerce All rights reserved. | Sitemap

- Forum Listing
- Marketplace
- Advanced Search
- Technical Discussion & Modifications
- Problems and Solutions
HELP! Cruise Control Not Working!!!

- Add to quote
The cruise control is used often by my wife on the Hwy, it was working fine this morning, but on the way home she could NOT get it to work at all. The green dash light indicating that cruise is "on" doesn't even come on....... Other then checking the fuses, is there ANY other COMMON problems that would cause the cruise too not work..... Thankx.

there was a recall on certain 6's so check that. if your g6 is not covered by the recall then it is the brake lamp switch. other problems she should occur are constant running exterior brake lamps and trouble shifting out of park (if this happens push the brake pedal in very VERY far and it will shift). I just had all these problems plus the cruise control issue and they were all linked to a POS Brake Lamp Switch.

Hmm interesting, I'm occassionally having the same issue with my car thinking it was Torque Lock. However, everytime I stop my car, I engage the parking brake and shift into park like you're supposed to, only for it not to shift out of park. The brake lights at the rear would on and only when they shut off am I finally able to shift out of park. Plus as you mentioned, the cruise control would sometimes cut out as I'm driving and would only turn back on once my vehicle comes to a complete stop. My co-worker who was following behind me told me that while I was driving, my brake lights would continuously be on. I have a 2006 Pontiac G6 GT, so would all this be a reult of the POS Brake lamp switch as well?
Jman0079 it does sound like it would be a faulty pos brake switch to me!!! And just to update, my wife hasen't had any more problems since this first happened....weird?!?!
haha i put pos as in piece of shit....the only name ive heard is just "Brake Lamp Switch" sorry for the confusion
I was not receiving any codes but had issues with cruise, power locks and remote start. It was imtermittent problem that made it hard to diagnose. Check to make sure everything else is working properly. I discovered that the auto door locks didn't lock when I moved the shifter into drive and didn't open when moved back to park. The cruise did not work, the remote start wouldn't work and the transmission did not shift smoothly. After 3 trips to the dealer they found a (TSB) technical service bulletin that told them to reflash the (ECM) computer. Dealer completed this last week and issue was resolved.
Cruise Control/Brake Light Problem I am having the same problem with my 2008 G6. I first noticed this a couple years ago when I was driving and the cruise control all of a sudden switched off. This kept happening intermittently for several day then a co-worker told me that I was riding my brakes. I took it back to the dealer and they said that they could not diagnose the problem unless it was currently occurring. This went on for about a month and many trips back to the dealer. Finally I took the technician out and it happened to him. They did something and it went away. A year later it came back. I went through the same BS about not being able to diagnose it unless it was currently occurring. They finally got it and fixed it. Here we are about a year later and I am having the same problem and the same BS with The dealer. Even though it is the same problem, they won't even look at it unless the problem is occurring. Has anyone had this problem and got it resolved? Getting very frustrated. The dealer has been no help and I am afraid the warranty will run out. PS - Sorry for the long lengthy reply, I needed to vent.
BradThePilot said: I am having the same problem with my 2008 G6. I first noticed this a couple years ago when I was driving and the cruise control all of a sudden switched off. This kept happening intermittently for several day then a co-worker told me that I was riding my brakes. I took it back to the dealer and they said that they could not diagnose the problem unless it was currently occurring. This went on for about a month and many trips back to the dealer. Finally I took the technician out and it happened to him. They did something and it went away. A year later it came back. I went through the same BS about not being able to diagnose it unless it was currently occurring. They finally got it and fixed it. Here we are about a year later and I am having the same problem and the same BS with The dealer. Even though it is the same problem, they won't even look at it unless the problem is occurring. Has anyone had this problem and got it resolved? Getting very frustrated. The dealer has been no help and I am afraid the warranty will run out. PS - Sorry for the long lengthy reply, I needed to vent. Click to expand...
Here are the various "fixes" I have read that the dealers try to correct this issue: applying dielectric silicone "grease" to the C1(X1) & C2(X2) BCM connectors rezeroing the brake pedal position sensor replacing the brake pedal position sensor replacing the electronic brake control module replacing the BCM I could be leaving something out Some fixes seem to work for some folks (at least for awhile).

I can vouch for the dielectric grease application on the BCM connectors. I had the stuck brake light problem (and non-functional cruise) and an application of grease to the connectors solved the problem immediately (and has prevented a reoccurrence for several months now). As for GM, I'm done with their cars. I enjoyed my G6 the first 4 years but it's failing apart and has required $1200+ in major repairs this year alone. It's only got 87,000 miles and I didn't abuse it, yet it feels like something twice as old now. I have a feeling problems with early G6's will become more and more common as they age, well above the average and more severe than other cars of that era.
greenman and CharlesP are correct. Try the dialectic grease as it worked on my wifes G6. I actually made a youtube vid for it but I'm on my work pc and can't post it right now. Search "g6 brake light" and you should find it pretty easily.
https://www.youtube.com/watch?v=N7RA7Mc_tLo
That's a good video but I would add two things: -disconnect the ground side of the battery before pulling BCM connectors -he shows applying dielectric silicone grease to the C1 connector & I would also do the C2 connector above it since you're in there already
- ?
- 143.2K posts
- 39.4K members
Top Contributors this Month


- Forum Listing
- Marketplace
- Advanced Search
- Chevy Cobalt
- Problems and Service
Cruise Control Not Working??
- Add to quote
My 2008 Cobalt LT came with factory installed cruise control. I went to use it the other day and when I pushed the button on the steering wheel to turn it on the light on it came on like it was on. BUT when I hit set nothing happened and the cruise control didn't set. I have not replaced any tail lights or done any modifications to the car. What should I check to try to figure out why it isn't working? Thanks! Shelly P.

Turn the key to on have someone press the brake pedal or put something heavy on it if you're alone and check if your high brake light works?
Just checked it and it is not working. NONE of my back brake lights or the back turn signals are working. Checked the fuse & relay labeled CHMSL in Engine Compartment Fuse Block and both seem fine. Also checked fuse #9 in the Floor console fuse block and it is fine. My back lights do blink when I unlock my doors, my headlights r working fine, and my front turn signal lights blink when turned on. I have no idea what else to check. If any1 has any clue what this could be or how to go about figuring out what it might be please help. Me and my kids have a trip coming up this weekend that we can't miss and have to drive my car there. Thanks!
Can you tell me where the one in the trunk is located? I have the owners manual but can't seem to find it in there. Thank you so much for your help.
Thank you so much for your help. I replaced all 3 bulbs in my Center High Mount Stop Lamp and the bulbs in both tail lamps/turn signals and both are working. Cruise Control is also working now!!! But I still have no back turn signals.... the front turn signals are working. Any idea what I should check next to figure out why back turn signals are not working?? Also my back hazard flashers are not working but the front ones are....

Are you 100% sure that you put the correct tail/blinker light bulbs in?
You need 3157 in the back. You probably don't have brake lights either except for third brake light.
Got turn signals fixed!!! I had the right bulbs in. The back turn signal lights in my Cobalt use a 3057 and the front uses a 3157. But after checking everything again and another trip to the auto parts store I figured out that the bulbs I had bought for my tail lamps/turn signals were defective. Replaced them with a new set and all my back lights are working!! Thank you so much for all your help. I now have working back lights and cruise control..... now I can focus on trying to figure out why the service airbag light is on and the passenger side airbag is staying off... then I'd be all set LOL Again thank you and I appreciate your help!
Check the connector under the passenger seat, sometimes a bottle can roll and catch the wires.
Thanks Colby7 for your suggestion. Sorry took so long to reply been busy and out of town a lot lately and not had a chance to fool with it. I checked the connector under the passenger seat and it was still connected. I unplugged it and re-plugged it back in just 2 be sure and the light is still on. I had it hooked up to see what codes it was throwing and strange as it may sound my car was throwing out no codes. The guy was baffled as to why my service airbag light would be on with no codes coming up. So he went and got another tester off the shelf that was specifically for detecting codes for airbags and any other codes and still it read out no codes. I was hoping not to have to take it to the dealership since any work they do winds up being very costly but looks like I might have to.
- ?
- 619.3K posts
- 29.1K members
Top Contributors this Month

Pontiac G5: Brake Lights Not Working Diagnosis

Brake lights are one of the most critical safety features that your Pontiac G5 has. They let other drivers know when you are slowing down, and that they need to slow down too. If your brake lights aren’t working, you’re way more likely to get rear ended than normal. The good news is that troubleshooting brake lights that aren’t working isn’t too difficult. The most common cause for this is a bad brake light switch.
You can test whether or not your G5’s brake lights are working all by yourself. Just back up really close to the garage door and push the pedal. You should be able to see the brake lights illuminating the door. If even one of them comes on, you know that the brake light fuse isn’t blown. We’ll go into more depth on that below.
Driving without the brake lights working is just as unsafe as if your G5’s brake lights were stuck on .
1. Check the Fuse
If none of the brake lights are working, we are going to follow the circuit from the fuse box back to the brake pedal. At some point the power is not getting from point A to point B. We just have to find where that is.
Please note that tail lights can work even if the brake lights are burned out. It is entirely possible that all the brake lights burned out at the same time.

The first thing that you should do if all of the brake lights are not working is check the fuse. It’ll be clearly labeled. It usually says something along the lines of “stop lamps” or stop. You can pull it and visually inspect it to make sure that it is not broken.
Even if it looks fine, if you have another fuse of the same amperage, swap it anyway. What works better is using a simple electrical test light to determine if the circuit works. Wal-Mart and any parts store will keep them in stock, usually at $10 or less.
Just hook the clip of the light up to a good ground and touch the two metal tabs on top of the fuse. There is no need to pull the fuse for this. It should be “hot” on both sides. If it is not, replace the fuse. If it blows more than once, it’s likely that your G5’s wiring harness has been damaged on the way to the brake lights. Make sure to put the same size fuse back in
2. Check your G5’s Brake Light Switch
Ok, now we’ve confirmed that there is power going to the brake light circuit, it’s time to figure out where in the path from the fuse box to the brake lights the power is lost. The most common location is the brake light switch . The good news is they are inexpensive and easy to replace.
Your G5’s brake light switch is under the brake pedal. It ALWAYS should have power running to it, even if the key is off. We need definitely need a test light at this point. The video below shows exactly how to do this.
He has the brake light switch out of the vehicle, which makes it way easier to see. You do not need to do this.
Basically, there are two wires, one is alway hot. When you press the brake pedal down, it sends this power to the brake lights. This is the most likely failure point.
If your vehicle has cruise control, it may appear as though there are two brake switches. The other one is to tell the cruise control to turn off when you press the brake pedal. You may need to consult your manual to determine which one is which. But, as a general rule, the cruise control switch will not have power going to it when the key is off like the brake light switch does.
3. Check for a Bad Ground
If there is a ground wire running to the brake light switch, make sure that it is secured tightly and corrosion free. If you can’t find the ground wire at all, run a jumper wire to substitute for the ground wire.
Now test the brake light switch. If it works, fix the ground wire.
4. Other Wiring Issues
If your G5’s brake light switch checked out ok, and there are no brake lights illuminating at all, inspect the wiring harness going from the brake switch to the bulbs themselves. There could be an issue with frayed wiring, wiring that has lost its ground, or a short/open situation.
If you have the “third” or dedicated brake light (the one not in your tail lights), check the harness after they diverge . You know that it has power before this point since the third brake light is still getting power.
Look in the trunk (if applicable). Check any grounds the harness has in there. Make sure that the harness wasn’t damaged in there. It’s not uncommon for cargo to do this.
Conclusion: Pontiac G5 Brake Lights Not Coming On
If your G5’s brake lights are not working, it’s most likely going to be caused by a bad brake light switch. Good luck fixing your vehicle!
COMMENTS
The most common reasons a Pontiac G5 cruise control isn't working are failed control module, sensor or switch issues, or throttle actuation problems. 0 %. 10 % of the time it's the. Control Module. 0 %. 10 % of the time it's the. Sensor. 0 %. 80 % of the time it's the.
Hi Guys, I have an '08 G5 Automatic 4 cylinder. the cruise control stopped working last month and it does not say cuise engaged when I try to set it. I checked the manual but could not figure out if there is a fuse for it that might have blown. Does anybody know if there is one, or possibly...
SOURCE: how do i disconnect the battery on pontiac g5. The battery is on the right side of the trunk compartment next to the spare tire. There is a corporate bulletin about the battery terminals being stripped from the factory and it states to clean the treads and replace the terminal bolts. The terminal bolts are 8mm or 5/16inch in size.
Jim DePalma. Tire Business. GM reports that the cruise control systems on some 2005-10 Chevy Cobalt and 2007-10 Pontiac G5 models may not function properly. One possible cause is that the cruise option was not enabled or the option was defaulted off after checking to see what options were enabled by the BCM during a previous repair.
It can also be caused by issues with the throttle control system or the ABS. In older cruise control systems, it can be caused by a broken vacuum line. Here is a more detailed list of the possible reasons your cruise control is not working: 1. Blown Fuse. All electrical systems in the vehicle are controlled by fuses.
Pontiac G5 (2007-2010) fuses and relays. Advertisements. The Pontiac G5 was produced from 2007 to 2010. In this article, you will find fuse box diagrams of Pontiac G5 2007, 2008, 2009 and 2010, get information about the location of the fuse panels inside the car, and learn about the assignment of each fuse (fuse layout) and relay.
For an easy-to-install cruise control kit for your Pontiac G5, Pontiac G6, or Chevy Cobalt, check out The Cruise Control Store. http://www.thecruisecontrolst...
Estimate. $94.99. Shop/Dealer Price. $105.01 - $112.52. Show example Pontiac G5 Cruise control is not working Inspection prices. Cruise control can be very convenient when on a long drive or when on the highway. By setting a speed, you can relax your foot and let the vehicle maintain speed.
View and Download Pontiac 2008 G5 owner's manual online. 2008 G5 automobile pdf manual download. ... If you leave your cruise control on when you are not using cruise, you might hit a button and go into cruise when you do not want to. You could be startled and even lose control. ... Page 129 Using Cruise Control on Hills How well the cruise ...
Cruise Control Kit Installation Instructions: Take the passenger side panel off of the center console. Then, looking at the BCM/Junction block, find the connector labeled J2 or C2 (depending on model) and loosen up the corresponding clip. Once the connector is free from its clips, pop off the blue cover on the connector and look for position 61 ...
2006 Pontiac Pursuit and Solstice 2007 Pontiac G5 2007 Saturn SKY ... Cruise control was working fine, hit an on ramp to get onto the highway which had a bit of a jarring bump. The coolent light when on then off, and at that point cruise control stopped working. ... #6 · Apr 7, 2014. There are multiple instances of cruise not working. Some ...
If you would like an effective cruise control system for your 2007-2010 Pontiac G5 with manual or automatic transmission, visit The Cruise Control Store today. phone ... Installation Instructions for Cruise Control on 2005-2008 Toyota Tacoma; 2014 Toyota Corolla 250-1836; About About Rostra; Customer Service; Return Policy;
Cruise control is a system to maintain a steady speed of your 2008 Pontiac G5. CARiD offers a wide selection of replacement cruise control system parts. CAR ID. 0 Change. Shopping Cart 0. Parts; Wheels & Tires; Exterior; Lighting; Body Parts; ... Pontiac G5 2008, Cruise Control Switch by WVE®. Replace your worn-out or faulty component with ...
Pontiac G5 2007-2010 Complete Cruise Control Kit. $204.95. Add to Cart. 1 of 1 Items. If you own a Pontiac G5, The Cruise Control Store offers several cruise control kit options if your vehicle currently doesn't have one. See our kits here.
Here are the various "fixes" I have read that the dealers try to correct this issue: applying dielectric silicone "grease" to the C1 (X1) & C2 (X2) BCM connectors. rezeroing the brake pedal position sensor. replacing the brake pedal position sensor. replacing the electronic brake control module. replacing the BCM.
T. tnhottie025 Discussion starter. 13 posts · Joined 2014. #1 · Mar 14, 2014. My 2008 Cobalt LT came with factory installed cruise control. I went to use it the other day and when I pushed the button on the steering wheel to turn it on the light on it came on like it was on. BUT when I hit set nothing happened and the cruise control didn't set.
My cruise control on my 08 G6 isn't working. The light on the steering wheel comes on but not the little speedometer in the dash. ... Asked by Joshua Dec 09, 2015 at 09:05 AM about the 2008 Pontiac G6 GT. Question type: Maintenance & Repair. Just bought the car on 11/27. 2 Answers. 210 Report; ... Used Pontiac G5. 31 listings starting at $2,075.
If your cruise control doesn't work, or your brake lights stay on try this first. If it doesn't work I have another video that shows how to replace the brake...
A faulty speed sensor will often be accompanied by a check engine light and trouble code. For example, P0500 (VSS circuit malfunction) is the most popular code related to the speedometer not working in the Pontiac G5. Your car's VSS does more than control the speedometer; it also helps to control the cruise control system and may even affect the way that the engine runs (some engines may ...
1. Check the Fuse. If none of the brake lights are working, we are going to follow the circuit from the fuse box back to the brake pedal. At some point the power is not getting from point A to point B. We just have to find where that is. Please note that tail lights can work even if the brake lights are burned out.
GT Coupe 2D. $20,560. $5,420. For reference, the 2008 Pontiac G5 originally had a starting sticker price of $17,955, with the range-topping G5 GT Coupe 2D starting at $20,560.