

Gerudo Canyon Tower: how to activate it in Zelda Tears of the Kingdom
Among the many activities players can take part in in Zelda Tears of the Kingdom The activation of the various reconnaissance towers. This is a colossal project, with no fewer than fifteen towers in all. In this guide, we explain how to access the Gerudo Canyon Tower and the steps to follow to get it up and running.
Finding the Gerudo Canyon Tower

Location of the Tower
Zone : South-West Hyrule
Contact details -2459, -2178, 0301
Nearby shrines : Suäli Uaqa, Tula Qamiqa
To reach the Gerudo Village, you have to cross the Gerudo Canyon. The reconnaissance tower is located on the eastern plateau of the canyon. Due to the ambient heat, you will have to Take something to cool down with you or wear appropriate clothing For example, the Sablons outfit. To reach the top, use the scaffolding provided.
Steps to activate the Tower
The Gerudo Canyon Tower is fairly easy to get to, but you'll still need to get its terminal working to recover the teleportation point. Only a pnj is capable of repairing this technology, and in this case it's Chênieh who's in charge. The problem is that he's stuck at the bottom of the plateau. So you're going to have to find a way to reassemble it .

The objective is relatively simple: you need to operate the goods lift . To achieve this, stack three metal cans Then attach this construction to the hook of the lift. With this counterweight, the lift is activated and Chênieh can get to work. At the end of your exchange with him, return to the Tower.
Now all you have to do is place the Pru'Ha Tablet on the temrinal and that's it! While you're in this part of the Kingdom, it might be a good idea to visit the Tower of the Gerudos Heights . It is close by, to the north-west of your current position.
For solutions to the other tricks, please refer to our page dedicated to the different Zelda Tears of the Kingdom recognition towers.

Gerudo Canyon Mine
Gerudo Canyon Mine is southwest of Gerudo Canyon Skyview Tower, east of Mayatat Shrine.

Cave Location
Cave features.
Gerudo Canyon Mine has an entrance at -2675, -2405, 0079 and another entrance at -2612, -2611, 0111. It is southwest of Gerudo Canyon Skyview Tower and east of Mayatat Shrine and Kara Kara Bazaar.
The northern entrance of the cave begins with a long corridor, which eventually opens out into a large room. In this large room, there are many enemies, including a Boss Bokoblin and some Bokoblins, Like Likes, an Ice Like, and some Keese.
There is a large stone bridge in the middle of the room that leads to a frog statue for the Yiga Clan exam .
This cave's Bubbulfrog is located on a ledge high up in the east wall. If you are having trouble finding it, climb up the west wall and look east to see it. Use Ascend from the niche in the east wall to reach the Bubbulfrog.

- The Legend of Zelda: Tears of the Kingdom Guide
- The Closed Door
- Beginning the Game
- Room of Awakening
- Great Sky Island
- Ukouh Shrine
- Go to the Southwest Shrine
- In-Isa Shrine
- Pondside Cave
- Mining Cave
- Bottomless Cave
- Go to the Southeast Shrine
- Gutanbac Shrine
- Enter the Temple
- Nachoyah Shrine
- To the Kingdom of Hyrule
- Lookout Landing
- Crisis at Hyrule Castle
- Hebra Regional Phenomena
- Tulin of Rito Village
- Hebra South Summit Cave
- Rising Island Chain
- Wind Temple
- Wind Temple Boss Strategy
- Eldin Regional Phenomena
- Yunobo of Goron City
- YunoboCo HQ Boss Strategy
- Death Mountain Boss Strategy
- Eldin Canyon Depths
- Fire Temple
- Fire Temple Boss Strategy
- Lanayru Regional Phenomena
- The Sludge-Covered Statue
- Sidon of the Zora
- Restoring the Zora Armor
- Clues to the Sky
- Mipha Court Boss Strategy
- Ancient Zora Waterworks
- Wellspring Island
- Water Temple
- Water Temple Boss Strategy
- Gerudo Regional Phenomena
- Riju of Gerudo Town
- Gerudo Desert Boss Strategy
- Lightning Temple
- Lightning Temple Boss Strategy
- Hyrule Castle and Beyond
- Hyrule Castle
- Sanctum Boss Strategy
- Secret of the...
- Thunderhead Isles
- Guidance from Ages Past
- Construct Factory
- Reach the Stone
- Spirit Temple
- Trail of the Master Sword
- Recovering the Hero's Sword
- Hyrule Castle Chasm
- Final Boss Strategy
- More Information
- List of Skyview Towers
- List of Quests
- List of Shrines
- List of Caves
- List of Wells
- List of Stables
- List of Geoglyph Locations
- List of Memories
- List of Recipes
- List of Named Locations
- List of Autobuild Schematics
- List of Monster Locations
- List of Coliseums
- List of Paraglider Fabrics
- List of Special Controls
- List of Armor
- amiibo Rewards and Unlocks
- Farming Guides
- Pony Points Rewards
- Hudson Sign Locations
- How to Reach Gerudo Secret Club
- How to Unlock All Character Profiles
- Link's Cooking Songs
Thonky's The Legend of Zelda: Tears of the Kingdom Guide
- Table of Contents
- The Legend of Zelda: Tears of the Kingdom Guide Main Page
Tours de reconnaissance Zelda Tears of the Kindgom : Position sur la carte, comment toutes les réparer ?
Comme dans Breath of the Wild, vous allez devoir trouver et escalader les tours d'observation afin de découvrir la carte, et repérer les points d'intérêt de Zelda TotK, comme les Sanctuaires. Retrouvez-en la liste dans ce guide, avec des explications afin de grimper au sommet.

Il y a un total de 15 tours à débloquer dans Zelda Tears of the Kingdom , une par région du continent principal. Elles servent à lever le brouillard qui cache la carte de la surface, ainsi que la carte des cieux, mais elles servent aussi de points de voyage rapide , ce qui est extrêmement pratique, puisqu'elles sont réparties équitablement dans le monde. Vous pouvez ensuite rejoindre facilement le lieu désiré en sautant, puis en déployant votre Paravoile . Cela vous fera donc gagner beaucoup de temps.
Certaines tours sont assez faciles à activer, d'autres demandent de résoudre des puzzles, voire de les réparer afin de les faire fonctionner. Nous allons donc vous fournir leur position, ainsi que la méthode à suivre pour les activer. Aucune tour ne peut être manquée durant votre aventure, vous pouvez toujours y retourner plus tard, même après la fin de l'histoire. Il n'y a pas d'ordre particulier à suivre pour activer les tours, même si parfois, débloquer une tour permet d'en débloquer une autre plus facilement.

- Disposer d'une jauge importante d' Endurance (et de la nourriture associée) en faisant les Sanctuaires peut rendre le déblocage des tours extrêmement rapide, si vous planez directement de l'une à l'autre. Dans le cas contraire, il faudra finir le trajet en marchant.
- N'hésitez pas à vous poser sur les îles célestes proches, afin de récolter leur contenu, et à utiliser leurs moyens de transport, afin de rejoindre la prochaine tour plus rapidement. On pense notamment aux planeurs .
- Vous pouvez facilement repérer les tours non actives grâce à la lumière des projecteurs qui les entoure . En les observant avec les jumelles, et en appuyant sur "A", vous allez marquer leur position sur la carte, ce qui vous aidera à vous repérer, surtout en chute libre puis en Paravoile .
Que faire pour les tours en panne ?
Dans certains cas, le terminal de la tour ne fonctionne pas, et on peut avoir l'impression qu'il faut un pouvoir supplémentaire pour l'activer. Mais ce n'est jamais le cas. Il faut trouver et aider les réparateurs à proximité, afin qu'ils se chargent de remettre la tour en état pour vous.

Tour du fort de guet
La première tour du jeu est activée automatiquement durant la quête principale : Crise au Château d'Hyrule. C'est un point de passage obligatoire que vous ne pouvez pas manquer.

Tour du mont Labulat
La première tour qu'il vous faudra vraiment découvrir est à Lindor, au Nord-Ouest de la Tour du Château d'Hyrule. Elle n'est pas très loin de l'écurie de Serenna. La tour se trouve sur un rocher entouré d'eau.

Utilisez les planches au Sud de la tour, dans le dépôt de matériel, et le pouvoir d' Emprise main afin de les coller ensemble et de vous fabriquer une rampe qui fera aussi office de pont de fortune . Vous disposez d'assez de matériel pour atteindre directement le haut du rocher, sans avoir à nager ni à escalader.

Tour du col de Térel
En poursuivant au Nord-Ouest, vous allez atteindre la région d'Hebra. La tour se trouve au sommet d'une montagne, entourée de ronces. Vous pouvez éviter les ronces en escaladant ailleurs, en descendant en Paravoile devant l'entrée, ou en leur mettant le feu .

Une fois arrivé à la tour, le plus simple est clairement d'y mettre le feu, en tirant une flèche combinée avec un fruit de feu, via le pouvoir d' Amalgame (Zr + Haut de la croix directionnelle), ou en allumant un feu de camp avec du bois et un silex que vous allez attaquer avec une arme quelconque. Ce ne sont que des exemples, il y a plein d'autres possibilités pour s'improviser pyromane ou pour passer les ronces. Prévoyez aussi de la nourriture anti-froid pour le chemin.

Tour de la prairie d'Urban
On poursuit toujours notre progression dans la même direction, et nous sommes à présent dans le coin le plus au Nord-Ouest de la carte, dans les grandes montagnes enneigées. La tour est située au sommet d'une montagne, elle aussi. Le plus simple est d'utiliser le Parapente depuis la Tour d'Hebra , qu'on a présentée juste au-dessus. Cela permet d'atteindre directement le sommet, ou presque, si vous avez assez d'endurance.

Si vous préférez grimper normalement, ou si vous n'avez pas le choix, il faut utiliser l' Emprise pour coller des planches verticales au reste du pont , afin de vous créer une surface verticale que vous pouvez escalader. Prévoyez des repas de régénération d'endurance pour atteindre le sommet, ou utilisez la combinaison entre un feu de camp et une pomme de pin d'Hylia, afin de créer un courant aérien ascendant, que vous pouvez utiliser pour prendre de l'altitude avec votre Parapente. Vous pouvez aussi fabriquer un escalier géant , plutôt qu'une surface verticale, même si ça prend un peu plus de temps. Une fois encore, pensez à prendre une copieuse quantité de nourriture anti-froid , ou l'équipement des piafs.

Tour des ruines obscurcies
On passe à présent à la région tout au Centre-Nord de la carte. Il va déjà falloir traverser le bourbier aux alentours, ce qui peut demander de fabriquer un pont, ou une passerelle en bois. Une fois sur place, il faut aller débloquer le sommet. Elle est entourée de plateformes volantes qu'il va falloir utiliser.

Attrapez la plus proche avec l' Emprise pour l'amener à portée, puis grimpez dessus. Collez les fusées trouvées dessus, en prenant bien soin d'orienter le nez vers le haut . L'objectif est de prendre de l'altitude. Activez la fusée en frappant dessus. Une fois au-dessus de la tour, descendez en parapente, mais n’atterrissez pas sur la plateforme qui bloque l'accès, vous ne pouvez pas déplacer un objet que vous occupez. Posez-vous plutôt sur l'anneau jaune juste en-dessous, ou sur les branches. Déplacez la plateforme gênante, ce qui va provoquer une petite scène animée. La tour est cassée, il vous faut donc redescendre en parapente, afin de parler au réparateur situé dans la tour. Il va bricoler la console, et vous pourrez enfin l'activer.

Guide vidéo

Vous ne comprenez pas comment débloquer la tour d'observation des ruines des obscurcies dans Zelda TotK ? C'est normal, il va falloir utiliser votre pouvoir Emprise et tenter de monter tout en haut pour l'activer ! Voici comment faire en vidéo et en guide écrit.
Tour du ravin d'Ordinn
On part à présent au Nord-Est de la carte, dans la région d'Ordinn. Une fois de plus, la tour se trouve sur une montagne. Escaladez la pente au Sud de la tour. Une fois au sommet, parlez au personnage qui se trouve à l'entrée. À présent, observez le ciel, à l'Est de la tour . Attendez que des débris tombent du ciel, ce qui va afficher une traînée verte assez facile à repérer.

Rejoignez le point d'impact, escaladez les débris, puis lancez la capacité de Rétrospective dessus. Cela va leur faire tracer la trajectoire inverse, et vous amener dans les cieux, avec des îlots intéressants à proximité. Dans le cas présent, ce qui nous intéresse, c'est la tour, donc sautez une fois que le rocher est assez haut, puis utilisez le Paravoile afin d'atteindre le sommet de la tour et l'ouverture qui s'y trouve. Activez le terminal à l'intérieur pour ouvrir la porte, ce qui vous donnera accès au reste de la tour.

Tour du plateau Zoran
Pour la Tour de la région Est de la région de Lanelle, il faut une fois de plus escalader une montagne. Mais l'ordre dans lequel on liste les tours n'est pas anodin. Une fois de plus, il existe un gros raccourci, en utilisant la Tour d'Ordinn et le Paravoile . Vous pouvez quasiment atteindre la tour directement de cette manière. Il y aura juste un dernier mur à escalader.

Une fois sur place, il faut se débarrasser de la gelée répugnante qui bloque l'entrée. Ramassez les fruits d'eau en forme de gourde verte autour de la tour, puis posez-en un à côté de l'obstacle, en passant par l'inventaire, un peu comme vous le feriez pour la cuisine. Attaquez le fruit, afin de libérer l'eau qu'il contient, ce qui lavera littéralement l'obstacle. Vous pouvez aussi le jeter, ou le tirer avec une flèche. Pensez aussi à libérer le personnage coincé dans la gelée à proximité, en utilisant la même méthode, afin de valider la quête annexe Couvert de vase .

Tour du mont Ramol
Nous sommes à présent dans le coin Nord-Est de la carte, à l'Est même du volcan. Atteindre la tour est assez facile, mais le terminal manque à l'appel, un monstre volant s'en est emparé, et il vous nargue en tournant dans la zone. Dommage pour lui, vous avez un arc . Le plus simple est d'utiliser le pouvoir d'Amalgame, afin d'ajouter un Œil de monstre (de n'importe quel type) à votre flèche, ce qui en fera un projectile qui va traquer automatiquement la cible la plus proche. C'est une astuce à retenir en général, si vous visez mal. Dans le cas contraire, une simple flèche suffira. Ramassez le terminal avec le pouvoir d'Emprise, et replacez-le dans la tour . Le technicien va vous parler de lui-même, avant d'effectuer les réparations.

Tour de la plaine d'Hyrule
Si vous allez directement au Sud du Château d'Hyrule, vous allez découvrir la tour sur une colline entourée de pointes. Vous avez plusieurs options. La première est de prendre les escaliers en bois à l'Est de la tour , ce qui va vous mener à une forteresse pleine d'ennemis, donc préparez-vous au combat. On vous conseille de sauvegarder la partie manuellement, afin d'éviter de perdre pas mal de temps en cas de mort, ce qui a de bonnes chances d'arriver. Vous avez le choix entre affronter les ennemis, ou passer en courant pour activer la tour. Le point clé est le pont avec les tonneaux explosifs et une grosse boule de démolition qui va dévaler dans votre direction. Il faut être décisif, et sauter du pont rapidement, pour atteindre le niveau juste en-dessous, ce qui évite de mourir de l'explosion. Lorsque vous remontez jusqu'au point, plusieurs ennemis vont descendre cette fois, vous pouvez les affronter, ou alors reculer et utiliser des flèches lorsqu'ils font demi-tour. Vous pouvez aussi tenter de passer rapidement, puis d'ouvrir la porte, afin d'entrer dans la tour pour l'activer.

L' alternative est d'utiliser les matériaux du dépôt à l'arrière du camp, pour se faire une rampe qui passe au dessus des pointes, et qui permet directement d'atteindre l'entrée de la tour sans se battre, ni risquer quoi que ce soit.

Tour de la plaine de Sahasla
Direction le Sud-Est du Château d'Hyrule pour cette tour. Préparez-vous à un détour et à un peu de spéléologie pour l'activer. Si vous allez jusqu'à l'entrée de la tour, un personnage va vous annoncer qu'elle est fermée. Il faut alors descendre, et entrer dans la grotte située sous la tour . Il y a deux entrées différentes dans les falaises, dont une située aux Coordonnées : 1320, -1142, 0134 .

La tour d'observation de la Plaine de Sahasla vous met en difficulté dans Zelda TotK ? Voici ce qu'il faut faire et comment il faut aider Piquieh afin de débloquer cet avant-poste qui vous permettra de cartographier la région ouest de Necluda.
Vous allez être bloqué par des rochers marron, que vous pouvez briser avec une arme au tranchant suffisant. Le plus simple est d'utiliser l'Amalgame, puis de fusionner un rocher à proximité avec une arme trouvée en les brisant, puis de les détruire ainsi. Il faut ensuite creuser dans la bonne direction, même si vous êtes libres d'explorer. Il faut se diriger vers l'icône de la tour sur la carte, en creusant sur les côtés, afin de se positionner pile en-dessous. Cherchez une pile de rochers gris qui bloquent un passage. Positionnez-vous devant ( Coordonnées sur la carte : 1340, -1181, 0131 ), et utilisez le pouvoir d' Infiltration , afin de traverser le plafond, et d'apparaître directement dans la tour. Utilisez l'Emprise pour retirer les 2 longs bâtons qui bloquent la porte coulissante. Il ne reste plus qu'à l'ouvrir et à faire entrer le réparateur.

Tour des peuliers
Plus au Sud du Château d'Hyrule, dans la région de Necluda, vous allez découvrir une autre tour à la console cassée. Le réparateur étant prisonnier, il faut le libérer afin qu'il puisse faire son travail. Il se trouve dans une grotte sous la tour .

Descendez les falaises au Sud de la tour, afin de trouver l'entrée de la grotte ( Coordonnées : 0605, -2226, 0051 ), elle est vraiment très proche de la tour, mais pas à la même altitude. Entrez, puis marchez sur la plaque de pression afin d'ouvrir la porte enfermant le réparateur. Utilisez votre pouvoir d'Infiltration, afin de vous téléporter directement dans la tour au-dessus, les réparations sont déjà faites.

Tour de Rabelle
Au Sud-Est de la carte se trouve la Bretagne, ou se qui s'en rapproche le plus en Hyrule, puisque, comme dans le jeu précédent, la pluie va vous pourrir la vie. Il y a des ronces tour autour de la tour, mais il est impossible de les faire brûler à cause des précipitations.

Les flèches de feu que vous tirez sur les ronces devant la Tour de Rabelle ne servent à rien et vous vous demandez comment vous allez bien pouvoir activer ce fichu poste d'observation de Zelda TotK ? Suivez le guide vidéo et écrit !
Il est inutile d'attendre une éclaircie, cela n'arrivera pas, il va falloir mettre les ronces au sec. Commencez par brûler les ronces situées sous les toits , afin d'atteindre la cour en face de la tour. Ensuite, utilisez le pouvoir d 'Emprise pour rassembler les grandes planches dans la zone et les coller ensemble. Vous avez besoin d'une planche d'une grande longueur, qui peut couvrir les ronces lorsque vous la placez au-dessus de l'entrée de la tour , sur les deux échafaudages. Vous pouvez à présent mettre le feu aux ronces à l'entrée. Rappelons que vous pouvez mettre le feu en frappant un silex à côté d'un morceau de bois, ou en utilisant un fruit de feu sur une flèche, avec le pouvoir d'Amalgame.

Tour de la montagne de Lanelle
Une tour se trouve au sommet du Mont Lanelle, dans le coin Sud-Est de la carte du monde. Il faut emprunter la tour en spirale qui grimpe jusqu'au sommet de la montagne. Vous pouvez vous fabriquer un véhicule en chemin, afin de grimper en transportant un Koguru . Le trajet n'est pas particulièrement complexe, mais il y a beaucoup d'ennemis redoutables , comme des lézards des glace, des loups de givre et des mains de miasme. C'est sans aucun doute la tour la plus dangereuse à atteindre en marchant. Au moins, la console de la tour n'est pas cassée, mais il fait terriblement froid. Prévoyez de la nourriture qui protège du froid , en cuisinant des ingrédients avec du piment. De l'équipement avec un bonus de résistance au froid serait aussi le bienvenu.

Tour du canyon de Gerudo
Si vous décidez de partir au Sud-Ouest , en direction du désert, vous pouvez trouver la tour au-dessus du canyon. Mais une fois de plus, la console d'activation est cassée. Le défi consiste à amener le réparateur jusqu'à cette dernière. Il se trouve sur l'ascenseur en face de la tour, mais qui est aussi bloqué au pied de la falaise.

Pour cette tour des contrées Gerudo dans Zelda TotK, vous allez devoir faire venir le réparateur Chênieh pour activer le mécanisme. Problème ? Il est coincé tout en bas d'un ascenseur. Retrouvez la vidéo dans cet article et le guide écrit.
Si vous allez lui parler, il va vous suggérer une solution : attacher des contrepoids métalliques au crochet au sommet, afin de faire monter l'ascenseur. Utilisez l' Emprise pour soulever les gros rochers en forme de cubes, puis collez-les au contrepoids de l'ascenseur. Il vous en faut 3 pour que l'ascenseur s'élève . Il ne vous restera plus qu'à parler à nouveau au réparateur, afin qu'il fasse son travail.
Veuillez noter que cette tour est dans une zone brûlante durant la journée . Comme vous n'avez probablement pas l'équipement adapté, prévoyez de la nourriture anti-chaleur , si possible. Si vous n'en avez pas, vous pouvez gérer la chaleur en marchant à l'ombre chaque fois que possible, ou en y allant de nuit .

Tour des hauteurs Gerudos
Cette dernière tour n'est pas complétement située dans le coin Sud-Ouest . En réalité, elle est sur les hauts plateaux enneigés, situés juste au Nord du désert de Gerudo. Une fois encore, prévoyez de la nourriture offrant une protection contre le froid , voire d'autres sources de protection.

L'entrée de la tour est bloquée par la neige, et il n'est pas possible de juste la faire fondre. Allez quelques mètres au Nord pour trouver une grotte : le Conduit de lave . Construisez un Radeau avec les planches présentes, vous en aurez besoin pour économiser votre endurance et tuer le crapaud blanc accroché au plafond.

Descendez la rivière jusqu'à tomber d'une cascade , dans un réservoir. Utilisez à présent l 'Emprise pour placer une planche à la surface de l'eau . Il faut la placer entre les piliers, juste sous la structure en bois. Vous pouvez aussi vous construire un pont pour l'atteindre malgré le courant. Utilisez ensuite le pouvoir d' Infiltration afin de vous téléporter dans la tour.

Des nouveaux pouvoirs de Link comme Amalgame ou Emprise, à des astuces de gameplay plus générales sur les sanctuaires et la carte : on guide vos premiers pas dans Zelda TotK avec nos astuces pour bien débuter, qui viennent inaugurer le lancement de notre soluce complète du RPG de Nintendo.
Fan de nombreux types de jeux, j'accroche surtout quand il faut faire souffrir ses méninges et peaufiner son gameplay. Des raids WoW, je suis passé aux CRPG, puis des tacticals aux 4X, mais aussi les jeux FromSoftware.
L'actu
18:23 Zelda Tears of the Kingdom ne profite pas d'une des meilleures idées de Breath of the Wild à cause de son manque de DLC...
16:27 Nintendo officialise la place des jeux Zelda Breath of the Wild et Tears of the Kingdom dans la chronologie de la saga, et c'est surprenant !
17:54 Le héros de l'un des jeux Zelda de votre enfance a connu une fin tragique et vous ne le saviez sûrement pas !
15:59 Un tout petit détail dans Zelda Tears of the Kingdom montre à quel point l'histoire du jeu était géniale !
15:52 Après 1 100 heures de jeu sur Zelda Tears of the Kingdom, ce joueur découvre une nouvelle astuce de fusion très utile !
15:03 Cette création astucieuse dans Zelda Tears of the Kingdom règle un des plus gros problèmes d'exploration du jeu
21:09 Zelda Tears of the Kingdom a forcé Nintendo à prendre une décision totalement inédite lors du développement du jeu
20:41 Une star de cinéma se cache dans Zelda Tears of the Kingdom et Breath of the Wild, et voici où la trouver
17:45 Les mystères de Zelda Tears of the Kingdom enfin résolus après plus d'un an de sortie du jeu ?
11:11 Nintendo a fait une erreur avec le DLC de Zelda Tears of The Kingdom en prenant cette mauvaise décision
recommandés

à découvrir

Hand-Picked Top-Read Stories

Dark Disturbances Pokémon GO: Dark Regirock, tasks, rewards… Everything you need to know about this special study

Pokémon GO Dark Flames: Mega Sableye, Shiny Boumata, Dates… All the details on the event

Pokémon GO Mega-Ténéfix: The best counters to beat it in Mega Raids
Trending tags.
- The Legend of Zelda: Tears of the Kingdom
- The Legend of Zelda
- Star Wars Outlaws
- Hogwarts Legacy
- Final Fantasy 6
- Elden Ring Shadow of the Erdtree
- Black Myth Wukong
- Gaming Guides and Tricks
The Secret of the Heroines Zelda Tears of the Kingdom: Where to find the 4 monuments of the Gerudo mission?

Updated on 05/28/2023 at 03:26 By Lloyd
During your regional investigation Riju, from Gerudo City, your camera will be put to use in a new mission: you must locate 4 monuments telling the story of the Gerudo heroines. This quest thread leads to a particularly cool treasure, let’s see how to complete this step.
In Zelda Tears of the Kingdom, the camera is of particular importance during your journey. With it, you will make the monster collector and the relay managers happy by offering them superb paintings and decipher a message from ancient times with the help of the kingdom’s archaeologists. This famous option added by Faras also serves to fill the enormous game encyclopedia necessary if you want to complete the 100%. Here you have to find 4 monuments scattered throughout the underground city.
Where to find the 4 monuments?
You can find the procedure to follow in the video at the top of the article .
- Monument 1: Go forward a little then explode the wall on your left with an arrow and an amalgam bomb. The first plate is just behind.
- Monument 2: Come on Disturb the class several times in the next classroom or walk around town shirtless you will be thrown into prison and the second plate will be found there.
- Monument 3: Still in the school room, after class, stand on the left then look to the right with your camera in your hands . By putting yourself at the right angle, you will succeed in taking a photo of the 3rd plate.
- Monument 4: Still in the same direction, continue down the corridor leading to a broken stele. Make Grip to reveal the broken piece of plate and glue it back together before taking your photo.

Why do this mission?
Like the Missing Caravaner, this is an additional step to get your hands on the best weapon used as a base for amalgamation in Zelda TotK, the famous Gerudo scimitar . After completing this mission, a second one will unlock, with access to a particularly practical secret room, since it will give some of the components necessary for the manufacture of the weapon very easily, with a guaranteed reappearance at each blood moon. But before getting there, you will have to find 7 orbs hidden throughout the desert in order to open access to ruins located in the north of the desert. Discover our guide from Soul to True Heroism.

Leave a Reply Cancel reply
Your email address will not be published. Required fields are marked *
Save my name, email, and website in this browser for the next time I comment.
Previous Post

Zelda Tears of the Kingdom Ignifus Lizard: Where to find this ingredient for the anti-fire remedy?

Labyrinth of Edal North Zelda Tears of the Kingdom: How to complete it?
Related posts.

Griock de Glace Zelda Tears of the Kingdom: How to beat the Hebra hydra boss?

Zelda Tears of the Kingdom Runa Qita Shrine, Tabanta: Where to find it, how to complete it?

This is the best Marvel Snap deck you can grab right now, but there’s a catch
The Legend Of Zelda: Tears Of The Kingdom - All Gerudo Town Side Quests

Your changes have been saved
Email is sent
Email has already been sent
Please verify your email address.
You’ve reached your account maximum for followed topics.
Quick Links
Getting to gerudo town, general gerudo town side quests, side quests after 'riju of gerudo town'.
Gerudo Village is located within one of the four main regions of Hyrule in The Legend of Zelda: Tears of the Kingdom . Here, you will be able to explore the desert shops and aid Riju in protecting the city. In addition to playing through the main story here, there are seven side quests available.
Related: The Legend Of Zelda: Tears Of The Kingdom - All Rito Village Side Quests
Before completing the Gerudo portion of the Regional Phenomena quest , you can find a few side quests. Once this main story portion is complete though, even more side quests will open up to you. Here, you can find all Gerudo side quests, as well as how to accept them.
If you have never been to Gerudo Town before, don't worry; we are going to take a quick look at how to get there.
From Hyrule Field, head southwest, towards the Great Plateau. On the way here, you will find the Hyrule Field Skyview Tower . From this tower, head south until the path stops , and you can only go east or west; this should be the top edge of the Great Plateau.
Once here, head west, until the path forks again. If you veer right, you will come across the Outskirt Stable. Veering left will set you on the path that leads to Gerudo Town. Follow this winding path, and eventually, you will end up in the Gerudo Desert. Navigating here can be a bit difficult, so be sure to just run facing southwest.
Gerudo Town has a large rock structure sticking up from the center, making it a bit easier to spot from a distance.
Now that you are here, let's take a look at general side quests in Gerudo Town. These quests don't require you to complete Riju of Gerudo Town .
The Mysterious Eighth
To complete The Mysterious Eighth, you will need to locate seven orbs around the desert. Some orbs can be found, while others require you to complete additional quests. In order to complete this quest, you will also need to finish the following quests.
- Lost In The Dunes
- Dalia's Game
Lastly, let's go over quests that you can complete after finishing Riju of Gerudo Town.
The Missing Owner can technically be finished before completing Riju of Gerudo Town , but as the desert is hard to navigate due to the storm, we suggest completing the main quest here first. Once you have saved Gerudo Town and recruited the help of Riju, you can easily finish The Missing Owner, which leads right into Pride of the Gerudo.
Next: The Legend Of Zelda: Tears Of The Kingdom - All Hateno Village Side Quests
- Triple-A Games

The Legend of Zelda: Tears of the Kingdom Walkthrough & Guides Wiki
- Main Quests
- Side Quests
- Side Adventures
- Tips & Tricks
- Interactive Map
Riju of Gerudo Town Walkthrough
▲ Get Pristine Weapons from the depths or an amiibo ! △ All 1000 Koroks | All 4 Great Fairies ▲ All 81 Addison Signs | All 147 Caves | All 58 Wells △ Starter Tips: Farm Rupees | Starting Armor ▲ Advanced Tips: Best Weapons | Best Armor | Best Food
Riju of Gerudo Town is a Main Quest in The Legend of Zelda: Tears of the Kingdom (TotK) that starts in Gerudo Town. Read on for a detailed walkthrough of this main quest, including guides on how to prepare for the Gibdo attack, the location of the pillars, and how to solve the mural riddle!
List of Contents
- How to Unlock
- Walkthrough
Pillars Location and Mural Riddle Solution
- Related Guides
How to Unlock Riju of Gerudo Town
Find the hidden shelter beneath the throne room.

Riju of Gerudo Town can be started by talking to Buliara in a hidden shelter. You can find this shelter by removing the cover behind the throne and dropping down two levels.
Gerudo Desert - Gerudo Town

The exact coordinates for this quest on the map are -3889, -2969, 0043 .
Gerudo Desert Region Map
Riju of Gerudo Town Walkthrough Guide
Find riju in the north gerudo ruins.

Upon arriving at the shelter's central room (where you fell down), enter the southeast room then turn left to the next. You'll know if you're in the correct room if you see two sand seals. From here, take another left to reach the Valley of Silent Statues .
Speak with Nellie

Keep following the path until you find a ledge with a Gerudo named Nellie nearby. The square ledge at the end will break off and fall down as soon as you step foot, but since there's no other way across, might as well play along.
Cross the Moving Sands

Use Ultrahand to create bridges with the wooden boards to cross the moving sands. You can also use the square platform that broke off earlier.
Your goal here is to get on the platform with a ladder on the right side of the room. Once you get there, keep using Ascend until you reach the bridge above.
Defeat the Lurking GIbdos

Walk north until you hit a wall then turn left. Jump to the next platform then quickly run to other end before you fall back down.
At the top of this slope is your first encounter with Gibdos —insect-like enemies that are nigh invulnerable until hit by elemental attacks .
Talk to RIju

Continue going up until you find the exit leading to the North Gerudo Ruins, where you can see Riju training along with her sand seal, Patricia.
Approach Riju to advance the main quest.
Train with Riju

Bring out your bow and arrow and shoot the first dummy to guide Riju's lightning strike. For the second set, wait for Riju to build up enough energy to reach the sand pile then shoot it so that the lightning strike hits all three dummies at once.
Head to Kara Kara Bazaar

You can fast travel to Mayatat Shrine , which is right outside Kara Kara Bazaar, if you already have it unlocked. Otherwise, fast travel to the Gerudo Canyon Skyview Tower instead then glide southwest to your destination.
Defeat the Gibdos

Same with training, letting Riju charge up increases the range of her lightning strikes . Once your target Gibdo is within range, shoot it with an arrow to guide Riju's lightning strike at it, dealing area damage.
Destroy Gibdo Hives

During the attack, you can also spot a tall mushroom-like object that seems to be where the Gibdos are coming from. Shoot it with an arrow once it gets within Riju's range to stop it from spawning more Gibdos.
Return to Gerudo Town

Head back to Gerudo Town and talk to Riju at the palace entrance.
Inquire About the Upcoming Battle

Head inside and talk to Riju at the throne. She will tell you to prepare for the upcoming fight and help the soldiers in organizing the town's defenses
Talk to Buliara to know about the plan and the enemy.
Prepare for the Battle

You will be given a chance to set up the town's defenses as preparation for the Gibdo attack. Sword troops, Spear troops, and a cannoneer can each be deployed at the gate of your choice, including a barricade. There will also be a hive in front of each gate and the number of attacking Gibdos will be the same.
The final setup won't really matter , but below are the most optimal positions for each squad when the siege starts.
It would be better to station the cannoneer at the west gate with a barricade as this side is relatively farther from the starting point and is harder to access. Having the cannoneer delay the attackers from this side will be helpful once you've cleared the north and east sides.
They will also benefit more from the blockade, being long-ranged attackers.
Talk to Riju when you're ready to start the siege.
Defend Gerudo Town

Destroy the three hives around Gerudo Town and wipe out all the Gibdos using Riju's lightning. You must also protect Riju from the Gibdos marching towards her.
The hives and enemies are marked with red circles on your minimap.
Investigate the Mural Beneath Gerudo Town

Drop back down again to the underground shelter and keep walking southwest until you find Riju and the mural she spoke of.
Solve the Riddle of the Pillars

You now need to find the pillars mentioned and solve the riddle to proceed. Solving the Pillars Riddle
Check the Center of the Triangle

Glide down to the center to find a mechanism revealed by lighting up the three pillars. Once Riju rejoins you, shoot the mechanism with an arrow to strike it with lightning. This will cause a temple to emerge in front of the altar. You will also be able to call on Riju's lightning for the dungeon run!
Clear the Lightning Temple

Approach the temple and get close to the purple node at the entrance. Call on Riju and shoot the node with an arrow to trigger a boss fight against the Queen Gibdo . After taking away a third of its health, it will fly to the roof of the temple and leave the entrance unprotected.
Destroy the Purple Node

Destroy the node blocking the temple entrance with Riju's lightning, head inside, and clear the Lightning Temple . Defeat the Queen Gibdo once and for all to receive the Vow of Riju, Sage of Lightning back at Gerudo Town. Our next objective leads us to a more searing place: the Eldin Canyon region.
How to Beat Queen Gibdo

Like every other Gibdo, the Queen Gibdo is immune to damage until you attack it with elemental weapons. Infuse your arrows with Fire, Ice, or Shock Fruits or call upon Riju's lightning to pierce through its immunity.
The Queen Gibdo turns white when it's vulnerable. Use this opportunity to unleash attacks with your strongest weapons.
The pillars are located far behind Gerudo town. Use Ascend from the throne and look southwest to spot a towering structure across the desert. Head there and follow the steps below to solve the riddle.
Find the First Tower

Fast travel to Soryotanog Shrine and head east to find the tower. Use Ascend on the structure to find a breakable cover at the center
Break the Cracked Rocks

Equip a hammer-type weapon and destroy the cracked rocks with a jump attack ( X > Y ). This will reveal a pillar of light that is redirected by an object above it.
Follow the Light

Follow the direction of the light until you find a structure similar with the first pillar, but with a wheel crank .
Push it counter-clockwise until the light hits the second pillar.
Follow the Newly Reflected Light

The light will then be reflected to the third pillar and back to the first, creating a large, imperfect, triangle. Follow the light to the third tower and go up with Ascend to find two stones and four sticks.
Gather All Materials Before Heading Up

Attach all six objects together and hold them up with Ultrahand near the platform above for at least five seconds .
Release them, quickly Ascend to the platform above, then use Recall on the stones.
Quickly Grab the Items with Ultrahand

This will make the stones and sticks float near you, where you can grab it with Ultrahand again.
Reach the Top of the Pillar

Do the same on the next platform above, but this time, hop on the stones as it rewinds , so you can reach the top of the pillar.
Move the Wheel Crank

Take the sticks and attach them on the wheel crank in the middle, then turn it counter-clockwise until the light triangle is finally complete.
The Legend of Zelda: Tears of the Kingdom Related Guides

List of All Walkthroughs
List of all main quests.
We at Game8 thank you for your support.
In order for us to make the best articles possible, share your corrections, opinions, and thoughts about 「Riju of Gerudo Town Walkthrough | Zelda: Tears of the Kingdom (TotK)」 with us!
When reporting a problem, please be as specific as possible in providing details such as what conditions the problem occurred under and what kind of effects it had.
This site is protected by reCAPTCHA and the Google
Do you want to send this information?
Walkthrough Menu
- TotK Wiki Top
Walkthroughs
Tips and tricks.
- Beginner's Guide
New Features
- How to Confuse Enemies
- How to Cure Gloom
- How to Blind Enemies
Combat Guides
- Flurry Rush, Sneakstrike, and Deal Critical Damage
- Weapon Modifiers Explained
- How to Raise Defense
- Passive Abilities for Weapons Explained
- How to Upgrade Armor
- How to Defeat Shielded Enemies
- How to Throw Items and Materials
- How to Repair Weapons
- How to Get Earthwake Technique
- How to Increase Weapon Durability
- How to Parry
- How to Sneakstrike
- How to Perfect Dodge and Flurry Rush
- Stealth Mechanics Explained
Exploration Guides
- How to Get Cold Resistance
- How to Dive
- How to Shield Surf
- How to Break Cracked Rocks
- How to Use Minecarts
- How to Chop Down and Use Fallen Trees
- How to Cross the Freezing Water
- Fast Travel Guide: How to Warp
- Weather Effects and How to Change the Weather
- How to Get Heat Resistance
- How to Make an Axe
- How to Tame Wild Horses
- What to Do During a Thunderstorm
- How to Pass Time
- How to Light Up Dark Areas
- How to Get Epona
- How to Check Coordinates
- How to Climb Efficiently
- How to Break Wooden Boxes
- How to Make a Fire
- How to Make a Raft
- How to Make a Hover Bike
- How to Use Rocket Shields
General Tips and Tricks
- Zonai Dispenser Guide
- How to Get the Paraglider and All Paraglider Designs
- How to Expand Inventory
- Pony Points Guide
- How to Increase Health and Stamina
- Best Settings to Use
- How to Swap Hearts for Stamina
- amiibo Unlocks and List of Compatible amiibo
- Blood Moon Explained
- Missables and One-Time Events Guide
- Where to Find Wild Greens
- Whistle Effects and How to Use
- How to Farm Crops
- How to Heal
- Post Game Content Guide
- Kochi Dye Shop Guide: How to Recolor Armor
- Ending Explained: How to Watch the True Ending
- List of Unlockables
- How to Get Ganon's Horse
Farming Guides
- How to Farm Arrows
- Bubbul Gem Guide
- How to Get More Energy Cells
- Early Game Rupee Farming
- How to Farm Weapons
- Dragon Part Farming Guide
- How to Get Pristine Weapons
Notable Item Location Guides
- How to Get the Travel Medallion
- How to Get the Champion's Leathers Early
- How to Get the Hylian Shield Early
- How to Restore the Master Sword
- How to Get the Classic Green Tunic
- How to Get Ring Garland
- Misko's Treasure Locations
- How to Get Monster Medals
Puzzle Solution Guides
- How to Solve the Water Temple Spinning Tower
- Where to Find King Dorephan
- How to Solve the Gerudo Light Puzzle
- Voe and You Class Solutions
Map Location Guides
- All Stable Locations
- All Sage's Will Locations
- How to Get to Hyrule Castle
- How to Get to Lost Woods and Enter Korok Forest
- Great Fairy Locations and How to Unlock
- How to Find the Light Dragon: Location and Drops
- How to Find Farosh: Location and Drops
- How to Find Naydra: Location and Drops
- How to Find Dinraal: Location and Drops
- Satori Cherry Blossom Tree Locations and Guide
- How to Reach Abandoned Hebra Mine
- How to Unlock Royal Hidden Passage
- All Addison Sign Locations
- How to Get into Gerudo Secret Club
- All Coliseum Locations and Rewards
- Koltin Locations and List of Rewards
- Satori (King of the Mountain) Locations
- Where to Find Dondons
- All Forge Construct Locations
- How to Get to Toto Lake
- All Goddess Statue Locations
Tier List Guides
- Best Early Game Armor
- Best Armor Sets (Equipment)
- Best Weapons and Shields
- Best Horses
- Best Equipment for Exploration
- Best Fuse Materials and Weapon Combinations
- Best Modes of Travel
Glitches and Exploits
- List of Glitches and Exploits
- How to Duplicate Weapons, Bows, and Shields
- How to Duplicate Materials
- Can You Pet the Dogs?
- What Transfers Over From Breath of the Wild?
- Should You Play BotW First?
- What Happens When You Die?
- How Does Autosave Work?
- What Happened to Link's House?
- Do Materials Respawn?
- How to Change the Difficulty
- How to Lower and Raise Hylian Hood
- When Do Shops Restock?
- Is There a Master Mode?
- All Abilities and How to Unlock
Zonai Arm Abilities
Purah pad abilities.
- Travel Medallion
- Shrine Sensor
- Hero's Path Mode
Sage's Abilities
- Vow of Tulin
- Vow of Riju
- Vow of Sidon
- Vow of Yunobo
- Interactive Map of Hyrule and All Locations
- Hyrule Surface Map and Regions
- Hyrule Sky Map and Regions
- Hyrule Depths Map and Regions
- Korok Seed Map and How to Use
- All 147 Caves
- All 58 Wells
- All Lightroot Locations and Maps
- All Chasm Locations and Maps
- List of Towns and Settlements
- All Tower Locations
- Lookout Landing Tower
- Hyrule Field Tower
- Gerudo Highlands Tower
- Lindor's Brow Tower
- Rospro Pass Tower
- Pikida Stonegrove Tower
- Thyphlo Ruins Tower
- Eldin Canyon Tower
- Ulri Mountain Tower
- Rabella Wetlands Tower
- Sahasra Slope Tower
- Popla Foothills Tower
- Gerudo Canyon Tower
- Upland Zorana Tower
- Mount Lanayru Tower
- List of All Shrines
- All 31 Shrine Quests
Great Sky Island Shrines
- Ukouh Shrine
- In-isa Shrine
- Gutanbac Shrine
- Nachoyah Shrine
Hyrule Field Shrines
- Ren-Iz Shrine
- Tsutsu-um Shrine
- Riogok Shrine
- Kamizun Shrine
- Sepapa Shrine
- Taki-Ihaban Shrine
- Ishodag Shrine
- Teniten Shrine
- Tajikats Shrine
- Yamiyo Shrine
- Kyononis Shrine
- Jiosin Shrine
- Jojon Shrine
- Serutabomac Shrine
- Tenmaten Shrine
- Sonapan Shrine
- Usazum Shrine
- Kyokugon Shrine
- Tadarok Shrine
- En-oma Shrine
- Susuyai Shrine
- Mayachin Shrine
- Makurukis Shrine
- Runakit Shrine
- Sinakawak Shrine
- Jinodok Shrine
Tabantha Shrines
- Oromuwak Shrine
- Gatakis Shrine
- Nouda Shrine
- Wao-os Shrine
- Iun-orok Shrine
- Turakawak Shrine
- Gasas Shrine
- Mayausiy Shrine
- Ikatak Shrine
- Ga-ahisas Shrine
- Ganos Shrine
- Taunhiy Shrine
Hebra Shrines
- Sahirow Shrine
- Rutafu-um Shrine
- Otak Shrine
- Eutoum Shrine
- Sisuran Shrine
- Oshozan-u Shrine
- Mayaotaki Shrine
- Tauyosipun Shrine
- Orochium Shrine
- Ijo-o Shrine
- Tenbez Shrine
- Taninoud Shrine
- Mayaumekis Shrine
- Kahatanaum Shrine
Great Hyrule Forest Shrines
- Sakunbomar Shrine
- Pupunke Shrine
- Ninjis Shrine
- Musanokir Shrine
- Kikakin Shrine
- Kiuyoyou Shrine
- Ekochiu Shrine
- Mayam Shrine
- Simosiwak Shrine
Akkala Shrines
- Rasiwak Shrine
- Jochi-iu Shrine
- Igashuk Shrine
- Sinatanika Shrine
- Rasitakiwak Shrine
- Jochi-ihiga Shrine
- Gatanisis Shrine
- Domizuin Shrine
- Kamatukis Shrine
- Gemimik Shrine
- Gikaku Shrine
- Mogisari Shrine
- Natak Shrine
Eldin Shrines
- Kisinona Shrine
- Minetak Shrine
- Mayak Shrine
- Sibajitak Shrine
- Sikukuu Shrine
- Timawak Shrine
- Mayachideg Shrine
- Sitsum Shrine
- Marakuguc Shrine
- Kadaunar Shrine
- Moshapin Shrine
- Jiotak Shrine
- Kimayat Shrine
- Isisim Shrine
- Momosik Shrine
Lanayru Shrines
- Ihen-a Shrine
- Mogawak Shrine
- Jonsau Shrine
- Maoikes Shrine
- Joniu Shrine
- Apogek Shrine
- Yomizuk Shrine
- Kurakat Shrine
- Morok Shrine
- O-ogim Shrine
- Jikais Shrine
- Tukarok Shrine
- Zakusu Shrine
- Igoshon Shrine
- Mayanas Shrine
- Jirutagumac Shrine
- Sihajog Shrine
Necluda Shrines
- Susub Shrine
- Zanmik Shrine
- Jochisiu Shrine
- Jogou Shrine
- Anedamimik Shrine
- Tokiy Shrine
- Utojis Shrine
- Sifumim Shrine
- Bamitok Shrine
- Marari-in Shrine
- Eshos Shrine
- Makasura Shrine
- Mayahisik Shrine
- Joju-u-u Shrine
- Josiu Shrine
- Ukoojisi Shrine
- Kumamayn Shrine
- Yansamin Shrine
Faron Shrines
- Jiukoum Shrine
- Ishokin Shrine
- Utsushok Shrine
- Joku-u Shrine
- Joku-usin Shrine
Gerudo Shrines
- Soryotanog Shrine
- Mayatat Shrine
- Miryotanog Shrine
- Suariwak Shrine
- Otutsum Shrine
- Mayamats Shrine
- Rakakudaj Shrine
- Irasak Shrine
- Karahatag Shrine
- Chichim Shrine
- Siwakama Shrine
- Motsusis Shrine
- Kitawak Shrine
- Turakamik Shrine
- Rotsumamu Shrine
- Siyamotsus Shrine
- Mayasiar Shrine
- Rakashog Shrine
- Kudanisar Shrine
- List of All Bosses and Minibosses
- Master Kohga
- Marbled Gohma
- Sludge Like
- Queen Gibdo
- Seized Construct
- Phantom Ganon
- Demon King Ganondorf and Demon Dragon
- Obsidian Frox
- Flame Gleeok
- Thunder Gleeok
- Frost Gleeok
- King Gleeok
- Flux Construct
- Flux Construct II
- Flux Construct III
- Stone Talus
- Stone Talus (Luminous)
- Battle Talus
- All Weapons and Equipment
- List of All One-Handed Weapons
- List of All Two-Handed Weapons
- List of All Spears
- List of All Bows
- List of All Shields
- All Champion Weapons
- List of amiibo Weapons
- List of All Armor
- List of All Headgear
- List of All Body Armor
- List of All Legwear
Temples and Dungeons
- All Temple Locations and Dungeon Guides
- Wind Temple
- Lightning Temple
- Fire Temple
- Water Temple
- Fifth Temple
- List of All Items
- List of All Materials
- List of All Zonai Devices
- List of All Key Items
- Basic Cooking Guide
- Advanced Cooking: Adding Buffs
- List of Cooked Dishes and Recipes
- List of Roasted Dishes and Recipes
- List of Frozen Dishes and Recipes
- List of Elixirs and Recipes
- All Monsters and Enemies
- Gloom Hands
- All Yiga Schematics and Schema Stones
- New and Returning Characters
- Latest News and Updates
- Ver. 1.2.0 Update Patch Notes
- New Zelda and Ganondorf amiibo
- Ver. 1.1.2 Update Patch Notes
- Release Date Guide
- Pre-Order Bonuses
- Will There Be DLC?
- Story Summary and Timeline
- Easter Eggs and Secrets
- New Features & Gameplay
- Will the Champions Appear?
- Is the Hookshot a Useable Item?
- Will There Be a Demo?
- Multiplayer Features
- List of Official Trailers
- Why Is the Master Sword Broken?
- How Long to Beat
- 3/28 Gameplay Trailer Analysis
- TOTK Edition Switch OLED
- Four New Abilities Introduced
- Sky Islands Explored
- Who are the Zonai?
- 4/13 Final Trailer Analysis
- Where is Daruk's Successor?
- Is Demise Returning?
- All Voice Actors Cast
- Is TOTK the Last Zelda Game?
- Preload Date and Guide
- Collector's Edition Differences
- How to Get TOTK Cheaper
- Hands-On Previews: Everything We Learned
- Where to Pre-Order Guidebook
- Tears of the Kingdom 1.1 Patch Notes
- Are Hearty Durians Still in the Game?
- What Happened to the Divine Beasts?
- Where is Kass?
- Message Boards
- Game Help & Questions (10)
- Discussion & Review Board (6)
- Fan Theory Sharing Board (7)
Other Zelda Wikis
- Breath of the Wild
- Link's Awakening
- Hyrule Warriors: Age of Calamity
- Skyward Sword HD
Japanese Wiki (日本語版)
- ティアーズオブザキングダム攻略
- 1 Interactive Map of Hyrule and Al...
- 2 Link's House: How to Build and R...
- 3 Lake Darman Monster Den Bubbulfr...
- 4 How to Get the Soldier's Greaves...
- 5 Stables Map and All Stable Locat...
- We could not find the message board you were looking for.
Gaming News

Genshin Backlash Cause Devs to Feel Defeated and "Useless"

Date A Live: Ren Dystopia Review (Steam)
![Ace Attorney Investigations Collection Review [Switch] | OBJECTION! This Game's Guilty of Greatness!](https://img.game8.co/3981424/2b9f85c1068d6c293b599bb184a6cea6.png/thumb "totk tour gerudo")
Ace Attorney Investigations Collection Review [Switch]
![NBA 2K25 Review [PS5] | The Best It's Been In Years](https://img.game8.co/3981487/84ebdc491bc13e7be1f519dd138f8962.png/thumb "totk tour gerudo")
NBA 2K25 Review [PS5]
More Gaming News
Popular Games

Genshin Impact Walkthrough & Guides Wiki

Zenless Zone Zero Walkthrough & Guides Wiki

Honkai: Star Rail Walkthrough & Guides Wiki

Black Myth: Wukong Walkthrough & Guides Wiki

Pokemon Scarlet and Violet (SV) Walkthrough & Guides Wiki

Monster Hunter Rise: Sunbreak Walkthrough & Guides Wiki

Star Wars Outlaws Walkthrough & Guides Wiki

Wuthering Waves Walkthrough & Guides Wiki

Once Human Walkthrough & Guides Wiki

Palworld Walkthrough & Guides Wiki
Recommended Games

Elden Ring Shadow of the Erdtree Walkthrough & Guides Wiki

Super Smash Bros. Ultimate Walkthrough & Guides Wiki

FF7 Remake Walkthrough & Guides Wiki

The Legend of Zelda: Breath of the Wild Walkthrough & Guides Wiki

Pokemon Legends: Arceus Walkthrough & Guides Wiki

New Pokemon Snap Walkthrough & Guides Wiki

Hyrule Warriors: Age of Calamity Walkthrough & Guides Wiki
All rights reserved
© Nintendo. The Legend of Zelda and Nintendo Switch are trademarks of Nintendo. The copyrights of videos of games used in our content and other intellectual property rights belong to the provider of the game. The contents we provide on this site were created personally by members of the Game8 editorial department. We refuse the right to reuse or repost content taken without our permission such as data or images to other sites.
- Popular Articles

The Legend of Zelda
- Le Donjon Aigle
- Le Donjon Lune
- Le Donjon Manji
- Le Donjon Serpent
- Le Donjon Lézard
- Le Donjon Dragon
- Le Donjon Démon
- Le Donjon Lion
- Montagne de la Mort
- Seconde quête
- Aides de jeu
- Conteneurs de Cœurs
- Info et médias
- Encyclopédie

The Adventure of Link
- Début de la quête
- Palais Parapa
- Traversée du Marais
- Direction Mido
- Donjon des Marais
- Direction l'Île Perdue
- Palais de l'Ile Perdue
- Nabooru et Darunia
- Palais de l'Ile de Mace
- Palais de l'Océan
- Ville Cachée de Kasuto
- Palais des Trois Yeux de Pierre
- Grand Palais
- Thunderbird et Dark Link
- Conteneurs de cœurs / de magie
- Sacs d'expérience
- Vies supplémentaires

A Link to the Past
- Château d'Hyrule
- Palais de l'Est
- Le Désert du Mystère
- Tour d'Héra
- Affronter Agahnim
- Palais des Ténèbres
- Palais des Marécages
- Palais des Squelettes
- Palais des Gargouilles
- Palais des Glaces
- Bourbier de la Souffrance
- Rocher de la Tortue
- Tour de Ganon
- Combat Final
- Quarts de coeur
- Flacons magiques
- Four Swords

Link’s Awakening
- Introduction
- Caverne Flagello
- Marais des Anémones
- Grotte du Génie
- La Prairie d'Oukoukou
- Souterrain aux clés
- Dunes de Yarna
- Abîme du Poisson
- Baie de Martha
- Poisson-Chat
- Les Deux Temples
- Temple du Masque
- Montagne Tartare Début
- Tour du Vautour
- Montagne Tartare Fin
- Roc de la Tortue
- Reste de l'Ile
- Palais de la Couleur
- Coquillages
- Quarts de Coeur
- Quête des Photos
- Plans des donjons
- Carte de Cocolint

Ocarina of Time
- Forêt Kokiri
- Mont du Péril
- Caverne Dodongo
- Domaine Zora
- Ventre de Jabu-Jabu
- Temple du Temps
- Bosquet Sacré
- Temple de la Forêt
- Village Goron
- Temple du Feu
- Caverne Polaire
- Temple de l'Eau
- Temple de l'Ombre
- Désert Hanté
- Temple de l'Esprit
- Gymnase Gerudo
- La Master Quest
- Skulltulas d'or
- Quarts de cœurs
- L'Épée Biggoron
- Les masques
- Les mélodies
- Pierres à potin
- Ocarina of Time 3D

Majora's Mask
- Avant Termina
- Le Masque Mojo
- Marais du Sud
- Temple de Bois-Cascade
- Montagnes du Nord
- Temple du Pic des Neiges
- Grande Baie
- Les œufs des Zoras
- Temple de la Grande Baie
- Royaume d'Ikana
- Vestiges du Château d'Ikana
- Temple de la Forteresse de Pierre
- Maison des Araignées (marais)
- Maison des Araignées (côte)
- Kafei et Anju
- De Skull Kid à Majora
- Quarts de Cœur
- Questions du renard
- Les flacons
- Majora's Mask 3D

Oracle of Ages
- Le sentier Bojo
- Tombe Esprits
- La Forêt Enchantée
- Le Donjon des Ailes
- Ile du Croissant
- Grotte de la Lune
- Lynna, Plaine Nuun (Moosh)
- Plaine Nuun (Ricky & Dimitri)
- Cité Symétrique, Pics Talus
- Donjon des Zombies
- Donjon Couronne
- Base de Rouleroche
- Grotte des Sirènes
- Palais d'Ambi
- Mer des Zoras
- Mer du non retour
- Tombe Ancienne
- Combat final
- Les anneaux
- Quête de l'Épée Noble

Oracle of Seasons
- Grotte du Héros
- Donjon Racine Noueuse
- Arrivée à Subrosia
- Ruines Serpent
- Choix de l'animal
- Marais Boueux
- Antre Mites Poison
- Prairie, Désert ou Rivière Natzu
- Cité Engloutie et Mont Cocotte
- Donjon Dragon Dansant
- Lac Monocle
- Grotte Licorne
- Ruines de Tarm et Bois Perdu
- Vestige Ancien
- Désert Samasa
- Crypte Étrange
- Temple des Saisons
- Donjon Épée & Écu
- Château d'Onox

The Wind Waker
- Île de l'Aurore
- Forteresse Maudite
- Île du Dragon
- Caverne du Dragon
- L'île aux forêts
- Bois Défendus
- Les trois Perles
- Tour des Dieux
- Le monde englouti
- Forteresse Maudite (Retour)
- Montagne de Feu
- Temple de la Terre
- L'île gelée
- Temple du Vent
- Reconstituer la Triforce
- La Tour de Ganon
- Le combat final
- Figurines Tendo
- Cartes au Trésor
- Cartes Spéciales
- The Wind Waker HD

The Minish Cap
- Forêt de Tyloria
- Mont Gonggle
- Grotte de Feu
- Le Sanctuaire
- Marais de Tabanta
- Forteresse du Vent
- Accès au prochain donjon
- Vallée des Rois
- Au-dessus des Nuages
- Palais du Vent
- Château des Ténèbres
- Fragments du Bonheur

Twilight Princess
- Village de Toal
- Château du Crépuscule
- Forêt de Firone
- Temple Sylvestre
- Village Cocorico
- Temple Abyssal
- Sanctuaire de la Forêt
- Désert Gerudo
- Tour du Jugement
- Massif des Pics Blancs
- Ruines des Pics Blancs
- Sanctuaire de la Forêt, retour
- Village Oublié
- Palais du Crépuscule
- Fragments de cœur
- Âmes de spectre
- Insectes dorés
- Bottes Secrètes
- Quête de l'Eau Thermale
- Caverne de l'Ordalie
- Tampons Miiverse
- Twilight Princess HD

Phantom Hourglass
- Temple du Roi des Mers (1)
- Île du Vent
- Temple du Roi des Mers (2)
- Temple du Courage
- Navire Fantôme
- Temple du Roi des Mers (3)
- Temple Goron
- Temple de la Glace
- Temple du Roi des Mers (4)
- Île des Morts & Île des Ruines
- Temple de Mutoh
- L'Épée Spectrale
- Les cartes au trésor
- Les gouttes d'Esprit
- Réceptacles de cœurs

Spirit Tracks
- Sanctuaire Sylvestre
- Sanctuaire des Neiges
- Temple des Neiges
- Sanctuaire Marin
- Temple Marin
- Sanctuaire du Feu
- Sommet de la Tour des Dieux
- Sanctuaire des Sables
- Temple des Sables
- Boussole de Lumière
- Les trois fins

Skyward Sword
- Temple de la Contemplation
- Volcan d'Ordinn
- Désert de Lanelle
- Raffinerie de Lanelle
- La Lyre de la Déesse
- Lac Faroria
- Grande Caverne Antique
- Mer de Sable
- Galion des Sables
- Sommet du Volcan
- Grand Sanctuaire Ancien
- Dragon de Feu
- Dragon d'Eau
- Dragon de Foudre
- Tour des Cieux
- Domaine de Hylia
- Cubes de la déesse
- Cristaux de Gratitude
- Marché Couvert

A Link Between Worlds
- Boutique de Lavio
- Demeure des Vents
- Bois Perdus & Château
- Palais des Marais
- Repaire des Bandits
- Ruines de Glace
- Palais du Désert
- Château de Lorule
- Ti'Gorneaux
- Quête de l'Épée Dorée
Breath of the Wild
- Plateau du Prélude
- Jusqu'au village de Cocorico
- En quête d'Impa
- Le Village d'Elimith
- Vah'Naboris
- Vah'Rudania
- Les Souvenirs
- La Lame purificatrice
- Le Château d'Hyrule et Ganon
- L'Ode aux Prodiges
- Tous les Sanctuaires
- Liste des Korogus
- Le village d'Euzero
- La boutique de Kilton
- Les recettes
- Costumes et Accessoires
Tears of the Kindgom
- L’Île Céleste du Prélude
- Le Fort de Guet
- Première visite des profondeurs
- En route pour le village Piaf
- Babil, du village Piaf
- Le temple du Vent
- En route pour le village Goron
- Yunobo, du village Goron
- Le temple du Feu
- En route pour le domaine Zora
- Sidon, du domaine Zora
- Le temple de l'Eau
- En route pour la cité Gerudo
- Riju, de la cité Gerudo
- Le temple de la Foudre
- Le château d'Hyrule
- Les ruines du village Cocorico
- Les ruines des terres des Dragons
- Mineru, la cinquième Sage
- L’Épée de Légende
- Duplicata et le grand projet de Kohga
- Tous les sanctuaires
- Tous les souvenirs et les larmes du dragon
- Toutes les quêtes secondaires
- Tous les 1000 Korogus
- Toutes les pancartes de Boulieh
- Les tenues et leurs améliorations
- La teinturerie et les tissus de paravoile
- La liste des recettes
- Encyclopedie
Echoes of Wisdom
- Toutes les actualités
Autres jeux
- Jeux électroniques
- Zelda Game & Watch
- Zelda Watch
- Barcode Battler
- Zelda: The Wand of Gamelon
- Link: The Faces of Evil
- Zelda's Adventure
- BS Legend of Zelda
- Soul Calibur II
- Super Smash Bros.
- Super Smash Bros. Melee
- Super Smash Bros. Brawl
- Super Smash Bros. 3DS/Wii U
- Super Smash Bros. Ultimate
- Tingle's Rosy Rupeeland
- Ripened Tingle’s Balloon Trip of Love
- Tingle's Balloon Fight
- Too Much Tingle Pack
- Jeux coopératifs
- Four Swords Adventures
- Tri Force Heroes
- Hyrule Warriors
- Hyrule Warriors (Wii U / 3DS / Switch)
- Hyrule Warriors : L’Ère du Fléau
- Autres jeux & mini-jeux
- Navi Trackers
- Link's Crossbow Training
- Battle Quest
- Picross Twilight Princess
- Cadence of Hyrule
- Produits dérivés
- Espace membre
- Puissance-Zelda
- Tears of the Kingdom
- Solution complète
Liste des puits de la Tour du canyon Gerudo
Solution de Tears of the Kingdom
- Présentation
- Liste de tous les sanctuaires
- Liste de toutes les quêtes
- Liste de tous les Korogus
- Liste de toutes les pancartes de Boulieh
- Liste de tous les puits d'Hyrule
Suppléments
- Quête principale
- Quêtes secondaires de village
- Quêtes secondaires à thème

Puits du canyon Gerudo
Coordonnées : -2817 -2232 0029 Description : À l'ouest du relais du canyon Gerudo. Il s'agit de l'objet d'une quête d'investigation de Penn . Entrez-y et vous atterrirez dans une cave. Si vous observez la cave, vous remarquerez une fissure sur le mur. Détruisez-le à l’aide d’explosifs ou d’une arme capable de détruire des rochers. Le mur détruit mène à une cave encore plus grande, où se cachent trois Lézalfos et un Like Like, que vous devez battre. Pour les Lézalfos, faites attention à leurs attaques vives qui pourraient vous surprendre, et pour les Like-Like n’attaquez que quand son point faible rouge est révélé. Une fois votre combat terminé, Penn vous rappelle en haut du puits car il s’inquiète pour vous. Vous lui expliquez alors ce qu’il s’est passé et il vous récompense.

Puits du bazar Assek
Coordonnées : -3233 -2602 0023 Description : À l'ouest de l'hotel du bazar Assek. En y pénétrant et en suivant le cours d'eau, vous arriverez à une grotte appelée la source de l'Oasis. Détruisez les différents rochers jusqu'à trouver l'Elusis et Arassos, un personnage qui s'est fait piéger. Le libérer est nécessaire pour la quête du caravanier disparu .

Puits du mont Nabooru
Coordonnées : -1720 -2235 0036 Description : Au bout de la pointe sud du mont Nabooru. L'intérieur du puits ne se compose que d'une série d'étang à différentes hauteurs peu utiles.

Article rédigé par Cap

À propos de l'auteure : Dans la vie comme sur PZ, je fais la pluie et le beau temps ! On retrouve généralement un peu de flood là où je suis passée, mais je suis un cas clinique ! Le docteur Novada suit mon cas de près !
Retour au menu
Puissance-Zelda 2000-2024 - Tous droits réservés
Sites Zelda francophones : Le Palais de Zelda Solarus-Games ZeldaWiki ZeldathonFR Hyrule's Journey Zeldaforce
Sites Zelda étrangers : Zelda Chronicles Zelda Archive
Autres sagas : RPG Soluce Final Fantasy Ring Finaland
Arts et Créations : Javras
- Login / Sign Up
- Zelda: Tears of the Kingdom guide
How to get to Gerudo Town in Zelda: Tears of the Kingdom
Navigate the sandstorm and get into the Gerudo Shelter
by Julia Lee

In The Legend of Zelda: Tears of the Kingdom , as you make you way to Gerudo Desert and Gerudo Town , you’ll notice that everything past the Kara-Kara Bazaar is covered in a dense sandstorm .
Navigating through the sandstorm wouldn’t be such a problem — if it didn’t completely obscure your map while you’re in it. (When you’re not in the sandstorm, however, you can see the region’s topography on your map.)
Before you start, make sure to grab the Gerudo Canyon Skyview Tower , which will reveal the area.
Our guide details how to get through the sandstorm in Gerudo Desert and how to actually get into Gerudo Town below.
How to get through the Gerudo Desert
Before you head out, you should have some form of cold resistance and heat resistance . The temperature in Gerudo Desert spikes during the day and drops at night, so prepare for both.
You also do not have to go to Gerudo Town on foot. By combining a Zonai sled, steering stick, and fan, you can make a cool vehicle to dash through the desert sand. We ran through on foot, which we detail below.
Around the desert, there are several updrafts you can use to glide upward, giving you an idea of your position . You’ll want to take advantage of these the best you can.
The first updraft is right where the sandstorm starts at the edge of Kara-Kara Bazaar:

Ride up and just start gliding straight towards Gerudo Town. Your best bet is just to keep heading as straight as you possibly can, trying your best to avoid making any unnecessary turns.
You will see more updrafts and even tall rock structures along the way, all which you should use to get an idea of where you are.

If you keep heading straight, there’s a high chance you’ll see hit the Desert Rift, a large canyon that you’ll have to cross. You can glide and climb up, go around, use rockets , etc., to get through.
You’ll also encounter Gibdo — a special type of monster that takes reduced damage from physical attacks — on the way to Gerudo Town. You’ll need to hit it with an elemental attack (like a shock fruit on an arrow or a flame-emitter), which will deal massive damage. Once it’s been hit with an elemental attack, it’ll turn white and take normal damage from physical attacks temporarily.
If you continue along, you will hit Gerudo Town. You’ll notice it is very empty.
How to get into Gerudo Town
Outside of some extra Gibdo skulking around, Gerudo Town is completely empty. Enter the cavern in the middle of the stairs to the throne room to see a Gerudo woman standing guard in front of a bunker. Obviously, since Link is a guy, they won’t let him in.
If you use Ultrahand on the nearby box and jump on that to peek in, you’ll get a hint on where to go next, but you can skip doing this if you don’t care.
Head back outside and jump into this well to the left of the bunker, if you’re facing the entrance.

Jump in and swim up the current, toward where the letters-in-a-bottle are drifting down. Once you get to the end of the well (where there’s a vase on a rope), Ascend up. Ta-da! You’ve now shocked and scared a ton of women by invading their war bunker.

After some clarification, Link will obviously be allowed to stick around, and you’ll be able to freely come and go from the Gerudo Shelter if you speak to the guards.
Gerudo Town will eventually return to its former glory, but you’ll need to finish the “ Riju of Gerudo Town ” quest line first, which begins shortly after you enter the shelter.
Also, don’t forget to Ascend up (several times) from the throne room in Gerudo Town to get access to Soryotanog Shrine , which will give you convenient fast-travel spot near town.
More in Zelda: Tears of the Kingdom walkthrough and guides

Most Popular
- Anker's two-headed USB-C cable is a $22 blessing
- The Baldur's Gate 3 team isn't finished with the game yet
- A good game like Concord just isn’t good enough anymore
- The Boy and the Heron, Twilight of the Warriors, Netflix’s Rebel Ridge, and every movie new to streaming this week
- Daggerheart, a new Critical Role game, feels more complicated than D&D in a good way
Patch Notes
The best of Polygon in your inbox, every Friday.
This is the title for the native ad
More in Zelda: Tears of the Kingdom guide

The Latest ⚡️
Screen Rant
Zelda: totk’s new timeline placement creates an obvious sequel setting.

Your changes have been saved
Email is sent
Email has already been sent
Please verify your email address.
You’ve reached your account maximum for followed topics.
Zelda: Why Ganondorf Is Always A Gerudo
One of my favorite zelda games might never be remastered, & i'm fine with that, tears of the kingdom puts a clever twist on a zelda tradition.
Following up The Legend of Zelda: Tears of the Kingdom with another game in the same continuity is a prospect that comes with a lot of challenges, but there's one approach that could actually set up an interesting successor. As a direct sequel to The Legend of Zelda: Breath of the Wild , Tears of the Kingdom returns to the same setting but shakes things up with a story that transforms the landscape and introduces new areas above and beneath Hyrule. It's a trick that worked well for its purposes, but it's not one that could easily be repeated.
The approach to sequels in the Zelda series has rarely been as straightforward as the relationship between Breath of the Wild and Tears of the Kingdom , leading to an overall timeline that's infamously convoluted and inconsistent. Zelda stories operate more as retellings of a central myth than anything, so it's not a big deal if every event doesn't line up in one proper succession. Fitting BOTW and TOTK into that picture was always uniquely challenging , however, and Nintendo has finally clarified the unusual relationship between those games and the rest of the series.
A Zelda: TOTK Sequel Could Take Place 100 Years Later
The gerudo might be the key.
Nintendo's always made it clear that Breath of the Wild and Tears of the Kingdom don't occur in any close range of time to the stories of the other games, but a new graphic from the Nintendo Live 2024 event showed the games as fully separate from the rest of the timeline . This doesn't necessarily imply that there still can't be any connection — a story set in the far-flung future might be represented in more or less the same way — but it does make it clear that Nintendo isn't worried about linking the narrative .
An image of the current Zelda timeline was reported on by Vooks and shared on Twitter by Wario64 .
Without any larger concerns of continuity, the narrative that started with BOTW is free to leap ahead with no consequences, and this could be the perfect opportunity to explore a core element of the Zelda mythos from a new angle. BOTW 's story effectively starts 100 years before the beginning of the game, when Calamity Ganon was revived and laid waste to much of Hyrule. A sequel could move 100 years into the future , a length of time that also coincides with the long-standing concept of a Gerudo male being born every 100 years.
The Legend of Zelda games feature many changing elements, but the recurring villain Ganondorf always appears as a Gerudo for good reason.
This concept is a core part of the mythology loop in Zelda , as the only Gerudo male that ever actually appears in the series is the Demon King Ganondorf . Some of the most interesting Zelda stories come about when the franchise breaks rules, however, and turning the Gerudo prophecy in a different direction would be the perfect way to do so. TOTK sees Ganondorf meet a definitive end, resetting the 100-year cycle and providing an opportunity for a new Gerudo king to come to the table.
Zelda Doesn't Have To Obey Tradition In A New Timeline
New takes on core concepts could be fun.
A Gerudo king who isn't Ganondorf could bring a different kind of villainy to the table or end up being an ally to Link instead . Previous departures from Ganondorf as a villain have resulted in memorable antagonists like Vaati from The Legend of Zelda: The Minish Cap and the flamboyant Demon Lord Ghirahim from Skyward Sword. There's always room for new takes on Ganondorf — although Ocarina of Time 's version is permanently iconic, The Wind Waker proved that it was possible to inject a different kind of presence and pathos into the character — but there are other options.
Some of the great Zelda games have received a lot of modern attention, but one with a ton of unique charms is unlikely to get the same treatment.
Nintendo hasn't always been especially willing to upend the core concepts of the Zelda series, but the new release of The Legend of Zelda: Echoes of Wisdom proves that the company is comfortable breaking rules for the first time . Having Zelda as the primary playable character is a game-changer, considering the only other game to fully commit to that concept was Zelda: The Wand of Gamelon , a Philips CD-i game that Nintendo doesn't consider part of the franchise. When taking the Breath of the Wild continuity as a standalone thing, there's a real chance that the myth could be upended.
Changing The Zelda Formula Opens Up New Possibilities
A totk sequel needs fresh opportunities.
Having another male Gerudo live up to Ganondorf would still be a challenge, but it's a challenge that opens up new possibilities . That legacy could loom over him in different ways, whether he considers himself a reincarnation of Demise's malice or faces prejudice from those who consider any Gerudo male heir a threat. There's really no limit to how far the concept could be twisted, and although seeing something as radical as Link being born as a Gerudo seems incredibly unlikely, thinking outside the box is a fun exercise all the same.
As a sequel, Zelda: Tears of the Kingdom needed to explain why Link wouldn’t have his strength from BOTW, and it put a twist on tradition to do so.
Moving a hundred years into the future also opens up the opportunity to overhaul the landscape again . In some areas, society could significantly progress, but a new villain could bring the threat of a Third Great Calamity or another transformative event. There's also no reason that the story would have to be confined to the bounds of Hyrule, and turning to a different kind of villain and motivation could propel it into yet unexplored locations.
It's very possible that Nintendo will leave the world of Breath of the Wild and Tears of the Kingdom behind for the time being. Everyone has different priorities in Zelda games, and although the modern titles redefined open-world games in a way that still feels ahead of the game eight years after BOTW , a return to a more traditional style would make some long-time fans happy. If The Legend of Zelda: Tears of the Kingdom does get a follow-up, however, checking in on a new Gerudo male would be the perfect way to shake it up again.
Sources: Vooks , Wario64/Twitter
The Legend of Zelda: Tears of the Kingdom
The Legend of Zelda: Tears of the Kingdom is the anticipated follow-up to Breath of the Wild, released in 2017. A rare occurrence in Zelda titles, Tears of the Kingdom is a direct sequel instead of loosely connected. In Tears of the Kingdom, Link will take to the skies and learn about a mysterious kingdom in the clouds.
- Les + attendus
- Tous les Jeux
- Culture Geek
- Réalité Virtuelle
- Rétrogaming
- Toutes les actus
- Actus JVTECH
- Tests produits High-Tech
- Guides d'achat High-Tech
- Gaming Live
- Vidéos Tests
- Vidéos Previews
- Replay Web TV
- Toutes les vidéos
- Hardware PC
- Xbox Series
- Overwatch 2
- League of Legends
- Genshin Impact
- Tous les Forums

Dans The Legend of Zelda : Tears of the Kingdom, certains adversaires sont plus coriaces que les autres. Parmi eux, on retrouve par exemple les Stalhinox, une version squelettique des Hinox classiques. On vous explique où les trouver et comment les éliminer dans Zelda TOTK.

Voir The Legend of Zelda : Tears of Kingdom sur Amazon
- Comment éliminer un Stalhinox facilement dans Zelda TOTK ?
Stalhinox du Passage secret royal
- Stalhinox de la Grotte de l’étang du Crâne
Stalhinox de la gorge Tragite
- Stalhinox du Puits de l'île de Sazu
- Stalhinox de l'Étang des Aigrefins
- Stalhinox des Profondeurs du Désert Gerudo
- Stalhinox de l’Ossuaire d’Akkala
Comment éliminer un Stalhinox facilement dans Zelda TOTK ?
En jouant à The Legend of Zelda : Tears of the Kingdom , vous ferez face à de très nombreux ennemis différents. Pour la plupart, ils existent d’ailleurs en plusieurs formes différentes, généralement classées par couleur (rouge, bleu, noir, blanc, argent, de la plus faible à la plus forte). Mais il existe également des adversaires un peu plus puissants que l’on pourrait qualifier de mini-boss vu la jauge de points de vie qui apparaît au-dessus de leur tête au moment de les affronter. Parmi eux, on retrouve par exemple les Golemax , les Lithorok , les Griocks , les Gigatriciens , les Moldarquors ou même les Lynels (même si ces derniers n’affichent pas leurs jauges de PV comme les autres). Normalement, les mini-boss les plus communs et les plus faciles à vaincre que vous croiserez seront les Hinox . Mais ces derniers existent également sous une forme bien particulière appelée Stalhinox .

En effet, les Stalhinox sont bien une variante squelettique des Hinox. Cependant, à l’inverse d’un simple changement de couleur, les Stalhinox ne peuvent pas être tués de la même façon que leurs congénères. Pendant une bonne partie du combat, traitez les Stalhinox exactement comme les autres Hinox et faites en sorte de viser leur œil unique grâce à votre arc . Au bout d’un certain nombre de dégâts, l'œil se délogera de son socle, ce qui devrait rendre le Stalhinox immobile. A ce moment, ignorez le gros sac d’os et concentrez toutes vos attaques sur l'œil . Non seulement vous lui infligerez beaucoup plus de dégâts de cette manière, mais vous n’aurez d’autre choix que de porter le coup final sur l’œil si vous voulez éliminer le Stalhinox.
Où trouver tous les Stalhinox dans Zelda TOTK ?
Comme tous les mini-boss de The Legend of Zelda : Tears of the Kingdom, les Stalhinox apparaissent à certains endroits bien spécifiques de la carte et peuvent y être combattus une fois par lune de sang. En bonne créature toute faite d’os, vous les trouverez généralement dans des grottes, puits et autres endroits souterrains , sans oublier bien sûr les immenses Profondeurs d’Hyrule. Ci-dessous, vous trouverez la carte avec l’emplacement de tous les Stalhinox du jeu, ainsi que la marche à suivre pour en trouver quelques uns facilement :
Crédits : Mapgenie

Allez tout au fond du Passage secret royal en vous frayant un chemin à travers les amas de roche grâce à des Fleurs bombe ou à Yunobo jusqu’à tomber sur des roches bleues . Bien qu’elles soient destructibles avec n’importe quelle arme de type marteau, vous gagnerez un temps précieux et perdrez bien moins d’armes si vous vous servez de Yunobo pour les détruire. Continuez sur ce chemin en détruisant plusieurs rochers bleus derrière lesquels se trouveront quelques gisements, puis nagez pour rejoindre une très grande salle où se trouvent quelques gisements et un énorme amas de roches au centre. Détruisez-le pour révéler le Stalhinox .
Stalhinox de la Grotte de l’étang du Crâne

Comme son nom l’indique, vous trouverez ce Stalhinox dans la Grotte de l’étang du Crâne , au nord-ouest des Profondeurs d’Akkala . Pour accéder à la grotte, partez depuis les falaises au nord de l’étang et rejoignez le sommet de la flèche de pierre qui sert d 'œil gauche à l’ étang du Crâne . Une fois à l’intérieur, avancez et déblayez les amas de rochers pour trouver le Stalhinox .

Vous trouverez ce Stalhinox dans la Grotte de la gorge Tragite , dont l’entrée se situe au fond de la Gorge Tragite , au niveau de la séparation entre le Mont Labulat et la Place commerciale de Delass . Éliminez le Litholike qui garde l’entrée, puis utilisez beaucoup de Fleurs bombe ou le pouvoir de Yunobo pour déblayer le gros amas de roche au centre de la grotte et ainsi libérer le Stalhinox .
Stalhinox du Puits de l'île de Sazu

Vous trouverez ce Stalhinox dans le Puits de l'île de Sazu qui se situe dans les Marécages de Lanelle au nord de la Tour de la plaine de Sahasla .
Stalhinox de l'Étang des Aigrefins

Vous trouverez ce Stalhinox sur une petite plateforme au beau milieu de l'Étang des Aigrefins , à l'est de la Tour de Rabelle .
Stalhinox des Profondeurs du Désert Gerudo

Vous trouverez ce Stalhinox dans les Profondeurs du Désert Gerudo tout au sud-ouest de la carte, à l'est de la Racine Igat Ahalaq .
Stalhinox de l’Ossuaire d’Akkala

Vous trouverez ce Stalhinox dans l’ Ossuaire d’Akkala , l’équivalent des Profondeurs de l 'Étang du Crâne . Vous pourrez y accéder très facilement en plongeant dans l’ Abîme de l’Etang du Crâne . Notez qu’il vous faudra éliminer quelques Stalbokoblins et quelques Stalmoblins avant qu’il se réveille, et que le vaincre vous permettra de récupérer l ' Épée de Biggoron .

3-Day Yekaterinburg Itinerary
Navigate forward to interact with the calendar and select a date. Press the question mark key to get the keyboard shortcuts for changing dates.
Navigate backward to interact with the calendar and select a date. Press the question mark key to get the keyboard shortcuts for changing dates.
- Yekaterinburg in 3 days
- 1-Day Yekaterinburg Itinerary
- 2-Day Yekaterinburg Itinerary
- 4-Day Yekaterinburg Itinerary
- 5-Day Yekaterinburg Itinerary
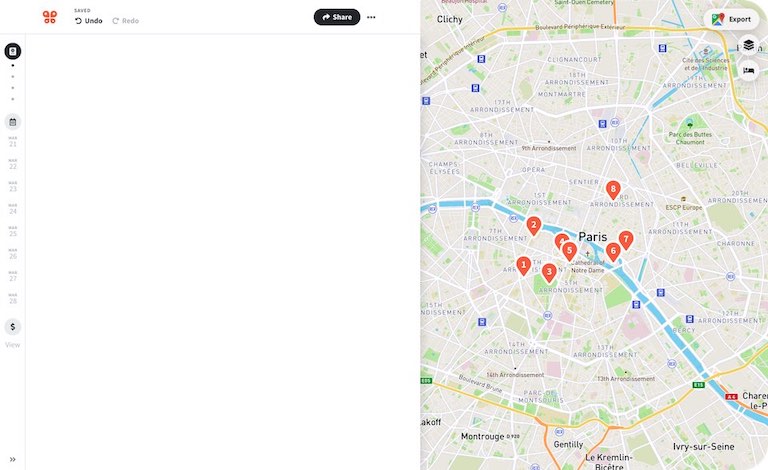
Table of contents
Day 1: most popular attractions, day 2: north side of town, day 3: off the beaten path.
Dendrologicheskiy Park-Vystavka
Yel'tsin center, observation deck, church on blood in honour of all saints resplendent in the russian land, park usad'by kharitonovykh-rastorguyevykh, where to eat, mamina mama, restaurant panorama a.s.p., mcdonald's, yekaterinburgskiy gosudarstvennyy akademicheskiy teatr opery i baleta, yekaterinburg museum of fine arts, monument to a keyboard, botanical garden of ural branch of ras, tts yevropa, ganina yama, pel'meni klab, pitstseriya papa rimskiy, chernyy tyul'pan, galereya art-ptitsa, museum of v.s. vysotsky, pokrovsky passage, museum of stone-cutting and jewelry art history, dom n. i. sevast'yanova, ulitsa vaynera, kamnereznyy dom antonova, the gyros bistro, old fashioned bar.
Attractions

Popular road trips from Yekaterinburg
All road trips from yekaterinburg.
- Yekaterinburg to Moscow drive
- Yekaterinburg to St. Petersburg drive
- Yekaterinburg to Helsinki drive
- Yekaterinburg to Kazan drive
- Yekaterinburg to Tallinn drive
- Yekaterinburg to Chelyabinsk drive
- Yekaterinburg to Riga drive
- Yekaterinburg to Vilnius drive
- Yekaterinburg to Tyumen drive
- Yekaterinburg to Perm drive
- Yekaterinburg to Kyiv drive
- Yekaterinburg to Nizhny Novgorod drive
- Yekaterinburg to Sochi drive
- Yekaterinburg to Tbilisi drive
- Yekaterinburg to Ufa drive
- Yekaterinburg to Yaroslavl drive
- Yekaterinburg to Samara drive
- Yekaterinburg to Minsk drive
- Yekaterinburg to Novosibirsk drive
- Yekaterinburg to Volgograd drive
- Yekaterinburg to Kostroma drive
- Yekaterinburg to Astana drive
- Yekaterinburg to Vladimir drive
- Yekaterinburg to Omsk drive
- Yekaterinburg to Almaty drive
- Yekaterinburg to Tula drive
- Yekaterinburg to Veliky Novgorod drive
- Yekaterinburg to Esto-Sadok drive
- Yekaterinburg to Sevastopol drive
- Yekaterinburg to Krasnoyarsk drive
Explore nearby places
- Yekaterinburg
- Beryozovsky
- Verhnyaya Pyshma
- Bolshoi Istok
- Sredneuralsk
- Krasnogvardeyskiy
- Mramorskoye
- Malobrusyanskoye
- Pervouralsk
- Verkh-Neyvinsky
All related maps of Yekaterinburg
- Map of Yekaterinburg
- Map of Shuvakish
- Map of Istok
- Map of Palkino
- Map of Rudnyy
- Map of Beryozovsky
- Map of Lesnoi
- Map of Verhnyaya Pyshma
- Map of Mednyy
- Map of Bolshoi Istok
- Map of Baltym
- Map of Sredneuralsk
- Map of Iset
- Map of Krasnogvardeyskiy
- Map of Aramil
- Map of Kosulino
- Map of Kurganovo
- Map of Monetny
- Map of Mramorskoye
- Map of Malobrusyanskoye
- Map of Kashino
- Map of Sysert
- Map of Revda
- Map of Zarechnyy
- Map of Taraskovo
- Map of Bilimbay
- Map of Pervouralsk
- Map of Polevskoy
- Map of Verkh-Neyvinsky
- Map of Malysheva
- Map of Novouralsk
Yekaterinburg throughout the year
- Yekaterinburg in January
- Yekaterinburg in February
- Yekaterinburg in March
- Yekaterinburg in April
- Yekaterinburg in May
- Yekaterinburg in June
- Yekaterinburg in July
- Yekaterinburg in August
- Yekaterinburg in September
- Yekaterinburg in October
- Yekaterinburg in November
- Yekaterinburg in December
Looking for other day-by-day itineraries in Yekaterinburg?
Check out our other curated itineraries that are also filled with jam-packed days:
- Itinerary + map in one view
- Live collaboration
- Auto-import hotels and reservations
- Optimize your route
- Offline access on mobile
- See time and distance between all your places
IMAGES
VIDEO
COMMENTS
How to activate the Gerudo Canyon tower in Zelda
Nos autres réseaux : Discord : https://discord.gg/VSy6EpeZz7Twitch : https://www.twitch.tv/laclemstimTiktok : https://www.tiktok.com/@la_clemstimTwitter: htt...
Finding the Gerudo Canyon Tower. Zone : South-West Hyrule. Contact details -2459, -2178, 0301. Nearby shrines : Suäli Uaqa, Tula Qamiqa. To reach the Gerudo Village, you have to cross the Gerudo Canyon. The reconnaissance tower is located on the eastern plateau of the canyon. Due to the ambient heat, you will have to Take something to cool ...
She helped launch the Rift Herald in 2016. Completing "Riju of Gerudo Town" in The Legend of Zelda: Tears of the Kingdom helps you find Riju, one of the four companions you'll need to seek ...
Pour cette tour des contrées Gerudo dans Zelda TotK, vous allez devoir faire venir le réparateur Chênieh pour activer le mécanisme. Problème ? Il est coincé tout en bas d'un ascenseur.
In this Zelda Tears of the Kingdom TOTK guide, we'll be showing you how to get the Gerudo Canyon Skyview Tower guide. This guide is a hidden treasure that wi...
The Gerudo Highlands Skyview Tower is found all the way east from the Hyrule Field at the coordinates (-3960, -1312, 0429), north of the desert.In order to safely make your way here, you'll need ...
Zelda: Tears of the Kingdom - Riju of Gerudo Town - Full Quest Walkthrough🖥️ ZELDA TOTK // GUIDES PLAYLIST:https://www.youtube.com/playlist?list=PLtA90_ts33...
Gerudo Canyon Stable. Gerudo Canyon Stable is a location that returns in The Legend of Zelda: Tears of the Kingdom, in its same location from the previous game before you get to the Gerudo Desert ...
You need to launch from the Gerudo Highlands Skyview Tower and glide east. You will need four rings of stamina and plenty of stamina-replenishing meals to reach the island. You must defeat King ...
Gerudo Canyon Mine has an entrance at -2675, -2405, 0079 and another entrance at -2612, -2611, 0111. It is southwest of Gerudo Canyon Skyview Tower and east of Mayatat Shrine and Kara Kara Bazaar. Cave Features. The northern entrance of the cave begins with a long corridor, which eventually opens out into a large room. In this large room, there ...
View Interactive Map. Riju of Gerudo Town is one of the four core Tears of the Kingdom Main Quests in the Regional Phenomena questline. You'll once again have to traverse the dangers of the Gerudo ...
Pour cette tour des contrées Gerudo dans Zelda TotK, vous allez devoir faire venir le réparateur Chênieh pour activer le mécanisme. Problème ? Il est coincé tout en bas d'un ascenseur.
Like the Missing Caravaner, this is an additional step to get your hands on the best weapon used as a base for amalgamation in Zelda TotK, the famous Gerudo scimitar. After completing this mission, a second one will unlock, with access to a particularly practical secret room, since it will give some of the components necessary for the ...
All TotK Gerudo Orb Locations Gerudo Orb 1 - Gerudo Shelter Main Area. Just in case you missed the first Gerudo Orb in Tears of the Kingdom, head back to the initial location in the Gerudo Shelter where you met Rotana. This is where you visited her time and time again in the main area of the Gerudo Shelter to give her the pictures of the White Stelae in the Seven Heroines' Secret quest.
To complete this, you will need to defeat a Molduga. Bring Isha 4 Diamond , 10 Flint , a Gerudo Scimitar , and a Gerudo Shield . Next: The Legend Of Zelda: Tears Of The Kingdom - All Hateno Village Side Quests. Here, you can learn how to complete every Gerudo Town side quest in Tears of the Kingdom.
Riju of Gerudo Town Walkthrough. Riju of Gerudo Town is a Main Quest in The Legend of Zelda: Tears of the Kingdom (TotK) that starts in Gerudo Town. Read on for a detailed walkthrough of this main quest, including guides on how to prepare for the Gibdo attack, the location of the pillars, and how to solve the mural riddle!
In Memory 12, the Sage of Water steps forward and tells King Rauru, "We just received word that the last free village in the Gerudo Desert has fallen." This implies that, following Ganondorf's transformation into the Demon King and the summoning of his monsters, he became at odds with the armies he once led.Without any more information, there seems to be two options for how this happened ...
Gerudo Town returns in The Legend of Zelda: Tears of the Kingdom, in its same location from the previous game in the middle of the Gerudo Desert. There is an enormous sandstorm cloaking the entire ...
Puits du canyon Gerudo. Coordonnées : -2817 -2232 0029 Description : À l'ouest du relais du canyon Gerudo. Il s'agit de l'objet d'une quête d'investigation de Penn. Entrez-y et vous atterrirez dans une cave. Si vous observez la cave, vous remarquerez une fissure sur le mur.
How to get into Gerudo Town. Outside of some extra Gibdo skulking around, Gerudo Town is completely empty. Enter the cavern in the middle of the stairs to the throne room to see a Gerudo woman ...
This concept is a core part of the mythology loop in Zelda, as the only Gerudo male that ever actually appears in the series is the Demon King Ganondorf.Some of the most interesting Zelda stories come about when the franchise breaks rules, however, and turning the Gerudo prophecy in a different direction would be the perfect way to do so.TOTK sees Ganondorf meet a definitive end, resetting the ...
Vous trouverez ce Stalhinox sur une petite plateforme au beau milieu de l'Étang des Aigrefins, à l'est de la Tour de Rabelle. Stalhinox des Profondeurs du Désert Gerudo
Yekaterinburg - Wikipedia
Student, Yekaterinburg, Russia - Sverdlovsk Oblast: See traveler reviews, candid photos, and great deals for Student at Tripadvisor.
24. Tour the Ural Vision Gallery; 25. Visit the monument of Alexander Stepanovich Popov; 26. Check out Yekaterinburg's unique subway system; 27. Enjoy the views from Vysotsky Viewing Platform; 28. Explore the Nevyansk Icon Museum; 29. Book a historical military tour of Yekaterinburg; 30. Visit sites of the city related to Russia's first ...
This is the second most beautiful place in the city. Orhan A — Google review. Ulitsa 8 Marta, 37а, Yekaterinburg, Sverdlovsk Oblast, Russia, 620014 • +7 343 376-48-62 • Tips and more reviews for Dendrologicheskiy Park-Vystavka.