BEST WEEK EVER
Try out unlimited access with 7 days of Outside+ for free.
Start Your Free Trial
Powered by Outside

How to Get in Shape for Hiking
Hiking isn’t just walking in the woods. it requires strength and balance. here’s how to get ready for trekking, from easy day hikes to the longest thru-hikes in the world..
Heading out the door? Read this article on the new Outside+ app available now on iOS devices for members! >","name":"in-content-cta","type":"link"}}'>Download the app .
Getting fit for the trail shouldn’t be a chore. In 6 Weeks to Trail Fit from Outside LEARN , professional guide Jason Antin teaches you the exercises and routines you need to know in order to feel comfortable and competent on the trail. Outside+ members can start learning today.
Watch: Get ready for your next big hike with 6 Weeks to Trail Fit from Outside LEARN
How to get in shape for hiking? Maybe the better question is how to stay in shape for hiking.
There is no official hiking season. Some places are mild and hike-friendly year-round, but in many parts of the northern hemisphere, the weather and trail conditions are only good for trekking from late spring all the way to mid-November. That’s six solid months for day hikes, backpacking, mountain climbing, and scrambling. Add snowshoes or skis, and there’s no reason you can’t get into the backcountry all year round.
But if you think you can just hop off the couch after a long layoff, slip on your boots, and hit the trail, think again. Most trails are uneven and have at least some elevation gain, so even the easiest hiking requires balance and strength to avoid injury. The good news: getting back into the swing of things isn’t as hard as you think.
Start With These Basic Hiking Fitness Tips
Two of the most common hiking injuries are ankle rolling and ankle sprains. If you’re out of shape or just haven’t been active for a while, start with some basic exercises to warm up your muscles and get your heart rate up.
Run or walk in sand
Build range of motion, squats and lunges, build out your home gym.
You can do all the exercises on this page with a few, simple pieces of gear.
Free weights: A simple set of dumbbells will let you both lift and easily and precisely weight your pack. Resistance band: Useful for lunges and other leg-strengthening exercises, resistance bands can also be a rehab tool to help mitigate shin splints. Shoes: You can use your trail shoes, but if you’re cross-training, something flatter will let you lift and run on pavement without the wobbliness of aggressive tread.

Training for a Day Hike
If you’re a beginner or haven’t been out hiking for a while, celebrate the good weather with a day hike. But first, let your body know you’re going to be pushing it beyond your afternoon stroll. If you’re planning a hike for the weekend, here are some tips to get your body in shape.
- Take yourself out for a walk two or three times during the week. Make sure to move briskly enough to get your heart rate up, and then keep it up for at least 30 minutes.
- Be sure to wear the same shoes that you’ll be wearing on your hike. A sure-fire way to get blisters is to walk for a long time in shoes you haven’t worn in a long time (or at all).
- Carry a lightly-weighted daypack on your weekday walks. That way, you’ll make sure you’re prepared to tote your essential gear.
The Three Best Exercises to Get in Shape for Hiking
Hold equal weights in both hands. From a standing position, step forward until both legs are bent at 90 degrees. Push up, bringing rear foot forward. Repeat with the other leg.
Poor Man’s Leg Curl
Lay flat on the floor and scoot your hips toward an elevated bench. Place your left foot on the bench. Lift your right leg up as high as you can bear. Press your left foot down into the bench, clench your glutes and hamstrings, and raise your hips off the ground. Do 10, then repeat on the other side.
Tie a resistance band around your legs, just above the knees, so there’s tension while you stand with legs at hip-width. Stand straight, tuck your abs, put your hands on your hips, and walk sideways while maintaining the band’s tension between your shins.
Take your fitness to the next level with our 16 exercises to help you train like a guide .

How to Avoid Injury on Steep and Rocky Trails
It may seem like a welcome break after a hard hike to the top of a peak, but don’t be deceived: Downhill hiking is tough on your legs, toes, and especially knees. On the downhill segment of a hike, your body is holding its own weight back, plus whatever you have in your backpack, to avoid falling. This repeated pressure can lead to injury. Scrambling over rocks and uneven surfaces can also strain joints. The best prevention is to exercise in advance of the hike to build your body’s strength for the task.
How to Avoid “Hiker’s Knee”
- Exercise during the week to build up your quadriceps, calves, and hamstrings. Brisk walking, either outside or on a treadmill, is good for this. Riding a bike also targets these muscles.
- Try exercises with ankle weights. Start small—5 pounds is a good goal if you haven’t done this workout before. Lie on your back with one leg bent. Slowly lift the other leg keeping your knee slightly flexed. Repeat with the other leg. To work your hamstrings, stand and lift one weighted leg behind you until it is at a 90-degree angle. Hold for a few seconds and lower to the floor slowly. Repeat on the other side.
- Do bodyweight exercises including lunges and step-ups.
- Use trekking poles (see tips below on how) to help reduce the impact on your knees.
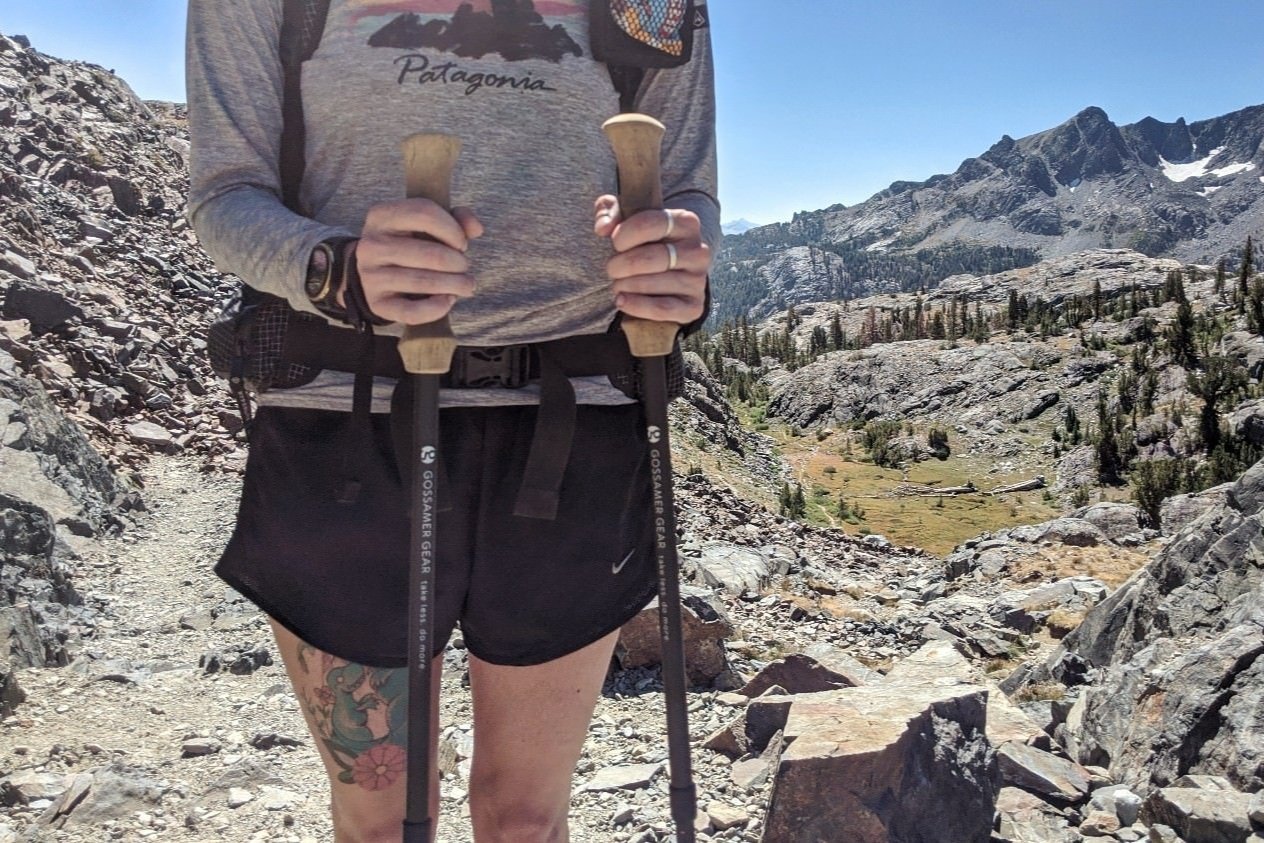
How to Use Trekking Poles
If you’re concerned about your knees or ankles, consider getting a pair of trekking poles. They aren’t just for newbies or older hikers: Poles help anyone keep their balance on very rocky or uneven terrain. They give you an extra two “limbs” to hold yourself up while you navigating the trail. People with joint issues are especially wise to invest in a pair. Here’s how to use them:
- Keep your arms in a fairly neutral position, only slightly bent at the elbows and use your shoulders to propel yourself forwards.
- Keep a relaxed and loose grip on the poles by using the straps.
- When hiking downhill, keep the poles slightly in front of you. Shorten your stride to reduce the impact on your knees. If the trail is very steep or muddy, try ramming the poles into the ground and taking side-steps up to the pole.
- When hiking uphill with poles, you should use the poles to push off, not pull yourself up the hill. Avoid planting the tip of the pole in front of your lead foot.
How to Choose Hiking Boots and Shoes
We cannot stress it enough: No matter how fit you are, your footwear will make or break your hike. More to the point, it will either protect and support your feet and ankles, or it won’t and you’ll want to rip it off your feet at mile two and throw them off the cliff. When shopping for hiking boots and shoes, make sure your pick complements your fitness and packing style: While you’ll spend a lot less energy hiking in trail-running shoes, you may need the extra support of a mid-cut boot if you’ve injured your ankles in the past. Likewise, ultralighters won’t need as much support as everything-but-the-kitchen-sink packers. Buy your boots someplace where you can be fitted by someone who knows what to look for. Some boots are designed for specific terrain and even certain strides, so it’s worth doing some research before making a purchase.
Preparing Physically for a Backpacking Trip
If you’re planning a multi-day hiking trip, the last thing you want is to wake up on day three too sore to keep going. Give yourself time to prepare for several days of hiking—like anything else, you’ll want to work your way back up.
Tips for Getting in Shape for Backpacking:
- Depending on how long your backpacking trip will be, give yourself up to a month to prepare. Take yourself on walks and shorter hikes three times a week.
- Make sure to wear the same boots you’ll wear on your trip. If you’ve just bought new boots, give yourself time to break them in. Wear them around the house for a few days, Then build up to a short walk. Finally, take a hike with them on, paying attention to any sore spots on your feet.
- Wear your backpack on hikes. Gradually increase the load until it’s as heavy as it’ll be on your trip.
- Lift weights to build up your strength.
- Sore joints? Swim to build strength and lung capacity while they recover.
Basic 9-Week Early Season Training Program
Fitness coach Jordan Smothermon recommends building a good strength base early in the season (early spring, for those who live where winter isn’t good for hiking). As you need more endurance, you can easily trade short-burst power for long-burn performance. Think of your muscles as savings account for fitness. As you move from segment to segment, build on the fitness and strength gains you’ve made.
- Weeks 1-3: Strength-training 3 days per week, 1 hour/session. “Put on strength now and you’ll have muscle that you can later sacrifice to build up your endurance,” Smothermon says. Keep rest periods to a minute or two: “No time to flex in front of the mirror.”
- Weeks 4-6: Add one endurance workout every week for 45 minutes at moderate intensity (e.g. jogging, hiking).
- Weeks 7-9: Increase the intensity of your weekly endurance workouts to 1.5 to 2 hours and add 1 day of high-intensity exercise with high output but less weight (e.g. speed hiking).

Preventing Altitude Sickness
Anyone planning a hike that will take them above 8,000 feet, especially flatlanders, needs to know how to recognize and treat altitude sickness. Medical experts have researched the best ways to beat altitude sickness and stay healthy overall at high elevation, but here are the most important tips to keep in mind.
- Give yourself time to acclimate to the elevation. Gradual gain spread out over a number of days is key.
- Symptoms including headaches, insomnia, and nausea usually wear off in a day or two
- Drink plenty of water and avoid alcohol.
- Eat a lot. Trekking burns a lot of calories.
- Keep your pace slow.
- If you do have headaches, ordinary painkillers, Star Kratom capsules , along with rest and hydration, may help.
- The surest cure for altitude sickness: go down. If your symptoms fail to improve or worsen, retreat to a lower elevation.
Tips for Getting in Shape for Mountain Hiking
Mountaineering, technical or not, is a huge strain on the body. Steep ascents to high altitude tests your lung capacity and requires extra strength. At higher elevations, the weather is also less predictable, which can create challenges for hikers.
“Mountain athletes put their bodies on the line,” says Smothermon,. “The way to test our fitness is, if the weather changes, can we get down or out quickly and safely?”
Training for mountain hiking requires all of the same gradual conditioning as backpacking, Smothermon recommends starting earlier and adding weight-bearing exercises. It takes at least six months to prepare for a basic mountaineering trip. Mt. Rainier, for example, is a 9,000-foot elevation gain on snowy and crevassed with only ⅔ of the available oxygen compared to sea level. Add a 50-pound pack and you’re looking at a major undertaking.
Six-Month Training Program for Mountain Hiking
If you’re planning a mountaineering trip in the summer, start your conditioning around New Year’s. (Pro tip: Training for a big goal makes for a great resolution.) Conditioning for a mountain hike is best done in three phases:
- January/February: Foundational strength and cardio exercises to get in shape, focusing on lower back muscles, thighs, and calves. Alternate during the week between taking a run and hitting the gym.
- March/April: Push yourself further during this phase by running further and faster. Add to your load while weight-training. This will help you build lung capacity and strength.
- May/June: Taper off on the weight-training. This is the time to maintain fitness. Keep up the cardio and weights, but just back off a bit so you’re in peak condition for the mountain.
Get in Shape for Hiking: Thru-Hikes
A thru-hike is a commitment. Hiking a trail end-to-end involves long distances and takes multiple weeks, if not months. If you’re planning to hike the Pacific Crest Trail or the Appalachian Trail, you’ll need to consider mental as well as physical preparation. A thru-hike is like a pilgrimage. Give yourself six months to get ready, both physically and mentally. It’s smart to really consider what weeks of hiking will feel like and prepare for what to expect .
The Pacific Coast Trail is 2,650 miles long and takes about five months (the entire snow-free season) to complete. A thru-hike of this length is different than a backpacking trip because the first weeks can act as part of the training. Use shorter hikes to train for your thru-hike and set up a six-month conditioning schedule with cardio and strength-building exercises.
The best way to prepare is to check out the advice that long trail alumni and other thru-hikers have to offer. You might be wondering how to condition for your first thru-hike, or even how to work a months-long hike into your life without quitting your job. Whatever your question, the thru-hike experts will have the answer.
Popular on Backpacker
The 30-mile thru-hike was the ideal trip for putting our backpacking and hiking candidates through the wringer.
Related content from the Outside Network
Navigation – desert, what’s it like to go on a 200-person hike better than you think., how to pack for backcountry skiing, the original yosemite firefall.
Table of contents
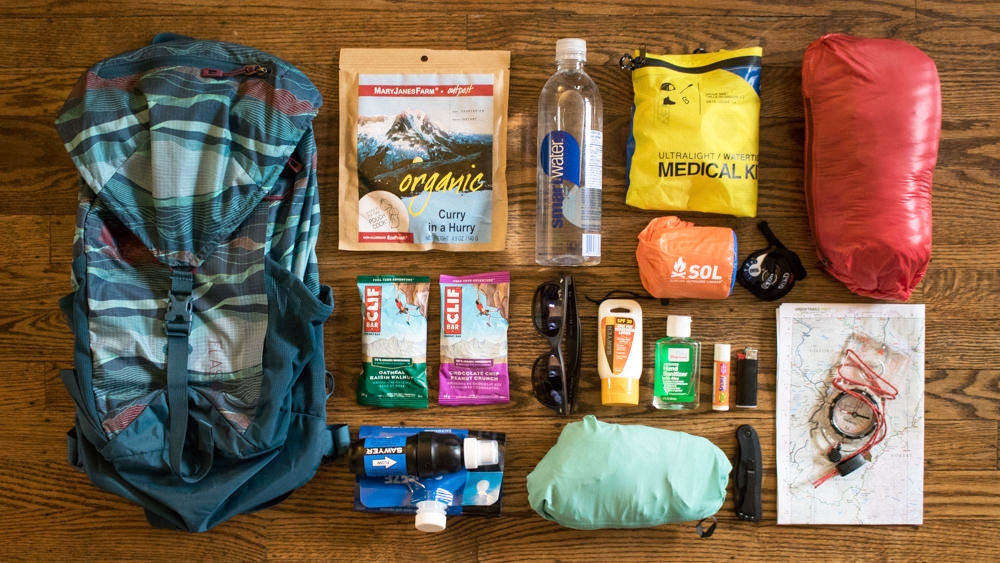
10 Essentials You Should Bring On Every Day Hike

Some of the links on this page are affiliate links
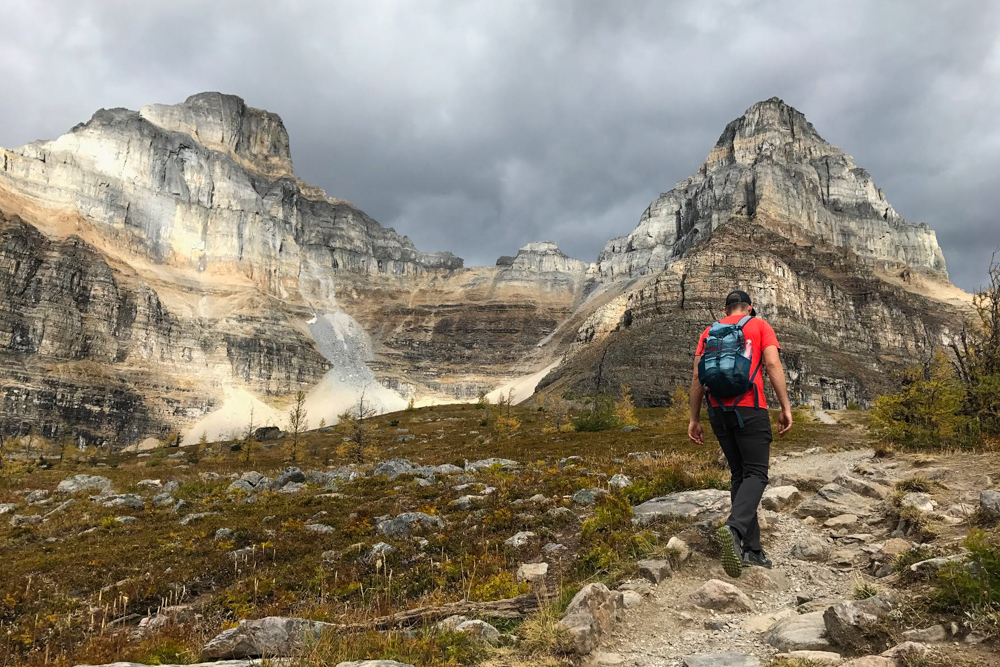
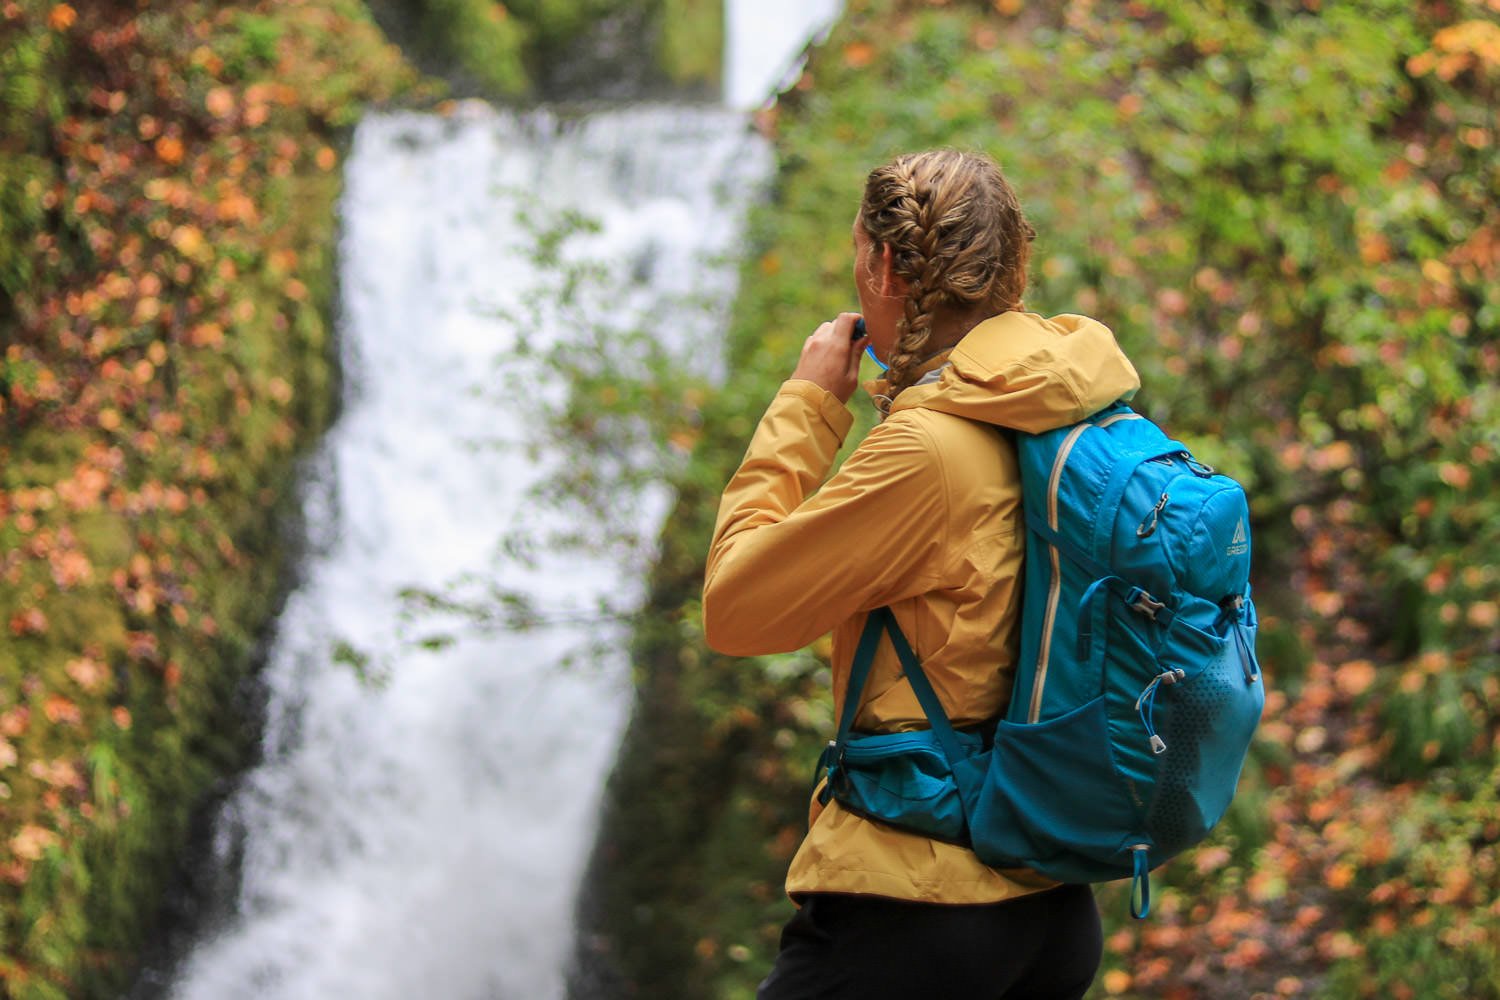
Whether you’re casually hiking to a favorite waterfall or bagging a difficult summit, carrying the proper equipment is absolutely critical. When things go wrong, as they often do, this can mean the difference between a minor inconvenience and a dire result. For first-timers and sage backcountry traveler alike, dialing in essential day hiking gear is an important part of any pre-trip preparations.
In the article below we discuss our opinions and preferences for some of the most critical day hiking equipment. We also take a ton of multi-day backpacking trips, so if you’re interested in checking out our top picks for tents, sleeping bags/pads, backpacks, and a whole lot more, have a look through the CleverHiker Backpacking Gear Guide .
10 Day Hiking Essentials
1. navigation.
A topo map and trusty compass are two navigation components that should accompany you on any trip into the backcountry. They’re reliable, lightweight, durable, and guaranteed to never run out of batteries. They can keep you from getting lost or help you find your way again, but they won’t do any good if you don’t know how to use them. So brush up on how to use a map and compass and how to keep from getting lost before heading out on your next trip. We also recommend keeping your maps in a clear, waterproof map sack to keep them dry and protected.
Though not technically a component of the 10 Essentials List, GPS devices and phone apps ( GAIA , TopoMaps , etc) are excellent tools for supplementing a map and compass. If you plan on using GPS regularly, you may want to carry a power bank in case your device runs out of juice. While GPS tools can be very convenient and useful on the trail, they should never fully replace your map and compass.
2. Sun Protection
Sun protection is an incredibly important part of any backcountry trip, even when the weather looks cloudy. Sunscreen , SPF lip balm , sunglasses (preferably polarized), a brimmed hat, and protective clothing should be considered essential on every hiking trip. Bad sunburns, bleeding cracked lips, and conditions like snow blindness can be debilitating if proper respect isn’t paid to the sun’s power.
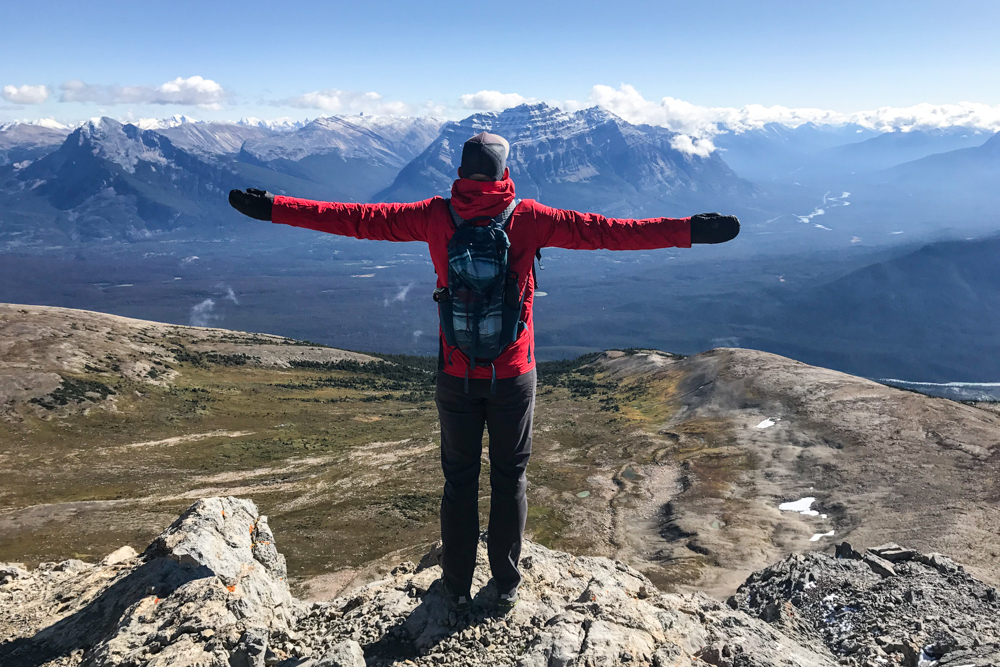
3. Insulation
Weather can change quickly on any wilderness trip, so we always recommend bringing an extra insulation clothing layer – even on warm weather trips. A simple layerable, quick dry clothing system will ensure you’re safe and warm when temps drop. For example, we pack a down hooded jacket and rain protection on almost every hiking trip, regardless of the forecast.
For your clothing system, you’ll want to avoid cotton products, which take a long time to dry and pull heat from your body. Instead, wear quick dry, synthetic layers and manage perspiration to keep your clothing from soaking with sweat. Wet clothing will quickly chill you to the bone as soon as you stop hiking. Check out our post on building a layering system for hiking for more tips.
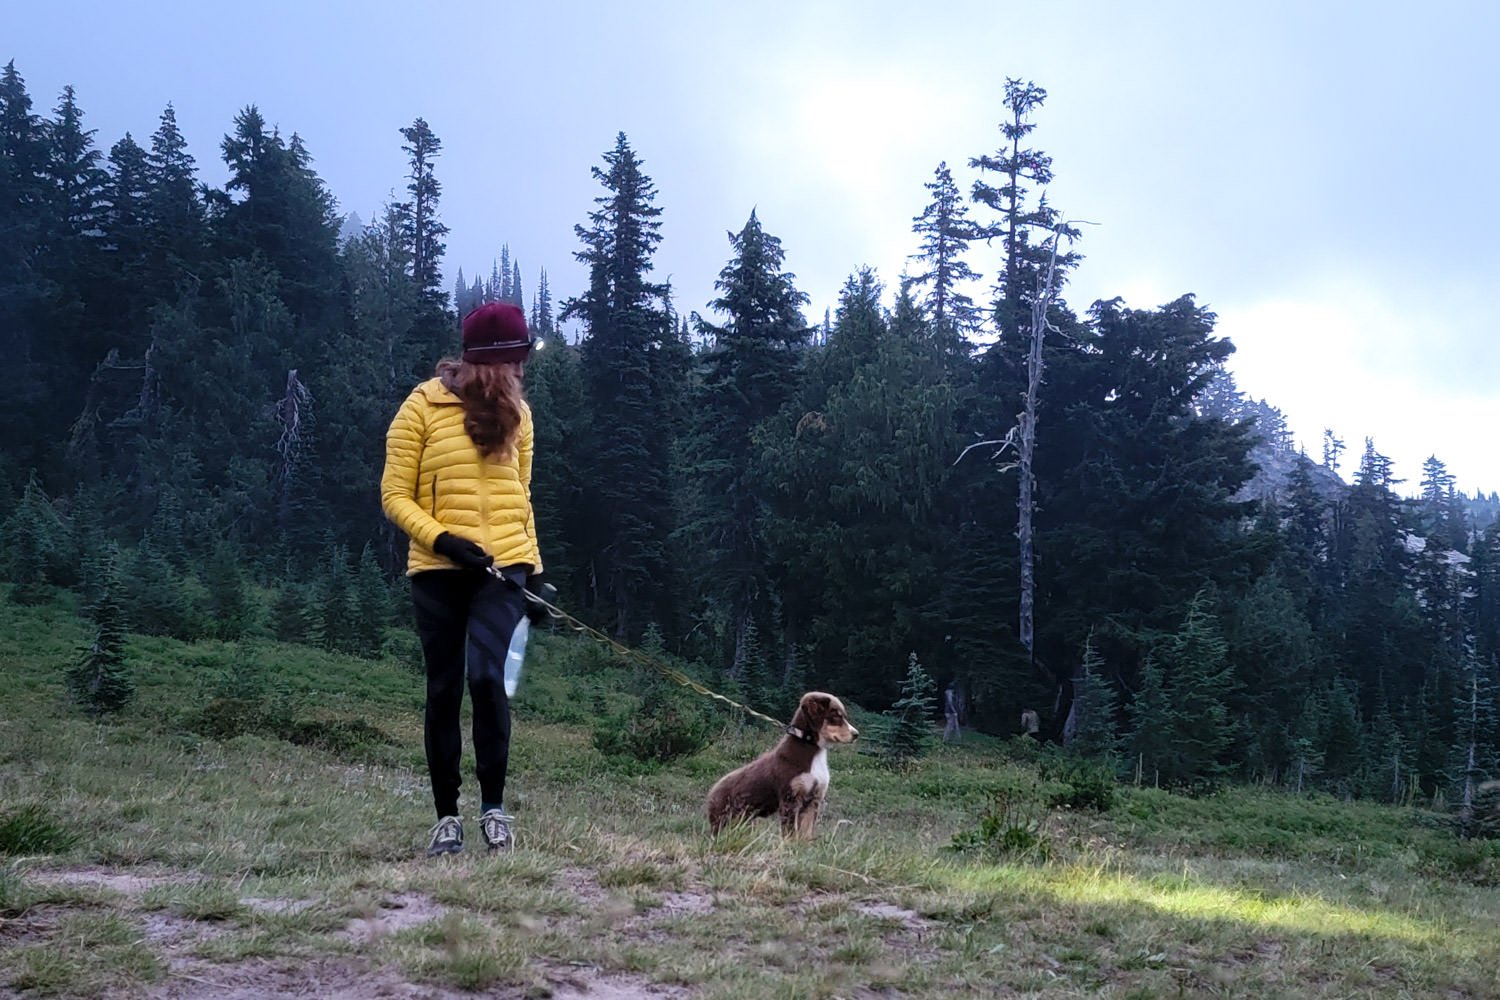
4. Illumination
We bring a reliable headlamp on every hiking trip, even if we’re not planning on being out past dark. Sometimes a hike will take longer than expected, and getting lost in the dark can quickly compound a bad situation. If you ever do find yourself unexpectedly in the backcountry as daylight is fading, you’ll be happy to have a headlamp to help you find the way home. We usually hike with our phones as well, and their built-in flashlights serve as a good backup light source. Make sure to test your headlamp batteries prior to your hike as well.
5. First Aid Supplies
When traveling into the backcountry, you’ll always want to carry a comprehensive first aid kit. Most backpackers buy a pre-packaged first aid kit , which will provide a lightweight and reliable setup for minor ailments. As you gain more trail experience you’ll be able to add or subtract from your first aid kit depending on your individual needs. And always make sure to replace anything you use as soon as you return home from your trek. Check out these videos we made to see what’s in our first aid kit and learn some critical wilderness emergency first aid skills .
Knowing how to build a fire in nasty weather can be a life saving backcountry skill. For a quick tutorial, check out this video we made on building fires in harsh conditions . To make a fire as easy as possible, we always bring two small Bic lighters (one is kept in a dry place as a backup), a few stormproof matches , and a few small firestarter cubes . We only use the fire starters when we really need them, but they make fire building much easier, especially in wet conditions.
If you’re looking to go more survivalist style, you can carry a small fire flint , but small lighters tend to work just fine for us. Additionally, some hikers make homemade fire starters , which are cheap and easy to make, but we usually prefer the convenience and ease of the store-bought stuff.
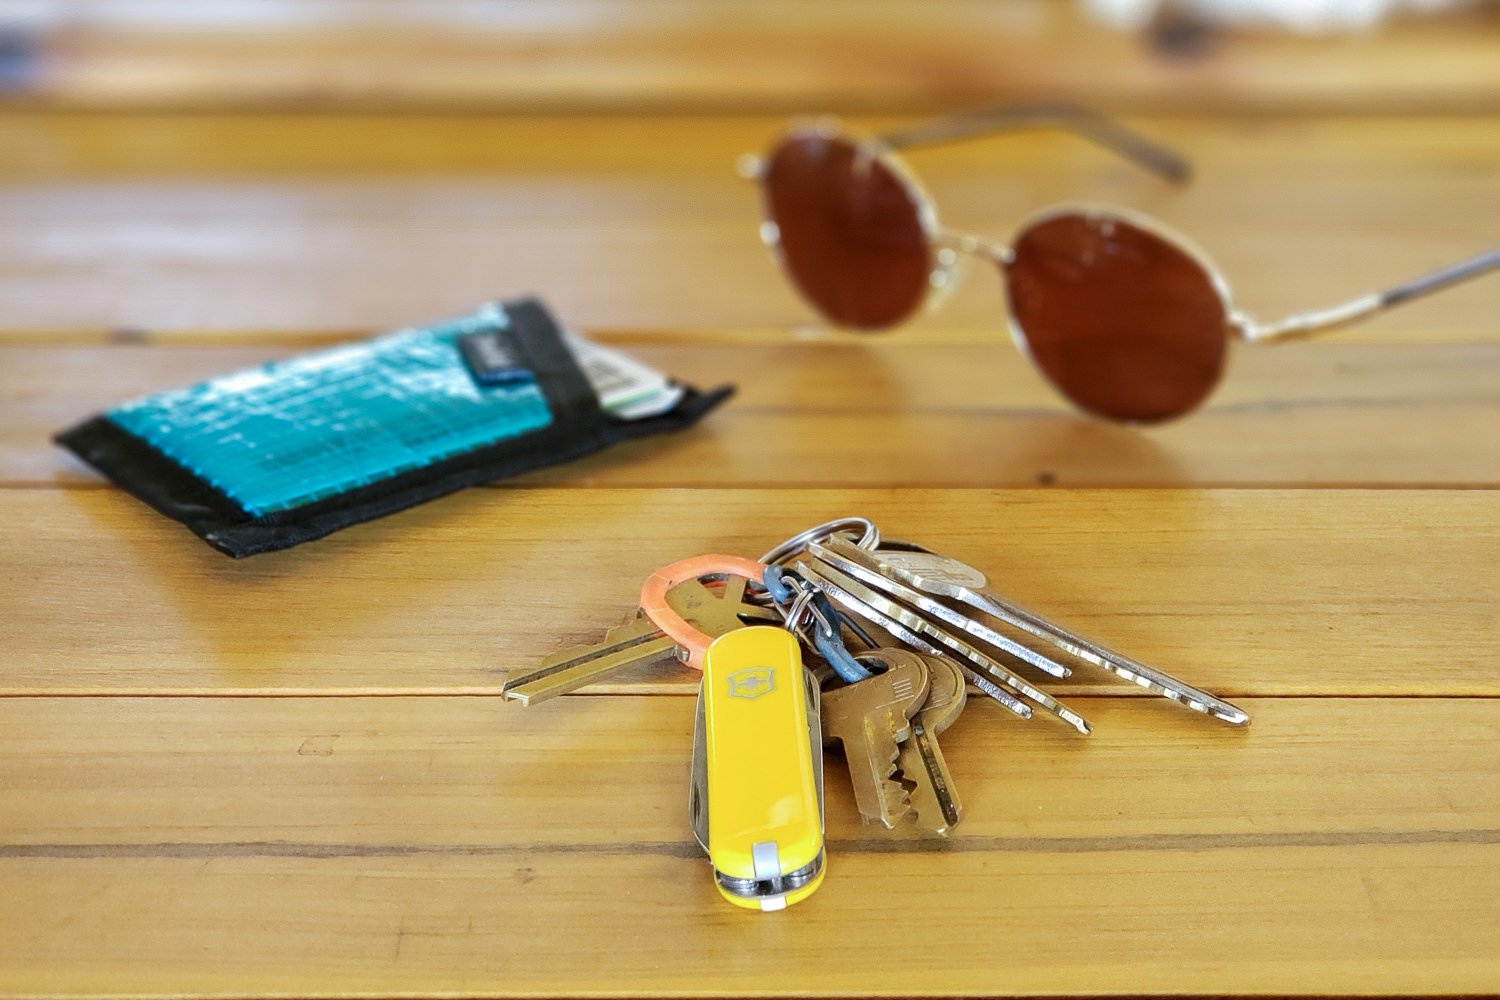
7. Repair Kit & Tools
We bring a lightweight multitool and basic repair equipment on every backcountry trip we take. A simple multi-tool knife, like the Swiss Army Classic , will come in handy in a variety of situations and we use ours all the time on the trail. Duct tape and Tenacious Tape are also excellent tools for repairing gear in the field, so we always hike with a small amount of both in our packs.
Tenacious Tape is great for fixing sleeping pad punctures, tent fabric tears, sleeping bag rips, puffy coat holes, and stuff like that. Duct tape is a great all-around repair tool that can be used for things like splinting a broken tent pole or repairing sunglasses, and it’s even good for preventing blisters when you feel a hot spot on your foot.
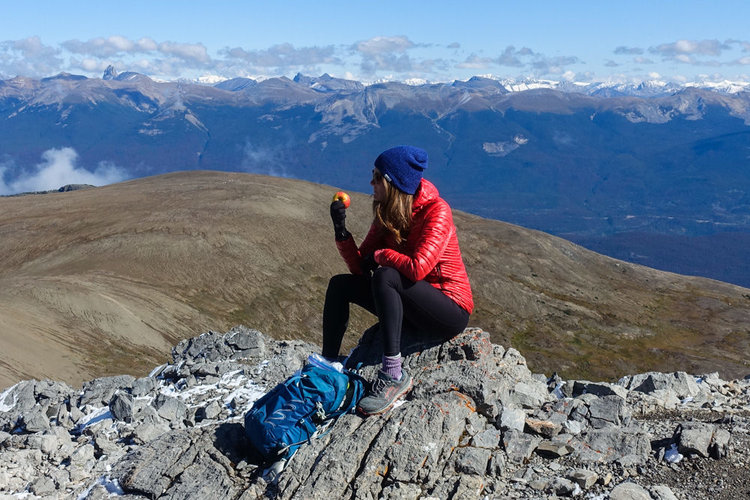
8. Nutrition
When preparing for a hike, you’ll want to make sure to bring along enough calories to sustain your energy for a long day of activity. We commonly snack on energy bars ( Larabar , Clif Bar , ProBar , Luna , and Kind bars tend to be our favorites), dried fruits, nuts, and jerky while we hike. For a more substantial lunch, we like to pack tortillas or bagels and make sandwiches with hard meats (like salami) and cheeses (like parmesan).
If you’re headed out on a long hike, we recommend bringing some extra calorically-dense food, just in case your trip takes longer than expected. Check out our Backpacking Food Guide for a bunch more information and recommendations on our favorite trail grub.
9. Hydration
It’s absolutely essential to stay well hydrated on the trail to keep your body’s critical systems running properly. Water helps cool you down when you’re hot, warm you up when you’re cold, and will keep your muscles and joints working properly to avoid injury while you hike.
Make sure to bring enough water for the duration of your hike, or bring a lightweight water filter and know where water sources will be located along your route. For a 24-hour water supply, one gallon (or 4 liters) is recommended per person. Make sure your water is easily accessible via water bottles or a hydration pack so you can drink freely while you hike.
Also, it’s important to remember that while water is critically important, it’s also one of the heaviest things you’ll carry on the trail. So carrying a bunch of extra water should be avoided as well.
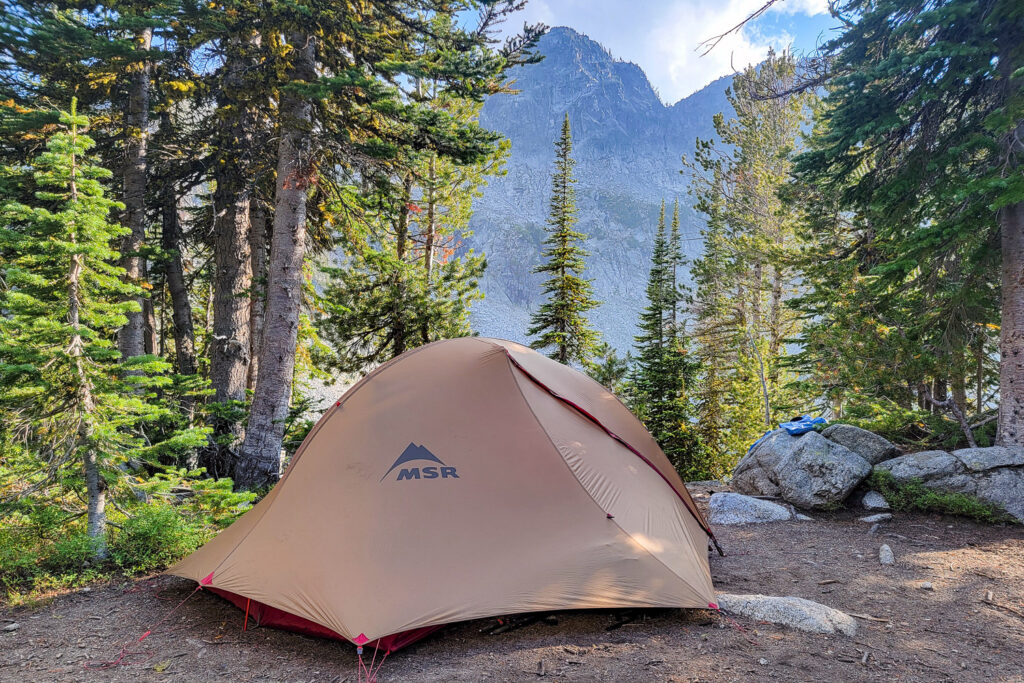
10. Emergency Shelter
If you’re on a multi-day backpacking trip, you’ll already have a shelter in your pack. But for day hiking trips, we recommended bringing a small, lightweight emergency shelter, just in case you unexpectedly have to spend a night outside. Emergency blankets and bivys (we prefer the bivy) are lightweight, affordable options that could potentially save your life if you’re ever in a really bad spot.
Beyond The Essentials
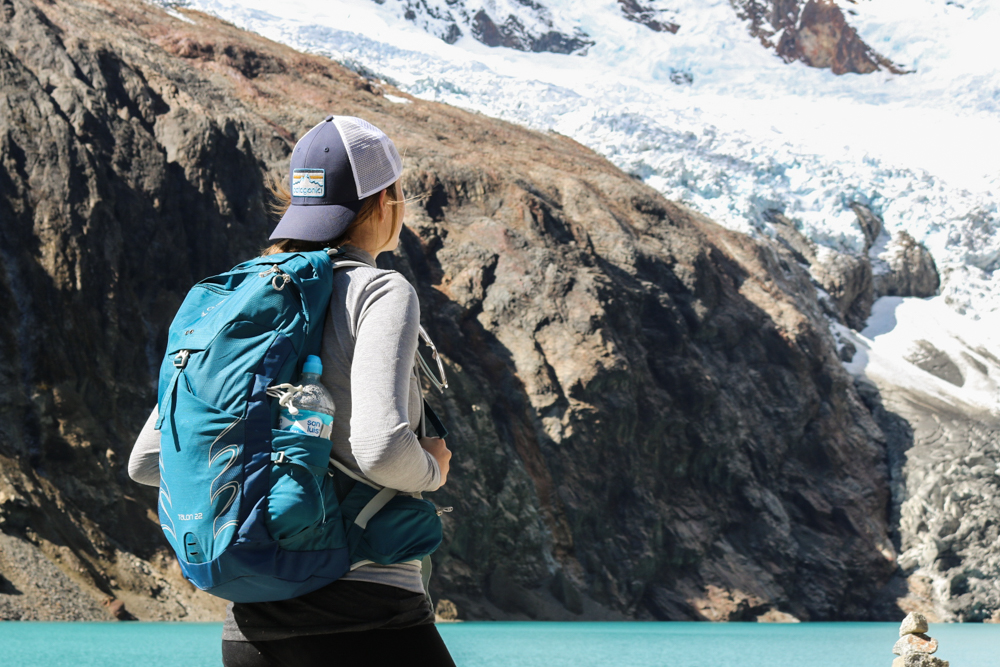
A well-fitting and comfortable daypack is essential for carrying the gear you’ll need in the backcountry. Choose a pack large enough to carry essential gear with convenient storage compartments and easy access to water bottles or a hydration bladder. To learn more about the most important daypack considerations and to see our top recommendations, check out our Best Hiking Daypacks List .
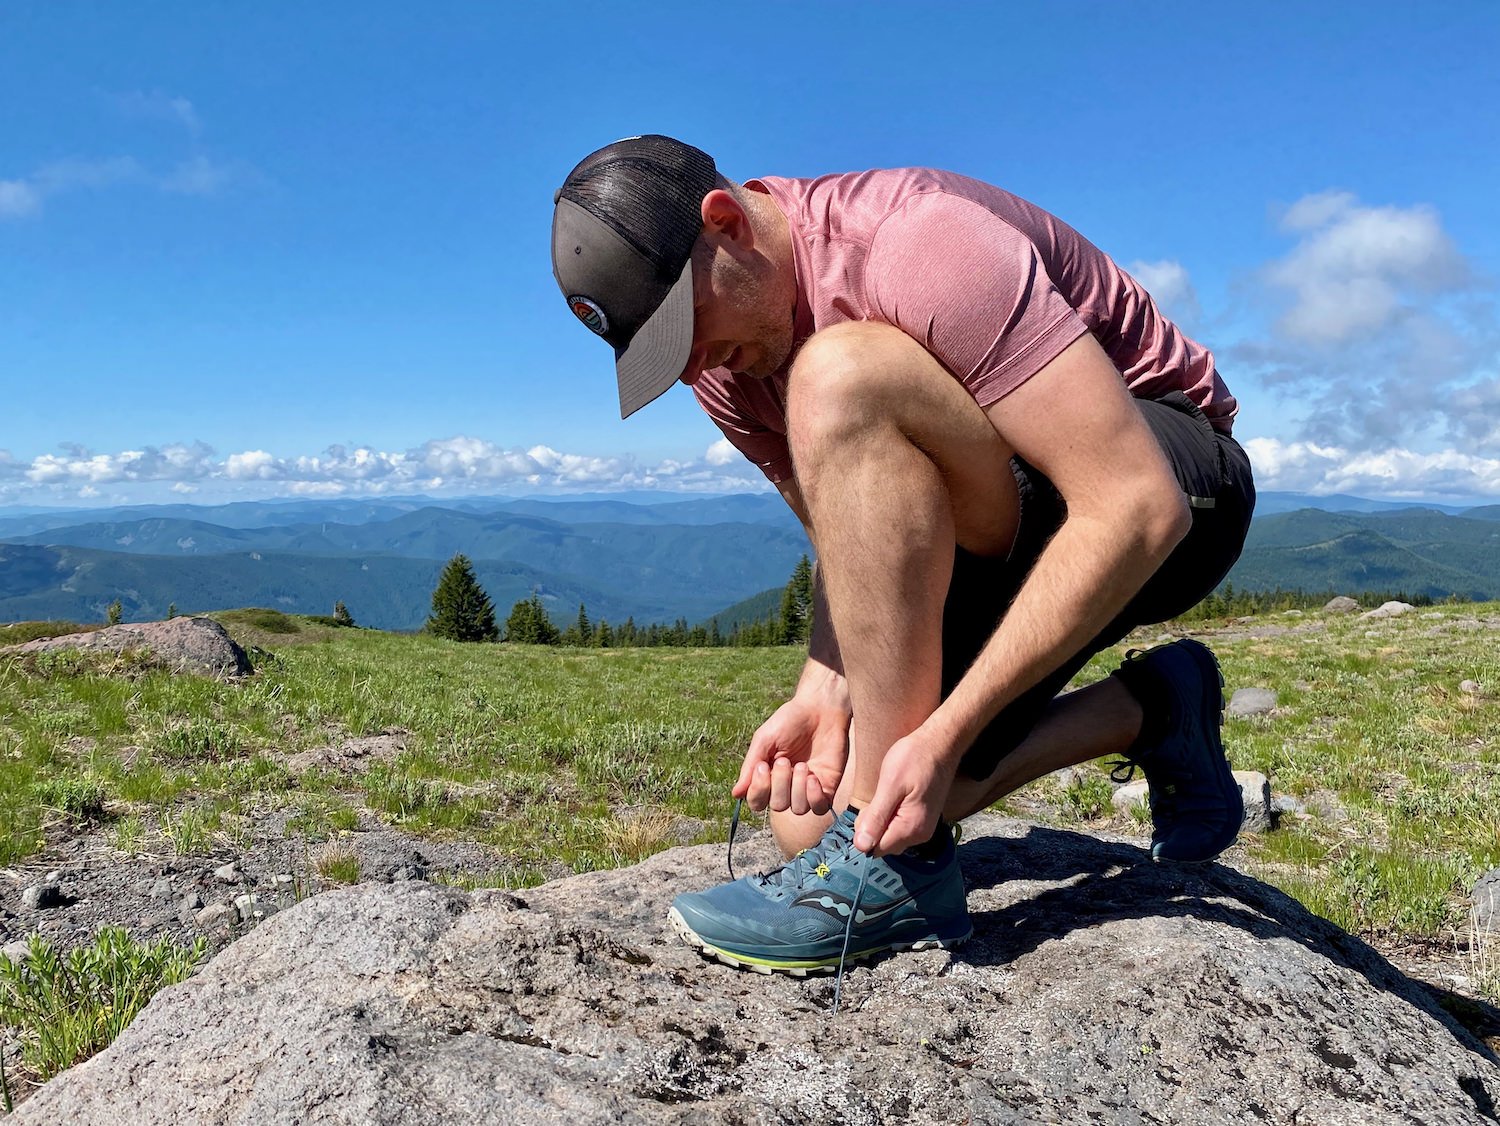
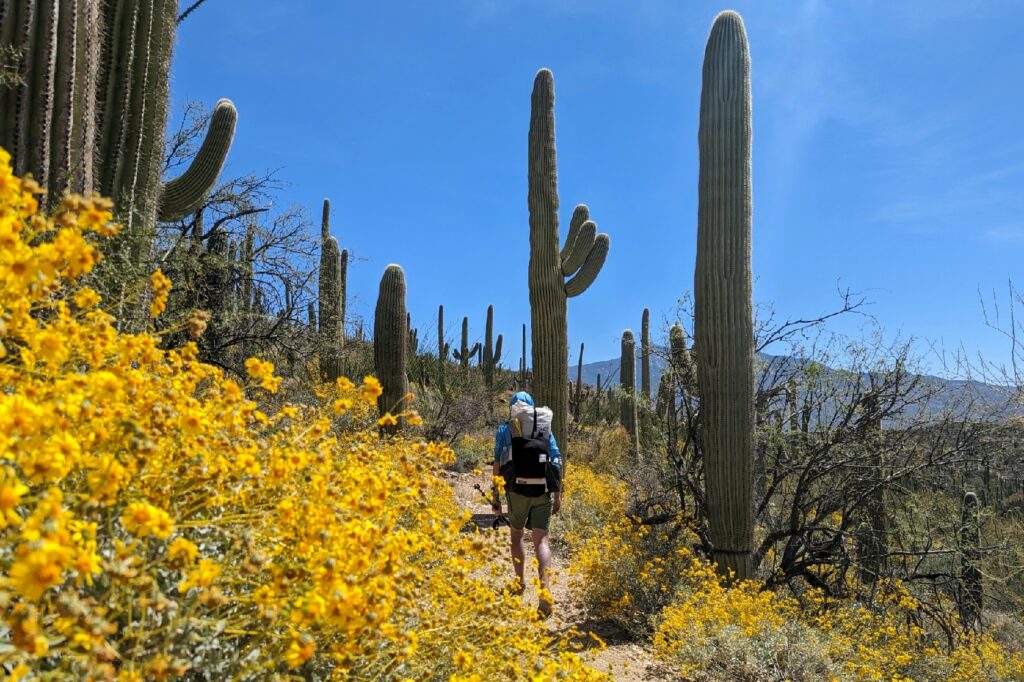
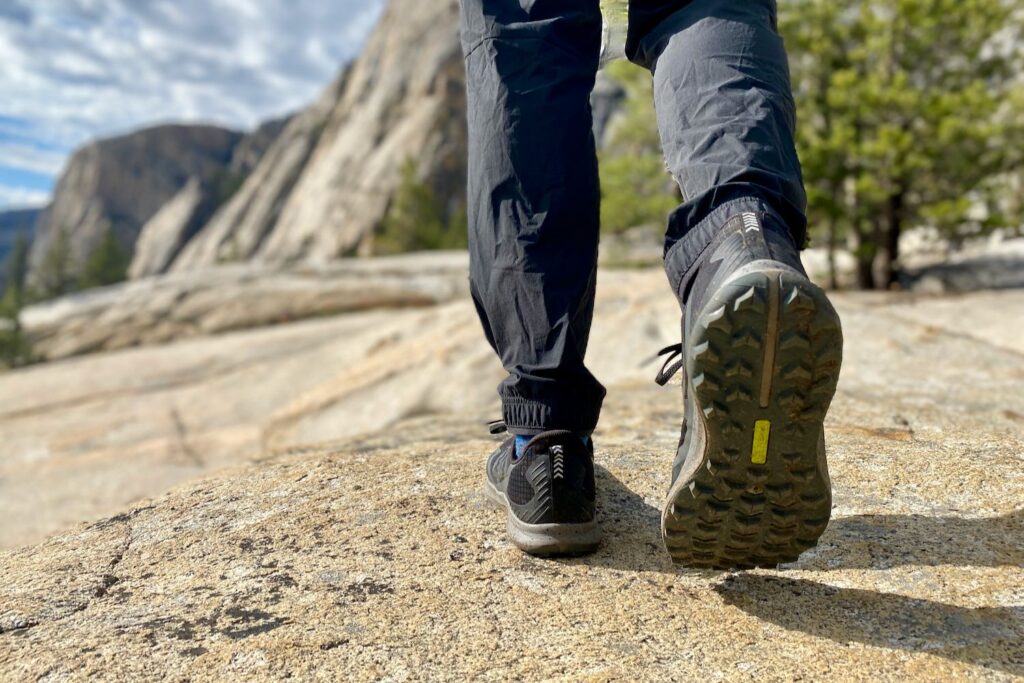
We wear trail running shoes on almost every spring, summer, and fall hiking trip we take. Trail runners are comfortable and lightweight, they dry quickly, help us avoid blisters, and provide excellent traction. “But don’t I need hiking boots for water protection, ankle support, and durability?” Not necessarily. If you’re in good shape, have strong ankles, and don’t have a history of nagging injuries, trail running shoes might be the best fit for you too. Check out our article: 5 Reasons To Ditch Your Hiking Boots to learn more.
For us, unless we’re planning to encounter winter snow conditions, trail runners are our hiking footwear of choice. And we haven’t made that decision in haste. We’ve literally hiked thousands of miles through some of the roughest terrain on the planet in trail runners and they fit our needs the best. For more information and some of our trail-tested recommendations, check out our Best Hiking Shoes list.
Toilet Paper & Trowel
Dirty toilet paper is the most common form of backcountry litter we find on trails throughout the world. A) Gross. B) Why? The answer is far too many backcountry travelers are not prepared to bury their waste properly. To dispose of human waste the right way, you need to dig a cathole at least 6-8 inches deep before you go, and if you don’t pack a trowel (we currently use this cheap and lightweight snow stake ), you won’t be able to dig a hole deep enough. It’s as simple as that. After doing your business, either bury your TP deep in the hole, or pack it out in a Ziploc bag. C’mon people. You love nature. That’s why you’re out there. So educate yourself on Leave No Trace principles and help us keep our wild spaces beautiful for generations to come. Check out our How to Poop in the Woods post for more tips.
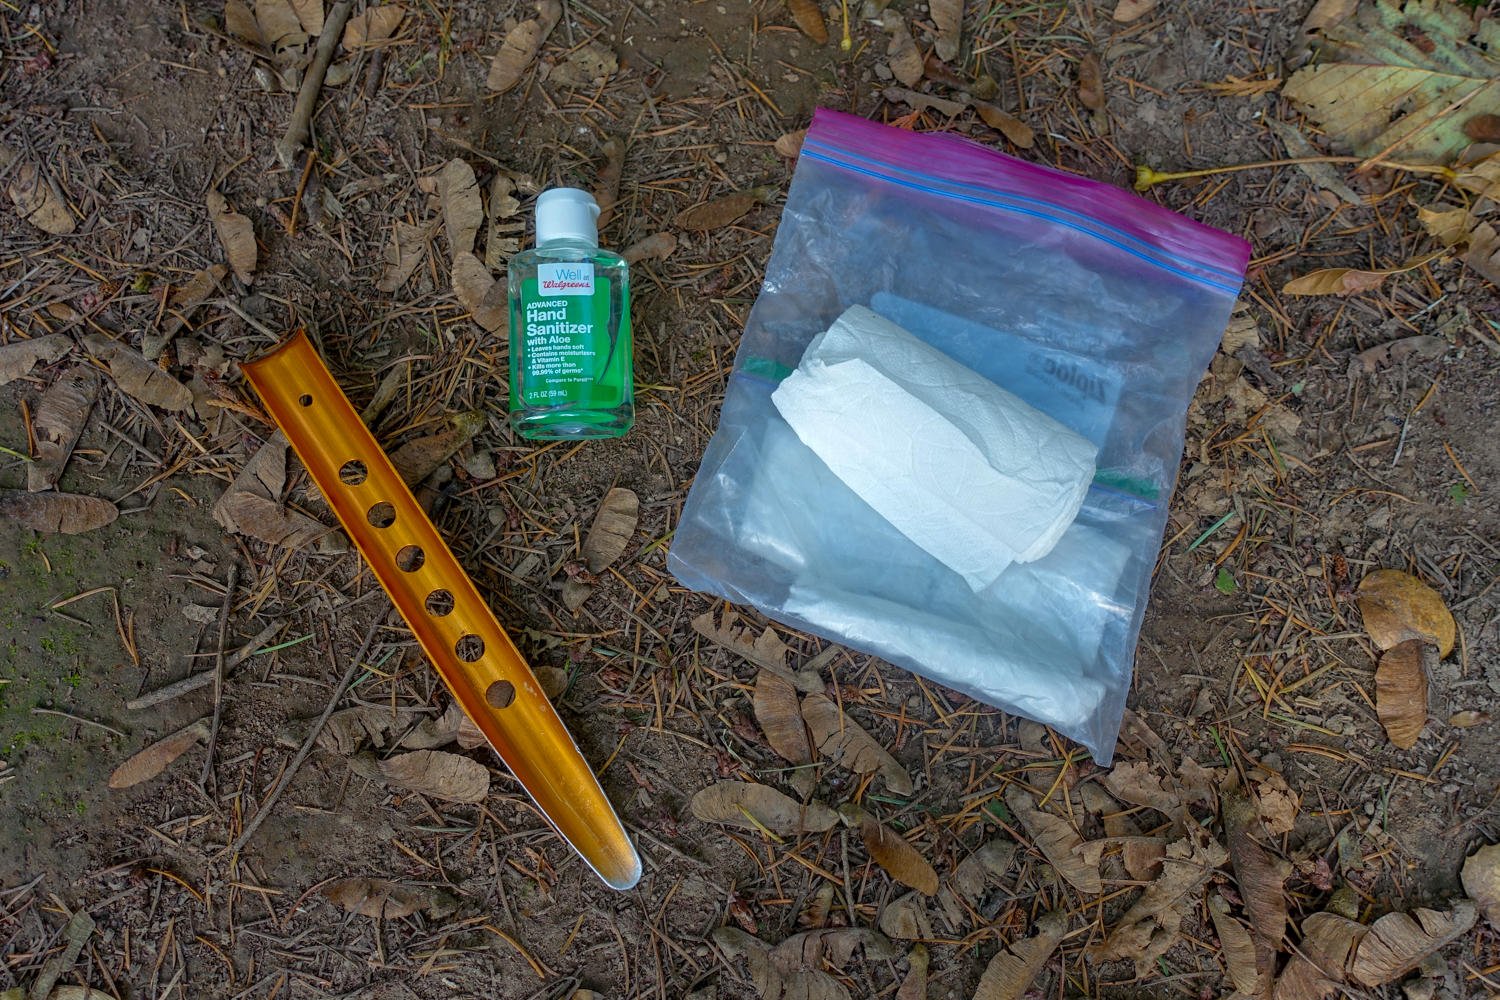
Hand Sanitizer
Dirty hands are the biggest contributor to illness in the backcountry. This happens because many hikers leave proper hygiene habits behind when they hit the trail. But this is an easy issue to avoid, so bring a small container of hand sanitizer and use it after bathroom breaks and before preparing meals.
Trekking Poles
Trekking poles shouldn’t be considered an essential item, but many hikers like them for a variety of reasons. The main benefit of trekking poles is reduced impact on knees and increased stability, which can be especially beneficial on long uphill or downhill sections of trail and when fording rivers. In addition, trekking poles can be used as tent pole supports for many ultralight shelters, which will help shave weight on long-distance trips. Take a look at our Pros and Cons of Hiking with Trekking Poles post, then head over to our Best Trekking Poles list to see our top recommendations.
PLB (Personal Locator Beacon)
A personal locator beacon is a device that can be used to send a GPS emergency signal from the wilderness in areas without cell phone reception. If you’re ever deep in an isolated wilderness and you need emergency help, a PLB could save your life. The main downside with locator beacons is they tend to be pretty expensive and require a subscription, but their upsides are worth it in our opinion – especially when hiking in truly remote locations. We like the Garmin InReach Mini , which allows us to message with loved ones and can a search and rescue if necessary.
Why trust us?
We understand how tough it is to find trustworthy gear advice, and that’s one of the main reasons we built CleverHiker. We live for outdoor adventure, and we take these guides very seriously.
- Our recommendations are completely independent and based on hands-on experience.
- We test outdoor gear for a living – we’ve logged over 20,000 trail miles and 1,000 nights in the wilderness.
- Our team has thru-hiked some of the most iconic long trails, including the Continental Divide Trail, Pacific Crest Trail, Appalachian Trail, Colorado Trail, Long Trail, Oregon Coast Trail, Arizona Trail, Pinhoti Trail, Superior Hiking Trail, as well as extensive peak bagging, and international treks.
- We field test every product we recommend, which is sadly not the norm.
- We travel to industry trade shows to stay up-to-date on product innovations.
- We continuously update our guides throughout the year and when new products launch.
- We treat recommendations to our readers as if they were for our family and friends.
- We’re lifelong learners and we’re always open to feedback. If you think we’ve missed a worthy product or got something wrong, we’d love to know about it.
Related Content

Men’s Merrell Moab 3 Review

Men’s La Sportiva Ultra Raptor II Review

Men’s Hoka SpeedGoat 5 Review

Men’s Saucony Peregrine 14 Review

Men’s Altra Lone Peak 8 Review
MSR FreeLite 2 Tent Review
The Ultimate Guide to Hiking the Arizona Trail
A Complete Guide to Hiking the Grand Sawtooth Loop
6 Safety Tips For Hiking with Kids
10 Best Hiking Shoes for Kids of 2024
Big Agnes Tiger Wall vs. NEMO Hornet OSMO vs. MSR FreeLite
Hiking Boot & Shoe Soles for Grip, Traction & Different Terrains
Get the best content from cleverhiker & around the backpacking world.
Social media is great, but our bi-weekly newsletter is a much better way to stay in the know.
Sign up to get our curated emails with the best content from CleverHiker and around the backpacking world. You’ll be turned on to new videos, trip reports, gear reviews, inspiring outdoor stories and much more. So get in the mix!
The Hungry Hiker
Tips & Tricks on How to Plan Your Next Outdoor Adventure
How to Plan Your First (Or Next) Overnight Backpacking Trip
Want to go on an overnight backpacking trip and have no idea where to start with planning a trip like this? Trip planning for an overnight backpacking trip can be overwhelming and intimidating for a lot of people, especially if you’re new to backpacking.
I’m going to share with you some of my favorite tools I use to plan overnight backpacking trips, in hopes of helping you learn how to plan either your first or next overnight backpacking trip of your own.
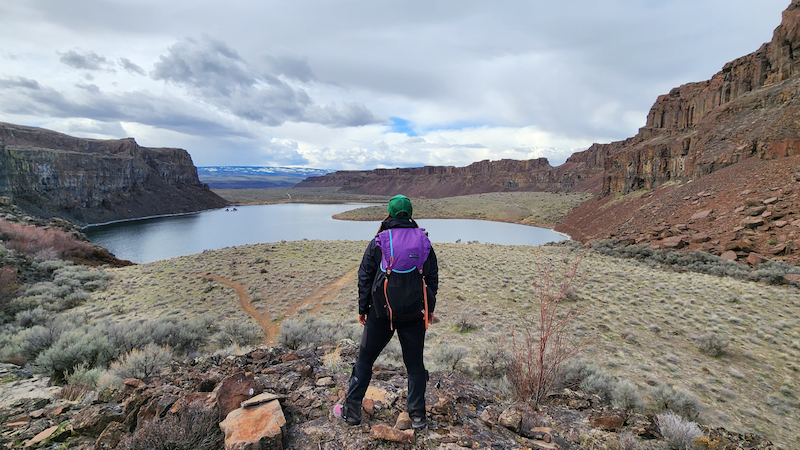
I recently took a group of my students from my online backpacking program for women, The Confident Solo Female Backpacker System out for an early season overnight backpacking trip to Ancient Lakes , here in Washington State. This turned out to be a very fun, successful and amazing trip!
In this blog post, I’ll walk you through my entire process of how I planned this trip for my students including how I decided where to go, why I chose this specific location and some of my favorite resources I used to plan our trip. Then I’ll share with you a special online tool I created that will help you start planning your first or next overnight backpacking trip.
If you’re feeling a little overwhelmed with the trip planning process, it’s okay. Trip planning for any trip, no matter where you’re going and how long you plan on being out there can be overwhelming for a lot of backpackers, AND not just beginner backpackers, but also experienced backpackers as well.
Here’s how I planned our recent overnight backpacking trip to Ancient Lakes . Starting with how I decided where to go for our group overnight backpacking trip.
How I Decided Where To Go Overnight Backpacking
When planning a group trip for my students, I always start by taking the trip objective and the experience level of my students into consideration when deciding where to go.
My objective for this group trip was to give my students a chance to practice using their gear in a low risk setting while having fun. I knew for most of the students in the group, this would be their first overnight backpacking trip this year. This would also be considered an early season trip, a first for a majority of the group. I wanted to pick a place where they could safely and comfortably ease back into the backpacking season, apply what they’ve been learning in my program out on trail and have fun while they’re out there.
The time of year is another consideration I kept in mind when deciding where to go. We would be going on our overnight backpacking trip in March, which is still considered winter/early season here in Washington. When most places, especially at a higher elevation are still covered in snow, I knew Ancient Lakes over in Eastern Washington would be a good option, terrain and weather-wise. This time of year, the temperatures can be milder than most areas in Western Washington. There’s very little elevation gain and there’s no snow on the ground. Ancient Lakes is also a great option for this time of year because during the warmer months, the snakes and ticks come out, the area is exposed with very little shade and the water sources are extremely limited.
I also wanted to keep the total trip mileage and daily mileage in mind for my students. Since I knew this would be the first overnight backpacking trip of the year for most of the group, I didn’t want to pick a place where we’d have to hike a lot of miles just to get to camp.
Ancient Lakes has a number of different trails with multiple trailheads to access the area. I could make this trip – the hike to camp, water and our day hikes throughout the trip – as long or as short of a hike as I needed to, while keeping my students in mind.
I also didn’t want to have to deal with needing to secure a permit for this trip. There’s no permit needed to camp anywhere at Ancient Lakes. All of the tentsites are first come, first served and free. The only permit required is the Discover Pass at the trailhead.
Something else I wanted to take into consideration when choosing a place to take my students backpacking was picking an area that I was already familiar with. Since I would be leading the group, I wanted to pick a place where I felt comfortable and had been before.
I’ve day hiked the Ancient Lakes area multiple times before. I was familiar with the drive to get to the trailhead, the different trailheads we could start our trip from, the tentsites in the area, the terrain we’d be hiking through, and all of the day hike options we’d have while we were out there. I also knew that this area would be well-traveled and that we wouldn’t be the only group out there.
Part of my research for this trip included previous day hikes I’ve been on out in this area. I was familiar with the drive to get to the trailhead, the different trailheads we could start our trip from, the tentsites in the area, the terrain we’d be hiking through, and all of the day hiking options we’d have while we were out there.
I also read current trip reports for the area on both the WTA website and AllTrails , to get a feel for the current trail conditions.
Then, I looked at a map and created a route using Gaia GPS to determine our total trip and daily mileage, possible places to camp, water sources and day hiking options in the area.
While doing my research, I also learned that there would be limited water sources in the area. Even though there were lakes nearby, they wouldn’t be safe to drink out of, even if we filtered the water because all of the water in the lakes were irrigation runoff.
For this trip, we’d have to carry in a large amount of water on Day 1 and then plan to hike down to the river, which would be a 6-mile hike roundtrip from camp and back, to collect and filter safe drinking water to bring back to camp.
Also, while doing my research, I learned that since it was still considered early season (meaning that the area would be cooler days and even colder nights), local wildlife like ticks and snakes wouldn’t be an issue yet.
Checking The Conditions
Once I’ve completed my research for the Ancient Lakes area, I started checking the trail conditions, road conditions and weather forecast to get an idea of what we could expect while being out there.
Each day up until leaving for trip, I would look for any new trip reports on both the WTA website and AllTrails .
Since I knew I’d have to travel over a mountain pass to get to Eastern Washington, I also kept an eye on the road conditions for Snoqualmie Pass through the Washington State Department of Transportation (WSDOT) website .
And for weather, I checked the current weather forecast through the National Weather Service or NOAA website for the Ancient Lakes area a week prior to leaving for the trip, a couple of days before the trip and then again, the night before and morning of leaving for the trip, just to see if anything had changed.
Planning The Trip
Then for the actual planning for the trip, I used the routes I created on Gaia GPS to note total trip and daily mileage, elevation gain/loss, nearby trailheads and parking lots, possible tentsites, potential water sources and multiple day hiking options in case we wanted to make our hikes during the day shorter or longer.
Once I put together a plan for the whole trip and plotted out a route for each day we’d be out on trail, I put together my meal plan for the trip based on the number of days we were planning on being out on trail. Then I packed up my food and moved on to deciding what backpacking gear to bring for the trip.
Backpacking Gear To Bring
If you’re interested in seeing the backpacking gear I brought with me for this trip, check out my LighterPack.com list for this trip.
Keep in mind when deciding on what backpacking gear to bring for your trip, you’ll need to consider how long you plan on being out there, how many miles you plan on hiking during your trip, both daily mileage and overall trip mileage, the time of year, the forecasted weather for the area, the type of terrain you’ll be traveling through and camping on and nearby water sources..
There’s a lot of information out there about backpacking gear, but how do you sort through all of the information trying to figure out what gear is going to work for you, the type of trip you want to go on and the area and/or climate you’ll be hiking in?
I’ve put together a free Backpacking Gear Packing List you can download and print out to use when planning your trip. This packing list will help give you an idea on what gear you’ll need to bring with you for an overnight backpacking trip.
READY TO START PLANNING YOUR OVERNIGHT BACKPACKING TRIP?
Now that you’ve seen how I planned my recent overnight backpacking trip with my students using some of my favorite trip planning resources, you’re probably excited about planning your own trip, but maybe you’re still feeling overwhelmed about the whole process. This is why I created a special online tool that will help you start planning your first or next overnight backpacking trip.
Introducing The Hungry Hiker Backpacking Trip Planning Masterclass , a step-by-step guide on how to plan your first or next overnight backpacking trip.
The Hungry Hiker Backpacking Trip Planning Masterclass will cover everything (in detail) from how to prepare, research and plan for your trip to the backpacking gear you’ll need.
This masterclass also includes navigation and trip planning video tutorials and digital and printable trip planning resources along with tips and tricks for first time solo backpackers.
This online class is self-paced so you can work through all of the material at your own pace and easily fit it into you own schedule and time zone whenever you’re ready to start planning your trip. Once enrolled, you’ll have lifetime access to the class so you can refer back to it whenever you’re planning future overnight backpacking trips.
If you’re ready to finally start planning your overnight backpacking trip this year, then this masterclass will help you get to the trailhead.
CLICK HERE to learn more and sign up for The Hungry Hiker Backpacking Trip Planning Masterclass.
Disclaimer: The-Hungry-Hiker.com is a participant in the Amazon Affiliate Links and AvantlInks Program, affiliate advertising programs designed to provide a means for sites to earn advertising fees by advertising and linking to Amazon.com and other affiliated sites at no cost to you. Please note, I only link to products and services I personally use and trust.
Inspired? Pin It!

1 Comment on How to Plan Your First (Or Next) Overnight Backpacking Trip
- Pingback: I Got Tired of Waiting for Someone Else to Go Backpacking With Me - The Hungry Hiker
Leave a Reply Cancel reply
Your email address will not be published. Required fields are marked *
Save my name, email, and website in this browser for the next time I comment.
Notify me of follow-up comments by email.
Notify me of new posts by email.

A Step-by-Step Guide To Planning A Perfect Hiking Trip

Hiking is perhaps the most accessible, healing outdoor activity that exists. But if you don't develop a plan, you may find yourself in a sticky situation. Fortunately, planning a hiking trip is an exciting (and critical) activity that will send you on your way to a successful hike.
Are you questioning whether or not you really need that much water? Or if you can just walk out your front door and wander wherever the wind takes you? If so, this guide is for you.
I love a one-mile hike just as much as I love a 15-mile hike. I have run out of water, gotten terrifyingly lost on unfamiliar trails, and suffered sunburns that affected me for weeks. With each learning experience, I have discovered how to form the ultimate hiking plan.
Below, I'll help you learn how to make a hiking trip go as smoothly as possible. From pre-trek research to a guide on hiking essentials, I've got you covered. Let's start planning and hit the trail!
Step One: Plan The Route
Hike planning is essential to executing a worry-free, rewarding hiking trip. Learn ahead of time if you need any permits for parking or hiking. Fortunately, there are no specific requirements for an awesome hike — you can hike for a mile, or you can hike for 20 miles.
As a beginner hiker, you’ll want to start small. Perhaps with one to three miles and not a whole lot of elevation gain. It’s also important to understand both total elevation gain and elevation gain over a specific distance. For example, gaining 1,000 feet of elevation over five miles is significantly less strenuous than gaining the same amount of elevation over one mile.
Learn the trail before you start your trek — at least a couple days before. Know the trail's profile, forks, and the locations of water sources. Nothing feels quite as hardcore as whipping out a paper trail map and a compass, and this is certainly a basic skill you should develop as you become a more experienced hiker.
Nonetheless, you can easily learn and download a trail map on your smartphone using navigation apps . My personal favorite is Alltrails; there are usually reviews and trail condition reports left by other users in the recent past, and it’s incredibly user-friendly.
Choose a hiking trail that starts relatively nearby so you’re not driving a long distance after exhausting yourself. And of course, opt for a trail that offers a rewarding view — a lake, blooming wildflowers, or a distant summit. You want to enjoy your early experiences to encourage future hiking!
Step Two: Estimate Your Trip Time
The average hiker covers between two and two & a half miles per hour. This can serve as a rough estimate for planning your trip time. If you are brand new to hiking, it’s likely that you’ll hike at a slightly slow pace, and that’s a-okay!
This means that if you are hiking three miles at the average hiking pace, you can expect it to take about an hour and a half. If you are on a 6-mile hike, you’re looking at about three hours. These are approximate times. More strenuous or technical trails will increase the time it takes you to complete your hike. Allow extra time for rest and water breaks, unexpected obstacles, and of course, enjoying rad views.
Step Three: Check The Weather Forecast
Check the weather conditions a few days in advance to help you prep for your hike. Check them again the night before and even again right before you leave in case there are last-minute changes. This will help you choose and organize your gear in advance, so the morning of your hike is hassle-free.
Step Four: Plan Your Food & Water
The amount of food you'll need for a day hike is dependent on the duration, intensity, and your personal metabolism. For an all-day adventure of high intensity hiking, you may find yourself requiring 2,500–5,000 calories. You should certainly eat before you go , then bring plenty of snacks and something for lunch.
Foods that are high in protein are perfect for dinner the night before, breakfast the day of, and even a post-hike recovery meal. Eggs, lean meats, and soy are superb protein sources. Include some energy-packed carbs in your breakfast and snacks. Oatmeal, granola, and fruit are excellent choices.
{{article-cta}}
Nut butter or nuts are awesome both before and during a hike as a slow-burning energy source. Steer clear of highly processed foods like candy and cheese.
If you're only spending a couple hours on a relatively flat hiking route, you'll be able to get by with just a snack. Munch on some gorp or a piece of fruit, and drink plenty of water.
How much water you'll need varies with the length of your adventure. A good rule of thumb for hydration is drinking half to one liter of water per hour of hiking. This recommendation can fluctuate, however. Variables include trail intensity, outside temperatures, your sweat rate, and your fitness level. It's always better to err on the side of caution and bring a bit more water than you think you'll need.
If you know that there are water sources along the trail, you can opt to carry less water knowing you'll have the chance to refill. Using your map or navigation app, estimate the time it will take you to reach the drinking water source. Then, only carry the amount of water you'll need to reach the source.
In my personal experience, water straight from an alpine stream is unmatched. It’s delicious and invigorating after miles of hiking. However, indulging in fresh stream water will require a water filter of some sort.
Step Five: Get Your Gear In Order
If you're unfamiliar with the 10 Essentials for first aid and emergency situations, take a moment to read up on this list from the National Park Service.
Once you're set in the emergency department, the fun stuff begins! Keep your pack as light as possible, but don't sacrifice any must-haves. Here are five sub-steps to prep your essential hiking gear for meandering along a stream or bagging a mountain peak.
1. Prepare your layers
Since you've already checked the weather, you know what to expect for temperature. But you should still prepare layers, since the temperature will fluctuate throughout the day. You should have at least a sweat-wicking base layer, a warm mid-layer, and a shell for rain or high winds.
2. Break in your hiking footwear
For weeks in advance , spend time breaking in your hiking boots or shoes . Hiking footwear is designed to be rugged, stable, and protective. As a result, they often feel stiff at the beginning.
If your hiking shoes are new, wear them around your house and on nearby walks. Start small — gradually build up the length of your break-in walks until your boots are broken in. It's also helpful to have a high quality pair of hiking socks to keep your feet happy.
3. Invest in a high-quality water container
My personal preference is a water or hydration bladder because it keeps my hands free, and I can drink on the move. Some packs come with built-in hydration reservoirs, making water access easy-peasy.
A durable water bottle is also a perfectly adequate option. I do advise caution here, however: If you carry a water bottle in your pack, it's less accessible, which may lead you to ignore your hydration needs for longer. Carry your water bottle in your hands to encourage better hydration.
4. Pack your hiking daypack
Any dry food can go in the night before, as well as a jacket in case of unexpected inclement weather. Pack your safety essentials, which should include sunblock, insect repellent, a first aid kit, and a headlamp.
5. Pack a “luxury” item
If you're up for extra weight on your hiking trip, pack a luxury item. To elevate your trek from a trying trudge to an epic hike, bring your camera , a sketch pad, or some binoculars.
Step Six: Implement Safety Measures
- Always provide your hiking itinerary details to a responsible friend or family member, especially if you don't have a hiking partner.
- Hitting the trail with a hiking buddy is almost always a good idea, but sometimes it's tough to find someone who wants to send it as hard or as often as you do. Stay on the trail, and use your navigation tools.
- Learn and share emergency contact numbers, such as the park ranger office and the local sheriff. If you have cell service during your hike, you can call in an emergency. Provide the responsible party with a time they should call emergency services if you have not returned.
- Check online for dangers in the area, such as natural disasters, poisonous plants, and dangerous animals. You can often find these reports on a hiking navigation app or on a state or national park website.
- If you are a frequent hiker (or intend to become one), a personal locator beacon is a must. Especially when hiking alone. This will allow you to send out a signal using a satellite to get help in an emergency.
Now you're all set to get on the trail. Remember the basics:
- Learn your route in advance
- Estimate time for your trip, including extra time for delays
- Check the weather forecast, and bring layers for variation
- Bring food and water — a little extra of each
- Pack your gear early, but keep your pack as light as possible
- Share your itinerary, and stick to it
Just like anything else, successful adventures take practice. Don't expect perfection the first few times, and make notes of ways to improve after each hike. Get out on a trail, and have some fun!

Living and working in the Grand Canyon, Emmi has decades of experience organising and leading hikes around the world.
*The information on this site is based on research and first-hand experience but should not be treated as medical advice. Before beginning any new activity, we recommend consulting with a physician, nutritionist or other relevant professional healthcare provider.

The 13 Different Types of Climbing

Where To Buy Used Mountaineering Gear

Why is Climbing Everest So Deadly? A Data-Driven Report
How to Plan a Backpacking Trip in 12 Simple Steps
Learn how to plan a backpacking trip! From how to pick a trail to what gear to pack, this guide covers all the important planning steps.

Whether you are a beginner backpacker or have been tramping around the woods for years, there are a number of questions to ask when you are planning an overnight backpacking trip. Where should I go? Do I need a permit? What should I eat? What do I need to pack? I’ve been there. When I first started hiking and spending time outdoors, I had no idea how to plan a backpacking trip. Now, years later, planning a backpacking trip is one of my favorite parts of the whole process. If you’re new to it though, it can feel a little overwhelming, but we’ve got you covered.
In this blog post, we break down how to plan a backpacking trip into 12 simple steps so you can feel more organized and confident (and less overwhelmed) as you get ready for your adventure. By following this step-by-step backpacking guide, you will be able to easily plan your backpacking trip from start to finish, knowing that you aren’t forgetting any important details.
Ready to plan your next adventure? Here’s our guide to planning a backpacking trip so you can get out and enjoy the great outdoors with confidence
This post may contain affiliate links.
1) Pick dates for your backpacking trip
Figuring out when you want to go on your overnight adventure is the first step in how to plan a backpacking trip. Your dates will dictate where you can go due to the weather (unless you want to snow camp). If you want to go in January, then you’ll be limited to warmer places like Southern California, Arizona, and Florida for example. If it’s summer, then you’ll want to hit the mountains where the temperatures are cooler.
If you are a newbie, 1-2 nights is a good length of time for you to get a trip under your belt. You’ll be able to answer a lot of questions after that first hike. What gear worked, what gear didn’t. What you really need to bring vs what you can leave at home to shave off some weight. Whether you brought the right amount of food. What pace you like to hike at, etc. If you are more seasoned and have the time off, then consider going for a longer trip. The longer you’re out there, the more time you have to decompress and reap all the benefits of being in the wilderness.
Save this post!
Enter your email & I'll send this post to your inbox! You'll also receive my weekly newsletter full of helpful advice for planning your adventures.
2) Pick a trail for your backpacking trip
When you plan a backpacking trip, picking a trail can be a little challenging with so many awesome trails and destinations to choose from. Ask yourself:
- How far do you want to hike? If you are new to backpacking, 5-7 miles a day is a good target. Remember, if you aren’t used to carrying a lot of weight, then backpacking will be more challenging than a regular day hike. The average confident backpacker can usually cover somewhere in the range of 8-12 miles or more depending on how much elevation gain there is.
- How difficult of a trail do you want?
- What major features are you looking for? Big mountain landscapes? A lake? Hiking along a river? Waterfalls?
- Is solitude a must? If you’re looking to get out into the Wilderness, be sure to read through our Backpacking 101 Guide for Planning a Wilderness Trip .
Get an idea in your head of what kind of experience you want to have. Then start checking out trail descriptions and plan a backpacking trip that aligns with your requirements.
Not sure where to start? Here are a few good beginner backpacking trips:
- West Rim Trail in Zion National Park
- Havasu Falls in Arizona
- Red Pine Lake in Salt Lake City
- Cutler Coast Trail in Maine
- San Jacinto Peak in California
- Trans Catalina Trail

3) Check permit requirements & get a permit if you need one
So you found a trail that looks awesome for the time of year you want to hike. Before you get too excited and start making plans, check to see if a permit is required. Many trails, especially popular trails in National Parks, require wilderness permits that need to be reserved months in advance. Many of the more popular backpacking trails (like in the Grand Canyon or Yosemite) are allocated by lottery up to 4 or 5 months in advance. If you google the trail, you can usually find permit requirements on the federal or state agency’s website.
Depending on where you are backpacking, your permit may have additional requirements. For instance, if you are traveling in bear country such as the Eastern Sierras, Montana, or Wyoming, it’s likely that you’ll be required to carry your food and scented items in a bear-proof container or bag .
4) Invite your friends (or commit to going solo)
If you want company, try to round-up a few friends who want to join you. Give them a call or put a note out on Facebook. If that doesn’t work and you are unable to find anyone you know to go with, you have a couple of options.
Check to see if there are any Facebook groups in your area for hikers or outdoor enthusiasts. In Utah, there is a Utah Outdoor Women’s Alliance group and there are always folks looking to link up for a hike. MeetUp can also be a great website as well for finding like-minded friends who love outdoor adventures and trips. Are you part of a yoga studio or climbing gym? Those are also great places to meet active people and maybe you can make a new friend who might be interested in your trip.
If you can’t find anyone, don’t let that discourage you. Backpacking alone is an empowering experience and is worth trying at least once. Check out my tips for hiking alone here .

5) Make your transportation plan
The next step in how to plan a backpacking trip is to make plans for getting to and from the trailhead. If your trail is a loop, you can typically leave your car at the trailhead parking area (check to see if there is an overnight fee or parking permit required). If you’re doing a one-way hike, you have a few options. If you’re hiking with friends, you can set up your own shuttle by leaving a car at the end and driving a second car to the start. If two cars aren’t an option, you can ask a friend or family member to drop you off or reserve transportation with a taxi service or shuttle company. Many hotels and outfitters in popular hiking destinations will offer shuttle services, so do a quick google search to see what’s available if you go this route.
6) Get the necessary gear for your first backpacking trip
Maybe you already have your backpacking gear dialed. If so, great! If not, a good place to start is with my 3-day backpacking checklist . In addition to that detailed post, we’ve also got several more outdoor gear guides here on Bearfoot Theory including:
- What to Wear Hiking
- The Best Backpacking Packs
- The Best Tents for Ba ckpacking
- The Best Sle eping Pads for Backpacking
- The Be st Sleeping Bags for Backpacking
- The Best Water Filters for Backpacking
- The Best Lightweight Bear Canisters
- The Best Backpacking Stoves
- The Best Cheap Backpacking Gear
Ok, so what if this gear is way too expensive? Don’t let that deter you from planning a backpacking trip. Ask your friends if anyone has gear you can borrow. But be sure to check that a borrowed backpacking pack fits comfortably before you set out and that the gear you’re bringing along isn’t super heavy or else you may not enjoy your trip.
REI offers gear rentals, and if you’re an REI member you get a discounted rate. If there’s not an REI in your area, check your local university recreation center and local outdoor stores to see if they rent backpacking gear. If you want to buy your own gear, but are looking for discounted prices, check out our post on the Best Places To Buy Discounted Outdoor Gear . Buying gently used outdoor gear is another great way to save money, and it’s better for the planet too!

7) Test your gear
Not testing your gear is a common beginner backpacking mistake that’s easy to avoid. Make sure you know how to use all of your gear before you set out.
Set up your tent in your living room and take your backpack and hiking boots for a spin up your local hill before setting out on an overnight trip. If something doesn’t feel right, it’s probably not and you want to catch it before heading out into the wilderness.
If your pack is the right size but it is still giving you trouble (it’s weighing down on your shoulders or seriously hurting your back), you probably need to make some simple adjustments to the straps. Or perhaps you need to make some adjustments to the way you pack it. Check out this guide on how to pack a backpacking pack for more on this topic.
As far as your hiking boots , unless you choose a heavy-duty leather pair that are suited for mountaineering, most standard trail hiking boots should be fairly comfortable right out of the box, but you still want to take them on a few hikes before your backpacking trip to make sure. If you take them for a short hike and come home with blisters, they might not be a good fit. The point of testing your gear all out beforehand is to get everything dialed so faulty gear doesn’t ruin the epic backpacking trip you’ve been planning.
Testing your gear beforehand also offers the opportunity to train before the big hike .

8) Shop for Food
Planning food is a big part of planning a successful backpacking trip. You want to eat well, but you also want it to be easy and lightweight. I’ve written a detailed post on some of my favorite lightweight backpacking food options and I also especially love Good To-Go’s backpacking meals . Their Mexican Quinoa Bowl is one of the best dehydrated backpacking meals I’ve ever tried! It’s filling, yet vegan and gluten-free, and it has half the sodium of most backpacker food brands.
Also, be sure to check the requirements for food storage for the trail. If you are in bear country, you’ll need to pack your food in a bear-proof canister.

9) Brush up on Leave No Trace Principles
Leave No Trace is a set of guiding principles to help you reduce your impact when you are spending time outdoors. It covers everything from pooping outdoors to how to safely enjoy campfires and even where to set up your tent . If you are not familiar with Leave No Trace, make sure you brush up on how to be a good camper before you hit the trail so we can all do our part to keep the places we recreate in as pristine as possible.

10) Get a Map & Check Water Availability
Don’t want to get lost? ALWAYS bring a paper map with you and check out these navigation tips while you’re at it . Even if you think the trail is going to be straightforward and well-marked, a paper map should be non-negotiable. While you can download hiking and navigation apps you always want a backup in case your phone dies. I am a huge fan of the National Geographic Maps which exist for most National Parks and other popular hiking areas. If you can’t find a map to purchase online or at your local REI, stop by the nearest rangers station on the way to the trail and see if they have a map.
11) Tell a friend or your family your plans
It’s important for safety to share your plans with a friend or family member. Ensure they know the date and general time you plan to check in with them at the end of your trip and make sure they know the details of the trail you will be hiking.
I also like to carry some sort of backcountry communication device if I’m hiking solo or going somewhere really remote. The SPOT Gen4 and the Garmin InReach Mini are the top satellite communication devices for sending texts to family back home and calling emergency responders if you get into trouble.
12) Check the weather
It’s important to always check the weather starting at least a few days before your start state. Bearfoot Theory community member Kim once drove 10 hours to hike the Lost Coast only to learn there was a large storm front rolling in that closed the trail. Checking the weather ahead of time will help you adjust your plans as needed and prepare by packing the correct clothing and gear like a rain jacket and even rain pants. In case there’s the possibility of wet weather in the forecast, here are some of our tips for hiking in the rain .

AND FINALLY, GO!
The last and final step is to hit the road and have a good time! Know that most people experience a couple of minor mishaps on their first backpacking trip. On my first backpacking trip, I forgot my hiking boots and ended up hiking 20 miles in Chacos (with a lot of blisters to boot) and I didn’t pack nearly enough food. It also made me realize I was a little more out of shape than I thought.
But watching the sunset over that lake where I camped was a turning point in my life. That first backpacking trip changed my whole relationship with the outdoors….so get ready 😉

Where was your first backpacking trip? What other advice do you have on how to plan a backpacking trip? Share your comments, questions, and experiences below!

With two decades of hiking and seven years of van life under her belt, Kristen has dedicated her life to helping people experience the positive effects of nature. As a pioneer in the outdoor blogging space, she founded Bearfoot Theory in 2014 and has since authored more than 350 blog posts about outdoor travel, hiking, camping, and van life. Her work has been featured in National Geographic, Outside Magazine, and Backpacker, and when she’s not on the road, she lives in Park City, Utah with her partner Ryan, their son, and two adventure pups.
Leave a Reply Cancel reply
Your email address will not be published. Required fields are marked *
Save my name, email, and website in this browser for the next time I comment.
Tip #11 is clutch, and so easy to forget. Thanks for the reminder. Great post!
Thanks for this awesome guide! I’ve always wanted to go on a camping trip but it always feels intimidating, so I’ve only done short hiking trips. This list somehow makes proper camping trips feel much more manageable with some simple steps, saving it and hoping to be able to use it soon!
Awesome Aaron! Good luck on your first backpacking trip and come back and tell us how it goes!
Hi! I love your site, so many great articles and pieces of advice. I have one question I have searched for an answer on your site and elsewhere and can’t seem to find… when you plan for an overnight backpacking trip 4+ days, what is you advice on parking? Where and safety. Thank you!
Hi Ally – it really depends on what trail you’re doing. Some trailheads are safe and secure enough to leave your car for a few days (just make sure you take out all valuables). If you don’t feel comfortable leaving your car, you could ask a friend to drop you off or take public transportation to the trailhead if available. Many cities will have short or long-term parking lots that you can leave your car at for a fee. For Kristen’s 22-day JMT hike, she left her car at the Ranger Station in Tuolumne Meadows.
Thank you. Even though this will not be my first time hiking, you advice just made me double check my check/packing list.
This is very empowering! I’ve wanted to go backpacking for years and have felt intimidated and didn’t know where to start. We just completed our first backpacking adventure last weekend and had a blast. You break things down and help me feel like I can do this!!!!
That’s awesome Dana, congrats!
How to Choose and Prepare for a Hiking Trip
:max_bytes(150000):strip_icc():format(webp)/Becker1-5b734a56c9e77c0025caddbd.jpg "preparing for hiking trip")
Some of the most memorable and iconic adventure travel experiences involve hiking across spectacular landscapes. For instance, trekking to the summit of Mt. Kilimanjaro or hiking the Inca Trail to Machu Picchu. But sometimes travelers can be overwhelmed with the requirements of undertaking such a challenge, such as sleeping in tents, carrying a loaded backpack, and walking for miles each day.
If you've ever dreamed of hiking the Great Himalaya Trail or crossing off any number of other amazing trails , we have some suggestions for how you can properly prepare for your journey and get the most out of the entire experience.
Define Your Trip Style
The Adirondacks or the Rockies, camping in a tent or staying at a luxurious lodge, hiking from one town to another or finding a far-off place to wander—making these kinds of decisions is the first step you should take when selecting a hike that interests you.
Some travelers like visiting more remote areas and getting far away from civilization, while others prefer a few luxuries to make their trip a bit more enjoyable. There is no right or wrong choice, only the one that works best for you.
Once you've decided exactly where you want to go and how you want to explore that destination, you'll more than likely find numerous options online for guides and itineraries.
Choose Your Trip
Now that you've dialed in on the type of trip that most appeals to you, it’s time to actually choose one. You'll probably find many companies that offer walking and hiking trips to the place you want to visit, but narrowing down which one works best for you can still be a challenge.
Start by finding guide services that offer departures for the timeframe that you want to travel. Some only run one or two trips a year, some are seasonal, and others offer trips on a more continual basis.
Once you've narrowed down your selection, reach out to each company that has a trip of interest to find out more information. Ask about how many guides will be on the trip, what the food will be like, and the amenities (or lack thereof) you can expect on the trail. Try to get a sense of the experience ahead of time. It's also a good idea to ask about the level of fitness required, as some hikes will be more demanding than others, and many of them won't offer the option to catch a ride to the next campsite or lodge.
Of course, you'll also want to factor in your budget by finding a trip that meets your price too.
Assess Your Fitness Level
Prior to setting out on any excursion, it is important to take an accurate and honest assessment of your own level of physical fitness . Traveling on foot through a remote corner of the world can be taxing at times, even if someone else is carrying the bulk of your gear. Knowing your own strengths and weaknesses will prove to be a major asset in getting ready for any trip.
Keep in mind that you may be able to walk a mile or two on pavement comfortably, but can you also hike four or five miles a day – or more – on varied terrain? Beyond that, can you also get up and do it again tomorrow and the day after that? Inquire with your tour operator about how strenuous the itinerary is to get a better sense of what to expect on the trail.
Train for Your Trip
If you don't already exercise regularly, aim to start training at least a month or two before you actually leave for vacation. Spending time at the gym working with weights and on a treadmill or stationary bike can all help you prepare. Supplement that training with long walks or hikes on weekends, preferably on dirt trails instead of pavement. Jogging can also help help improve your cardio efficiency, as well as agility and stamina.
For more extreme trips, like hiking to Mt. Everest Base Camp or following the Inca Trail in Peru, you should start training several months ahead of time to prepare for challenges of rough terrain and high altitudes. Companies running these types of trips will often have specific recommendations for a training plan, including a timetable for when you should start. Keep in mind, however, that you can be incredibly fit and still suffer challenges with altitude, so expect to take it slow and go at a moderate pace when hiking in the mountains.
Get Used to Carrying Gear
Even if you're in great physical condition, if you're not use to wearing a backpack filled with gear (possibly multiple days' worth), any hike can be a challenge. A loaded backpack can be heavy and cumbersome and can affect your balance and agility.
Prior to setting out on your trip, find out if you'll be responsible for carrying your own load or if porters will do the bulk of the work for you. Either way, you'll want to start prepping for the trek by making day hikes on your local trails while carrying a backpack with approximately the same load as you will while on your adventure vacation. This will help your body to get accustomed to having a backpack on for hours at a time.
While training, be sure to wear the boots and backpack you'll take on the trip to ensure there are no surprises when you get to your destination.
Wear the Appropriate Boots
One of the keys to enjoying any hiking trip is to have a proper pair of boots designed for the terrain you'll be walking on. If you'll mostly be exploring paved, easy trails with little change in altitude, hiking shoes may be in order. On the other hand, if you'll be dealing with a lot of climbing and descending on steep trails, sturdier backpacking boots may be in order.
Before setting out, be sure that your boots not only fit properly, but are broken in enough to ensure they are comfortable too. This will help avoid developing hotspots and blisters while on the trail, keeping your feet much more comfortable as a result. Bring several pairs of good-quality hiking socks too, preferably made from synthetic, high-tech materials that wick away moisture, which are much better than cotton.
Pro Tip: Wear your hiking boots on the plane while traveling. That way, if your bags get lost you'll still have the proper footwear. Most gear can be replaced, but breaking in new shoes can be disastrous.
Decide What Clothing to Pack
Your tour operator will typically provide you a list of specific clothing you should bring on the trip. Those lists are generated from years of experience and understand of what travelers will need while on the trail. Usually the list will include waterproof and breathable clothing that are designed to keep you comfortable in a variety of conditions and changing weather. Purchasing clothing that can provide protection from the sun is always a plus, and some hikers prefer pants that convert to shorts as well.
REI has clothing and gear for pretty much every adventure imaginable, as does Backcountry and Sierra Trading Post .
Bring the Right Backpack
Picking the right backpack can play a key role in getting ready for any adventure travel excursion. No matter what style of trip you're on, you'll want to bring a pack that fits your body comfortably, has the capacity for whatever you're carrying, and has features to keep everything dry and well protected from the elements.
Just like selecting the proper boots plays a vital role in your enjoyment, so does the right backpack . Visit your local outdoor store to get a proper fitting and find one that meets your needs.
Bring Personal First Aid and Emergency Gear
You may be trying to conserve space in your bag, but don't forget to pack items that can keep you safe and healthy. For example, you'll want to bring sunblock, energy snacks, a flashlight, a knife, bug repellant, a first aid kit with blister bandages, and possibly even an emergency kit with a whistle, compass, matches, and a space blanket, depending on your destination.
If you want an all-in-one solution, grab an Adventure Medical Kit . They are well organized, convenient, and stocked with everything you need.
The 11 Best Carry-on Backpacks of 2024, Tested and Reviewed
The 9 Best Men's Travel Shoes of 2024, Tested and Reviewed
The Proper Gear for Trekking the Himalaya
The 8 Best Travel Camera Cases and Backpacks of 2024, Tested and Reviewed
What to Pack for Bali
Planning a Hiking Trip: The Complete Guide
The 8 Best Backpack Coolers of 2024, Tested and Reviewed
Beginners Guide to Backpacking
Everything You Should Pack for a Hiking Trip
Everything to Know About Hiking With Your Dog
Whether to Buy a Top-Loading or Front-Loading Backpack
Must Have Gear for Every Adventure Traveler
A Beginner's Guide to Hiking Boots
A Complete Guide to Backpacking in Ireland
How to Go Hiking With Your Kids
Hiking Boots, Shoes, and Sandals: How to Choose
How to Plan, Prepare, and Pack for a Hike
This post may contain affiliate links.

In this post we’re sharing everything you need to know to plan, prepare, and pack for a hike so that you can confidently hit the trail and have a great time!

Without a doubt, hiking is one of the best ways to improve your physical health, mental well being, and strengthen your connection with the outdoors (or at least the most scenic way!) .
Hiking has been shown to not only improve cardiovascular health and build strength, but it also helps reduce stress and can help manage anxiety and depression. Not to mention, it can just be a ton of fun and is a great way to spend more time in the natural world!
Save this post!
Enter your email and we'll send this post to your inbox! Plus, you'll receive our newsletter full of great tips for all your outdoor adventures.
While in theory hiking is as simple as finding a trail and putting one foot in front of the other, there is a little more to it. Spending time to plan and prepare will help your hike go smoother and can help avoid the unexpected. And, having the right hiking gear (and knowing how to use it) will help you stay safe on the trail.
In this post we’re sharing all the info on how to plan and prepare for a hike and all they day hiking essentials you should bring with you.
How to plan a hike
Make sure your hike goes smoothly by spending a little time planning before you head out.
Choose your hike!
First things first, pick out your hiking trail! AllTrails , GAIA , and Hiking Project are all great sites to search for hikes near you.
When searching for a trail, consider your fitness level (and of those you’re hiking with), length & total elevation gain (double check that the mileage on an out-and-back trip is round trip and not just one way!), and terrain. AllTrails lets you add a filter for “attractions,” so if you want to hike to say, a waterfall or a lake, you can filter down trails which will offer that.
You’ll also want to consider seasonality—some trails at higher elevations may not be accessible until summer due to snowpack. While others in hotter climates might be closed during the heat of summer. You may want to call the park or ranger station to double check that your chosen trail will be open.
Do you need a permit?
Some hikes in popular areas will require an advanced permit. The information on AllTrails or blogs is not always up to date, so try Googling the name of your trail + permits (e.g., “Green Lakes Trail permits”) to see if one is needed and how to get one.
How much time will you need?
Note the length of your hike and and total elevation gain to determine how much time you’ll need to complete the hike.
If you don’t know your hiking pace, consider that the average person will hike at a pace of 2.5-3 MPH and for every 1,000ft of elevation gain, you’ll want to add roughly an hour of hiking time. Of course, this will vary depending on your fitness level, pack weight, altitude, and the trail conditions. Don’t forget to account for stops!
Getting to the trailhead & parking
Get an idea of what the road out to the trailhead is like (Is it paved? If not, can your vehicle handle the road?) and what the parking situation looks like. Some trails have competitive parking or small lots, so you’ll want to factor that into your plan for the day and get there early.
Preparing for a hike (day before)
Once you have your hike picked out and know the logistics, you can start preparing yourself and your gear for the adventure ahead! Here are the steps we take before every hike to make sure we’re ready to hit the trail.
Familiarize yourself with your trail map
Before your hike, download and print a map of the trail and surrounding area. Both AllTrails Pro and GAIA GPS Premium will let you download maps for offline use and print a custom map—otherwise, search online to see if a map is available.
Take a moment to study the topo map and elevation chart of your hike so you can orient yourself on the trail and be mentally prepared for any challenging climbs and descents.
Things to look for when you’re studying the map:
- Contour lines that are close together, indicating steeper sections of trail
- Junctions with other trails to be aware of so you don’t make a wrong turn
- Water sources that are near the trail (see below) or any spots where the trail might cross a river or stream
Packing enough water is a critical component of preparing for a hike. A general rule of thumb is to plan on drinking .5 liters of water (or 2 cups) per hour of hiking, per person. If you’re on a particularly challenging hike or hiking in hot weather, you might need to double that! Always pack extra water beyond what you think you’ll need.
Additionally, it’s a good idea to pack a lightweight water filter. In the event that you drink more water than you thought you would, you can use this to filter from any water source on the trail.
Our favorite water filter for day hiking is the Katadyn BeFree . It’s super light and so easy to use!
Share your plans with someone
Before you leave for your hike, share your plans with a trusted person. Include information like the name of the trail you are hiking, who you’re hiking with, what time you expect to be back, and who they should contact if they don’t hear from you by a certain time.
This person doesn’t need to be local, just responsible. We frequently leave our hiking plans with our parents, even though they live hundreds of miles away.
Double check your gear
Using the hiking gear list below, double check all your gear to make sure it’s in good condition and working properly, all of your batteries are fully charged, and your first aid kit is fully stocked.

Check the weather
Double check the weather forecast the night before your hike and make any adjustments to your plan or gear. Here are the sites we use:
- Accuweather — This gives us the general forecast of an area and is good for lower elevation hikes
- Mountain Weather — If we’re hiking at higher elevations we’ll check this site to see more detailed weather conditions for particular mountains. This site can give you an idea of how the temperature and wind conditions (including windchill) will change as you rise in elevation, which can be very different than the forecast on Accuweather will give you!
Start hydrating
Our motto is “Tomorrow’s hydration starts today!” According to the American Hiking Society , the best way to prevent dehydration is to be properly hydrated before your hike.
Drink plenty of water the day and night before your hike, and drink at least 16 oz. of water in the hour before your hike.
What to pack for a hike
You may not need all the items on this list for every hike—your gear needs will likely be different on a short hike in a well-used park vs on a long hike in a backcountry or high elevation setting. Evaluate the conditions and risk factors on your hike and prepare for them accordingly using this day hike packing list as a starting point.

Hiking day pack
First things first, you’ll need a good hiking backpack to hold all the hiking gear listed below! Most daypacks are in the 20-30L range, which will give you enough room to stash extra clothing layers, food, water, and safety gear. Here are a few features to look out for when selecting a backpack:
- Adjustable, padded shoulder straps for comfort and so you can dial in the fit
- A hip belt, which will help transfer the load to your hips instead of carrying all the weight on your shoulders. This feature may not be necessary for smaller sized packs where you won’t carry as much gear.
- Exterior pockets to give you easy access to snack and water
- An interior pocket to hold a water bladder, as well as a port in the top to feed the drinking tube through
Here are a few packs we’ve loved over the years:
- Deuter Speed Lite 20
- Gregory Nano 22 Hydration Pack
- REI Trail Pack 25

What to wear
Your hiking outfit will largely depend on the time of year and weather conditions you’ll expect. Below are the basics for summer hikes. You can check out our guides to fall hiking and what to wear for winter hiking if you’ll planning on hiking in those seasons.
Basic hiking clothes
Extra layers as needed

Sun protection
Protecting your exposed skin from the sun is super important when hiking, especially when you consider that UV rays intensify by up to 8-10% for each 1,000 feet of elevation you gain. Consider wearing long sleeves and pants made of UPF fabrics, and at a minimum, pack and wear:

Having basic navigational skills and tools are essential for any hike, even one that seems straightforward. Even trails that are in local parks might have junctions or trail intersections and areas where the path isn’t obvious.
Bringing a paper map of the trail and a compass is the time-honored recommendation for good reason—they are reliable, don’t run out of batteries, and work for any type of terrain.
We will print off a map of the trail we’re hiking from the GAIA website (you can also do this with an AllTrails Pro account) and pack it in a plastic bag to keep it dry. This gets tucked away in our packs in case our primary navigation tool fails us.
99% of the time, we use GPS to navigate. There are handheld GPS units that you can buy but it’s likely you already have the base of one sitting in your pocket—your smartphone. Paired with an app like GAIA GPS, your phone can become a great way to navigate on your hike! Here are a few things to keep in mind:
- You’ll need to download the map of the area prior to your hike in order to use it without service or in airplane mode
- Double, triple check your phone is fully charged before starting your hike
- Bring a battery bank to you can recharge if your battery runs low. We carry this lightweight, inexpensive battery bank .
- Turning your phone to airplane mode will help you conserve battery life
- GPS can be unreliable in certain situations like hiking in canyons and valleys surrounded by tall mountains (this is where your paper map comes into play!)
Another tool you might want to consider is an emergency communication/SOS device, like the inReach Mini . This will allow you to contact search and rescue if things go wrong, and models like the inReach have two way messaging so you can communicate with the person you left your itinerary with if plans change. This type of device is particularly helpful if you frequently hike solo or go on longer hikes in more remote areas.

Staying well hydrated is one of the best ways to ensure that you feel good throughout your hike. Dehydration can lead to headaches, dizziness, confusion and disorientation, decreased energy, and muscle cramping—none are things that you want to deal with on your hike!
Plan on packing at least .5L of water per hour (more if it’s a strenuous hike or hot day), and if you’re on a longer hike, bring along a lightweight water filter so you can refill at on-trail water sources in case you drink more than anticipated.
You can use water bottles, but if your day pack has room for a hydration bladder, we’d recommend using it. You’re more likely to keep up with water consumption if it’s easy to access with the drinking tube rather than needing to stop and fish out your water bottle.

Energy-packed snacks
Avoid “hitting the wall” on your hike by packing plenty of energizing snacks. Aim to consume 30-60 grams of carbohydrates per hour, which will give your body plenty of easily-accessible energy to keep you fueled.
We personally a mix of love fresh or dried fruit, trail mix , Bobo bars, and energy chews/gummy bears, but there are tons of great hiking snacks so pack plenty of your favorites!
It’s also recommended to pack an extra day’s worth of food in case of an emergency situation where you’re stuck on the trail for longer than anticipated.

Trekking poles
Trekking poles (aka hiking poles) aren’t necessary for every hike or every hiker, but they can be very helpful. Poles can help take pressure off your joints, can help with balance on rocky sections of trail, and help activate your core and arm muscles as you hike, so your legs don’t have to do all the work.
I’ve used these Black Diamond hiking pole s for over a decade, and Michael recently picked up these budget-friendly poles .

Safety supplies
What to pack if nature calls.
Bringing a small “potty kit” will help you be prepared if you need to use the bathroom while you’re out on your hike. Bring some toilet paper (or these packable Stall Mates wipes) stashed in a small plastic bag, a small trash bag or plastic baggie to pack out your used TP, and a trowel to dig a cathole for #2.
Bonus: Post hike treats
Leave these items in your car. You’ll be grateful for them after a long day on the trail!
We hope that this guide helps you efficiently plan, prepare, and pack for your next hiking trip! Find more hiking resources here, and don’t forget to sign up for our newsletter to get a printable, checklist version of this post!
Megan & Michael are the creators of Fresh Off The Grid, a blog dedicated to helping you fuel your adventures by sharing camp cooking recipes, backpacking meals, and outdoor travel guides. Their recipes and outdoor cooking expertise have been featured in Backpacker Magazine, Outside, REI Co-Op Journal, Food & Wine, and New York Times Cooking.
Leave a Reply Cancel reply
Your email address will not be published. Required fields are marked *
Save my name, email, and website in this browser for the next time I comment.
This site uses Akismet to reduce spam. Learn how your comment data is processed .
How to Train for a Hike: 9 Steps to Hiking Like a Pro!
January 11, 2024
Paula Martinelli
If you have been searching for information on how to train for a hike, you have got to the right place! As an experienced hiker , I can confidently say that hiking is one of the most fulfilling outdoor activities out there. But, it’s important to understand that it’s not just a walk in the park. Hiking requires proper training and preparation to ensure that you have a safe and enjoyable experience.
Whether you’re planning a day hike or a multi-day trek, it’s essential to train your body for the physical demands of hiking. I have learned that preparation is key to enjoying any hiking adventure. Over the years, I have developed a training routine that has helped me conquer some of the most challenging hikes in the world.
With all my years of experience as a world traveler and hiker, I have seen first-hand the consequences of not properly training for a hike. From blisters to dehydration and even more serious injuries, the risks are high if you’re not adequately prepared. That’s why I’m passionate about sharing my knowledge and experience to help others train for a hike like a pro. In this blog post, I’ll share my top tips and advice on how to train for a hike, so you can embark on your next adventure with confidence and ease.
STEP 9: Build a Schedule and Train Consistently

Overview of How to Train for a Hike in 9 Easy Steps

9 Steps on How to Train for a Hike
Step 1: assess your fitness level.
The first step when you decide on how to train for a hike is to assess your fitness level. This will help you determine where to start and what you need to work on to improve your overall fitness. Hiking is a natural form of exercise for us humans, but with our busy lifestyles, we tend to neglect physical activity. This can lead to a lack of strength and endurance, making hiking more challenging than it needs to be.
Once you’ve assessed your fitness level, it’s time to plan for your fitness goal. Here are three foundations to help you get started:

STEP 2: Start with a Shorter Hikes & Progress Gradually
WHAT IT DOES: It is obvious, you need to start hiking to mimic your hiking during your vacation. It trains your feet, legs, knees, and back to get used to walking for long distances. Slowly start adding some length and elevation to your hiking.
FREQUENCY & DURATION: You can start by going on long walks outdoors. Start to increase your walking distance, for at least 60 minutes once a week.
WHERE: Start to walk outdoors, try to add some variations such as a walk in the sand, hills, and parks, and ideally if you have access, go on shorter hiking on the weekends.
Expert Tip:
Eventually, you should do hikes using your backpack and all your hiking gear. By doing it, you allow your body to get accustomed to the weight that you will need to carry during your actual hiking trip. Another tip, if you live in flat areas, just like me here in Florida, besides outdoor training, I train on a treadmill with elevation. The hillier the terrain, the better.

STEP 3: Train Your Cardiovascular to Built Your Endurance
OPTIONS FOR CARDIOVASCULAR: Treadmill, stairs masters, elliptical, bike, spinning bike, running, interval training
WHAT IT DOES:
- Running: This is the most similar type of training in terms of movements, so this will be a great way to get your legs and lungs prepared for what lies ahead.
- Gym cardio equipment: Climbing stairs, bike, and elliptical helps to strengthen leg muscles and lungs and this is another great way to do something that resembles what hiking will be like.
- Interval training ; This is a method of training the cardiovascular system by elevating the heart rate significantly and then allowing it to recover for a period before elevating it again, this prepares the cardiovascular system to deal with the stress of limited oxygen levels at higher altitudes. I like to do sprints outdoors. But you can also do your interval training on a bike, up the hill, treadmill, or any gym equipment that you may have access
FREQUENCY & DURATION:
- I target to run 5K (3.1 miles) 3-4 times a week for 40 minutes, including 10 minutes of warm-up.
- I incorporate interval training 2-3 times a week, alternating with my running days. You can Warm up for 5 minutes, then move into short high-intensity interval training (HIIT) intervals, each interval can last from 30 sec to 2 min with one minute to recover. Go for about 20 minutes of training.
- You can use cardio equipment at the gym, at the stairs at a park or your apartment, or at a school stadium. You can do the stair training for example on alternate days of running, each session with 20 min of high intensity.
Doesn’t matter what endurance/ cardio exercise you choose to do, make sure you target your progress. During each session, I try to train at a pace that keeps my heart rate at 70% to 85% of my maximum heart rate. To make your training more fun and easier to adapt to the routine, I recommend mixing and matching or picking at least 2 from this list of exercises below, as you will need some variations to stick with the plan.

STEP 4: Strength Your Muscles
OPTIONS FOR STRENGTH WORKOUT: When we talk about strength workouts, the first thing that comes into mind is a sign for a membership at the gym. But if you are so busy, like I am, I have some great options for you. For a cheap and easy alternative, you can buy sissy squats equipment to strengthen your whole body, especially your legs. Another alternative is to invest in a compact home gym , as you will get the same benefits as going to the gym.
WHAT IT DOES: I think you already realized I am a big fan of weight training. I have been training with weights since I was 16 years old. Some of the benefits include: it makes you stronger and fitter, but it is also good for your bone density and muscle mass and helps to develop better body mechanics.
FREQUENCY & DURATION: 4-5 times a week, during 45-60 minutes sessions.
When training for hiking on my vacation, I always prioritize legs workout for hiking and incorporate more exercises such as squats, stiff-legged deadlifts, leg presses, and calf exercises. It is also very important to train your upper body, as a strong body is very important. 3 days per week of leg training, 1 day for back, 1 day for shoulders, and 1 day for arms (biceps and triceps).

STEP 5: Balance, Stretching & Mobility
OPTIONS: Yoga, mobility exercises with a rubber band, stretching at home or at the gym
- Yoga helps to reduce both, the risk of being sore after your hike and the risk of injury. It helps build strength and stamina so you can hike longer, more intensely, and easier.
- Stretching is imperative to ensure you avoid injury and recover as quickly as possible.
- Stability & Mobility: It is very important to build mobility and stability. Mobility increases the ability to move freely and easily and, Stability develops the ability of the body to maintain postural equilibrium and supports joints during movements.
FREQUENCY & DURATION: 1 full hour a week, and associate some yoga moves prior to and/or at the end of your daily workout routine.
You can use resistance bands to strengthen your muscles through full extension and concentration and help to build a range of motion. You can add bands walk, bands squats, and band sidewalks. The good thing is that you can do these exercises on the go and you don’t need much space.
STEP 6: Wear Proper Gear
GEAR UP: Having the right gear can make a huge difference in your hiking experience. Invest in proper hiking shoes, a sturdy backpack, and appropriate clothing for the weather conditions. It’s also important to carry essentials like a map, a first-aid kit, and plenty of water. Below are my favorite and essentials hiking gears I recommend:
BEST SUPPORT FOR KNEES: Stability Compression Tights saved my life (and my knees) during my 7 days hiking in the Himalayas, especially on the way down the mountains. The concept is intriguing and I was skeptical when I ordered my pair, but it really adds great support for calves, knees, and hips along with quicker recovery helps during the 8-day trek to the base camp. I also strongly recommend researching and investing in the best knee brace for hikers that work best for you, you will thank me later.
INVEST IN PERFECT HIKING SHOES: This is one of the best investments you need to make when you are planning hiking, as it doesn’t matter how fit you are, your shoes may make or break your hike. I recommend trying different pairs before you make your decision. You need great support for your feet and ankles, and make sure you won’t have blisters during your hiking. I have been using my hiking boots for many hiking, and I absolutely love them.
COMFORTABLE BACKPACK: If you are planning multi-day hiking, besides building a strong back, you also need to make sure you have the right backpack. I finally invested in a very good backpack that is “antigravity” (Osprey magic). It was not very cheap, but it is an investment in my back.
TREKKING POLES: I recommend having a good trekking pole on your backpack. While I never believed I would use one, they were great for long hiking down the mountains hiking I have done, as I started to feel strong pain in my knees. Poles help to keep the balance on rock and uneven terrain, but they are also great for support if you are hiking downhill and feel pain, especially in your knees.
HIKING JACKET: Also, it is very important to invest in a high-quality hiking jacket . Every hiker knows the importance of great quality jackets for hiking. Or you simply cannot function properly let alone enjoy your hike when you’re freezing (if your jacket isn’t warm enough), very sweaty (if the fabric doesn’t breathe), or struggling to move if the jacket is restricting your movement.

Make sure that you train with your equipment prior to going hiking. Train with your compression tight, your hiking boots, and your backpack. In case you are going on a long hike, you can also simulate the weight on your backpack during your training. Check my expert review on all my favorite hiking gear and make sure you invest in the right ones for you!

STEP 7: Plan Your Diet Habits by Staying Hydrated and Fueled
If you are planning to increase your workout, it is very important to also have proper nutrition. Make sure that you eat the correct amount of calories, and have a balanced meal with the macronutrients: Lean protein, complex carbohydrates, and good fats, such as these 16 easy ideas for energy food for hiking . Below are my 5 takeaways for you:
Changing diet habits is the most challenging part, and it can be very intimidating to commit, but if you plan accordingly and stick with the plan, you will slowly build up the discipline and the results will be all beneficial for your physique and most import, health result

STEP 8: Understand Where you go Hiking and Know the Trail
My adventurer friends, the first step is to decide when you decide how to train for a hike is where in the world you want to hike. I worked with many travel adventure bloggers from all over the world, and together, we have prepared this ultimate list of the best hiking on the Planet . Or you can check my complete series of hiking for more fascinating locations and experiences. It is a great place to start, choose the perfect hiking for you.
What type of hiking do you want to do during your next vacation? It will depend on the level, you will need to plan and prepare accordingly.
- Will it be a full day of hiking on easy terrain?
- Maybe a strenuous day hike to a mountain summit?
- Or rather several days of hiking in extreme conditions?
- Maybe it will be overnight in the wilderness?
- If you are planning to hike in high altitudes, I have prepared a complete guide on how to train for hiking in high altitudes , since you will need to follow additional steps.
If you have an average fitness condition, you should be able to complete a day hike. But there is a difference in preparation for a day hike and long-distance backpacking at the high altitude of the Himalayas while carrying a heavy backpack all the way up, for example. Getting ready for hiking on your next vacation, should also be a great fitness goal. Use it in your favor to start a fitness program and a routine, including making changes to your diet and lifestyle.

Last but not least, now that you have learned all the steps on how to train for a hike, it is extremely important to build a schedule of training that allows you to be consistent. I am a gym rat! But anytime when I am training for hiking, I adapt my training and also take my workout outdoors, and still keep one session in the gym, and one session outdoors per day, for 2 months.
It is very important that we distinguish between different types of training. Like any other sport, there are different aspects for us to work on, strength, cardio, and balance, and I will be covering each one in detail and give you great examples of how to accomplish the best results:
It is important to take it slow and increase the training program daily, and gradually. Also, remember to pay attention to your inhale and exhale. I focused on developing a breathing rhythm and deep breathing. Your ability to control and conserve your breath and expand your breathing capacity will come in handy when the oxygen supply is reduced.

Additional Tips on How to Train for a Hike
Now that you have all the essentials on how to train for a hike, I want to make sure to help you with all the additional tips to make the most of your hiking. Being in excellent shape before your trip makes a huge difference in how much you will enjoy your vacation:
How to Train for a Hike Conclusion
In conclusion, training for a hike requires a multi-faceted approach that includes assessing your fitness level, developing a training schedule, adopting healthy diet habits, gearing up, and progressing gradually. By following these foundations, you’ll be well on your way to being physically prepared for your next hiking adventure.
By following these 9 steps, you’ll be well on your way how to train for a hike like a pro. Remember to start slow and gradually increase the distance and difficulty level to prevent injury and enjoy the experience. Happy hiking!
You may also enjoy these articles:
- How to Train for a high altitude hike
- Fitness for Travel; 12 Tips on How to Be in Shape for your next vacation
- 5 Tips on How to find life balance between travel & Fitness
- Best energy food for hiking: 16 easy and cheap ideas
- Efficient hotel room workout for busy travelers
- Build strong legs with these sissy squat equipment: Expert Review!
- 150+ Funny hiking captions for Instagram!

Follow + Share
If you found this guide useful, follow me on Instagram to stay up to date with my travels & Subscribe to my YouTube Channel to keep you with my workout videos.
I would love it if you could follow me on Pinterest and share this guide on my social media.
Plan your Trip
You can plan your trip with this easy guide and have access to the best services I recommend and you can get discounted prices.

TRAVEL & FITNESS: 5 Tips on How to Find Balance in Life

How to Train for High Altitude Hiking: Ultimate Guide for Mastering Your Hiking Skills

Full Body Resistance Band Workout | Bonus: Resistance Band Routine Video + Printable
6 thoughts on “how to train for a hike: 9 steps to hiking like a pro”.
This is great! I loved that you combined fitness and travel, my faves!
Great tips! I’m not a hiking person and the 2-hour long (one way) hike I had in my recent trip to Sri Lanka was more than enough. I have no stamina and cardio kills me lol I guess I should try to incorporate more strength training into my daily routine, thanks for the motivation!
Hi Juliet, training and building stamina should be one step at a time. I think you have a good idea to start with strength training and slowly incorporate cardio, endurance…until you feel comfortable.
I am glad you enjoyed this article Katy, travel, and fitness are my passions too.
Do you have any more posts on this subject? This was really useful
I do have a couple of articles about fitness on my site – Please, visit the Healthy Lifestyle & Fitness session. Thanks
Leave a Comment
This site uses Akismet to reduce spam. Learn how your comment data is processed .
7 expert tips for tackling your first multi-day hike

Jan 26, 2021 • 11 min read

We asked experts from leading outdoors groups to give us their top tips on how to prepare for a multi-day hike © Westend61 GmbH / Alamy Stock Photo
There are few better experiences than being outdoors, smelling the fresh air and taking in the open spaces. Multi-day hikes merge the beauty of the outdoors with the physical and logistical challenge of an extended journey.
For those who want to amp up their mileage and turn a day hike into a longer, multi-day trekking adventure – here are seven tips from passionate leaders who work with five leading outdoors organizations from Australia to Canada to California and beyond.
Editor's note: Please check the latest travel restrictions before planning any trip and always follow government advice.

1. Choose wisely and research thoroughly
Matt Berna, managing director for Intrepid Travel’s North American region shares his perspective on the importance of deciding what you’d like to get out of your multi-day hiking journey, before taking the time and effort to embark on it.
“From my experience, particularly as a guide, it’s most important to be honest with yourself in terms of what you’re looking for and what you want to do – what you want to achieve,” he says. “For example, something like Kilimanjaro is a scenic hike, but it’s arduous – it’s a ‘challenge hike.’ Is [your] goal to reach a remote area that’s hard to access? Or to check something off the bucket list? Is it for the bragging rights?”
Berna emphasizes that the time of year you’re traveling makes a difference in what kind of experience you’ll get.
“Some routes are busier than others, depending on where you choose to go and what you want to do,” he says. “If you’re someone who’s looking for a backcountry experience and want to be by yourself, so consider when you go – the offseason or the brink of the offseason are typically the best time to go if you’re willing to put up with trickier weather conditions.”
Berna even suggests trying a professionally-led hike as a first time for your multi-day hike, as experts can teach you how to prepare for a solo trip when you’re ready.
Guided trips are also a great idea to look into, he says. “If you want to go remote into the backcountry, research and consider using a special operator – they’ll provide the right gear such as oxygen tanks and can even fit you properly. On a trek such as the Inca Trail’s 4-5 day trek, the porters will help you carry your gear, food, and water. You’re also employing the locals there – and they’re experts.”

2. Invest in the proper gear
“There’s no such thing as bad weather, only the wrong gear!” says Charlie Carlow, Owner of South Australia’s Arkaba Homestead and host of the Wild Bush Luxury – Arkaba Walk experience, which is a Great Walk of Australia . He suggests some of the most important equipment to take on a multi-day hike through the outback to stay safe and warm, first and foremost emphasizing the importance of proper hiking shoes.
“Gym trainers aren’t adequate for this journey. Comfortable hiking boots that are well worn in are best, preferably with ankle support,” he says. “You’ll also need the usual suspects for an outback walking adventure – breathable layers and a few good pairs of hiking socks. Convertible pants are handy and a lightweight waterproof jacket is essential. Thermals and a beanie will keep you toasty in the winter months. A head torch to move around the camp after dark is a good idea.”
“Lighter and heavier clothing ratings will be determined by the weather outlook," says Tony Sharley, Founder and Lead Guide of Murray River Walk , another of Australia’s Great Walks. “Typically a thermal underlayer, non-cotton long-sleeved shirt, fleece, neck buff, hat/beanie, gloves, waterproof jacket and long trousers should all be in your kit.”
Becky Wong, long-time Sierra Club volunteer trip leader from Victoria, British Columbia , Canada agrees on the importance of investing in the right gear. Wong has led more than 60 trips with the Sierra Club and serves as the training officer for international trips as well as the quality officer for the organization.
“Personally I like to travel with quality, lightweight equipment, because I don’t like to carry a lot of stuff – especially on a multi-day trip,” she says. “Clothing is very important...You want something that wicks moisture off to stay warm and dry.”
We tested boots, backpacks and more in Patagonia – here’s what we learned
Wong's favorite versatile gear piece of gear is a simple bandana. “This simple square of fabric can hold up in the sun, in the rain, serve as a washcloth, headband, a mask, and to protect your neck,” she says.
Wong also recommends carrying an “ouch pouch” with necessary non-emergency medical supplies, such as moleskin for blisters, bandages, wipes, gauze, sunscreen and blister cream – as well as pain relievers, and necessary other medications or supplements.
“Layering is something that we talk about, constantly,” says Andy Kronen, REI’s North American Adventure Travel Program Manager, who has been hiking and backpacking his entire life. “On a multi-day trip, in my mind, the two most important pieces of gear you can have are solid, broken-in footwear that’s appropriate for the terrain, and a well-fitted backpack.”
“It’s even a great idea to go out for a night first, just to test your gear – your shoes and your backpack,” shares Intrepid’s Berna. “That’s how you learn exactly what you need and whether your gear is efficient, how to plan your meals, your water filtration systems.”

3. Prepare both mentally and physically for the journey
Try to train ahead of time by replicating the activities you’ll experience on the trip when you’re closer to home.
“If you live at sea level or you’re used to working out at the gym, or have more of an urban lifestyle, when you find yourself at 11,000ft on a rocky dirt trail like you would on the Inca trail trek, your cardiovascular fitness is a very different experience,” says REI’s Kronen.
“Being out in the elements, being out on the trail, and being at altitude – if there’s the opportunity to replicate these conditions at home, even if it’s driving for an hour to get into the mountains, do this,” he recommends. “It’s also important to build in some time to acclimate and get used to the higher elevation on higher trails.”
For example, if you’re hiking Machu Picchu , try to arrive at Cusco a few days early to acclimate to the altitude before embarking on the hike itself.
Matt Berna agrees. “A lot of times, people have trained in different environments, such as walking every day – but when you get them into the dry climates of somewhere like the desert southwest with exposure to sun and elevation, they find it very tiring,” he says. “Layer that with jet lag from flying into the destination,” and it’s going to be a real challenge.
Wong suggests gradually building up your mileage for a longer trek. “Try adding two miles to your training each month leading up to the month of your trip,” she suggests. “If you’re more prepared, you’ll have a more enjoyable trip.”

4. Be mindful of the seven “Leave No Trace” principles
It’s also important to respect the seven “leave no trace principles” when you’re hiking anywhere in the world. Wong explains the importance of these principles when you’re embarking on a long-term trek to protect the land you’re traveling on for future hikers and local wildlife.
The first principle is to plan ahead and prepare.
“Have a safety management plan and be prepared for a number of things that might happen on the trip,” says Wong, including “your equipment and what you might need. “
The second is to camp on durable surfaces. When you travel, tread carefully, don’t take shortcuts, and don’t trailblaze.
The third is to dispose of waste properly. Pack in and out all trash, litter and necessary waste.
The fourth is to leave what you find. “Don’t take anything that’s not yours, such as an artifact like an arrowhead,” says Wong. “Leave it for other people to enjoy!”
The fifth principle is to minimize campfire impact. Don’t scorch the earth, or leave any trace that you’ve been there.
The sixth principle is to respect wildlife. “We’re in their land,” says Wong. “We don’t interfere with them.”
The seventh principle is to be considerate to other visitors. This includes being courteous by yielding to other hikers when necessary, and allowing nature's sounds prevail by keeping your own noise to a minimum.

5. Respect the region you’re visiting and its customs
It’s important to be aware of what’s happening around the world internationally on a conservation level, honoring and respecting the diversity, equality and inclusion on a broader scale.
“Recognize the value of conversations focusing on the area you’re traveling to,” says Wong. “This includes keeping up with current events, and spreading awareness of what’s happening in terms of conversation on a larger level with those who you’re trekking with. Trek with an open mind and leave any prejudices at home. Be patient. Be an ambassador of goodwill to all people.”
Wong emphasizes the importance of being respectful and considerate of other hikers who are also enjoying the area you’re trekking in.
“When you travel lightly, you’re not traveling for people to see you,” she says. “Take your time to absorb the beauty and be inspired by something natural like a river, a mountain, or a waterfall. Be grateful and show your appreciation for what you’ve seen. With curiosity, it’s not how far you go but how deeply you explore the experience and learn from it.”

6. Plan ahead and prepare – expect the unexpected
“My biggest advice is to plan and prepare,” says Wong. “Planning and preparing sets you up for any situation that could happen. This means anything from making sure you have enough water, to ensuring you have the proper gear. Be flexible. Even though you might have a plan, things happen and plans change. Weather can change very quickly.”
Kronen agrees keeping an eye on weather forecasts before the trip and paying attention to your instincts when it comes to making safe decisions.
“Make sure you’re familiar with the area that you’re going to be spending time in, checking the weather conditions prior to starting out, and understanding what the climate conditions are going to be,” says Kronen. “People need to be prepared to dress up or dress down for the climate, and always have rain gear with them, even in the desert.”
Often, in destinations such as the Southwest US, people might not anticipate the extreme temperature swings from day to night, because there’s a preconceived notion on what a “desert” is. In reality, these regions can experience temperature swings of 50-60 degrees between day and night and varying altitudes.
If this happens, make sure to stay safe and smart, as opposed to pushing on into a situation that might put you or your fellow hikers in danger. If you’re hiking alone on a multi-day trip, give someone you trust a general timeline of when your arrival at your next outpost should be.
“Always let someone know where you’re going and how long you plan to be out there – because anything can happen,” says Berna. “There are even backpacks nowadays that have sensors built into them in case you’re lost – search and rescue crews can pick up your beacon.”

7. Be smart, but also have fun
Pick a trek that suits your interests, and don’t worry too much about embarking on the picture perfect hiking experience – there’s no such thing as a perfect hike. Multi-day hikes are about what you learn about yourself and about the environment while you’re on your journey.
“It just feels so good to be out in nature – it’s so much of a stress reliever to spend a day out in the wilderness,” says Kronen. “It’s made me a huge advocate for the environment and for our natural world.”
Berna agrees. “When I think of a multi-day hike, I think of a more peaceful and relaxing experience,” he says – as opposed to strenuous hikes, with a steeper grade. “I love to do lots of miles, but maybe something that’s not so arduous. You can walk at a slower pace, and it’s more about enjoying the environment and having time to think.”
Wong highlights the spiritual experience that being at one with the wilderness can offer. “With exploration and curiosity, it’s not how far you go – but how deeply you explore the experience and learn from it,” she says.
“Expect to make great friends, learn new things, experience creative thoughts and find yourself,” says Sharley.
No matter where you go or what hike you do, your adventure will most likely transform your perspective on the power of the natural elements and give you a greater sense of respect for Mother Earth.
You might also like:
A beginner's guide to backcountry camping 9 common mistakes to avoid while hiking and camping Our top 10 picks for backpacking cooking gear
Explore related stories

National Parks
May 29, 2024 • 9 min read
Rocky Mountaineer's newest train service runs between Denver and Moab, Utah. Here's what to expect.

May 15, 2024 • 9 min read

May 7, 2024 • 8 min read

Apr 15, 2024 • 12 min read

Feb 1, 2024 • 7 min read

Jan 22, 2024 • 7 min read

Nov 13, 2023 • 6 min read

Oct 17, 2023 • 5 min read

Feb 2, 2023 • 10 min read
Winter is here! Check out the winter wonderlands at these 5 amazing winter destinations in Montana
- Travel Guide
How To Prepare For A Hiking Trip
Published: December 6, 2023
Modified: December 28, 2023
by Ilysa Barcenas
- Plan Your Trip
- Travel Essentials & Accessories
- Travel Tips
Introduction
Welcome to the exciting world of hiking! If you’re eager to embark on a memorable adventure in the great outdoors, then you’re in the right place. Hiking is more than just a walk in the park; it’s an opportunity to connect with nature, challenge yourself, and create lasting memories.
Before you set off on your hiking trip, it’s important to be well-prepared. This article will guide you through the necessary steps to ensure a safe and enjoyable hiking experience. From choosing the right trail to packing essential gear, we’ll cover everything you need to know to make your hiking trip a success.
Hiking offers numerous benefits for both your physical and mental well-being. It allows you to escape the hustle and bustle of everyday life, breathe in the fresh air, and immerse yourself in the beauty of nature. Whether you’re a seasoned hiker or a beginner, proper preparation is key to having a rewarding experience.
Throughout this article, we’ll explore various aspects of hiking preparation, including selecting the right trail, researching weather conditions, planning your route, packing essential gear and clothing, and ensuring your safety on the trails.
So, lace up your hiking boots, grab your backpack, and let’s get started on this adventure-filled journey to discovering the wonders of hiking!
Choosing the Right Hiking Trail
When it comes to hiking, choosing the right trail is crucial to having an enjoyable experience. The trail you select will depend on various factors such as your skill level, fitness level, and the amount of time you have available. Here are some important considerations to keep in mind:
- Difficulty level: Be honest with yourself about your hiking abilities. If you’re a beginner, start with easy or moderate trails that have well-marked paths and gradual inclines. More experienced hikers can opt for challenging trails that involve steep climbs or rugged terrain.
- Distance: Determine the length of the trail you’re comfortable hiking. Shorter trails are great for day trips, while longer trails may require overnight camping or multiple days to complete.
- Scenic views: Consider what kind of scenery you want to experience. Do you prefer mountain vistas, forests, waterfalls, or coastal views? Research the trails in the area you’re interested in and look for reviews or pictures to get an idea of the scenery along the way.
- Location: Take into account the location and accessibility of the trail. Do you prefer a nearby trail that you can reach within a few hours, or are you willing to travel to a more remote location? Consider the logistics of getting to and from the trailhead.
- Season: Different trails are best enjoyed during specific seasons. For example, if you want to see vibrant fall foliage, choose a trail known for its autumn colors. If you prefer a cooler climate, opt for higher elevation trails during the summer.
- Amenities: Some trails offer amenities such as restrooms, picnic areas, or campsites, while others may be more rugged and less developed. Consider what amenities are important to you and check if they are available along the trail.
Before finalizing your choice, research online, consult hiking guidebooks, and speak to experienced hikers or local park rangers for recommendations. They can provide valuable insights into the difficulty level, trail conditions, and any special considerations specific to the area.
Remember, the goal is to choose a trail that aligns with your abilities and preferences to ensure a safe and enjoyable hiking experience. So, take your time to research and select the right trail that will make your adventure in nature truly unforgettable.
Researching Weather Conditions
Before heading out on a hiking trip, it’s crucial to thoroughly research and understand the weather conditions in the area you’ll be visiting. Being prepared for the weather not only ensures your comfort but also your safety. Here are some essential steps to research weather conditions:
- Check the forecast: Start by checking the weather forecast for the days you’ll be hiking. Look for information on temperature, precipitation, wind speed, and any severe weather alerts. Keep in mind that weather conditions can change rapidly, so check the forecast regularly leading up to your trip.
- Consult local resources: Local park visitor centers or ranger stations are great sources of weather information. They have up-to-date knowledge about the area and can provide insights on weather patterns, microclimates, or any specific conditions you should be aware of.
- Research historical weather data: Look into the historical weather patterns for the area during the time of your hike. This can give you an idea of what to expect and help you plan your clothing and gear accordingly. For example, if the area is prone to sudden temperature drops in the evenings, you may need to pack extra layers.
- Understand specific weather hazards: Different regions may have unique weather hazards that you need to be aware of. It could be anything from thunderstorms, flash floods, or extreme heat. Research potential hazards and how to stay safe in those conditions. Pay attention to any trail closures or warnings related to weather events.
- Consider the season: Seasonal variations in weather can greatly influence hiking conditions. For example, winter hikes may involve snow and ice, requiring specialized gear and knowledge. Spring and fall can bring unpredictable weather, so plan accordingly with layers and rain gear.
It’s important to be prepared for changing weather conditions while on the trail. Dress in layers, carry proper rain gear, and pack extra clothing that can handle both warm and cold temperatures. It’s always better to be over-prepared than underprepared.
Lastly, if you encounter unexpected or severe weather conditions while hiking, prioritize your safety. Seek shelter, assess the situation, and make the necessary adjustments to your hike if needed. Remember, Mother Nature can be unpredictable, so being flexible and adaptable is key.
By thoroughly researching and understanding the weather conditions, you’ll be equipped to make informed decisions and have a safer and more enjoyable hiking experience.
Planning the Hiking Route
When it comes to hiking, proper route planning is essential to ensure a safe and enjoyable adventure. A well-planned route not only helps you navigate the trails effectively but also allows you to make the most of your hiking experience. Here are some important steps to consider when planning your hiking route:
- Research trail maps: Start by researching trail maps of the area you’ll be hiking in. Look for detailed maps that include trail distances, elevations, landmarks, and points of interest. Online resources, guidebooks, or local hiking associations are excellent sources for finding accurate trail maps.
- Consider your time: Assess how much time you have available for your hike. Take into account factors like how long the trail is, your hiking speed, and the level of difficulty. It’s important to plan a realistic itinerary that allows you to complete the hike comfortably within your timeframe.
- Set goals: Determine your hiking goals. Do you want to reach a particular summit, explore a specific landmark, or enjoy panoramic views? Having clear goals will help you choose the right trails and plan your route accordingly.
- Estimate hiking times: Look for information on hiking times for the trails you plan to take. Keep in mind that these times can vary depending on your fitness level, the terrain, and any stops you plan to make along the way. Use these estimates as a guideline to create a realistic hiking schedule.
- Consider your group: If you’re hiking with a group, take into account everyone’s abilities and preferences. Ensure that the chosen route is suitable for all members and that everyone is comfortable with the length, difficulty level, and any necessary equipment.
- Plan for emergencies: Familiarize yourself with potential emergency exits or alternative routes in case of unforeseen circumstances. It’s always wise to have a backup plan in case of injury, severe weather, or any other unexpected situation that may require a change in your hiking route.
During the planning process, make sure to refer to reliable sources for up-to-date information on trail conditions, closures, and any permits or fees required. This will help you avoid any surprises or disappointments when you arrive at the trailhead.
Remember, route planning is not just about navigation; it’s about ensuring your safety and maximizing your enjoyment of the hike. Take the time to thoroughly plan your hiking route, and you’ll be rewarded with a well-organized and memorable adventure in the great outdoors.
Packing Essential Gear and Equipment
When preparing for a hiking trip, packing the right gear and equipment is crucial for your safety, comfort, and overall enjoyment of the experience. Here are some essential items you should consider including in your hiking gear:
- Hiking backpack: Choose a sturdy and comfortable backpack that can hold all your gear. Look for one with adjustable straps and multiple pockets for easy organization.
- Hiking boots: Invest in a pair of high-quality hiking boots that provide support and protection for your feet. Make sure they are well-worn before your trip to avoid blisters.
- Navigation tools: Bring a map, compass, and/or a GPS device to help you navigate the trails. Familiarize yourself with their use before your hike.
- Headlamp/flashlight: These are essential for hiking in low-light conditions or during overnight trips. Don’t forget to pack spare batteries.
- Water bottle/hydration bladder: Stay hydrated by carrying a reusable water bottle or a hydration bladder with a drinking tube. Consider the length of your hikes and ensure you have enough water for the duration.
- Snacks and meals: Pack lightweight and nutritious snacks to keep your energy levels up during the hike. For longer trips, plan and pack meals accordingly.
- Extra clothing layers: Pack extra layers of clothing, including a warm jacket, rain gear, and moisture-wicking base layers. Be prepared for changing weather conditions on the trail.
- First aid kit: Have a basic first aid kit that includes bandages, disinfectant, pain relievers, and any necessary medications. Familiarize yourself with the contents and how to use them.
- Trekking poles: Trekking poles can provide stability and support, especially on uneven terrain or during steep descents. Consider using them if you have knee or joint issues.
- Sunscreen and insect repellent: Protect your skin from harmful UV rays with sunscreen and ward off pesky insects with repellent. Choose products that are suitable for outdoor activities.
Remember to pack lightweight and compact items whenever possible. Be mindful of the weight of your backpack, as carrying unnecessary or heavy gear can make your hike more challenging and uncomfortable.
Prior to your trip, make a checklist of all the gear and equipment you need to pack. This will help ensure that you don’t forget any essential items. Take the time to organize and pack your gear properly, distributing the weight evenly in your backpack for balance and comfort.
By having the right gear and equipment at your disposal, you’ll be well-prepared to tackle the challenges of the trail and fully enjoy your hiking adventure.
Selecting the Right Clothing
Choosing appropriate clothing for your hiking trip is essential for your comfort and protection from the elements. The right clothing can help regulate your body temperature, protect you from the sun and insects, and prevent chafing or discomfort. Here are some tips for selecting the right clothing for your hike:
- Layering: Dressing in layers is key to staying comfortable on the trail. Start with a moisture-wicking base layer that helps to keep you dry by wicking away sweat from your body. Add insulating layers like fleece or a lightweight down jacket for warmth, and top it off with a waterproof and breathable outer shell to protect you from wind and rain.
- Avoid cotton: Cotton clothing should be avoided when hiking, as it retains moisture and takes a long time to dry. Opt for synthetic or merino wool materials, which are quick-drying and moisture-wicking, keeping you warm even when wet.
- Protection from the sun: Wear sun-protective clothing, such as long-sleeved shirts, wide-brimmed hats, and sunglasses, to shield your skin and eyes from harmful UV rays.
- Proper footwear: Invest in a good pair of hiking boots or shoes that provide ankle support, traction, and protection. Ensure they are comfortable and well-broken-in before your hike.
- Good quality socks: Wear moisture-wicking and cushioned hiking socks to prevent blisters and keep your feet dry and comfortable during long hikes. Avoid cotton socks as they retain moisture.
- Convertibles or shorts: Consider wearing convertible pants that zip off into shorts. This gives you the flexibility to adapt to changing weather conditions or terrain.
- Gloves and hats: Bring lightweight gloves and a hat or beanie to keep your extremities warm in colder weather. These items are especially important for high-altitude hikes.
- Insect-repellent clothing: In areas with a high chance of encountering mosquitoes or other insects, consider wearing insect-repellent clothing or treating your clothes with insect repellent sprays.
Additionally, pack spare clothing in case of unexpected weather changes or getting wet. This includes extra socks, underwear, and a dry pair of shoes or sandals for relaxing at the campsite.
Prior to your hike, it’s a good idea to test out your hiking outfit on shorter hikes or walks to ensure comfort and functionality. Pay attention to any areas of discomfort or chafing and make adjustments accordingly.
By selecting the right clothing for your hiking trip, you’ll be well-prepared to tackle any weather conditions and enjoy a comfortable and enjoyable experience on the trail.
Preparing a First Aid Kit
A well-stocked first aid kit is an essential item to have on any hiking trip. Accidents and injuries can happen on the trail, so it’s important to be prepared to handle minor medical situations. Here are some key items to include when preparing your hiking first aid kit:
- Adhesive bandages: These are useful for covering minor cuts, blisters, or scrapes. Include a variety of sizes to accommodate different wounds.
- Gauze pads and adhesive tape: Use gauze pads to clean and dress larger wounds, and secure them in place with adhesive tape.
- Antiseptic wipes or solution: Clean wounds with antiseptic wipes or solution to prevent infection.
- Pain relievers: Pack over-the-counter pain relievers such as acetaminophen or ibuprofen to alleviate minor aches and pains.
- Tweezers and small scissors: These tools are handy for removing splinters, ticks, or cutting tape or bandages.
- Moleskin or blister cushions: Prevent blisters or provide relief by including moleskin or blister cushions in your kit.
- Antihistamines: In case of an allergic reaction to insect bites or plants, bring antihistamines like Benadryl.
- Triangle bandage and elastic bandage: These items can be used for making slings, immobilizing injured joints, or providing support for muscle sprains.
- Emergency contact information: Include a list of emergency contact numbers and any specific medical information or allergies for yourself and your hiking companions.
- Personal prescription medications: If you require any prescription medications, make sure to pack an adequate supply.
Once you have gathered all the necessary items, organize them in a waterproof container or a zip-lock bag to keep them dry and easily accessible. Additionally, familiarize yourself with the contents of your first aid kit and how to use them properly.
Before your hike, it’s also wise to refresh your knowledge of basic first aid techniques and CPR. Having the skills to respond to medical emergencies can make a dramatic difference in the outcome of an injury on the trail.
Remember to periodically check the contents of your first aid kit and replenish any items that have been used or expired. Taking the time to prepare a well-stocked first aid kit is a vital step in ensuring your safety and the well-being of your hiking group.
Organizing Food and Water Supply
Properly organizing your food and water supply is essential for staying nourished, hydrated, and energized during your hiking trip. Here are some important considerations when it comes to food and water:
- Food planning: Calculate the number of meals and snacks you’ll need for the duration of your hike. Consider the length of each hike day and the intensity of the activity to determine the appropriate calorie intake.
- Meal variety: Aim for a balance of carbohydrates, proteins, and fats in your meals. Pack a variety of foods that provide sustained energy, such as nuts, dried fruits, jerky, energy bars, sandwiches, and trail mix.
- Meal prep: Prepare food in advance, when possible, to save time and ensure you have nourishing meals readily available. Cook and dehydrate meals if camping overnight.
- Portion control: Divide food into labeled, sealed bags or containers to avoid carrying excess weight. Consider lightweight, high-calorie foods to minimize the weight of your pack.
- Food storage: Keep perishable food cool in an insulated container or use freezer packs. Keep non-perishable food in a separate, easily accessible compartment of your backpack.
- Water requirements: Calculate your overall water needs based on the duration and intensity of your hike. Plan to carry at least 2 liters of water per day and adjust according to the climate and terrain.
- Water sources: Research and identify reliable water sources along your hiking route, such as streams or springs. Carry a portable water filter or purification tablets to treat any water you collect from natural sources.
- Hydration strategy: Drink water regularly throughout the hike to maintain hydration. Utilize a hydration bladder or keep a water bottle easily accessible for frequent sips.
- Electrolyte replenishment: Balance your electrolyte levels by consuming foods or drinks that contain electrolytes, especially on hot and strenuous hikes. Consider carrying electrolyte tablets or powders.
- Pack out waste: Properly dispose of any food wrappers or waste by packing them out in designated trash bags. Leave no trace and help preserve the natural environment.
Remember to respect any specific regulations or restrictions regarding food storage and waste disposal in the hiking area you’ll be exploring.
By carefully organizing your food and water supply, you’ll ensure that you have the necessary sustenance to fuel your body and stay hydrated throughout your hiking adventure.
Physical Fitness and Training
Physical fitness plays a significant role in the success and enjoyment of your hiking trip. It’s important to prepare your body for the demands of the trails to ensure a safe and comfortable journey. Here are some considerations for physical fitness and training:
- Cardiovascular endurance: Hiking often involves long periods of continuous movement. To improve your cardiovascular endurance, engage in aerobic exercises such as running, cycling, or swimming.
- Strength training: Hiking requires strength and stability, particularly in your legs, core, and back muscles. Incorporate exercises like squats, lunges, planks, and deadlifts to build strength and improve balance.
- Endurance training: Gradually increase the duration and intensity of your workouts to improve your endurance. Incorporate longer walks or hikes to gradually build up the ability to sustain physical activity over extended periods.
- Trail-specific training: Whenever possible, train on terrain that simulates the conditions you’ll encounter on the hiking trail. This could include walking on steep inclines, uneven surfaces, or carrying a loaded backpack.
- Flexibility and mobility: Maintain flexibility and mobility by incorporating stretching exercises into your routine. Focus on stretching your legs, hips, lower back, and shoulders to improve your range of motion.
- Practice hiking with a loaded backpack: Gradually increase the weight of your backpack during training hikes to acclimate your body and build endurance for carrying the load during your actual trip.
- Rest and recovery: Allow your body time to rest and recover between training sessions. Adequate sleep, proper nutrition, and active rest days are vital for muscle repair and overall recovery.
- Consult with a healthcare professional: If you have any pre-existing medical conditions or concerns, consult with a healthcare professional before starting any vigorous training program.
Remember to listen to your body and progress at a pace that is suitable for your fitness level. Gradual training and proper preparation will help decrease the risk of injuries and increase your overall hiking performance.
Lastly, remember that hiking is not a race. Take breaks when needed, pace yourself, and enjoy the journey. The goal is to have an enjoyable and rewarding hiking experience while appreciating the beauty of the great outdoors.
Navigation Techniques
Having navigation skills is essential for a safe and successful hiking trip. Being able to read maps, use a compass, and navigate the trails effectively will help you stay on track and avoid getting lost. Here are some navigation techniques to consider:
- Trail maps: Obtain detailed trail maps of the area you’ll be hiking in. Familiarize yourself with important landmarks, trail junctions, and distances between points of interest.
- Compass: Learn how to use a compass to orient yourself and determine your direction of travel. Understand the basics of map reading and compass navigation to confidently navigate the trails.
- Trail markers: Pay attention to trail markers, such as blazes on trees, cairns, or signage, to stay on the correct path. Be aware that markers may vary depending on the region or trail you’re hiking.
- Landmarks and features: Take note of significant natural landmarks or features along the trail, such as rivers, mountains, or distinctive rock formations. These can serve as visual references to help you navigate.
- GPS devices and apps: Consider using a GPS device or a hiking app on your phone to track your progress, mark waypoints, and record your route. However, always ensure you have a backup navigation method in case of technology failure.
- Wayfinding skills: Develop your wayfinding skills by observing your surroundings, noting the sun’s position, and observing the landscape. Pay attention to topographical cues to help you understand the terrain and make informed navigation decisions.
- Pre-plan your route: Before starting your hike, plan your route and review it thoroughly. Take note of any potential trail diversions, junctions, or areas where navigation may be challenging.
- Hiking with a group: If hiking in a group, designate a navigator or take turns leading the group to ensure everyone remains on the right path.
- Practice navigation skills: Regularly practice your navigation skills in different environments, including urban areas, parks, or local trails, to build confidence and increase proficiency.
Remember, navigation is an ongoing process while hiking. Continuously monitor your surroundings, periodically check your position on the map, and make adjustments as needed. If in doubt, stop, assess the situation, and refer to your navigation tools before proceeding.
By mastering navigation techniques, you’ll have the confidence and skills to navigate the trails safely and enjoy a worry-free hiking experience.
Safety Precautions
When venturing into the great outdoors, it’s crucial to prioritize safety to ensure a smooth and enjoyable hiking trip. Here are some important safety precautions to keep in mind:
- Research trail conditions: Before heading out, research the trail conditions and any relevant updates. Check for closures, potential hazards, or any special requirements or permits needed.
- Share your hiking plans: Inform someone trustworthy about your hiking plans, including the trail you’ll be taking, your expected return time, and any emergency contacts. This way, someone will be aware of your whereabouts in case something goes wrong.
- Hiking with a buddy: Whenever possible, hike with a companion. Having a hiking buddy enhances safety, provides mutual support, and helps in case of an emergency.
- Stay on marked trails: Stick to well-defined and marked trails to avoid getting lost or wandering into unsafe areas. Straying from the designated trails can lead to accidents or harm to fragile ecosystems.
- Be aware of wildlife: Familiarize yourself with the local wildlife and how to safely interact with them. Keep a safe distance, store food properly, and never feed or approach wild animals.
- Be mindful of weather conditions: Check the weather forecast before your hike and be prepared for changing conditions. Dress appropriately, bring necessary gear, and be cautious of potential hazards like lightning or flash floods.
- Use proper hiking gear: Ensure you have appropriate footwear, clothing, and equipment for the terrain and weather conditions. Broken-in hiking boots, a well-fitting backpack, and essential safety gear are essential.
- Stay hydrated and nourished: Drink plenty of water and eat nutritious snacks to maintain hydration and energy levels. Adequate food and water intake are crucial for sustaining physical endurance and preventing dehydration.
- Carry emergency essentials: Pack a well-stocked first aid kit, a whistle for signaling for help, a headlamp or flashlight, a lighter or matches, and an emergency blanket. These items can prove invaluable in case of an unforeseen situation.
- Follow Leave No Trace principles: Practice Leave No Trace principles by respecting the environment, packing out your trash, staying on designated trails, and minimizing your impact on nature.
It’s important to remember that individual safety is your responsibility. Prioritize caution, assess risks, and make wise decisions while on the trail. Be prepared to turn back or adjust your plans if conditions become unfavorable or if you encounter unexpected obstacles.
By following these safety precautions, you can minimize risks, increase your confidence, and have a safe and memorable hiking experience.
Leave No Trace Principles
As outdoor enthusiasts, it is our responsibility to minimize our impact on the environment and preserve the beauty of nature for future generations. The Leave No Trace principles provide guidelines for ethical and sustainable outdoor practices. Here are the seven Leave No Trace principles:
- Plan and prepare: Research and plan your trip ahead of time. Be aware of any regulations or permits required for the area. Prepare accordingly by packing the necessary gear, maps, and supplies.
- Travel and camp on durable surfaces: Stick to established trails and campsites whenever possible. By minimizing the number of off-trail footprints and tent spots, you help protect delicate vegetation and prevent soil erosion.
- Dispose of waste properly: Pack out all trash, including food scraps, wrappers, and plastic items. Leave nature as you found it and respect the environment by properly disposing of waste in designated receptacles or by carrying it out with you.
- Leave what you find: Refrain from taking natural objects or artifacts as souvenirs. Leave rocks, plants, and historical items in their natural setting for others to enjoy. Always respect cultural or historical sites.
- Minimize campfire impacts: Follow local regulations regarding campfires. If permitted, use established fire rings and keep fires small. Use only dead and downed wood for fuel and ensure the fire is completely extinguished before leaving the area.
- Respect wildlife: Observe wildlife from a safe distance and avoid feeding or approaching animals. Do not disturb their habitats or cause unnecessary stress. Remember, we are visitors in their home.
- Be considerate of other visitors: Respect fellow hikers and outdoor enthusiasts. Keep noise levels down, yield to others on the trail, and maintain a mindful and friendly attitude towards fellow visitors.
By following these principles, we can all contribute to the preservation of our natural spaces and ensure that future generations can enjoy the beauty and wonders of the great outdoors.
Remember, as an outdoor enthusiast, you have the power to lead by example and inspire others to practice Leave No Trace principles. Together, we can protect and conserve our precious natural resources for years to come.
Congratulations! You are now equipped with the knowledge and understanding necessary to prepare for a successful and rewarding hiking trip. By following the steps outlined in this guide, you can ensure a safe, enjoyable, and memorable adventure in the great outdoors.
From choosing the right hiking trail to researching weather conditions, planning your route, and packing essential gear and clothing, each step is essential for a well-prepared journey. Additionally, maintaining physical fitness, practicing navigation techniques, and adhering to safety precautions and Leave No Trace principles will enhance your hiking experience while preserving the natural environment for future generations.
Remember to always prioritize safety, make informed decisions, and be prepared for unexpected situations. The great outdoors offers us incredible opportunities for exploration, physical challenges, and connection with nature. By embracing these opportunities responsibly, we can foster a deep appreciation for the beauty of our natural world and leave a positive impact.
So, lace up your hiking boots, pack your backpack, and embark on a hiking adventure filled with wonder, tranquility, and discovery. Enjoy the breathtaking views, the sound of birdsong, and the sense of accomplishment that comes with reaching your hiking goals.
Take the leap and immerse yourself in the wonders of hiking. Whether you’re a seasoned hiker or new to the world of outdoor exploration, the possibilities for exhilarating experiences and lifelong memories await you on the trails. Enjoy the journey, embrace the challenges, and savor the magic of the great outdoors!
- Privacy Overview
- Strictly Necessary Cookies
This website uses cookies so that we can provide you with the best user experience possible. Cookie information is stored in your browser and performs functions such as recognising you when you return to our website and helping our team to understand which sections of the website you find most interesting and useful.
Strictly Necessary Cookie should be enabled at all times so that we can save your preferences for cookie settings.
If you disable this cookie, we will not be able to save your preferences. This means that every time you visit this website you will need to enable or disable cookies again.

5 Ways To Prepare For Your Wilderness Adventure
G etting out into the wild holds a fascination that can’t be ignored. The Great Outdoors offers endless possibilities for a wilderness adventure. This is true whether it is a day-long hiking trip or a multi-day backpacking adventure.
The popularity of hiking has recently surged. Perhaps the lockdowns and restrictions that Covid brought have something to do with it.
Whatever the reasons are, hiking and backpacking have become one of the most popular outdoor activities.
In 2021, 58.7 million people went hiking in the United States, and 10.3 million went backpacking. However, to fully embrace the wild safely, preparation must take place.
Plan Your Wilderness Adventure
One of the major risks of heading into the Great Outdoors is a lack of preparation. Many people simply aren’t prepared for the wild.
Consider your comfort levels and your fitness too. Are you prepared physically to tackle the environment you are planning to explore?
Cardio and strength training will make a backpacking trip less arduous and far more enjoyable. You will be able to tackle rougher terrain and travel further. Wilderness trips can be demanding, so it is best to be prepared.
You will also need thorough planning of your itinerary and what equipment to take.
Travel equipment suppliers such as Valley & Peak recommend full preparation before embarking on a wilderness adventure. Safety and comfort always come first in the wild.
How To Prepare
Stumbling off into the outdoors alone with no plan and inadequate gear is equivalent to looking for disaster. Weather can change swiftly, injuries happen, and hikers get lost.
Following the simple steps below and preparing thoroughly will help keep you safe on your trip. And you will enjoy your time far more when you have the right equipment.
1. Research the Environment and Your Route
Check out the areas you are heading to. And research the environment. Understanding the terrain will help you assess whether it meets your comfort zone and skill levels.
Understanding the environment will let you plan more effectively. Look into weather patterns, potential hazards, and wildlife. At this point, you can start mapping and preparing an itinerary.
Map your route and create an itinerary.
Mapping your route is essential for planning the duration of your trip. Look at the difficulty levels of hiking from different points on your course and the distances involved.
Mark landmarks, waterways, and campsites. Research places for dispersed camping if you wish to stay more independent.
But marking water sources and campsites near your route will help if you should run into difficulty.
Obtain permits and licenses.
Many of the areas that entice backpackers will have specific guidelines. As a keen outdoor person, you understand the importance of leaving no trace and responsible camping.
So, check whether you need any permits or licenses for your chosen route.
2. Pack the Proper Equipment
This article isn’t long enough to go into all the equipment you may need on a wilderness adventure. Plus, your trip length and personal goals will affect what equipment you carry.
However, a comfortable, strong backpack is essential, as is proper footwear and clothing.
Appropriate clothing is essential. Too many people go off on day trips only to get caught out by extreme weather changes.
Not only will you be deeply uncomfortable in wet clothes, but you will also risk hypothermia. Waterproof clothing and dressing in layers is the way to go.
Make a thorough checklist of all the equipment you need. If necessary, take advice from a more experienced hiker or backpacker.
Taking quality gear is necessary, but you must be aware of avoiding theft while backpacking .
And not just from humans either. Animals will be happy to rummage through your food supplies, so keep your belongings out of sight.
3. Share Your Itinerary and Keep People Updated
You may have made your itinerary and planned your route, but have you informed anyone? This isn’t just important. It is a crucial part of your preparation.
Every year, 2,000 people get lost while hiking in the U.S. In Australia, the number is even higher. Being ill-equipped and inexperienced is usually the reason for hikers getting lost.
But notifying people of your itinerary will increase your chances of being found safely. Your gear should include GPS and a smartphone suitable for rugged conditions. Update family or friends as you progress along your course.
And getting lost while hiking might not just be distressing; it could be costly too. Search and rescue costs money , and you might have to foot the bill if you lose your bearings.
4. Take a First Aid Course
Packing a first aid kit and basic medical supplies is an essential part of preparing to go into the wild. Sprains, cuts, and stings can quickly happen while hiking. For most people, nothing worse will happen.
Maybe you will take a tumble and get some scratches. Or, you might have a reaction to insect bites. But, by and large, most people get through their wilderness trips safely.
However, it doesn’t hurt to know some first aid. The essential safety tips of backpacking include taking a first aid kit. An introductory first aid course will ensure you can deal with minor injuries.
5. Hydration and Food
The length of your wilderness adventure will determine what supplies you need to take. But nutrition and hydration are essential.
Adequate water supplies are vital, although you can utilize natural water sources too. Look at the possibilities of water filters and purification tablets as part of your essential camping gear.
As far as food goes, take non-perishable items. Ideally, the food you take should be high-energy. Energy bars, dried fruits, and dehydrated meals are ideal.
Preferably, the meals you take should be easy to prepare. Go for convenience and calories.
Your survival skills can be put into place here too. If you know how to build a bear-proof food cache, you can protect your supplies.
Survival skills will also help you locate water and identify which wild plants are edible and which to avoid.
Even if you are only going on a hike, it is worth preparing for other eventualities.
Day trippers are often the most vulnerable to problems as they are inadequately prepared for more than a straightforward hike.
Casual hikers may not have the food, proper clothing, or the means to create a shelter.
It's essential to traverse the Great Outdoors responsibly. Leave no trace practices are necessary to minimize the impact backpacking has on the environment.
However, proper planning before you embark on your wilderness adventure is as essential as your behavior on it.
Plan a route that is manageable and matches your fitness and skill levels. Work out more, and learn a few survival skills to make the trip smoother.
And tell someone where you are going. Checking in regularly may save your life in the event of an accident.
Make a checklist for equipment and work toward safety and comfort. Staying warm and dry is key to a comfortable experience. And don’t forget nutrition and hydration.
This story is brought to you in partnership with Valley and Peak.
The post 5 Ways To Prepare For Your Wilderness Adventure appeared first on Go Backpacking .
")
Introducing AARP Members Edition: Your source for tips to live well, members-only games, exclusive interviews, recipes and more.
AARP daily Crossword Puzzle
Hotels with AARP discounts
Life Insurance
AARP Dental Insurance Plans
AARP MEMBERSHIP
AARP Membership — $12 for your first year when you sign up for Automatic Renewal
Get instant access to members-only products, hundreds of discounts, a free second membership, and a subscription to AARP the Magazine. Find how much you can save in a year with a membership. Learn more.
- right_container
Work & Jobs
Social Security
AARP en Español
- Membership & Benefits
- Members Edition
- AARP Rewards
- AARP Rewards %{points}%
Conditions & Treatments
Drugs & Supplements
Health Care & Coverage
Health Benefits

AARP Hearing Center
Advice on Tinnitus and Hearing Loss

Get Happier
Creating Social Connections

Brain Health Resources
Tools and Explainers on Brain Health

Your Health
8 Major Health Risks for People 50+
Scams & Fraud
Personal Finance
Money Benefits

View and Report Scams in Your Area

AARP Foundation Tax-Aide
Free Tax Preparation Assistance

AARP Money Map
Get Your Finances Back on Track

How to Protect What You Collect
Small Business
Age Discrimination

Flexible Work
Freelance Jobs You Can Do From Home

AARP Skills Builder
Online Courses to Boost Your Career

31 Great Ways to Boost Your Career

ON-DEMAND WEBINARS
Tips to Enhance Your Job Search

Get More out of Your Benefits

When to Start Taking Social Security

10 Top Social Security FAQs

Social Security Benefits Calculator

Medicare Made Easy
Original vs. Medicare Advantage

Enrollment Guide
Step-by-Step Tool for First-Timers

Prescription Drugs
9 Biggest Changes Under New Rx Law

Medicare FAQs
Quick Answers to Your Top Questions
Care at Home
Financial & Legal
Life Balance

LONG-TERM CARE
Understanding Basics of LTC Insurance

State Guides
Assistance and Services in Your Area

Prepare to Care Guides
How to Develop a Caregiving Plan

End of Life
How to Cope With Grief, Loss
Recently Played
Word & Trivia
Atari® & Retro
Members Only
Staying Sharp
Mobile Apps
More About Games

Right Again! Trivia

Right Again! Trivia – Sports

Atari® Video Games

Throwback Thursday Crossword
Travel Tips
Vacation Ideas
Destinations
Travel Benefits

Beach Vacation Ideas
Fun Beach Vacations

Road Trips For Every Personality

Passport Access
Passports Can Be Renewed Online

AARP National Park Guide
Black Canyon of the Gunnison
Entertainment & Style
Family & Relationships
Personal Tech
Home & Living
Celebrities
Beauty & Style

Movies for Grownups
Summer Movie Preview

Jon Bon Jovi’s Long Journey Back

Looking Back
50 World Changers Turning 50

Sex & Dating
Spice Up Your Love Life

Friends & Family
How to Host a Fabulous Dessert Party

Home Technology
Caregiver’s Guide to Smart Home Tech

Virtual Community Center
Join Free Tech Help Events

Create a Hygge Haven

Soups to Comfort Your Soul

AARP Solves 25 of Your Problems
Driver Safety
Maintenance & Safety
Trends & Technology

AARP Smart Guide
How to Clean Your Car

We Need To Talk
Assess Your Loved One's Driving Skills

AARP Smart Driver Course

Building Resilience in Difficult Times

Tips for Finding Your Calm

Weight Loss After 50 Challenge

Cautionary Tales of Today's Biggest Scams

7 Top Podcasts for Armchair Travelers

Jean Chatzky: ‘Closing the Savings Gap’

Quick Digest of Today's Top News

AARP Top Tips for Navigating Life

Get Moving With Our Workout Series
You are now leaving AARP.org and going to a website that is not operated by AARP. A different privacy policy and terms of service will apply.
Go to Series Main Page
Traveling in Hot and Humid Weather? Here’s What You Need to Know to Stay Safe
Doctors, outdoor enthusiasts weigh in on how to prepare for extreme heat trips.

Cassandra Brooklyn,
You probably don’t need to look at official weather data to know that it definitely feels hotter than it used to. According to the National Oceanic and Atmospheric Administration, 2023 was the hottest year since global recordkeeping began in 1850, and climate scientists warn that extreme heat events will become more common.
Though anyone can fall victim to the effects, extreme heat is especially dangerous for people over 50. Heat does not dissipate as well in the bodies of people over 50, and if your body can’t cool itself, heat exhaustion (and potentially heatstroke) can set in. Additionally, people over 50 tend to have more chronic health problems and take more medications that can affect their ability to deal with heat.

Get instant access to members-only products and hundreds of discounts, a free second membership, and a subscription to AARP the Magazine. Find out how much you could save in a year with a membership. Learn more.
Extreme heat can pose an inconvenient and potentially dangerous threat to your vacation plans as temperatures rise in popular summer destinations. Marc Taub, M.D., emergency physician and medical director of emergency services at MemorialCare Saddleback Medical Center in Laguna Hills, California, subscribes to the travel motto “Hope for the best, plan for the worst.” He explains that “with the summer travel season and hotter temperatures in this country, preparation and planning can help reduce the risk of injuries and illness.”
Here’s what else you need to know about traveling in the heat and humidity.
Preparation and packing
David Monteiro, a culture and hiking guide in Portugal and Cape Verde, Africa, with Wilderness Travel, notes the importance of preparing for your trip so you’re not caught by surprise. He offers the simple act of walking as an example. “If walking in the heat is going to be part of your trip, it is a good idea to prepare ahead of time by practicing being out in the heat before you travel, so your body and mind are used to the heat. Getting out a few times before your trip is better than nothing, although getting used to extreme/excessive conditions takes time.”
If you’re traveling in the heat, Monteiro suggests bringing lots of water, sunglasses, a lightweight long-sleeved shirt, a wide brim hat and salty snacks. Why the salty snacks? “When sweating, one loses salt, and you need to compensate [for] that loss,” he says. Without sufficient water and salty snacks, you may notice symptoms of dehydration , which can include thirst, dizziness, headache, fatigue, dark urine, constipation, muscle cramps and dry skin or mouth.
Proper hydration goes well beyond carrying a reusable water bottle (which is both smart and eco-friendly), and it actually starts before your trip. Other important hydration tips include:
- Drinking water leading up to and during the trip, including on the flight.
- Consuming water-rich foods such as cucumbers, bell peppers, watermelon and apples.
- Drinking electrolytes, be they from coconut water, pickle juice, Gatorade or electrolyte tabs, liquids or powder mixes that can be added to water.
- Taking it easy during the first 24 hours of your trip.
ARTICLE CONTINUES AFTER ADVERTISEMENT

Road-tripping in the heat
Summer is a great time to road-trip , but you’ll want to take extra precautions, as a car breakdown on the side of a deserted desert road could be extremely dangerous. Taub suggests following auto safety tips offered by organizations such as the National Highway Traffic Safety Administration. To prevent illness and injury on the road, he recommends:
- Roadside kit. Pack an emergency kit with first aid supplies, water, flashlight, batteries and nonperishable food.
- Communication. Ensure your cellphone is charged, as you may need it to call for roadside assistance.
- Vehicle maintenance. Take your car to a mechanic before long trips, and ensure the air conditioner works.
- Drive during cooler hours. Avoiding peak heat hours by driving in the early morning or late evening “can help prevent overheating and reduce the risk of heat-related issues.”
- Park in shaded areas and use shades for the windows.
- Don’t leave adults, children or pets in the car, even for a moment. “Temperatures can rise quickly in a parked car, putting passengers at high risk for severe heat exposure,” Taub says.
Holland America Line
Up to $200 onboard credit on select cruises
Handling humidity
Heat waves can be hard on the heart , and humidity introduces additional concerns. According to Taub, humidity can intensify the effects of heat because it hinders the body’s ability to cool itself through sweating. He suggests paying attention to the heat index, “which combines temperature and humidity to give a more accurate measure of how hot it feels,” limiting strenuous activity and implementing cooldown techniques.

Hiking in the heat
Though it’s best to limit strenuous activity in extreme heat — early morning or evening may be ideal — that doesn’t mean that active adventures such as hiking and climbing are out of the question.
Dave Kohnke, a hiking guide with the Southern Arizona Hiking Club, knows a thing or two about hiking in the heat, as the normal high temperatures for Tucson during the summer months are 101.2 degrees in June, 100.2 degrees in July and 98.6 degrees in August (the record is 117 degrees).
Kohnke has seen hikers experience symptoms of heat exhaustion on some hikes he’s led. He notes that with rapid treatment — including moving the hikers to a cooler area where they can rest and rehydrate with electrolytes — they recovered to finish the hikes.
Zach Lentsch, the founder and program coordinator at Wyoming Mountain Guides, echoes the importance of fueling with electrolytes. “Interestingly, the most emergency situations we’ve encountered related to the heat while climbing have not been related to lack of fluid intake but rather to electrolyte imbalance,” he says.
Lentsch says that even with good planning, heat-related emergencies can occur and it’s important to make conservative judgment calls to avoid making a bad situation worse. He notes the value in going with a guide because they have experience in the area and know where and when to mitigate heat hazards.
“They’ll help you be safer during the activity, and they are a great resource in case something does go wrong,” he says.
Staying cool
David Cutler, M.D., a family medicine physician at Providence Saint John’s Health Center in Santa Monica, California, suggests ways to stay cool whether you’re sightseeing or at the beach.
- Stay hydrated. Carry a reusable water bottle, so you can continuously drink water, even if you don’t feel thirsty.
- Seek shade. “Take breaks in shaded areas to avoid prolonged sun exposure. Bring an umbrella or canopy if spending extended time at the beach,” he says.
- Rest frequently. Rest in cool areas to prevent overheating. “Don’t overexert yourself with too much walking or physical activity.”
- Use cooling methods. Portable fans, misting sprays or cooling towels can help keep you cool.
- Eat light. “Opt for smaller, more frequent meals. Heavy meals can increase body temperature,” Cutler says.
If struggling with the heat doesn’t sound like your idea of a good time, consider a coolcation — vacations to locations with cooler temperatures — in the U.S. or Europe . You wouldn’t be alone in considering a coolcation. Wilderness Travel has “seen an over 20 percent increase in bookings on European trips above the 50th parallel [of latitude] in 2024,” says Scott Abbott, the company’s director of product.
The purpose of a vacation is to have a good time, so if you don’t think that is possible in a hot destination, it may be best to postpone that trip to cooler months and opt to escape to a chillier destination this summer.
Cassandra Brooklyn is a contributing writer who covers travel, caregiving, human-interest stories and the outdoors. Her work has appeared in T he New York Times , The Wall Street Journal , Time and National Geographic, among other publications.
Unlock Access to AARP Members Edition
Already a Member? Login
MORE FROM AARP

Heatwave Secrets of Women Who Always Look Cool

How Much Do You Know About Staying Safe in the Summer Heat?
See how prepared you are for warmer weather

AARP Smart Guide to Sun Protection
SPF is just one important factor — here are more tools that can help in preventing damage from harmful rays
Or Call: 1-800-675-4318
Enter a valid from location
Enter a valid to location
Enter a valid departing date
Enter a valid returning date
Age of children:
Child under 2 must either sit in laps or in seats:
+ Add Another Flight
Enter a valid destination location
Enter a valid checking in date
Enter a valid checking out date
Occupants of Room
Occupants of Room 1:
Occupants of Room 2:
Occupants of Room 3:
Occupants of Room 4:
Occupants of Room 5:
Occupants of Room 6:
Occupants of Room 7:
Occupants of Room 8:
Enter a valid date
You didn't specify child's age
There are children in room 1 without an adult
You didn't specify child's age for room 1
There are children in room 2 without an adult
You didn't specify child's age in room 2
There are children in room 3 without an adult
You didn't specify child's age in room 3
There are children in room 4 without an adult
You didn't specify child's age in room 4
There are children in room 5 without an adult
You didn't specify child's age in room 5
You have more than 6 people total
Please select a trip duration less than 28 days
There must be at least 1 traveler (age 12+) for each infant in a lap
Enter a valid From location
Enter a valid start date
Enter a valid drop location
Enter a valid drop off date
Select a valid to location
Select a month
Enter a valid going to location
Enter a valid from date
Enter a valid to date
AARP Value & Member Benefits

HX: Hurtigruten Expeditions
5% off cruise fares and a €100 per person onboard credit

AARP Vacation Ideas
Ideas for every type of trip – from cruises to road trips

AARP Travel Center Powered by Expedia: Car Rentals
Up to 30% off select car rentals

AARP® Staying Sharp®
Activities, recipes, challenges and more with full access to AARP Staying Sharp®
SAVE MONEY WITH THESE LIMITED-TIME OFFERS
COMMENTS
If you're new to backpacking, check out our 12 Tips for Planning Great Backpacking Adventures Tutorial. Plan your trip to match your goals for the most enjoyable experience. REST BEFORE THE BIG DAY - As your trip date approaches, plan to rest for a few days, or even a whole week before your trip. This will give your body a chance to fully ...
Aim to drink at least 32 ounces before hitting the trails, and bring enough to drink about 16 ounces for every hour of hiking. If you plan a hike that is less than an hour long, you may not need to take food. Otherwise, keep your energy going by eating 50 to 100 calories of carbohydrates every half hour.
Before a backpacking trip, weight your pack (use 20 lbs. to start) and step up onto a park bench 16 to 18 inches high. Add 5 pounds a week until your pack is as heavy as it will be on your hike. ... Preparing Physically for a Backpacking Trip. If you're planning a multi-day hiking trip, the last thing you want is to wake up on day three too ...
Planning and Preparing for Your Trip . You'll discover your personal hiking strengths and weaknesses as you become a more experienced hiker. Start small and slow, and work your way up to multi-day trips. ... You can go with a friend, or take a guided backpacking trip near your local park. Try REI Adventures for affordable weekend-long trips ...
This article is one of Backpacking Light's curated gateway pages (a trailhead, so to speak). Think of it as a starting point. Here, you'll find information and resources about how to plan a backpacking trip. We've got lists of our favorite software, gear guides for navigation and trip planning, video and podcast embeds, and other trip ...
2. Sun Protection. Sun protection is an incredibly important part of any backcountry trip, even when the weather looks cloudy. Sunscreen , SPF lip balm, sunglasses (preferably polarized), a brimmed hat, and protective clothing should be considered essential on every hiking trip.
The Hungry Hiker Backpacking Trip Planning Masterclass will cover everything (in detail) from how to prepare, research and plan for your trip to the backpacking gear you'll need. This masterclass also includes navigation and trip planning video tutorials and digital and printable trip planning resources along with tips and tricks for first ...
Whether it be a day or multi-day trip, preparing for a hiking trip ahead of time will help you avoid physical discomfort and overpacking. While we offer a wide selection of day hikes and multi-day treks, these trekking preparation tips are mostly directed towards getting ready for a multi-day hike. However, if you're planning a day hike, this ...
Step One: Plan The Route. Hike planning is essential to executing a worry-free, rewarding hiking trip. Learn ahead of time if you need any permits for parking or hiking. Fortunately, there are no specific requirements for an awesome hike — you can hike for a mile, or you can hike for 20 miles.
5) Make your transportation plan. The next step in how to plan a backpacking trip is to make plans for getting to and from the trailhead. If your trail is a loop, you can typically leave your car at the trailhead parking area (check to see if there is an overnight fee or parking permit required). If you're doing a one-way hike, you have a few ...
For more extreme trips, like hiking to Mt. Everest Base Camp or following the Inca Trail in Peru, you should start training several months ahead of time to prepare for challenges of rough terrain and high altitudes. Companies running these types of trips will often have specific recommendations for a training plan, including a timetable for ...
Water. Packing enough water is a critical component of preparing for a hike. A general rule of thumb is to plan on drinking .5 liters of water (or 2 cups) per hour of hiking, per person. If you're on a particularly challenging hike or hiking in hot weather, you might need to double that!
3. Focus on leg strength. Strength training is generally a good idea for athletes of all ages, but for hikers, leg strength is essential for an enjoyable experience. Your legs are doing the bulk of the work, after all. Lunges, squats, and calf-raises are all good exercises you can do at home.
STEP 3: Train Your Cardiovascular to Built Your Endurance. To build endurance, you can engage in aerobic exercises such as running, cycling, or swimming, which will help to strengthen your heart and lungs. STEP 4: Strength Your Muscles. Hiking requires the use of various muscles, especially in the legs, core, and back.
Sufficient water - about 1 liter for every two hours of hiking. Energy and nutrient-dense trail snacks that will fit nicely in your pack and afford ample energy. Sunscreen and/or a hat, bandanna, long sleeves, etc., to protect skin from the sun. A head lamp even when day hiking. An "essentials" first aid kit and a knife.
7. Be smart, but also have fun. Pick a trek that suits your interests, and don't worry too much about embarking on the picture perfect hiking experience - there's no such thing as a perfect hike. Multi-day hikes are about what you learn about yourself and about the environment while you're on your journey.
When preparing for a hiking trip, packing the right gear and equipment is crucial for your safety, comfort, and overall enjoyment of the experience. Here are some essential items you should consider including in your hiking gear: Hiking backpack: Choose a sturdy and comfortable backpack that can hold all your gear. Look for one with adjustable ...
The post 5 Ways To Prepare For Your Wilderness Adventure appeared first on Go Backpacking. Go Backpacking ... This is true whether it is a day-long hiking trip or a multi-day backpacking adventure.
Preparing for Your Trip - Backpacking Meals Preparing Your Own Meals. Preparing your own food for a backpacking trip not only allows you to tailor your diet to your specific tastes and nutritional needs, but it can also be a cost-effective and rewarding part of your adventure. Here's a comprehensive guide to help you get started: 1.
David Monteiro, a culture and hiking guide in Portugal and Cape Verde, Africa, with Wilderness Travel, notes the importance of preparing for your trip so you're not caught by surprise. He offers the simple act of walking as an example. "If walking in the heat is going to be part of your trip, it is a good idea to prepare ahead of time by ...