Table of contents

How to Train for Hiking & Backpacking Trips

Some of the links on this page are affiliate links

If you’ve got your sights set on a difficult hike or an epic backpacking trip, it’s smart to prepare your body in the weeks and months leading up to it by doing some training. When you’re in tip-top shape, you can truly enjoy the experience instead of worrying about being sore and exhausted. Training can also be a lot of fun and you can do it at home without spending a dime.
If you’re already active and feel like you’re in good shape, you may think you don’t need to condition for your trip. But be honest with yourself – when’s the last time you put on a backpack and slogged up flights of stairs for hours upon hours? Hiking and backpacking are more than just walking, they’re an endurance sports. The more you train, the better you’ll feel when the big day comes.
The Benefits of Training

A BETTER EXPERIENCE
Training will allow you to enjoy your time on the trail more. Instead of feeling tired and miserable while hiking, you can focus on having fun and soaking in nature’s beauty. If you aren’t over-exerting yourself, you’ll have more energy left in the tank to explore side trails, take photos, savor your time in camp, or whatever brings you joy. If you have quads of steel, you’ll also be able to carry more food or luxury items, like a Kindle , mini travel game , or a flask . The benefits don’t end when the trek is over either. A fit person doesn’t need as much time to recover after a trip and their memories of the experience will be more positive.
AVOID BLISTERS & INJURIES
A little pre-trip training will help you avoid potential blisters and injuries. Developing strength and flexibility in the knees, ankles, and feet is especially critical for backpacking. Resistance training strengthens muscles and tendons while increasing the flexibility of the ligaments. This helps mitigate the risk of strains or tears. Training can also help prevent blisters by gradually toughening up the skin and by giving you time to break-in and become familiar with your footwear . Become a blister-fighting ninja by reading our How to Prevent and Treat Blisters While Hiking post .

MOTIVATION FOR LONG-TERM HEALTH & FITNESS
An upcoming adventure makes a great goal to motivate you to work on your fitness. Every time you think of those beautiful mountains you’re going to climb, your drive to walk or do squats will be reignited. It’s also a ton of fun to train since it gets you active and going outside regularly. You may even inspire your family or friends to train with you!
Conditioning doesn’t have to build up and end with a single trip either. You can use training to develop a bomber stress-relieving routine for your long-term mental and physical health. To galvanize training into your lifestyle, pencil in several challenging hikes or backpacking trips on your calendar throughout the year. For us, there’s nothing as powerful as an epic vista to incentivize ongoing exercise. Check out our Backpacking Trip Guides for inspiration.
Where to Start
Zero in on your goals.
Training is most effective when you have specific goals you want to reach, which is why it pays to do your research and get to know the route you plan to hike. Look closely at your backpacking itinerary and zero-in on logistics. Pay attention to details like how many miles you’d like to travel per day, how much elevation gain and loss there is on your route, and how much weight you’ll likely carry in your backpack . Remember to factor in food weight if you’ll have long carries between resupply points and water weight if you’ll traverse significant dry stretches. Once you have a good grasp on these facts, you can start practicing for these specific conditions. Check out our video on trip planning for more details.

NAVIGATE THE NUMBERS
It’s really helpful to know about how long it takes you to hike a mile for both training and trip-planning purposes. Your speed will change depending on your fitness level, obstacles on the trail, weather, and the weight on your back. Once you’re in shape, a good hiking pace to strive for (with a backpack on and over variable terrain), is 2-3 miles per hour. That’s about 20-30 minutes per mile. Plan to take about 30 minutes longer for every 1,000 feet of elevation gain (uphill).
The most important thing you can do to start training for a hike is to start moving regularly. It doesn’t really matter what you do, just get up and get your blood flowing for at least 20 minutes a day. Walk, dance, vigorously clean – whatever is the most accessible and enjoyable to you at the time. This will start exercising your heart and lungs – the real workhorses of hiking and backpacking. It’s best to start training about eight weeks before a big hike, but it can’t hurt to start earlier. If you’ve been sedentary for a while or your sights are set on a particularly long or challenging trip, we recommend training for at least a few months so you can ease into it gradually.

START A WALKING ROUTINE
Start walking as often as possible. Begin with a couple of easy walks per week. Then work up to doing several more intense walks mid-week and a longer hike on the weekend. Keep track of how many miles you walk, how long it takes, and how you feel. Some people like to use a phone app or a fitness watch, such as a Fitbit , to track their activity. These indicators will give you an idea of what your current fitness level is and how much you need to push yourself to be ready for your trip. Increase the length and difficulty of your walks in baby steps. The last thing you want to do while training is strain something and have to put your plans on hold. Consistently work towards small, attainable goals and make sure you’re enjoying yourself along the way.
HEAD FOR THE HILLS
Hilly terrain creates an excellent opportunity for bursts of intensity followed by periods of recovery, which builds up your endurance for backpacking like nothing else can. Alternating between high-intensity uphill sections and lower-intensity flat or downhill sections keeps your heart rate fluctuating. This type of interval training gives you a great workout in less time. It also revs up your calorie-burning ability and keeps training more interesting. Most importantly, it boosts your aerobic capacity, so you can eventually hike longer and steeper routes.

Once you’re feeling strong on your walks, start wearing a daypack to add to the challenge. Load your daypack with enough weight to account for about 25% of the total amount you plan to carry on your trek. Water bottles are heavy when full and make great weights. Gradually add more weight to the backpack until you can easily handle at least 75% of the total weight you intend to carry on your trip. Towards the end, you should transition to wearing the backpack you plan to use on your backpacking trip.That way you can practice making adjustments and troubleshoot any issues with friction or fit. If you’re not sure how heavy your backpack will be yet, check out our Ultralight Backpacking Basics Guide and our Ultimate Backpacking Checklist to learn more.

Finding the Time to Train With a Busy Schedule
We understand that it can be tough to find the time to train when you have a busy schedule. If all you can manage is a walking routine, don’t beat yourself up. Logging miles is by far the most important part of training. Bonus points if you can also carve out 20 or 30 minutes two or three times a week to do some of the following exercises. Your body will thank you for it. To maximize your time, focus on exercises that improve overall fitness and target multiple muscle groups with each repetition.
Strengthening exercises

PARTS OF THE BODY WE USE MOST WHILE HIKING & BACKPACKING:
- Core (abdominals, obliques, back)
- Legs (quadriceps, hamstrings, glutes, calves)
- Hips (hip flexors)

Top 5 Training Exercises
It’s ideal to do the following strength training exercises two or three times per week on the days you aren’t walking or doing cardio. Make sure to stretch and warm up for a few minutes before you start to protect your joints.

If you only have time for one exercise, do squats. They’re super effective at strengthening your glutes and legs, which are constantly challenged while backpacking. Stand with your feet shoulder-width apart. Keeping your knees in line with your ankles, bend at your knees and sit back as if you are sitting into a low chair behind you. Keep your chest open and upright. Then, driving your weight into your heels, stand back up, squeezing your glutes as you come up. Extra credit: Hold weight in hands while you do your squats to add resistance. Reps: 1-3 sets of 20+
Lunges will help strengthen your quads, the largest muscles in your legs so you’ll be ready to charge up those relentless uphill sections of trail. To do this exercise, start by standing with your feet together. Step your right foot forward and lunge forward. Then step your right foot back to meet your left again. Next, step your right foot to the right and lunge to the side. Bring your right foot back to meet your left. Then, step your right foot back behind you and lunge back. Bring your right foot forward to meet your left. Repeat on your left side. That’s one rep. Extra credit: Hold a weight or water bottle in each hand if you want to up your game. Reps : 1-3 sets of 10+

MOUNTAIN CLIMBERS
Mountain climbers give you a burst of cardio to help get your lungs and heart ready for backpacking. At the same time, they strengthen your core, which supports your load and provides stability on uneven terrain. Start in a high plank position with your hands directly under your shoulders on the floor and your legs extended behind you. Keep your body in a straight line and float your right knee up to meet your chest or outer right elbow (try both). Hold for a second, then, return your foot to plank position. Repeat with your left knee, using your core to keep everything tight. Repeat, as fast as you can with control, alternating sides. Reps: 1-3 sets of 20+
The step up exercise builds strength and endurance in your glutes and quad muscles, so you’ll be ready to step up and over any amount of downed logs or obstacles that stand in your way. You’ll need a stable surface, about 8 inches off the ground to step up onto. The bottom step on a flight of stairs works well. Start with your left foot on the ground and your right foot on top of the step (your right knee will be bent). Step up until you are standing with your right leg nearly straight and you’re balanced on top of the step. Pause in a balanced position with your left foot a few inches above the step. Then step down, returning your left leg and right foot to the starting position. Do all your reps on one side, then repeat the exercise on the other side. Extra credit: wear a backpack with some weight or increase the step height to add to the challenge. Reps: 1-3 sets of 20+

CALF RAISES/HEEL DIPS
Calf raises and heel dips will give you chiseled calves as well as strong ankles and feet, so you’ll be less fatigued and more stable on uneven terrain. You’ll need a stable step to do this exercise. The bottom step on a flight of stairs works well. Start with both feet on top of the step, positioned so that your weight is on your toes/balls of the feet and your heels are floating over the edge. First, stand up high on your toes, squeezing your calves and pausing at the top. Then, lower your heels, dipping them lower than the edge of the step. Come back to a neutral position, then repeat. Reps: 1-3 sets of 20+
Mental Aspects of Training

Hiking and backpacking can be intense both mentally and physically. Training will not only tone your body, but it will also help you develop mental stamina.
Your brain plays a critical role in training for a hike or big undertaking of any kind. The more you practice, the more confident you’ll become in your body and your abilities. After you reach a big goal for the first time, you’ll know what it feels like, and you’ll be certain you can do it again. You’ll likely find that you’re much tougher that you ever imagined and that you can breathe to get through challenges instead of giving up when things get hard.
If you’re having a bad day and you’re dragging, listen to music to get pumped up or push a little less if you need to. The toughest part is getting going. The hardest and most worthwhile hikes take perseverance, grit, and a positive attitude. Being present and having gratitude for the beauty around you will go a long way.

Shoes & Boots
It’s really important to wear the same footwear you’ll be wearing for your hike while you train. The more experience you have with your shoes or boots, the less likely you are to develop blisters or have problems on your trip. Wear your shoes for several weeks to get to know them and use the opportunity to nip troubles in the bud while resources are still close at hand.
We prefer to hike in trail running shoes most of the time because they’re lightweight, breathable, and they sap less energy with every step. Learn more about why we prefer trail running shoes for backpacking trips by reading or 5 Reasons to Ditch Your Boots article. We have experience with a ton of footwear and we’re happy to share it.
Check out our footwear lists for our top recommendations:
- Best Trail Running Shoes ( Men’s / Women’s )
- Best Hiking Shoes ( Men’s / Women’s )
- Best Hiking Boots ( Men’s / Women’s )
- Best Winter Boots ( Men’s / Women’s )

Training for High Altitude Hikes
It’s especially important to train before hiking and backpacking at high elevations. When we go higher than 8,000 feet (or 2,400 meters) above sea level, our bodies can start to be affected by the lower air pressure. Lower air pressure means there’s less oxygen for us to breathe and we run less efficiently because of it. It’s not uncommon to be more tired than usual, have a mild headache, or to feel like you need to breathe deeper to fill your lungs.

ALTITUDE SICKNESS
Altitude sickness, or acute mountain sickness (AMS) is a lot like a hangover. Some people are affected more than others and it can be a really miserable experience. Fortunately, there are precautions you can take to avoid it. That said, it’s important to know the signs and symptoms of AMS so you can keep it from escalating into a major issue (see HACE and HAPE below).
The first symptoms of altitude sickness are headache, loss of appetite, and trouble sleeping. If these symptoms don’t go away in a day or if they get worse you should consider descending to rest. More serious symptoms include vomiting, feeling dizzy, confusion or spaciness, feeling unable to walk, and having bluish lips or fingernails.
HACE & HAPE
High altitude cerebral oedema (HACE) or pulmonary oedema (HAPE) , are fatal conditions to look out for while hiking and backpacking at high altitude. Excess fluid in the lungs or fluid around the brain can kill you quickly. The good news is, these conditions rarely occur unless you spend a significant amount of time above 10,000 feet. Patients usually don’t present symptoms unless they spend more than 48 hours above 13,000 feet. Know the signs before you embark on an adventure in extremely high places. Shortness of breath at rest, confusion, or extreme drowsiness are signs of a life-threatening emergency.

TIPS FOR HIGH ALTITUDE SUCCESS
- Acclimate – If you’ll be traveling to a location with a much higher altitude than the place where you live, try to give yourself an extra day or two in town to get used to the lower air pressure before you start. If you plan to tackle a high mountain summit, build up to it by climbing lower mountains in the area in the weeks before if you can.
- Ascend gradually – Climb high during the day, but try not to camp more than 1,000 feet higher than you did the night before to give your body a chance to acclimate slowly (remember the phrase: climb high, sleep low).
- Adjust your pace – You may have to hike a bit slower than usual or take breaks more often. That’s okay. It’s critical to listen to your body and not push too hard.
- Drink plenty of water and eat well – Lots of water and a diet rich in carbohydrates will help stave off symptoms of altitude sickness. Snack often to fuel your body consistently.
- Avoid alcohol – Since hydration is so important at high altitude, it’s best to save the booze for celebration after your trip.
- Bring warm clothes – Temperatures fluctuate drastically during the course of a day at high elevations and conditions can change rapidly. Be prepared with a hat, gloves, and extra layers to regulate your temperature and keep you well-insulated, even in the summer.
- Wear sunscreen – The sun is extra intense at high elevations and the health of your skin plays a huge role in your ability to thermoregulate and stay well at high altitude.

Final Tips For Training
TRIP PLANNING
After you’ve had some time to train and you have an idea of what your body can handle, be honest with yourself about your fitness level and the amount of time you have left to make more progress before your trip. Revisit your trip plans and dial them in with realistic expectations. If you realize you’ve overestimated your abilities, you’ll still have time to adjust your plans. If you’re not going for a speed record, you’ll probably have a better time if you’re a bit conservative with your estimates. If you’re new to backpacking, check out our 12 Tips for Planning Great Backpacking Adventures Tutorial .

REST BEFORE THE BIG DAY – As your trip date approaches, plan to rest for a few days, or even a whole week before your trip. This will give your body a chance to fully recover so you can be at your best on the day of your trip. Light exercise is a good thing, just keep in mind that last-minute planning, packing, and travel can sap energy, so it’s best to take a break from rigorous training just before your big day. Eat well, sleep well, and get pumped!
Once you get into the habit of walking, moving, and getting outdoors, you probably won’t want to stop. We make continuous training for adventures part of our lifestyle. It helps relieve stress, gives us something to look forward to, and keeps us in shape so we’re not scrambling when the next opportunity for adventure comes up. We hope this helps you reach your goals and inspires you to plan a trip if you haven’t already.

Related Content

The 35 Best Ways to Save At REI’s Member Moment Event 2024
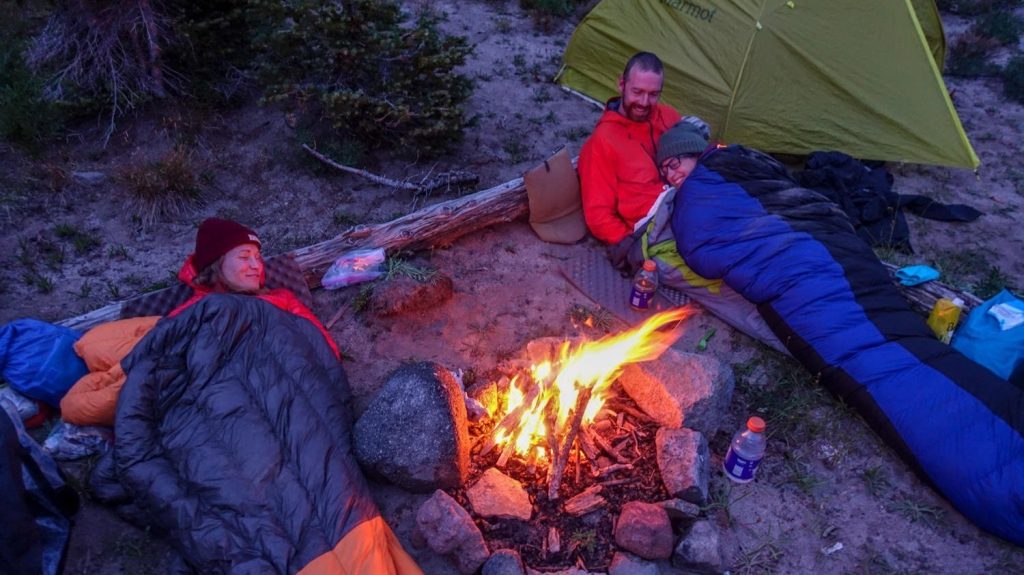
10 Campfire Safety Tips
Get the best content from cleverhiker & around the backpacking world.
Social media is great, but our bi-weekly newsletter is a much better way to stay in the know.
Sign up to get our curated emails with the best content from CleverHiker and around the backpacking world. You’ll be turned on to new videos, trip reports, gear reviews, inspiring outdoor stories and much more. So get in the mix!

A Step-by-Step Guide To Planning A Perfect Hiking Trip

Hiking is perhaps the most accessible, healing outdoor activity that exists. But if you don't develop a plan, you may find yourself in a sticky situation. Fortunately, planning a hiking trip is an exciting (and critical) activity that will send you on your way to a successful hike.
Are you questioning whether or not you really need that much water? Or if you can just walk out your front door and wander wherever the wind takes you? If so, this guide is for you.
I love a one-mile hike just as much as I love a 15-mile hike. I have run out of water, gotten terrifyingly lost on unfamiliar trails, and suffered sunburns that affected me for weeks. With each learning experience, I have discovered how to form the ultimate hiking plan.
Below, I'll help you learn how to make a hiking trip go as smoothly as possible. From pre-trek research to a guide on hiking essentials, I've got you covered. Let's start planning and hit the trail!
Step One: Plan The Route
Hike planning is essential to executing a worry-free, rewarding hiking trip. Learn ahead of time if you need any permits for parking or hiking. Fortunately, there are no specific requirements for an awesome hike — you can hike for a mile, or you can hike for 20 miles.
As a beginner hiker, you’ll want to start small. Perhaps with one to three miles and not a whole lot of elevation gain. It’s also important to understand both total elevation gain and elevation gain over a specific distance. For example, gaining 1,000 feet of elevation over five miles is significantly less strenuous than gaining the same amount of elevation over one mile.
Learn the trail before you start your trek — at least a couple days before. Know the trail's profile, forks, and the locations of water sources. Nothing feels quite as hardcore as whipping out a paper trail map and a compass, and this is certainly a basic skill you should develop as you become a more experienced hiker.
Nonetheless, you can easily learn and download a trail map on your smartphone using navigation apps . My personal favorite is Alltrails; there are usually reviews and trail condition reports left by other users in the recent past, and it’s incredibly user-friendly.
Choose a hiking trail that starts relatively nearby so you’re not driving a long distance after exhausting yourself. And of course, opt for a trail that offers a rewarding view — a lake, blooming wildflowers, or a distant summit. You want to enjoy your early experiences to encourage future hiking!
Step Two: Estimate Your Trip Time
The average hiker covers between two and two & a half miles per hour. This can serve as a rough estimate for planning your trip time. If you are brand new to hiking, it’s likely that you’ll hike at a slightly slow pace, and that’s a-okay!
This means that if you are hiking three miles at the average hiking pace, you can expect it to take about an hour and a half. If you are on a 6-mile hike, you’re looking at about three hours. These are approximate times. More strenuous or technical trails will increase the time it takes you to complete your hike. Allow extra time for rest and water breaks, unexpected obstacles, and of course, enjoying rad views.
Step Three: Check The Weather Forecast
Check the weather conditions a few days in advance to help you prep for your hike. Check them again the night before and even again right before you leave in case there are last-minute changes. This will help you choose and organize your gear in advance, so the morning of your hike is hassle-free.
Step Four: Plan Your Food & Water
The amount of food you'll need for a day hike is dependent on the duration, intensity, and your personal metabolism. For an all-day adventure of high intensity hiking, you may find yourself requiring 2,500–5,000 calories. You should certainly eat before you go , then bring plenty of snacks and something for lunch.
Foods that are high in protein are perfect for dinner the night before, breakfast the day of, and even a post-hike recovery meal. Eggs, lean meats, and soy are superb protein sources. Include some energy-packed carbs in your breakfast and snacks. Oatmeal, granola, and fruit are excellent choices.
{{article-cta}}
Nut butter or nuts are awesome both before and during a hike as a slow-burning energy source. Steer clear of highly processed foods like candy and cheese.
If you're only spending a couple hours on a relatively flat hiking route, you'll be able to get by with just a snack. Munch on some gorp or a piece of fruit, and drink plenty of water.
How much water you'll need varies with the length of your adventure. A good rule of thumb for hydration is drinking half to one liter of water per hour of hiking. This recommendation can fluctuate, however. Variables include trail intensity, outside temperatures, your sweat rate, and your fitness level. It's always better to err on the side of caution and bring a bit more water than you think you'll need.
If you know that there are water sources along the trail, you can opt to carry less water knowing you'll have the chance to refill. Using your map or navigation app, estimate the time it will take you to reach the drinking water source. Then, only carry the amount of water you'll need to reach the source.
In my personal experience, water straight from an alpine stream is unmatched. It’s delicious and invigorating after miles of hiking. However, indulging in fresh stream water will require a water filter of some sort.
Step Five: Get Your Gear In Order
If you're unfamiliar with the 10 Essentials for first aid and emergency situations, take a moment to read up on this list from the National Park Service.
Once you're set in the emergency department, the fun stuff begins! Keep your pack as light as possible, but don't sacrifice any must-haves. Here are five sub-steps to prep your essential hiking gear for meandering along a stream or bagging a mountain peak.
1. Prepare your layers
Since you've already checked the weather, you know what to expect for temperature. But you should still prepare layers, since the temperature will fluctuate throughout the day. You should have at least a sweat-wicking base layer, a warm mid-layer, and a shell for rain or high winds.
2. Break in your hiking footwear
For weeks in advance , spend time breaking in your hiking boots or shoes . Hiking footwear is designed to be rugged, stable, and protective. As a result, they often feel stiff at the beginning.
If your hiking shoes are new, wear them around your house and on nearby walks. Start small — gradually build up the length of your break-in walks until your boots are broken in. It's also helpful to have a high quality pair of hiking socks to keep your feet happy.
3. Invest in a high-quality water container
My personal preference is a water or hydration bladder because it keeps my hands free, and I can drink on the move. Some packs come with built-in hydration reservoirs, making water access easy-peasy.
A durable water bottle is also a perfectly adequate option. I do advise caution here, however: If you carry a water bottle in your pack, it's less accessible, which may lead you to ignore your hydration needs for longer. Carry your water bottle in your hands to encourage better hydration.
4. Pack your hiking daypack
Any dry food can go in the night before, as well as a jacket in case of unexpected inclement weather. Pack your safety essentials, which should include sunblock, insect repellent, a first aid kit, and a headlamp.
5. Pack a “luxury” item
If you're up for extra weight on your hiking trip, pack a luxury item. To elevate your trek from a trying trudge to an epic hike, bring your camera , a sketch pad, or some binoculars.
Step Six: Implement Safety Measures
- Always provide your hiking itinerary details to a responsible friend or family member, especially if you don't have a hiking partner.
- Hitting the trail with a hiking buddy is almost always a good idea, but sometimes it's tough to find someone who wants to send it as hard or as often as you do. Stay on the trail, and use your navigation tools.
- Learn and share emergency contact numbers, such as the park ranger office and the local sheriff. If you have cell service during your hike, you can call in an emergency. Provide the responsible party with a time they should call emergency services if you have not returned.
- Check online for dangers in the area, such as natural disasters, poisonous plants, and dangerous animals. You can often find these reports on a hiking navigation app or on a state or national park website.
- If you are a frequent hiker (or intend to become one), a personal locator beacon is a must. Especially when hiking alone. This will allow you to send out a signal using a satellite to get help in an emergency.
Now you're all set to get on the trail. Remember the basics:
- Learn your route in advance
- Estimate time for your trip, including extra time for delays
- Check the weather forecast, and bring layers for variation
- Bring food and water — a little extra of each
- Pack your gear early, but keep your pack as light as possible
- Share your itinerary, and stick to it
Just like anything else, successful adventures take practice. Don't expect perfection the first few times, and make notes of ways to improve after each hike. Get out on a trail, and have some fun!

Living and working in the Grand Canyon, Emmi has decades of experience organising and leading hikes around the world.
*The information on this site is based on research and first-hand experience but should not be treated as medical advice. Before beginning any new activity, we recommend consulting with a physician, nutritionist or other relevant professional healthcare provider.

The 13 Different Types of Climbing

Where To Buy Used Mountaineering Gear

Why is Climbing Everest So Deadly? A Data-Driven Report
How to Plan, Prepare, and Pack for a Hike
This post may contain affiliate links.

In this post we’re sharing everything you need to know to plan, prepare, and pack for a hike so that you can confidently hit the trail and have a great time!

Without a doubt, hiking is one of the best ways to improve your physical health, mental well being, and strengthen your connection with the outdoors (or at least the most scenic way!) .
Hiking has been shown to not only improve cardiovascular health and build strength, but it also helps reduce stress and can help manage anxiety and depression. Not to mention, it can just be a ton of fun and is a great way to spend more time in the natural world!
Save this post!
Enter your email and we'll send this post to your inbox! Plus, you'll receive our newsletter full of great tips for all your outdoor adventures.
While in theory hiking is as simple as finding a trail and putting one foot in front of the other, there is a little more to it. Spending time to plan and prepare will help your hike go smoother and can help avoid the unexpected. And, having the right hiking gear (and knowing how to use it) will help you stay safe on the trail.
In this post we’re sharing all the info on how to plan and prepare for a hike and all they day hiking essentials you should bring with you.
How to plan a hike
Make sure your hike goes smoothly by spending a little time planning before you head out.
Choose your hike!
First things first, pick out your hiking trail! AllTrails , GAIA , and Hiking Project are all great sites to search for hikes near you.
When searching for a trail, consider your fitness level (and of those you’re hiking with), length & total elevation gain (double check that the mileage on an out-and-back trip is round trip and not just one way!), and terrain. AllTrails lets you add a filter for “attractions,” so if you want to hike to say, a waterfall or a lake, you can filter down trails which will offer that.
You’ll also want to consider seasonality—some trails at higher elevations may not be accessible until summer due to snowpack. While others in hotter climates might be closed during the heat of summer. You may want to call the park or ranger station to double check that your chosen trail will be open.
Do you need a permit?
Some hikes in popular areas will require an advanced permit. The information on AllTrails or blogs is not always up to date, so try Googling the name of your trail + permits (e.g., “Green Lakes Trail permits”) to see if one is needed and how to get one.
How much time will you need?
Note the length of your hike and and total elevation gain to determine how much time you’ll need to complete the hike.
If you don’t know your hiking pace, consider that the average person will hike at a pace of 2.5-3 MPH and for every 1,000ft of elevation gain, you’ll want to add roughly an hour of hiking time. Of course, this will vary depending on your fitness level, pack weight, altitude, and the trail conditions. Don’t forget to account for stops!
Getting to the trailhead & parking
Get an idea of what the road out to the trailhead is like (Is it paved? If not, can your vehicle handle the road?) and what the parking situation looks like. Some trails have competitive parking or small lots, so you’ll want to factor that into your plan for the day and get there early.
Preparing for a hike (day before)
Once you have your hike picked out and know the logistics, you can start preparing yourself and your gear for the adventure ahead! Here are the steps we take before every hike to make sure we’re ready to hit the trail.
Familiarize yourself with your trail map
Before your hike, download and print a map of the trail and surrounding area. Both AllTrails Pro and GAIA GPS Premium will let you download maps for offline use and print a custom map—otherwise, search online to see if a map is available.
Take a moment to study the topo map and elevation chart of your hike so you can orient yourself on the trail and be mentally prepared for any challenging climbs and descents.
Things to look for when you’re studying the map:
- Contour lines that are close together, indicating steeper sections of trail
- Junctions with other trails to be aware of so you don’t make a wrong turn
- Water sources that are near the trail (see below) or any spots where the trail might cross a river or stream
Packing enough water is a critical component of preparing for a hike. A general rule of thumb is to plan on drinking .5 liters of water (or 2 cups) per hour of hiking, per person. If you’re on a particularly challenging hike or hiking in hot weather, you might need to double that! Always pack extra water beyond what you think you’ll need.
Additionally, it’s a good idea to pack a lightweight water filter. In the event that you drink more water than you thought you would, you can use this to filter from any water source on the trail.
Our favorite water filter for day hiking is the Katadyn BeFree . It’s super light and so easy to use!
Share your plans with someone
Before you leave for your hike, share your plans with a trusted person. Include information like the name of the trail you are hiking, who you’re hiking with, what time you expect to be back, and who they should contact if they don’t hear from you by a certain time.
This person doesn’t need to be local, just responsible. We frequently leave our hiking plans with our parents, even though they live hundreds of miles away.
Double check your gear
Using the hiking gear list below, double check all your gear to make sure it’s in good condition and working properly, all of your batteries are fully charged, and your first aid kit is fully stocked.

Check the weather
Double check the weather forecast the night before your hike and make any adjustments to your plan or gear. Here are the sites we use:
- Accuweather — This gives us the general forecast of an area and is good for lower elevation hikes
- Mountain Weather — If we’re hiking at higher elevations we’ll check this site to see more detailed weather conditions for particular mountains. This site can give you an idea of how the temperature and wind conditions (including windchill) will change as you rise in elevation, which can be very different than the forecast on Accuweather will give you!
Start hydrating
Our motto is “Tomorrow’s hydration starts today!” According to the American Hiking Society , the best way to prevent dehydration is to be properly hydrated before your hike.
Drink plenty of water the day and night before your hike, and drink at least 16 oz. of water in the hour before your hike.
What to pack for a hike
You may not need all the items on this list for every hike—your gear needs will likely be different on a short hike in a well-used park vs on a long hike in a backcountry or high elevation setting. Evaluate the conditions and risk factors on your hike and prepare for them accordingly using this day hike packing list as a starting point.

Hiking day pack
First things first, you’ll need a good hiking backpack to hold all the hiking gear listed below! Most daypacks are in the 20-30L range, which will give you enough room to stash extra clothing layers, food, water, and safety gear. Here are a few features to look out for when selecting a backpack:
- Adjustable, padded shoulder straps for comfort and so you can dial in the fit
- A hip belt, which will help transfer the load to your hips instead of carrying all the weight on your shoulders. This feature may not be necessary for smaller sized packs where you won’t carry as much gear.
- Exterior pockets to give you easy access to snack and water
- An interior pocket to hold a water bladder, as well as a port in the top to feed the drinking tube through
Here are a few packs we’ve loved over the years:
- Deuter Speed Lite 20
- Gregory Nano 22 Hydration Pack
- REI Trail Pack 25

What to wear
Your hiking outfit will largely depend on the time of year and weather conditions you’ll expect. Below are the basics for summer hikes. You can check out our guides to fall hiking and what to wear for winter hiking if you’ll planning on hiking in those seasons.
Basic hiking clothes
Extra layers as needed

Sun protection
Protecting your exposed skin from the sun is super important when hiking, especially when you consider that UV rays intensify by up to 8-10% for each 1,000 feet of elevation you gain. Consider wearing long sleeves and pants made of UPF fabrics, and at a minimum, pack and wear:

Having basic navigational skills and tools are essential for any hike, even one that seems straightforward. Even trails that are in local parks might have junctions or trail intersections and areas where the path isn’t obvious.
Bringing a paper map of the trail and a compass is the time-honored recommendation for good reason—they are reliable, don’t run out of batteries, and work for any type of terrain.
We will print off a map of the trail we’re hiking from the GAIA website (you can also do this with an AllTrails Pro account) and pack it in a plastic bag to keep it dry. This gets tucked away in our packs in case our primary navigation tool fails us.
99% of the time, we use GPS to navigate. There are handheld GPS units that you can buy but it’s likely you already have the base of one sitting in your pocket—your smartphone. Paired with an app like GAIA GPS, your phone can become a great way to navigate on your hike! Here are a few things to keep in mind:
- You’ll need to download the map of the area prior to your hike in order to use it without service or in airplane mode
- Double, triple check your phone is fully charged before starting your hike
- Bring a battery bank to you can recharge if your battery runs low. We carry this lightweight, inexpensive battery bank .
- Turning your phone to airplane mode will help you conserve battery life
- GPS can be unreliable in certain situations like hiking in canyons and valleys surrounded by tall mountains (this is where your paper map comes into play!)
Another tool you might want to consider is an emergency communication/SOS device, like the inReach Mini . This will allow you to contact search and rescue if things go wrong, and models like the inReach have two way messaging so you can communicate with the person you left your itinerary with if plans change. This type of device is particularly helpful if you frequently hike solo or go on longer hikes in more remote areas.

Staying well hydrated is one of the best ways to ensure that you feel good throughout your hike. Dehydration can lead to headaches, dizziness, confusion and disorientation, decreased energy, and muscle cramping—none are things that you want to deal with on your hike!
Plan on packing at least .5L of water per hour (more if it’s a strenuous hike or hot day), and if you’re on a longer hike, bring along a lightweight water filter so you can refill at on-trail water sources in case you drink more than anticipated.
You can use water bottles, but if your day pack has room for a hydration bladder, we’d recommend using it. You’re more likely to keep up with water consumption if it’s easy to access with the drinking tube rather than needing to stop and fish out your water bottle.

Energy-packed snacks
Avoid “hitting the wall” on your hike by packing plenty of energizing snacks. Aim to consume 30-60 grams of carbohydrates per hour, which will give your body plenty of easily-accessible energy to keep you fueled.
We personally a mix of love fresh or dried fruit, trail mix , Bobo bars, and energy chews/gummy bears, but there are tons of great hiking snacks so pack plenty of your favorites!
It’s also recommended to pack an extra day’s worth of food in case of an emergency situation where you’re stuck on the trail for longer than anticipated.

Trekking poles
Trekking poles (aka hiking poles) aren’t necessary for every hike or every hiker, but they can be very helpful. Poles can help take pressure off your joints, can help with balance on rocky sections of trail, and help activate your core and arm muscles as you hike, so your legs don’t have to do all the work.
I’ve used these Black Diamond hiking pole s for over a decade, and Michael recently picked up these budget-friendly poles .

Safety supplies
What to pack if nature calls.
Bringing a small “potty kit” will help you be prepared if you need to use the bathroom while you’re out on your hike. Bring some toilet paper (or these packable Stall Mates wipes) stashed in a small plastic bag, a small trash bag or plastic baggie to pack out your used TP, and a trowel to dig a cathole for #2.
Bonus: Post hike treats
Leave these items in your car. You’ll be grateful for them after a long day on the trail!
We hope that this guide helps you efficiently plan, prepare, and pack for your next hiking trip! Find more hiking resources here, and don’t forget to sign up for our newsletter to get a printable, checklist version of this post!
Megan & Michael are the creators of Fresh Off The Grid, a blog dedicated to helping you fuel your adventures by sharing camp cooking recipes, backpacking meals, and outdoor travel guides. Their recipes and outdoor cooking expertise have been featured in Backpacker Magazine, Outside, REI Co-Op Journal, Food & Wine, and New York Times Cooking.
Leave a Reply Cancel reply
Your email address will not be published. Required fields are marked *
Save my name, email, and website in this browser for the next time I comment.
This site uses Akismet to reduce spam. Learn how your comment data is processed .
How to Plan a Backpacking Trip in 12 Simple Steps
Learn how to plan a backpacking trip! From how to pick a trail to what gear to pack, this guide covers all the important planning steps.

Find this post helpful? Learn how you can support Bearfoot Theory’s work here . You can also shop for gear through the affiliate links in this blog post where we get a small commission at no cost to you. It helps keep our team running and the lights on. THANK YOU! -Kristen
Whether you are a beginner backpacker or have been tramping around the woods for years, there are a number of questions to ask when you are planning an overnight backpacking trip. Where should I go? Do I need a permit? What should I eat? What do I need to pack? I’ve been there. When I first started hiking and spending time outdoors, I had no idea how to plan a backpacking trip. Now, years later, planning a backpacking trip is one of my favorite parts of the whole process. If you’re new to it though, it can feel a little overwhelming, but we’ve got you covered.
In this blog post, we break down how to plan a backpacking trip into 12 simple steps so you can feel more organized and confident (and less overwhelmed) as you get ready for your adventure. By following this step-by-step backpacking guide, you will be able to easily plan your backpacking trip from start to finish, knowing that you aren’t forgetting any important details.
Ready to plan your next adventure? Here’s our guide to planning a backpacking trip so you can get out and enjoy the great outdoors with confidence
The 12 steps of planning a backpacking trip
1) pick dates for your backpacking trip.
Figuring out when you want to go on your overnight adventure is the first step in how to plan a backpacking trip. Your dates will dictate where you can go due to the weather (unless you want to snow camp). If you want to go in January, then you’ll be limited to warmer places like Southern California, Arizona, and Florida for example. If it’s summer, then you’ll want to hit the mountains where the temperatures are cooler.
If you are a newbie, 1-2 nights is a good length of time for you to get a trip under your belt. You’ll be able to answer a lot of questions after that first hike. What gear worked, what gear didn’t. What you really need to bring vs what you can leave at home to shave off some weight. Whether you brought the right amount of food. What pace you like to hike at, etc. If you are more seasoned and have the time off, then consider going for a longer trip. The longer you’re out there, the more time you have to decompress and reap all the benefits of being in the wilderness.
2) Pick a trail for your backpacking trip
When you plan a backpacking trip, picking a trail can be a little challenging with so many awesome trails and destinations to choose from. Ask yourself:
- How far do you want to hike? If you are new to backpacking, 5-7 miles a day is a good target. Remember, if you aren’t used to carrying a lot of weight, then backpacking will be more challenging than a regular day hike. The average confident backpacker can usually cover somewhere in the range of 8-12 miles or more depending on how much elevation gain there is.
- How difficult of a trail do you want?
- What major features are you looking for? Big mountain landscapes? A lake? Hiking along a river? Waterfalls?
- Is solitude a must? If you’re looking to get out into the Wilderness, be sure to read through our Backpacking 101 Guide for Planning a Wilderness Trip .
Get an idea in your head of what kind of experience you want to have. Then start checking out trail descriptions and plan a backpacking trip that aligns with your requirements.
Not sure where to start? Here are a few good beginner backpacking trips:
- West Rim Trail in Zion National Park
- Havasu Falls in Arizona
- Red Pine Lake in Salt Lake City
- Cutler Coast Trail in Maine
- San Jacinto Peak in California
- Trans Catalina Trail

3) Check permit requirements & get a permit if you need one
So you found a trail that looks awesome for the time of year you want to hike. Before you get too excited and start making plans, check to see if a permit is required. Many trails, especially popular trails in National Parks, require wilderness permits that need to be reserved months in advance. Many of the more popular backpacking trails (like in the Grand Canyon or Yosemite) are allocated by lottery up to 4 or 5 months in advance. If you google the trail, you can usually find permit requirements on the federal or state agency’s website.
Depending on where you are backpacking, your permit may have additional requirements. For instance, if you are traveling in bear country such as the Eastern Sierras, Montana, or Wyoming, it’s likely that you’ll be required to carry your food and scented items in a bear-proof container or bag .
4) Invite your friends (or commit to going solo)
If you want company, try to round-up a few friends who want to join you. Give them a call or put a note out on Facebook. If that doesn’t work and you are unable to find anyone you know to go with, you have a couple of options.
Check to see if there are any Facebook groups in your area for hikers or outdoor enthusiasts. In Utah, there is a Utah Outdoor Women’s Alliance group and there are always folks looking to link up for a hike. MeetUp can also be a great website as well for finding like-minded friends who love outdoor adventures and trips. Are you part of a yoga studio or climbing gym? Those are also great places to meet active people and maybe you can make a new friend who might be interested in your trip.
If you can’t find anyone, don’t let that discourage you. Backpacking alone is an empowering experience and is worth trying at least once. Check out my tips for hiking alone here .

5) Make your transportation plan
The next step in how to plan a backpacking trip is to make plans for getting to and from the trailhead. If your trail is a loop, you can typically leave your car at the trailhead parking area (check to see if there is an overnight fee or parking permit required). If you’re doing a one-way hike, you have a few options. If you’re hiking with friends, you can set up your own shuttle by leaving a car at the end and driving a second car to the start. If two cars aren’t an option, you can ask a friend or family member to drop you off or reserve transportation with a taxi service or shuttle company. Many hotels and outfitters in popular hiking destinations will offer shuttle services, so do a quick google search to see what’s available if you go this route.
6) Get the necessary gear for your first backpacking trip
Maybe you already have your backpacking gear dialed. If so, great! If not, a good place to start is with my 3-day backpacking checklist . In addition to that detailed post, we’ve also got several more outdoor gear guides here on Bearfoot Theory including:
- What to Wear Hiking
- The Best Backpacking Packs
- The Best Tents for Backpacking
- The Best Sleeping Pads for Backpacking
- The Best Sleeping Bags for Backpacking
- The Best Water Filters for Backpacking
- The Best Lightweight Bear Canisters
- The Best Backpacking Stoves
- The Best Cheap Backpacking Gear
Ok, so what if this gear is way too expensive? Don’t let that deter you from planning a backpacking trip. Ask your friends if anyone has gear you can borrow. But be sure to check that a borrowed backpacking pack fits comfortably before you set out and that the gear you’re bringing along isn’t super heavy or else you may not enjoy your trip.
REI offers gear rentals, and if you’re an REI member you get a discounted rate. If there’s not an REI in your area, check your local university recreation center and local outdoor stores to see if they rent backpacking gear. If you want to buy your own gear, but are looking for discounted prices, check out our post on the Best Places To Buy Discounted Outdoor Gear . Buying gently used outdoor gear is another great way to save money, and it’s better for the planet too!

7) Test your gear
Not testing your gear is a common beginner backpacking mistake that’s easy to avoid. Make sure you know how to use all of your gear before you set out.
Set up your tent in your living room and take your backpack and hiking boots for a spin up your local hill before setting out on an overnight trip. If something doesn’t feel right, it’s probably not and you want to catch it before heading out into the wilderness.
If your pack is the right size but it is still giving you trouble (it’s weighing down on your shoulders or seriously hurting your back), you probably need to make some simple adjustments to the straps. Or perhaps you need to make some adjustments to the way you pack it. Check out this guide on how to pack a backpacking pack for more on this topic.
As far as your hiking boots , unless you choose a heavy-duty leather pair that are suited for mountaineering, most standard trail hiking boots should be fairly comfortable right out of the box, but you still want to take them on a few hikes before your backpacking trip to make sure. If you take them for a short hike and come home with blisters, they might not be a good fit. The point of testing your gear all out beforehand is to get everything dialed so faulty gear doesn’t ruin the epic backpacking trip you’ve been planning.
Testing your gear beforehand also offers the opportunity to train before the big hike .

8) Shop for Food
Planning food is a big part of planning a successful backpacking trip. You want to eat well, but you also want it to be easy and lightweight. I’ve written a detailed post on some of my favorite lightweight backpacking food options and I also especially love Good To-Go’s backpacking meals . Their Mexican Quinoa Bowl is one of the best dehydrated backpacking meals I’ve ever tried! It’s filling, yet vegan and gluten-free, and it has half the sodium of most backpacker food brands.
Also, be sure to check the requirements for food storage for the trail. If you are in bear country, you’ll need to pack your food in a bear-proof canister.

9) Brush up on Leave No Trace Principles
Leave No Trace is a set of guiding principles to help you reduce your impact when you are spending time outdoors. It covers everything from pooping outdoors to how to safely enjoy campfires and even where to set up your tent . If you are not familiar with Leave No Trace, make sure you brush up on how to be a good camper before you hit the trail so we can all do our part to keep the places we recreate in as pristine as possible.

10) Get a Map & Check Water Availability
Don’t want to get lost? ALWAYS bring a paper map with you and check out these navigation tips while you’re at it . Even if you think the trail is going to be straightforward and well-marked, a paper map should be non-negotiable. While you can download hiking and navigation apps you always want a backup in case your phone dies. I am a huge fan of the National Geographic Maps which exist for most National Parks and other popular hiking areas. If you can’t find a map to purchase online or at your local REI, stop by the nearest rangers station on the way to the trail and see if they have a map.
11) Tell a friend or your family your plans
It’s important for safety to share your plans with a friend or family member. Ensure they know the date and general time you plan to check in with them at the end of your trip and make sure they know the details of the trail you will be hiking.
I also like to carry some sort of backcountry communication device if I’m hiking solo or going somewhere really remote. The SPOT Gen4 and the Garmin InReach Mini are the top satellite communication devices for sending texts to family back home and calling emergency responders if you get into trouble.
12) Check the weather
It’s important to always check the weather starting at least a few days before your start state. Bearfoot Theory community member Kim once drove 10 hours to hike the Lost Coast only to learn there was a large storm front rolling in that closed the trail. Checking the weather ahead of time will help you adjust your plans as needed and prepare by packing the correct clothing and gear like a rain jacket and even rain pants. In case there’s the possibility of wet weather in the forecast, here are some of our tips for hiking in the rain .

AND FINALLY, GO!
The last and final step is to hit the road and have a good time! Know that most people experience a couple of minor mishaps on their first backpacking trip. On my first backpacking trip, I forgot my hiking boots and ended up hiking 20 miles in Chacos (with a lot of blisters to boot) and I didn’t pack nearly enough food. It also made me realize I was a little more out of shape than I thought.
But watching the sunset over that lake where I camped was a turning point in my life. That first backpacking trip changed my whole relationship with the outdoors….so get ready 😉

Where was your first backpacking trip? What other advice do you have on how to plan a backpacking trip? Share your comments, questions, and experiences below!
Related Posts

With two decades of hiking and seven years of van life under her belt, Kristen has dedicated her life to helping people experience the positive effects of nature. As a pioneer in the outdoor blogging space, she founded Bearfoot Theory in 2014 and has since authored more than 350 blog posts about outdoor travel, hiking, camping, and van life. Her work has been featured in National Geographic, Outside Magazine, and Backpacker, and when she’s not on the road, she lives in Park City, Utah with her partner Ryan, their son, and two adventure pups.
Leave a Reply Cancel reply
Your email address will not be published. Required fields are marked *
Save my name, email, and website in this browser for the next time I comment.
Tip #11 is clutch, and so easy to forget. Thanks for the reminder. Great post!
Thanks for this awesome guide! I’ve always wanted to go on a camping trip but it always feels intimidating, so I’ve only done short hiking trips. This list somehow makes proper camping trips feel much more manageable with some simple steps, saving it and hoping to be able to use it soon!
Awesome Aaron! Good luck on your first backpacking trip and come back and tell us how it goes!
Hi! I love your site, so many great articles and pieces of advice. I have one question I have searched for an answer on your site and elsewhere and can’t seem to find… when you plan for an overnight backpacking trip 4+ days, what is you advice on parking? Where and safety. Thank you!
Hi Ally – it really depends on what trail you’re doing. Some trailheads are safe and secure enough to leave your car for a few days (just make sure you take out all valuables). If you don’t feel comfortable leaving your car, you could ask a friend to drop you off or take public transportation to the trailhead if available. Many cities will have short or long-term parking lots that you can leave your car at for a fee. For Kristen’s 22-day JMT hike, she left her car at the Ranger Station in Tuolumne Meadows.
Thank you. Even though this will not be my first time hiking, you advice just made me double check my check/packing list.
This is very empowering! I’ve wanted to go backpacking for years and have felt intimidated and didn’t know where to start. We just completed our first backpacking adventure last weekend and had a blast. You break things down and help me feel like I can do this!!!!
That’s awesome Dana, congrats!
How to Choose and Prepare for a Hiking Trip
:max_bytes(150000):strip_icc():format(webp)/Becker1-5b734a56c9e77c0025caddbd.jpg "preparing for hiking trip")
Some of the most memorable and iconic adventure travel experiences involve hiking across spectacular landscapes. For instance, trekking to the summit of Mt. Kilimanjaro or hiking the Inca Trail to Machu Picchu. But sometimes travelers can be overwhelmed with the requirements of undertaking such a challenge, such as sleeping in tents, carrying a loaded backpack, and walking for miles each day.
If you've ever dreamed of hiking the Great Himalaya Trail or crossing off any number of other amazing trails , we have some suggestions for how you can properly prepare for your journey and get the most out of the entire experience.
Define Your Trip Style
The Adirondacks or the Rockies, camping in a tent or staying at a luxurious lodge, hiking from one town to another or finding a far-off place to wander—making these kinds of decisions is the first step you should take when selecting a hike that interests you.
Some travelers like visiting more remote areas and getting far away from civilization, while others prefer a few luxuries to make their trip a bit more enjoyable. There is no right or wrong choice, only the one that works best for you.
Once you've decided exactly where you want to go and how you want to explore that destination, you'll more than likely find numerous options online for guides and itineraries.
Choose Your Trip
Now that you've dialed in on the type of trip that most appeals to you, it’s time to actually choose one. You'll probably find many companies that offer walking and hiking trips to the place you want to visit, but narrowing down which one works best for you can still be a challenge.
Start by finding guide services that offer departures for the timeframe that you want to travel. Some only run one or two trips a year, some are seasonal, and others offer trips on a more continual basis.
Once you've narrowed down your selection, reach out to each company that has a trip of interest to find out more information. Ask about how many guides will be on the trip, what the food will be like, and the amenities (or lack thereof) you can expect on the trail. Try to get a sense of the experience ahead of time. It's also a good idea to ask about the level of fitness required, as some hikes will be more demanding than others, and many of them won't offer the option to catch a ride to the next campsite or lodge.
Of course, you'll also want to factor in your budget by finding a trip that meets your price too.
Assess Your Fitness Level
Prior to setting out on any excursion, it is important to take an accurate and honest assessment of your own level of physical fitness . Traveling on foot through a remote corner of the world can be taxing at times, even if someone else is carrying the bulk of your gear. Knowing your own strengths and weaknesses will prove to be a major asset in getting ready for any trip.
Keep in mind that you may be able to walk a mile or two on pavement comfortably, but can you also hike four or five miles a day – or more – on varied terrain? Beyond that, can you also get up and do it again tomorrow and the day after that? Inquire with your tour operator about how strenuous the itinerary is to get a better sense of what to expect on the trail.
Train for Your Trip
If you don't already exercise regularly, aim to start training at least a month or two before you actually leave for vacation. Spending time at the gym working with weights and on a treadmill or stationary bike can all help you prepare. Supplement that training with long walks or hikes on weekends, preferably on dirt trails instead of pavement. Jogging can also help help improve your cardio efficiency, as well as agility and stamina.
For more extreme trips, like hiking to Mt. Everest Base Camp or following the Inca Trail in Peru, you should start training several months ahead of time to prepare for challenges of rough terrain and high altitudes. Companies running these types of trips will often have specific recommendations for a training plan, including a timetable for when you should start. Keep in mind, however, that you can be incredibly fit and still suffer challenges with altitude, so expect to take it slow and go at a moderate pace when hiking in the mountains.
Get Used to Carrying Gear
Even if you're in great physical condition, if you're not use to wearing a backpack filled with gear (possibly multiple days' worth), any hike can be a challenge. A loaded backpack can be heavy and cumbersome and can affect your balance and agility.
Prior to setting out on your trip, find out if you'll be responsible for carrying your own load or if porters will do the bulk of the work for you. Either way, you'll want to start prepping for the trek by making day hikes on your local trails while carrying a backpack with approximately the same load as you will while on your adventure vacation. This will help your body to get accustomed to having a backpack on for hours at a time.
While training, be sure to wear the boots and backpack you'll take on the trip to ensure there are no surprises when you get to your destination.
Wear the Appropriate Boots
One of the keys to enjoying any hiking trip is to have a proper pair of boots designed for the terrain you'll be walking on. If you'll mostly be exploring paved, easy trails with little change in altitude, hiking shoes may be in order. On the other hand, if you'll be dealing with a lot of climbing and descending on steep trails, sturdier backpacking boots may be in order.
Before setting out, be sure that your boots not only fit properly, but are broken in enough to ensure they are comfortable too. This will help avoid developing hotspots and blisters while on the trail, keeping your feet much more comfortable as a result. Bring several pairs of good-quality hiking socks too, preferably made from synthetic, high-tech materials that wick away moisture, which are much better than cotton.
Pro Tip: Wear your hiking boots on the plane while traveling. That way, if your bags get lost you'll still have the proper footwear. Most gear can be replaced, but breaking in new shoes can be disastrous.
Decide What Clothing to Pack
Your tour operator will typically provide you a list of specific clothing you should bring on the trip. Those lists are generated from years of experience and understand of what travelers will need while on the trail. Usually the list will include waterproof and breathable clothing that are designed to keep you comfortable in a variety of conditions and changing weather. Purchasing clothing that can provide protection from the sun is always a plus, and some hikers prefer pants that convert to shorts as well.
REI has clothing and gear for pretty much every adventure imaginable, as does Backcountry and Sierra Trading Post .
Bring the Right Backpack
Picking the right backpack can play a key role in getting ready for any adventure travel excursion. No matter what style of trip you're on, you'll want to bring a pack that fits your body comfortably, has the capacity for whatever you're carrying, and has features to keep everything dry and well protected from the elements.
Just like selecting the proper boots plays a vital role in your enjoyment, so does the right backpack . Visit your local outdoor store to get a proper fitting and find one that meets your needs.
Bring Personal First Aid and Emergency Gear
You may be trying to conserve space in your bag, but don't forget to pack items that can keep you safe and healthy. For example, you'll want to bring sunblock, energy snacks, a flashlight, a knife, bug repellant, a first aid kit with blister bandages, and possibly even an emergency kit with a whistle, compass, matches, and a space blanket, depending on your destination.
If you want an all-in-one solution, grab an Adventure Medical Kit . They are well organized, convenient, and stocked with everything you need.
The 11 Best Carry-on Backpacks of 2024, Tested and Reviewed
Everything You Should Pack for a Hiking Trip
The 8 Best Hoka Shoes of 2024, Tested and Reviewed
How to Go Hiking With Your Kids
15 Outdoor Skills to Master This Year, With Expert Tips and Tricks
A Beginner's Guide to Hiking Boots
The 14 Best Survival Kits of 2024
10 Tips for Hiking California's Lost Coast Trail
Hiking Boots, Shoes, and Sandals: How to Choose
The Complete Guide to Climbing Morocco's Mount Toubkal
Must Have Gear for Every Adventure Traveler
5 Great Winter Hikes to Take in Vermont
The 8 Best Bags and Backpacks for Disney of 2024, Tested and Reviewed
Your Complete Guide to Bikepacking
The Best Daypacks for Hiking of 2024, Tested and Reviewed
The Complete Guide to Franz Josef Glacier in New Zealand
How to Train for a Hike: 9 Steps to Hiking Like a Pro!
January 11, 2024
Paula Martinelli
If you have been searching for information on how to train for a hike, you have got to the right place! As an experienced hiker , I can confidently say that hiking is one of the most fulfilling outdoor activities out there. But, it’s important to understand that it’s not just a walk in the park. Hiking requires proper training and preparation to ensure that you have a safe and enjoyable experience.
Whether you’re planning a day hike or a multi-day trek, it’s essential to train your body for the physical demands of hiking. I have learned that preparation is key to enjoying any hiking adventure. Over the years, I have developed a training routine that has helped me conquer some of the most challenging hikes in the world.
With all my years of experience as a world traveler and hiker, I have seen first-hand the consequences of not properly training for a hike. From blisters to dehydration and even more serious injuries, the risks are high if you’re not adequately prepared. That’s why I’m passionate about sharing my knowledge and experience to help others train for a hike like a pro. In this blog post, I’ll share my top tips and advice on how to train for a hike, so you can embark on your next adventure with confidence and ease.
STEP 9: Build a Schedule and Train Consistently

Overview of How to Train for a Hike in 9 Easy Steps

9 Steps on How to Train for a Hike
Step 1: assess your fitness level.
The first step when you decide on how to train for a hike is to assess your fitness level. This will help you determine where to start and what you need to work on to improve your overall fitness. Hiking is a natural form of exercise for us humans, but with our busy lifestyles, we tend to neglect physical activity. This can lead to a lack of strength and endurance, making hiking more challenging than it needs to be.
Once you’ve assessed your fitness level, it’s time to plan for your fitness goal. Here are three foundations to help you get started:

STEP 2: Start with a Shorter Hikes & Progress Gradually
WHAT IT DOES: It is obvious, you need to start hiking to mimic your hiking during your vacation. It trains your feet, legs, knees, and back to get used to walking for long distances. Slowly start adding some length and elevation to your hiking.
FREQUENCY & DURATION: You can start by going on long walks outdoors. Start to increase your walking distance, for at least 60 minutes once a week.
WHERE: Start to walk outdoors, try to add some variations such as a walk in the sand, hills, and parks, and ideally if you have access, go on shorter hiking on the weekends.
Expert Tip:
Eventually, you should do hikes using your backpack and all your hiking gear. By doing it, you allow your body to get accustomed to the weight that you will need to carry during your actual hiking trip. Another tip, if you live in flat areas, just like me here in Florida, besides outdoor training, I train on a treadmill with elevation. The hillier the terrain, the better.

STEP 3: Train Your Cardiovascular to Built Your Endurance
OPTIONS FOR CARDIOVASCULAR: Treadmill, stairs masters, elliptical, bike, spinning bike, running, interval training
WHAT IT DOES:
- Running: This is the most similar type of training in terms of movements, so this will be a great way to get your legs and lungs prepared for what lies ahead.
- Gym cardio equipment: Climbing stairs, bike, and elliptical helps to strengthen leg muscles and lungs and this is another great way to do something that resembles what hiking will be like.
- Interval training ; This is a method of training the cardiovascular system by elevating the heart rate significantly and then allowing it to recover for a period before elevating it again, this prepares the cardiovascular system to deal with the stress of limited oxygen levels at higher altitudes. I like to do sprints outdoors. But you can also do your interval training on a bike, up the hill, treadmill, or any gym equipment that you may have access
FREQUENCY & DURATION:
- I target to run 5K (3.1 miles) 3-4 times a week for 40 minutes, including 10 minutes of warm-up.
- I incorporate interval training 2-3 times a week, alternating with my running days. You can Warm up for 5 minutes, then move into short high-intensity interval training (HIIT) intervals, each interval can last from 30 sec to 2 min with one minute to recover. Go for about 20 minutes of training.
- You can use cardio equipment at the gym, at the stairs at a park or your apartment, or at a school stadium. You can do the stair training for example on alternate days of running, each session with 20 min of high intensity.
Doesn’t matter what endurance/ cardio exercise you choose to do, make sure you target your progress. During each session, I try to train at a pace that keeps my heart rate at 70% to 85% of my maximum heart rate. To make your training more fun and easier to adapt to the routine, I recommend mixing and matching or picking at least 2 from this list of exercises below, as you will need some variations to stick with the plan.

STEP 4: Strength Your Muscles
OPTIONS FOR STRENGTH WORKOUT: When we talk about strength workouts, the first thing that comes into mind is a sign for a membership at the gym. But if you are so busy, like I am, I have some great options for you. For a cheap and easy alternative, you can buy sissy squats equipment to strengthen your whole body, especially your legs. Another alternative is to invest in a compact home gym , as you will get the same benefits as going to the gym.
WHAT IT DOES: I think you already realized I am a big fan of weight training. I have been training with weights since I was 16 years old. Some of the benefits include: it makes you stronger and fitter, but it is also good for your bone density and muscle mass and helps to develop better body mechanics.
FREQUENCY & DURATION: 4-5 times a week, during 45-60 minutes sessions.
When training for hiking on my vacation, I always prioritize legs workout for hiking and incorporate more exercises such as squats, stiff-legged deadlifts, leg presses, and calf exercises. It is also very important to train your upper body, as a strong body is very important. 3 days per week of leg training, 1 day for back, 1 day for shoulders, and 1 day for arms (biceps and triceps).

STEP 5: Balance, Stretching & Mobility
OPTIONS: Yoga, mobility exercises with a rubber band, stretching at home or at the gym
- Yoga helps to reduce both, the risk of being sore after your hike and the risk of injury. It helps build strength and stamina so you can hike longer, more intensely, and easier.
- Stretching is imperative to ensure you avoid injury and recover as quickly as possible.
- Stability & Mobility: It is very important to build mobility and stability. Mobility increases the ability to move freely and easily and, Stability develops the ability of the body to maintain postural equilibrium and supports joints during movements.
FREQUENCY & DURATION: 1 full hour a week, and associate some yoga moves prior to and/or at the end of your daily workout routine.
You can use resistance bands to strengthen your muscles through full extension and concentration and help to build a range of motion. You can add bands walk, bands squats, and band sidewalks. The good thing is that you can do these exercises on the go and you don’t need much space.
STEP 6: Wear Proper Gear
GEAR UP: Having the right gear can make a huge difference in your hiking experience. Invest in proper hiking shoes, a sturdy backpack, and appropriate clothing for the weather conditions. It’s also important to carry essentials like a map, a first-aid kit, and plenty of water. Below are my favorite and essentials hiking gears I recommend:
BEST SUPPORT FOR KNEES: Stability Compression Tights saved my life (and my knees) during my 7 days hiking in the Himalayas, especially on the way down the mountains. The concept is intriguing and I was skeptical when I ordered my pair, but it really adds great support for calves, knees, and hips along with quicker recovery helps during the 8-day trek to the base camp. I also strongly recommend researching and investing in the best knee brace for hikers that work best for you, you will thank me later.
INVEST IN PERFECT HIKING SHOES: This is one of the best investments you need to make when you are planning hiking, as it doesn’t matter how fit you are, your shoes may make or break your hike. I recommend trying different pairs before you make your decision. You need great support for your feet and ankles, and make sure you won’t have blisters during your hiking. I have been using my hiking boots for many hiking, and I absolutely love them.
COMFORTABLE BACKPACK: If you are planning multi-day hiking, besides building a strong back, you also need to make sure you have the right backpack. I finally invested in a very good backpack that is “antigravity” (Osprey magic). It was not very cheap, but it is an investment in my back.
TREKKING POLES: I recommend having a good trekking pole on your backpack. While I never believed I would use one, they were great for long hiking down the mountains hiking I have done, as I started to feel strong pain in my knees. Poles help to keep the balance on rock and uneven terrain, but they are also great for support if you are hiking downhill and feel pain, especially in your knees.
HIKING JACKET: Also, it is very important to invest in a high-quality hiking jacket . Every hiker knows the importance of great quality jackets for hiking. Or you simply cannot function properly let alone enjoy your hike when you’re freezing (if your jacket isn’t warm enough), very sweaty (if the fabric doesn’t breathe), or struggling to move if the jacket is restricting your movement.

Make sure that you train with your equipment prior to going hiking. Train with your compression tight, your hiking boots, and your backpack. In case you are going on a long hike, you can also simulate the weight on your backpack during your training. Check my expert review on all my favorite hiking gear and make sure you invest in the right ones for you!

STEP 7: Plan Your Diet Habits by Staying Hydrated and Fueled
If you are planning to increase your workout, it is very important to also have proper nutrition. Make sure that you eat the correct amount of calories, and have a balanced meal with the macronutrients: Lean protein, complex carbohydrates, and good fats, such as these 16 easy ideas for energy food for hiking . Below are my 5 takeaways for you:
Changing diet habits is the most challenging part, and it can be very intimidating to commit, but if you plan accordingly and stick with the plan, you will slowly build up the discipline and the results will be all beneficial for your physique and most import, health result

STEP 8: Understand Where you go Hiking and Know the Trail
My adventurer friends, the first step is to decide when you decide how to train for a hike is where in the world you want to hike. I worked with many travel adventure bloggers from all over the world, and together, we have prepared this ultimate list of the best hiking on the Planet . Or you can check my complete series of hiking for more fascinating locations and experiences. It is a great place to start, choose the perfect hiking for you.
What type of hiking do you want to do during your next vacation? It will depend on the level, you will need to plan and prepare accordingly.
- Will it be a full day of hiking on easy terrain?
- Maybe a strenuous day hike to a mountain summit?
- Or rather several days of hiking in extreme conditions?
- Maybe it will be overnight in the wilderness?
- If you are planning to hike in high altitudes, I have prepared a complete guide on how to train for hiking in high altitudes , since you will need to follow additional steps.
If you have an average fitness condition, you should be able to complete a day hike. But there is a difference in preparation for a day hike and long-distance backpacking at the high altitude of the Himalayas while carrying a heavy backpack all the way up, for example. Getting ready for hiking on your next vacation, should also be a great fitness goal. Use it in your favor to start a fitness program and a routine, including making changes to your diet and lifestyle.

Last but not least, now that you have learned all the steps on how to train for a hike, it is extremely important to build a schedule of training that allows you to be consistent. I am a gym rat! But anytime when I am training for hiking, I adapt my training and also take my workout outdoors, and still keep one session in the gym, and one session outdoors per day, for 2 months.
It is very important that we distinguish between different types of training. Like any other sport, there are different aspects for us to work on, strength, cardio, and balance, and I will be covering each one in detail and give you great examples of how to accomplish the best results:
It is important to take it slow and increase the training program daily, and gradually. Also, remember to pay attention to your inhale and exhale. I focused on developing a breathing rhythm and deep breathing. Your ability to control and conserve your breath and expand your breathing capacity will come in handy when the oxygen supply is reduced.

Additional Tips on How to Train for a Hike
Now that you have all the essentials on how to train for a hike, I want to make sure to help you with all the additional tips to make the most of your hiking. Being in excellent shape before your trip makes a huge difference in how much you will enjoy your vacation:
How to Train for a Hike Conclusion
In conclusion, training for a hike requires a multi-faceted approach that includes assessing your fitness level, developing a training schedule, adopting healthy diet habits, gearing up, and progressing gradually. By following these foundations, you’ll be well on your way to being physically prepared for your next hiking adventure.
By following these 9 steps, you’ll be well on your way how to train for a hike like a pro. Remember to start slow and gradually increase the distance and difficulty level to prevent injury and enjoy the experience. Happy hiking!
You may also enjoy these articles:
- How to Train for a high altitude hike
- Fitness for Travel; 12 Tips on How to Be in Shape for your next vacation
- 5 Tips on How to find life balance between travel & Fitness
- Best energy food for hiking: 16 easy and cheap ideas
- Efficient hotel room workout for busy travelers
- Build strong legs with these sissy squat equipment: Expert Review!
- 150+ Funny hiking captions for Instagram!

Follow + Share
If you found this guide useful, follow me on Instagram to stay up to date with my travels & Subscribe to my YouTube Channel to keep you with my workout videos.
I would love it if you could follow me on Pinterest and share this guide on my social media.
Plan your Trip
You can plan your trip with this easy guide and have access to the best services I recommend and you can get discounted prices.

TRAVEL & FITNESS: 5 Tips on How to Find Balance in Life

How to Train for High Altitude Hiking: Ultimate Guide for Mastering Your Hiking Skills

Full Body Resistance Band Workout | Bonus: Resistance Band Routine Video + Printable
6 thoughts on “how to train for a hike: 9 steps to hiking like a pro”.
This is great! I loved that you combined fitness and travel, my faves!
Great tips! I’m not a hiking person and the 2-hour long (one way) hike I had in my recent trip to Sri Lanka was more than enough. I have no stamina and cardio kills me lol I guess I should try to incorporate more strength training into my daily routine, thanks for the motivation!
Hi Juliet, training and building stamina should be one step at a time. I think you have a good idea to start with strength training and slowly incorporate cardio, endurance…until you feel comfortable.
I am glad you enjoyed this article Katy, travel, and fitness are my passions too.
Do you have any more posts on this subject? This was really useful
I do have a couple of articles about fitness on my site – Please, visit the Healthy Lifestyle & Fitness session. Thanks
Leave a Comment
This site uses Akismet to reduce spam. Learn how your comment data is processed .
- Odnoklassniki icon Odnoklassniki
- Facebook Messenger
- LiveJournal
- Work With Me
Home » Blog » How To Prepare for Hiking and Backpacking Trips
How To Prepare for Hiking and Backpacking Trips

So you’ve decided you want to spend more time hiking and backpacking this summer. That’s awesome! Getting out into the backcountry is seriously one of the most rewarding things you can do. Though maybe it’s dawned on you these last couple of weeks that you need to get your butt into gear if you’re going to be fit enough and prepared for summer adventures… amirite? You’ve come to the right place because we are going to cover everything you need to know to prep for hiking and backpacking trips.
Disclaimer : This blog post is in collaboration with Backcountry.com and features some affiliate links. This means I get a small commission if you make a purchase (at no extra cost to you). Use code RENEE15 to get 15% off your first Backcountry order (some exclusions apply). You can also learn more about my affiliate policy here . Thank you for the support!
Keep in mind that this guide is more focused on warmer weather hiking and backpacking , not winter adventures. This guide is for you if you’re either completely new to outdoor adventures or if you’ve slacked off over the winter months and need to get yourself hiking fit again. Let’s jump into it!
Review and Organize Your Gear
After a few months of laying dormant, your hiking and backpacking gear will likely need some love! Pull it out of storage, dust off the cobwebs, and get everything organized for an amazing summer of adventures. Below are some key things to consider when reviewing your gear.
First You Need to Find Everything!
Finding all my hiking and backpacking gear at the beginner of summer can be a challenge haha. One thing that’s helpful is to print out a checklist so that I can simply go through everything and make sure I’m not missing any items. Check out my Beginner’s Guide to Hiking and Beginner’s Guide to Backpacking for downloads of printable checklists. You can even laminate them and use a dry-erase marker to check things off for each adventure!
Designate a spot in your house (or outside) to lay everything out and assess its condition. I find it helpful to cluster items into categories such as camping items, hiking clothes, accessories, backpacks, etc. You may even find some items that you thought you had lost! At the end of the season, I like to store all my clean, dry gear in storage bins so that I know it will all be organized and ready to go for my next adventure.
Does Anything Need Repairing?
Assess all your gear and decide if anything needs repairing . Many outdoor gear brands have excellent gear repair programs to prevent you from needing to buy a whole new item. If you’re someone who likes to wash your clothes in permethrin (to deter mosquitos), now is a good time to do it.
Do You Need To Buy Anything New?
Most years I find that I buy at least a couple of new items due to wear or tear or simply because I am ready to upgrade a particular piece. I know a lot of people who enjoy hiking and backpacking will initially borrow gear or use whatever they have at home… and that is totally okay! Then as time goes on you can save up and invest in higher quality pieces that are more lightweight and durable.
Some new items for me this season are the Osprey Lumina 60L Backpack , Lander Cairn Mini Lantern , and the SPOT Gen4 Satellite GPS Messenger.
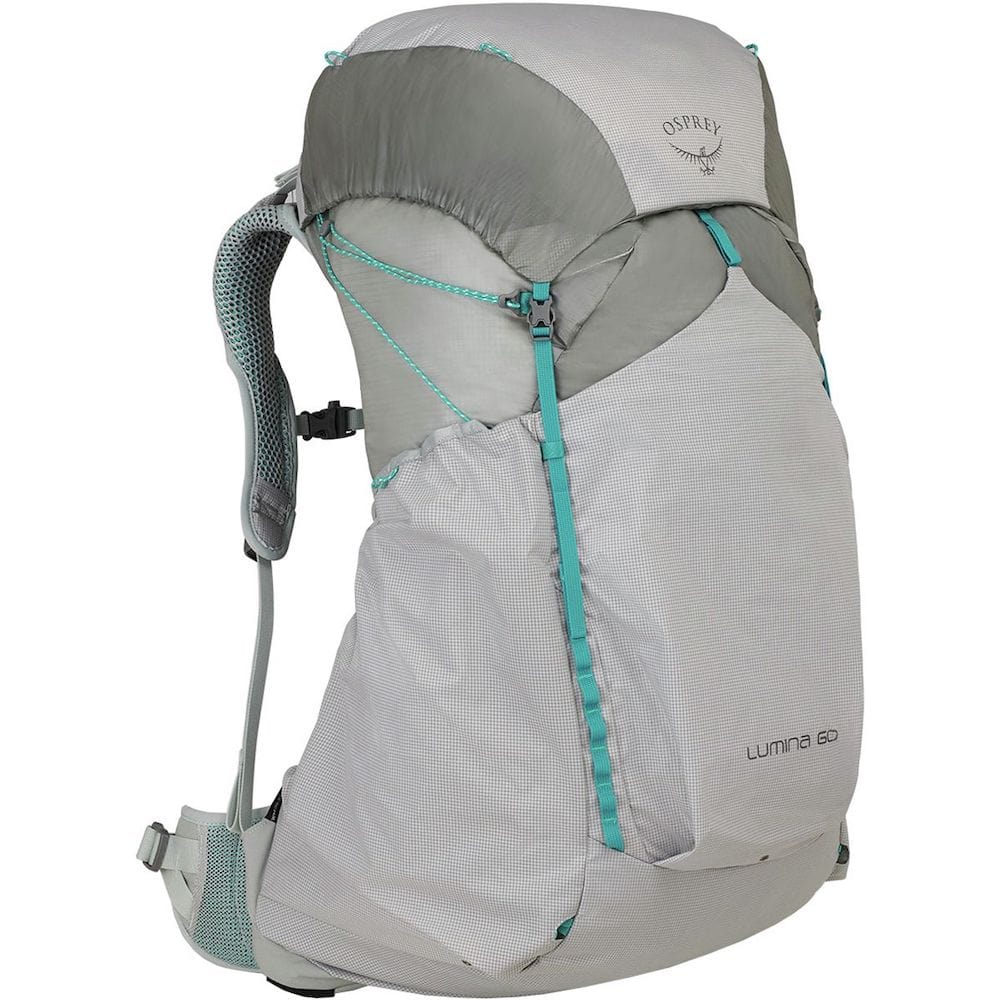
Don’t forget to use code RENEE15 to get 15% off your first Backcountry.com order! (some exclusions apply) Click here to shop my favorites .
Rewiew How To Use Everything
Before heading out hiking or backpacking you first need to make sure you can use all your gear! You definitely need to practice setting up and using anything that’s 100% brand new to you this season (e.g. tents, sleeping pads, GPS devices, etc.) Then I would also suggest reviewing your older gear items and make sure you still remember how to use them correctly. Don’t feel silly setting up a tent in your front yard… it’s better than getting into the mountains and not knowing what you’re doing. This is also a good chance to ensure you aren’t missing any tent stakes before you head out on your first trip.
Get Into Shape for Hiking and Backpacking
Did you slack off over winter and get a little out of shape? Me too. Don’t worry, because next up we are going to cover exactly how to get fit for hiking and backpacking! In an ideal world, you would focus on maintaining fitness over the winter months so that getting back into outdoor adventures wasn’t so challenging each year…. but I know that is easier said than done! Below are my top tips for training for hiking and backpacking season.
Start a Training Program
I am not a doctor or fitness instructor, so I won’t be telling you exactly what to do, but I can tell you what works for me. Firstly you need to assess your current fitness . How much does your strength and cardio fitness differ right now compared to during hiking season? Once you have a rough idea, then you can focus on making a plan. What I find works for me is focusing on an at-home workout routine that targets cardio, strength training, and stretching/yoga. I’ll break each one down into its own section below.
Update: I just purchased a Fit for Hiking fitness plan from Bradee ( Pony Tail On A Trail ). I will let you know how I like it once completed 🙂
Cardio Training
Start walking as much as possible. This will not only help with cardiovascular fitness but will also help prepare your feet and joints for long-distance walking. Try to fit in as many walks as possible around your neighborhood each week. Then on weekends take longer walks in local parks or on trails that may be open for the season.
Start small and work your way up for both length and difficulty. Hills are a great way to train for hiking trails, so get some of those in if you can. You can also start carrying a backpack on these walks and increase the weight to gradually give yourself more of a challenge.
Strength Training
For strength training, I will focus on the muscles most used during hiking . These are my core muscles, leg muscles (quadriceps, hamstrings, glutes, calves), and hip flexors. Some of my favorite types of exercises to do at home are featured below (there are free videos on YouTube showing how to do each one). You can slowly add weight when doing these exercises, e.g. wear your backpack while doing squats and step-ups.
- Squats (regular, sumo, jump)
- Mountain climbers
- Lunges (regular and reverse)
- Step-ups (and “heel down” exercises from step)
- Resistance band hip exercises
- Calf raises
Stretching and Yoga
Don’t forget to also stretch! I find yoga to be so helpful for getting my body ready for outdoor adventures, as well as for recovery after a strenuous trip. Even just 5-10 minutes of stretching each day can make a huge difference! There are a lot of free YouTube videos with short yoga routines and one channel particularly like is Yoga with Adriene .
begin With Some Easy Hiking Trails
It’s important to start slow at the beginning of hiking season and then gradually work your way up to more challenging trails to condition yourself and avoid injury. This will look different for everyone and will depend on fitness levels and what you typically consider to be a challenging hike. I personally like to start with something under 5 miles and not too much elevation gain, then gradually work my way up to longer and more strenuous trails as the season goes on.
Interested in tracking your hikes so you can see how far you walked and get an idea of the elevation profile? I’ve used Gaia GPS app for years now and I highly recommend it for tracking and recording hiking adventures. The app provides topographic maps where you can follow the trail and check for water sources. It’s free to download and use but you can only download offline maps if you have the premium membership (great for when you can’t rely on phone service!) Click here to get 20% off your membership.
Wear In Your Hiking Shoes
If you have invested in new hiking shoes for this upcoming season then it’s important you focus on breaking them in. DO NOT wear them for the first time on a 10-mile hike unless you want painful feet and blisters. It’s always a good idea to practice wearing your hiking shoes off-trail before you take them into the wilderness. Walk around your neighborhood in them or try out an urban walk where you can be close to your car if blisters start forming.
Plan Your Hiking and backpacking Trips
Some people dread this next step but I personally love it! Planning hikes and making an adventure bucket list is something I look forward to every year. I guess it’s the anticipation and excitement of knowing it’s not too long until I am out in the wilderness again. Below you will find my top tips for planning hiking and backpacking trips.
Research Hiking Trails
There are so many ways to find amazing hiking trails! My top resources are typically blog posts, Pinterest, All Trails, Google Maps + Earth, and websites like Washington Trails Association (relevant for those who live in Washington State). I also like to chat with friends and find inspiration via local hiking Facebook groups.
I highly recommend finding a way to record your hiking research . Two common options are using the Notes app on your phone or opt for something like Google Sheets. Maybe you don’t get to hike a certain trail this summer, but why waste all that planning when you could hike it in the future?!
make a hiking Tally and Bucket List
Another thing I like to do at the beginning of each season is to create a note on my phone with a tally of hikes I have completed. For example, “Trails Hiked in 2021”. Then I break it down by month and keep a tally of each hike I complete, along with the date and any other information I want to record. I find this super helpful to look back on each year and see when I hiked certain trails because it allows me to factor in things like snowpack and wildflower conditions.
Then underneath this tally, I also keep a list of my “bucket list” hiking and backpacking trips for the season. I know I won’t get to all of these but it’s nice to have them written down as prompts. If you’re a little extra like me, you can even subdivide these into areas/parks or types of trips (e.g. solo vs with friends).
Apply for Permits and Reservations
Once you have an idea of the trails you plan to hike, that’s when you can start applying for any required permits or reservations . Not all trails or backpacking destinations require permits, but these days many of them do! How you obtain these permits will depend on the popularity of the trail.
Super popular trails may have a lottery system where you have to apply many months before the hike. Some will require you to visit a ranger station or visitor center to obtain a walk-up permit before your trek. Always research ahead of time and be sure to mark those lottery entry dates into your calendar a good 6 months in advance!
Connect with your adventure buddies
If you have friends you like to hike and backpack with, now is the time to start chatting about any upcoming adventures! I always like to take at least a couple of backpacking trips with friends each season and planning ahead of time can help make sure everyone is prepared.
Request Time Off Work
Now for the not-so-fun stuff… Depending on your work situation, you may need to apply for time off . Try to utilize as many long weekends and holidays to take your hiking and backpacking trips. You can extend them even further by adding a day or two on either side.
Plan and Prepare Outdoor meals
Before each hiking season, I like to prepare some of my snacks and meals . This means that before each trip I don’t have to worry about madly getting stuff ready or ordering last-minute items. Below I cover some things I like to do to be prepared as possible.
Prepare Hiking Snacks
My husband and I keep a drawer at home for our hiking snacks . We order our favorites in bulk ahead of time and then can simply grab and go before a trip. Sometimes we opt to take fresh items instead, but if we don’t have any or are trying to hike super lightweight, it’s nice to have our snack drawer already stocked up.
In your hiking snack draw, you can also consider storing some homemade trail mix packets. There are tons of recipes online for trail mix combinations, so find that sounds yummy to you. If you like to prepare your own homemade snacks then I would highly recommend checking out blogs like Fresh Off The Grid .
Prepare Backpacking Meals
I have tried dehydrating my own backpacking meals in the past but haven’t had a lot of success. This is by far the most economical and sustainable way to prepare your own backpacking meals, but I know not everyone has access to a dehydrator. I personally love to backpack with Mary Jane’s Farm Outpost Meals because I find that they taste yummy, don’t upset my stomach, and the packaging is more sustainable than other brands. I always order a bunch of these meals ahead of time and set them aside for backpacking trips.
Prepare Your Car
Preparing your car for hiking and backpacking season is a step a lot of people don’t think about. It probably depends on where you live, but here in Washington many of the best hikes can only be accessed by driving bumpy forest roads . These roads typically don’t have any phone coverage and you’re out there on your own if you get stuck! Follow the below steps to make sure your car is ready to go for summer adventures!
Get Your Car Serviced
Make sure your car is up to date with its oil changes , fluid top-ups, and other maintenance requirements. Is your spare tire in good shape and ready to use? Do you need to switch out your winter tires or summer tires? Make sure all of this is in order before summer comes around!
Review Your Car Emergency Kit
I highly recommend having a car emergency kit if you plan to drive down forest roads or in areas without phone coverage. In this kit you should consider storing:
- Headlamp/flashlight
- Emergency blanket
- First aid kit
- Portable phone charger
- Work gloves
- Emergency device
- Small tire jack
- Retractable shovel
- Tire patch kit
- Gaia GPS offline maps of area
- Extra water and non-perishable snacks
Make a Post-Hike Car Kit
There’s nothing better than getting back to the car after a hot sweaty hike and being able to take off your hiking shoes, have a cold drink of water, and put on some fresh clothes. Especially if you can’t go home right away for a shower! I would highly suggest putting together a post-hike car kit with the following items:
- Sandals or flip flops
- Spare change of clothes
- Quick-dry towel
- Insulated water jug with cold water
- Post-hike snacks

More Hiking and Backpacking Resources
I hope you found this guide helpful! If you’re looking for more hiking and backpacking resources then definitely check out some of other other articles listed below:
- Beginners Guide to Hiking (including a packing checklist)
- Best Hiking Shoes for Men and Women
- What To Wear Hiking as a Woman
- Best Apps for Planning and Recording Hikes
- Hiking Trail Etiquette Rules You Need To Know
- Leave No Trace Principles and How To Follow Them
- Eco-Friendly Outdoor Hygiene for Hikers and Campers
- Must-Know Bear Safety Tips for Hiking and Camping
- How To Get Over Your Fears of First Time Backpacking
- Beginners Guide to Backpacking (including a printable checklist)
- How To Get a Good Nights Sleep in the Backcountry
- Beginners Guide to Winter Hiking and Camping
PIN for Later Planning
Related guides.

Ultimate Guide to Winter Hiking and Camping

Arctic Expedition on the Seabourn Venture – Greenland and Canada

9 Luxury Backpacking Items That Are Worth The Extra Weight
Join our mailing list for exclusive resources, events, and more.
Thank you for subscribing!
Thanks for all these great tips and ideas. I’m definitely implementing a few before my next hike.
Usually, I never comment on blogs, but your article is so convincing that I never stop myself from saying something about it. You’re doing a great job Man, Keep it up.
Leave a Reply Cancel reply
Your email address will not be published. Required fields are marked *
This site uses Akismet to reduce spam. Learn how your comment data is processed .
Follow Along on Instagram
7 expert tips for tackling your first multi-day hike

Jan 26, 2021 • 11 min read

We asked experts from leading outdoors groups to give us their top tips on how to prepare for a multi-day hike © Westend61 GmbH / Alamy Stock Photo
There are few better experiences than being outdoors, smelling the fresh air and taking in the open spaces. Multi-day hikes merge the beauty of the outdoors with the physical and logistical challenge of an extended journey.
For those who want to amp up their mileage and turn a day hike into a longer, multi-day trekking adventure – here are seven tips from passionate leaders who work with five leading outdoors organizations from Australia to Canada to California and beyond.
Editor's note: Please check the latest travel restrictions before planning any trip and always follow government advice.

1. Choose wisely and research thoroughly
Matt Berna, managing director for Intrepid Travel’s North American region shares his perspective on the importance of deciding what you’d like to get out of your multi-day hiking journey, before taking the time and effort to embark on it.
“From my experience, particularly as a guide, it’s most important to be honest with yourself in terms of what you’re looking for and what you want to do – what you want to achieve,” he says. “For example, something like Kilimanjaro is a scenic hike, but it’s arduous – it’s a ‘challenge hike.’ Is [your] goal to reach a remote area that’s hard to access? Or to check something off the bucket list? Is it for the bragging rights?”
Berna emphasizes that the time of year you’re traveling makes a difference in what kind of experience you’ll get.
“Some routes are busier than others, depending on where you choose to go and what you want to do,” he says. “If you’re someone who’s looking for a backcountry experience and want to be by yourself, so consider when you go – the offseason or the brink of the offseason are typically the best time to go if you’re willing to put up with trickier weather conditions.”
Berna even suggests trying a professionally-led hike as a first time for your multi-day hike, as experts can teach you how to prepare for a solo trip when you’re ready.
Guided trips are also a great idea to look into, he says. “If you want to go remote into the backcountry, research and consider using a special operator – they’ll provide the right gear such as oxygen tanks and can even fit you properly. On a trek such as the Inca Trail’s 4-5 day trek, the porters will help you carry your gear, food, and water. You’re also employing the locals there – and they’re experts.”

2. Invest in the proper gear
“There’s no such thing as bad weather, only the wrong gear!” says Charlie Carlow, Owner of South Australia’s Arkaba Homestead and host of the Wild Bush Luxury – Arkaba Walk experience, which is a Great Walk of Australia . He suggests some of the most important equipment to take on a multi-day hike through the outback to stay safe and warm, first and foremost emphasizing the importance of proper hiking shoes.
“Gym trainers aren’t adequate for this journey. Comfortable hiking boots that are well worn in are best, preferably with ankle support,” he says. “You’ll also need the usual suspects for an outback walking adventure – breathable layers and a few good pairs of hiking socks. Convertible pants are handy and a lightweight waterproof jacket is essential. Thermals and a beanie will keep you toasty in the winter months. A head torch to move around the camp after dark is a good idea.”
“Lighter and heavier clothing ratings will be determined by the weather outlook," says Tony Sharley, Founder and Lead Guide of Murray River Walk , another of Australia’s Great Walks. “Typically a thermal underlayer, non-cotton long-sleeved shirt, fleece, neck buff, hat/beanie, gloves, waterproof jacket and long trousers should all be in your kit.”
Becky Wong, long-time Sierra Club volunteer trip leader from Victoria, British Columbia , Canada agrees on the importance of investing in the right gear. Wong has led more than 60 trips with the Sierra Club and serves as the training officer for international trips as well as the quality officer for the organization.
“Personally I like to travel with quality, lightweight equipment, because I don’t like to carry a lot of stuff – especially on a multi-day trip,” she says. “Clothing is very important...You want something that wicks moisture off to stay warm and dry.”
We tested boots, backpacks and more in Patagonia – here’s what we learned
Wong's favorite versatile gear piece of gear is a simple bandana. “This simple square of fabric can hold up in the sun, in the rain, serve as a washcloth, headband, a mask, and to protect your neck,” she says.
Wong also recommends carrying an “ouch pouch” with necessary non-emergency medical supplies, such as moleskin for blisters, bandages, wipes, gauze, sunscreen and blister cream – as well as pain relievers, and necessary other medications or supplements.
“Layering is something that we talk about, constantly,” says Andy Kronen, REI’s North American Adventure Travel Program Manager, who has been hiking and backpacking his entire life. “On a multi-day trip, in my mind, the two most important pieces of gear you can have are solid, broken-in footwear that’s appropriate for the terrain, and a well-fitted backpack.”
“It’s even a great idea to go out for a night first, just to test your gear – your shoes and your backpack,” shares Intrepid’s Berna. “That’s how you learn exactly what you need and whether your gear is efficient, how to plan your meals, your water filtration systems.”

3. Prepare both mentally and physically for the journey
Try to train ahead of time by replicating the activities you’ll experience on the trip when you’re closer to home.
“If you live at sea level or you’re used to working out at the gym, or have more of an urban lifestyle, when you find yourself at 11,000ft on a rocky dirt trail like you would on the Inca trail trek, your cardiovascular fitness is a very different experience,” says REI’s Kronen.
“Being out in the elements, being out on the trail, and being at altitude – if there’s the opportunity to replicate these conditions at home, even if it’s driving for an hour to get into the mountains, do this,” he recommends. “It’s also important to build in some time to acclimate and get used to the higher elevation on higher trails.”
For example, if you’re hiking Machu Picchu , try to arrive at Cusco a few days early to acclimate to the altitude before embarking on the hike itself.
Matt Berna agrees. “A lot of times, people have trained in different environments, such as walking every day – but when you get them into the dry climates of somewhere like the desert southwest with exposure to sun and elevation, they find it very tiring,” he says. “Layer that with jet lag from flying into the destination,” and it’s going to be a real challenge.
Wong suggests gradually building up your mileage for a longer trek. “Try adding two miles to your training each month leading up to the month of your trip,” she suggests. “If you’re more prepared, you’ll have a more enjoyable trip.”

4. Be mindful of the seven “Leave No Trace” principles
It’s also important to respect the seven “leave no trace principles” when you’re hiking anywhere in the world. Wong explains the importance of these principles when you’re embarking on a long-term trek to protect the land you’re traveling on for future hikers and local wildlife.
The first principle is to plan ahead and prepare.
“Have a safety management plan and be prepared for a number of things that might happen on the trip,” says Wong, including “your equipment and what you might need. “
The second is to camp on durable surfaces. When you travel, tread carefully, don’t take shortcuts, and don’t trailblaze.
The third is to dispose of waste properly. Pack in and out all trash, litter and necessary waste.
The fourth is to leave what you find. “Don’t take anything that’s not yours, such as an artifact like an arrowhead,” says Wong. “Leave it for other people to enjoy!”
The fifth principle is to minimize campfire impact. Don’t scorch the earth, or leave any trace that you’ve been there.
The sixth principle is to respect wildlife. “We’re in their land,” says Wong. “We don’t interfere with them.”
The seventh principle is to be considerate to other visitors. This includes being courteous by yielding to other hikers when necessary, and allowing nature's sounds prevail by keeping your own noise to a minimum.

5. Respect the region you’re visiting and its customs
It’s important to be aware of what’s happening around the world internationally on a conservation level, honoring and respecting the diversity, equality and inclusion on a broader scale.
“Recognize the value of conversations focusing on the area you’re traveling to,” says Wong. “This includes keeping up with current events, and spreading awareness of what’s happening in terms of conversation on a larger level with those who you’re trekking with. Trek with an open mind and leave any prejudices at home. Be patient. Be an ambassador of goodwill to all people.”
Wong emphasizes the importance of being respectful and considerate of other hikers who are also enjoying the area you’re trekking in.
“When you travel lightly, you’re not traveling for people to see you,” she says. “Take your time to absorb the beauty and be inspired by something natural like a river, a mountain, or a waterfall. Be grateful and show your appreciation for what you’ve seen. With curiosity, it’s not how far you go but how deeply you explore the experience and learn from it.”

6. Plan ahead and prepare – expect the unexpected
“My biggest advice is to plan and prepare,” says Wong. “Planning and preparing sets you up for any situation that could happen. This means anything from making sure you have enough water, to ensuring you have the proper gear. Be flexible. Even though you might have a plan, things happen and plans change. Weather can change very quickly.”
Kronen agrees keeping an eye on weather forecasts before the trip and paying attention to your instincts when it comes to making safe decisions.
“Make sure you’re familiar with the area that you’re going to be spending time in, checking the weather conditions prior to starting out, and understanding what the climate conditions are going to be,” says Kronen. “People need to be prepared to dress up or dress down for the climate, and always have rain gear with them, even in the desert.”
Often, in destinations such as the Southwest US, people might not anticipate the extreme temperature swings from day to night, because there’s a preconceived notion on what a “desert” is. In reality, these regions can experience temperature swings of 50-60 degrees between day and night and varying altitudes.
If this happens, make sure to stay safe and smart, as opposed to pushing on into a situation that might put you or your fellow hikers in danger. If you’re hiking alone on a multi-day trip, give someone you trust a general timeline of when your arrival at your next outpost should be.
“Always let someone know where you’re going and how long you plan to be out there – because anything can happen,” says Berna. “There are even backpacks nowadays that have sensors built into them in case you’re lost – search and rescue crews can pick up your beacon.”

7. Be smart, but also have fun
Pick a trek that suits your interests, and don’t worry too much about embarking on the picture perfect hiking experience – there’s no such thing as a perfect hike. Multi-day hikes are about what you learn about yourself and about the environment while you’re on your journey.
“It just feels so good to be out in nature – it’s so much of a stress reliever to spend a day out in the wilderness,” says Kronen. “It’s made me a huge advocate for the environment and for our natural world.”
Berna agrees. “When I think of a multi-day hike, I think of a more peaceful and relaxing experience,” he says – as opposed to strenuous hikes, with a steeper grade. “I love to do lots of miles, but maybe something that’s not so arduous. You can walk at a slower pace, and it’s more about enjoying the environment and having time to think.”
Wong highlights the spiritual experience that being at one with the wilderness can offer. “With exploration and curiosity, it’s not how far you go – but how deeply you explore the experience and learn from it,” she says.
“Expect to make great friends, learn new things, experience creative thoughts and find yourself,” says Sharley.
No matter where you go or what hike you do, your adventure will most likely transform your perspective on the power of the natural elements and give you a greater sense of respect for Mother Earth.
You might also like:
A beginner's guide to backcountry camping 9 common mistakes to avoid while hiking and camping Our top 10 picks for backpacking cooking gear
Explore related stories

Feb 1, 2024 • 7 min read
Need fresh ideas for your big spring trip? Read on for out-of-the-box destinations for a fun spring break 2024.

Jan 22, 2024 • 7 min read

Nov 13, 2023 • 6 min read

Oct 17, 2023 • 5 min read

Feb 2, 2023 • 10 min read

Nov 25, 2022 • 10 min read

Sep 1, 2022 • 8 min read

Aug 27, 2022 • 8 min read

Jul 29, 2022 • 15 min read

Outdoor Revival
8 Essential Tips For Your First Backpacking Trip
Posted: April 2, 2024 | Last updated: April 3, 2024

Backpacking is one of the most popular hobbies in the United States. While people love to connect with the wilderness, there's some things beginner backpackers should know before embarking on their first excursion.

Dehydrated meals are a lifesaver
When you're carrying all your gear, you'll not have the option to eat much fresh food. There is, however, a solution: dehydrated meals. These can easily be cooked, as long as you have fire and water. They barely take up any room in your pack and come in many different forms.
If dehydrated meals aren't your thing, other options include pre-made sandwiches, protein bars and granola.

Pack for comfort, not looks
It can be easy to stay cool while out in the wild, as layers can always be removed. Staying warm, on the other hand, can be a bit more difficult. As such, backpackers need to focus on comfort, rather than a nice appearance.
Look for warm layers that can easily fit in your pack. You'll also want to focus on wearing wool, rather than cotton. This may make you smell a bit more pungent, but that shouldn't be too much of a concern when you're out backpacking.

Don't forget to pack the essentials
Backpackers are usually so concerned about efficiently packing their bags that they can easily forget important things like sunscreen and bug spray.
These adventurers are going to be spending much more time than usual in direct sunlit, meaning protection is essential. Hikers are also likely to encounter annoying bugs, such as mosquitos, so bug spray is highly recommended.

Make sure you're prepared to take on such an endeavor
People who have never been on a long backpacking trip might overestimate their ability to complete the trek. As such, beginners are advised against making a long trip to start and, instead, prepare with shorter excursions.
Newcomers can also prepare for hikes by jogging, using an elliptical or walking at home. As well, make sure you're familiar with how the elements and altitude may differ from your hometown.

Make sure your meals are calorie-dense
We already know that dehydrated meals are among the best choices for backpackers, but not all are created equal. They burn plenty of calories when on a trip and it's important to refuel. Therefore, backpackers should look for food that's more calorie-dense. Smart choices include oatmeal for breakfast and instant mashed potatoes with dinner.

Water can easily be purified
Obviously, campers should be drinking plenty of water while out, but it's obviously heavy and cumbersome to travel with. Most hiking trails have streams nearby, but the water flowing through them could be contaminated.
The nice thing is that it's easier to purify water than ever before. Nowadays, water from a nearby stream can be filtered in as little as 90 seconds by using a purifying wand.

Pack a comfy pair of footwear
When hiking along a trail during the day, you'll want to be wearing some serious hiking boots or shoes. By the end of the day, you'll most definitely want to get them off as quickly as possible. For time at your campsite, make sure to pack comfortable shoes. During the summertime, you can even pack sandals that won't take up too much room.

You may have to prepare to keep your cellphone working
More from us: Canada's Mount Thor Is the Longest Vertical Drop In the World
Many don't like to stay too far from their cellphones and that includes hikers. Of course, it's not just about Twitter and Instagram. A phone could be a lifeline if there's a serious accident. Hikers in cold weather are advised to keep their devices in a thermal bag, as the chill could affect their battery life. Camping stores also sell power banks that can be used to keep phones charged.
More for You
Airspace shut down and major shipping lane closed after huge failed missile launch
Black Radio Host Blasts DEI 'Garbage'
I did 50 standing toe touches every day for a week — here’s what happened to my abs
The dog breed that's attacked the most people, according to data. Plus, see the rest of the top 20.
19 Easy Ways to Fall Back Asleep After Waking Up in the Middle of the Night
Netflix's One Piece Star Pulls Back the Curtain on Season 2
Pilot says brakes seemed less effective than usual before a United Airlines jet slid off a taxiway
Fact Check: The Truth About Claims That Mark Wahlberg and Mel Gibson Are Launching 'Non-Woke' Film Studio
I Lost White Friends When I Finally Spoke Out
I moved from the US to Ireland. Here are 11 things that surprised me most.
I did 50 standing oblique crunches every day for a week — here’s what happened to my abs
17 of the Most Dangerous Tourist Destinations in the World
Bug haters, beware: After 200 years, the cicadas are here by the trillions
Your iPhone’s Volume Buttons Are Loaded with Hidden Features
The True Cost of the Churchgoing Bust
Buying Last Year’s Model of These 20 Cars Will Save You 28%+ Over the New Version
First Lady Jill Biden reportedly urging the president privately to end the war in Gaza: 'Stop, stop it now'
I Lost 100lbs by Following 5 Small Daily Habits
Watch: Water gushes out of New York City skyscraper
Aldi’s New Colorful Glassware Set Is the Best Williams-Sonoma Copycat We’ve Seen Yet
2-FOR-1 GA TICKETS WITH OUTSIDE+
Don’t miss Thundercat, Fleet Foxes, and more at the Outside Festival.
GET TICKETS
OUTSIDE FESTIVAL JUNE 1-2
Don't miss Thundercat + Fleet Foxes, adventure films, experiences, and more!
Powered by Outside
Thru-Hiking a Long Trail This Year? Backpack These Trails First
You can't (or shouldn't) just jump into your thru-hike without a trial run. take these three trails for a spin before the big trip..
Heading out the door? Read this article on the new Outside+ app available now on iOS devices for members! >","name":"in-content-cta","type":"link"}}'>Download the app .
In our travel column, assistant editor Emma Veidt answers your hiking questions with the help of a rotating cast of experts.
Dear Backpacker,
I’m stepping out on my first long-distance thru-hike this year, and I’m not sure what to expect. What are some trails where I can give my gear and skills a trial run before I set off on my trip? — Looking For Long Walks
Dear Looking,
We’re now in the early stages of thru-hiking season, which means thousands of eager long-distance hikers will join you in dialing in their gear, squeezing in their last few training hikes, and getting excited for the months ahead. Although there are dozens of long trails in the country that people thru-hike, many focus on the Triple Crown: the Pacific Crest Trail, Continental Divide Trail, and Appalachian Trail.
According to The Trek’s 2022 AT hiker survey , more than 10 percent of thru-hikers had started their hike without ever going on a backpacking trip—some hadn’t even gone car camping. Although that strategy does work for some, it’s better to work out some of the more complicated parts of backpacking before you’re deep in the backcountry. Luckily, there are lots of easy backpacking shakedown trips available in close proximity to the most popular starting spots of the Triple Crown trails.
The Best Pacific Crest Trail Shakedown Hike: Noble Canyon Trail
Just 30 miles from the PCT’s southern terminus in Campo, California is one of the area’s best warm-ups, the Noble Canyon Trail. A hike here is a preview of what you’ll experience in Southern California: Starting in the desert with scrub and cacti lining the trail, you climb through riparian wetlands into high forests full of pines. Want a peek of the adventure to come? The top of Noble Canyon overlooks the PCT; you can see miles of trail on a clear day.
There are a number of water features and creek crossings on this hike as long as the region received enough snow or rain that year. Even in rainy years, the water crossings are easy enough that beginners could forge through. Noble Creek isn’t always flowing, but it often is through late spring, making it a great place for backpackers to find and filter water. (There’s also a water spigot at Penny Pines about halfway through the hike.) Backpackers need to remember bug spray— biting flies are known to swarm the trail as the weather heats up.
You have two starting point options, from the canyon floor or from the rim of the canyon. Climbing up and out of the canyon isn’t short and steep; it’s long and gradual, which will prepare you well for the big peaks of the PCT to come.
Note for backpackers: This is one of the most popular mountain biking trails in the area. Keep your ears open and eyes peeled for bikers, who usually ride from the top of the canyon to the bottom.

The Best Continental Divide Trail Shakedown Hike: Mineral Creek Trail
Getting to Crazy Cook Monument, the southern terminus of the CDT, takes a bit of work and planning. The spot is in the middle of an arid, remote desert on the border between New Mexico and Mexico. Nine out of every 10 CDT thru-hikers get to the monument using shuttle services out of Lordsburg, New Mexico, according to a 2023 survey conducted by Halfway Anywhere . That’s because Crazy Cook is 75 miles of highway driving and 20 miles on a dirt road from Lordsburg. During peak thru-hiking season, the Continental Divide Trail Coalition and Crazy Cook Shuttle operate the two services available for thru-hikers.
That being said, many CDT hikers do their final preparations and shakedowns on trails near Lordsburg. Just an hour drive away, Gila National Forest has skyscraping canyon walls and enough reliable water sources to swim and drink from that long, heavy water carries are rarely an issue. One of the most popular alternate CDT routes passes through this forest, and thru-hikers who take it often call it one of the most rewarding sections of trail in the whole state.
Before setting out from Crazy Cook, backpackers should spend a night or two exploring the Mineral Creek Trail. Here, you can see the rusty remains of the historic mining town of Cooney, Cooney’s Tomb, and several mining operations along the trail. When hiking this trail in the springtime, get ready to practice creek crossings. There are plenty of natural features to keep you interested as you go, including: wildflowers, waterfalls, soaring canyon walls, and natural stone arches.

The Best Appalachian Trail Shakedown Hike: A Section of The Benton MacKaye Trail
Nine out of 10 AT hikers start from Springer Mountain in Georgia, which isn’t immediately accessible off the road: There’s an 8-mile approach to the top of Springer, so many thru-hikers consider Amicalola Falls their unofficial southern terminus. But we don’t recommend waiting until the approach trail to take your fully-loaded (let’s be real: probably overloaded) backpack for its inaugural spin.
The mountains of northern Georgia have a well-maintained, well-connected network of trails that offer hundreds of miles you can backpack. Want to rub elbows with other thru-hikers? The 280-mile-long Benton MacKaye Trail shares a starting terminus with the AT—the two trails actually interweave four times in the first 7 miles of the BMT—so you can chat with both BMT and AT hikers while sampling the same terrain you’ll soon be hiking.
Don’t want to start on Springer Mountain? The first 90 miles of BMT are in Georgia with over a dozen access points , which means you can easily do anything from a quick overnight to a weeklong trip before even leaving the state.
About 15 miles into the BMT, you’ll cross a 260 foot footbridge—the longest suspension bridge in the state—over the Toccoa River. Between miles 23.5 and 34.4 of the BMT, you’ll reach Skeenah Gap and Wilscot Gap, a section that is renowned for its difficulty. How hard is it? Skeenah Gap’s name comes from the Cherokee word asgina which means ghost, devil, or demon. Hiking both of these sections in a day means trekking 11 miles while gaining over 4,000 feet—which passes as a relatively difficult training hike for the AT.
The BMT doesn’t require any permit unless you plan on backcountry camping in Great Smoky Mountains, which contains 93 miles of the trail.
Popular on Backpacker
Related content from the outside network, what’s it like to go on a 200-person hike better than you think., how to pack for backcountry skiing, the original yosemite firefall, hiker charges mountain lion.
IMAGES
VIDEO
COMMENTS
If you're new to backpacking, check out our 12 Tips for Planning Great Backpacking Adventures Tutorial. Plan your trip to match your goals for the most enjoyable experience. REST BEFORE THE BIG DAY - As your trip date approaches, plan to rest for a few days, or even a whole week before your trip. This will give your body a chance to fully ...
Before a backpacking trip, weight your pack (use 20 lbs. to start) and step up onto a park bench 16 to 18 inches high. Add 5 pounds a week until your pack is as heavy as it will be on your hike. ... Preparing Physically for a Backpacking Trip. If you're planning a multi-day hiking trip, the last thing you want is to wake up on day three too ...
Planning and Preparing for Your Trip . You'll discover your personal hiking strengths and weaknesses as you become a more experienced hiker. Start small and slow, and work your way up to multi-day trips. ... How to Choose and Prepare for a Hiking Trip How to Pee While Hiking Navigation 101: Skills and Tools for Finding Your Way on a Hike
Aim to drink at least 32 ounces before hitting the trails, and bring enough to drink about 16 ounces for every hour of hiking. If you plan a hike that is less than an hour long, you may not need to take food. Otherwise, keep your energy going by eating 50 to 100 calories of carbohydrates every half hour.
Step One: Plan The Route. Hike planning is essential to executing a worry-free, rewarding hiking trip. Learn ahead of time if you need any permits for parking or hiking. Fortunately, there are no specific requirements for an awesome hike — you can hike for a mile, or you can hike for 20 miles.
Stretch. Make room for your breath by doing simple stretches that release tightness in your shoulders, chest, and side body. A few simple stretches will help to expand the muscles of your rib cage and the diaphragm can help cultivate a greater lung capacity for hiking. Read next: How To Improve Your Lung Capacity. 3.
Water. Packing enough water is a critical component of preparing for a hike. A general rule of thumb is to plan on drinking .5 liters of water (or 2 cups) per hour of hiking, per person. If you're on a particularly challenging hike or hiking in hot weather, you might need to double that!
1) Pick dates for your backpacking trip. Figuring out when you want to go on your overnight adventure is the first step in how to plan a backpacking trip. Your dates will dictate where you can go due to the weather (unless you want to snow camp). If you want to go in January, then you'll be limited to warmer places like Southern California ...
For more extreme trips, like hiking to Mt. Everest Base Camp or following the Inca Trail in Peru, you should start training several months ahead of time to prepare for challenges of rough terrain and high altitudes. Companies running these types of trips will often have specific recommendations for a training plan, including a timetable for ...
Whether it be a day or multi-day trip, preparing for a hiking trip ahead of time will help you avoid physical discomfort and overpacking. While we offer a wide selection of day hikes and multi-day treks, these trekking preparation tips are mostly directed towards getting ready for a multi-day hike. However, if you're planning a day hike, this ...
STEP 3: Train Your Cardiovascular to Built Your Endurance. To build endurance, you can engage in aerobic exercises such as running, cycling, or swimming, which will help to strengthen your heart and lungs. STEP 4: Strength Your Muscles. Hiking requires the use of various muscles, especially in the legs, core, and back.
Graph your route. Highlight the route you will be taking. Mark potential campsites, water stops, and major road intersections. Check the weather and pack accordingly, keeping in mind that the weather at the base of a mountain and halfway up a mountain can be vastly different. Rain gear (one of the 10 Essentials) should be brought even if no ...
As a rule of thumb, pack one liter of water for every hour you plan to be hiking. Beginner hikers can expect to travel about two miles per hour on a moderate trail (factor in more time for steeps), so carry at least two liters of water for a four mile hike. On especially hot days, pack more. Yes, water is heavy.
3. Focus on leg strength. Strength training is generally a good idea for athletes of all ages, but for hikers, leg strength is essential for an enjoyable experience. Your legs are doing the bulk of the work, after all. Lunges, squats, and calf-raises are all good exercises you can do at home.
Before heading out hiking or backpacking you first need to make sure you can use all your gear! You definitely need to practice setting up and using anything that's 100% brand new to you this season (e.g. tents, sleeping pads, GPS devices, etc.)Then I would also suggest reviewing your older gear items and make sure you still remember how to use them correctly.
7. Be smart, but also have fun. Pick a trek that suits your interests, and don't worry too much about embarking on the picture perfect hiking experience - there's no such thing as a perfect hike. Multi-day hikes are about what you learn about yourself and about the environment while you're on your journey.
As such, beginners are advised against making a long trip to start and, instead, prepare with shorter excursions. Newcomers can also prepare for hikes by jogging, using an elliptical or walking at ...
Although there are dozens of long trails in the country that people thru-hike, many focus on the Triple Crown: the Pacific Crest Trail, Continental Divide Trail, and Appalachian Trail. According to The Trek's 2022 AT hiker survey, more than 10 percent of thru-hikers had started their hike without ever going on a backpacking trip—some hadn ...